Clone trooper Visor help

hdtheater

Sr Member
RPF PREMIUM MEMBER
I am working on a Phase 2 clone trooper helmet and am trying to figure out the best way to attach the visor. I have used epoxy in the past, but where it was really secure, it ended up smearing Epoxy all over and wasn't the cleanest of solutions.

What is a tried and true process that will result in a clean and secure installation?


-Eric
 
seems that no one answered yet... at least I don't have much experience with these kind of Visor installation too, but there are some different options. I like it glued in so that the whole helmet becomes a little bit massive an one piece, but with mine I had some problems with the glue too. well there are some less liquid but more jelly like glues that might be better for the job. another way could be to fix the visor inside with some wooden pieces or something, put some clay from the outside to close every slit and than glue it.
on the other hand you could just glue 4 or more nuts into the helmet, or chicago screws, so you are able to fixating the visor mechanical by the screws. the good thing there is, that you could change the visor later. but in my opinion with just some few screws the visor will never fit really really tight. but it might be enough, depends on what you want. you could also just glue some pieces of aluminum or so into it to fix it. there are many threads here and on other boards showing that with boba fett helmets or TK buckets. should work just fine with a clone helmet too.
have a look at my helmet here if you want to, but as I said, its glued in too and I had a little bit of trouble also, but I m happy with the result at least. :http://www.therpf.com/showthread.php?t=233851

here are some links for other installation methodes as well...

https://www.youtube.com/watch?v=t4JAKwH9Jfc

https://www.youtube.com/watch?v=e-OfRg-yTYU

good luck...
 
Last edited:
seems that no one answered yet... at least I don't have much experience with these kind of Visor installation too, but there are some different options. I like it glued in so that the whole helmet becomes a little bit massive an one piece, but with mine I had some problems with the glue too. well there are some less liquid but more jelly like glues that might be better for the job. another way could be to fix the visor inside with some wooden pieces or something, put some clay from the outside to close every slit and than glue it.
on the other hand you could just glue 4 or more nuts into the helmet, or chicago screws, so you are able to fixating the visor mechanical by the screws. the good thing there is, that you could change the visor later. but in my opinion with just some few screws the visor will never fit really really tight. but it might be enough, depends on what you want. you could also just glue some pieces of aluminum or so into it to fix it. there are many threads here and on other boards showing that with boba fett helmets or TK buckets. should work just fine with a clone helmet too.
have a look at my helmet here if you want to, but as I said, its glued in too and I had a little bit of trouble also, but I m happy with the result at least. :http://www.therpf.com/showthread.php?t=233851

here are some links for other installation methodes as well...

https://www.youtube.com/watch?v=t4JAKwH9Jfc

https://www.youtube.com/watch?v=e-OfRg-yTYU

good luck...


I agree.... This method in theory should wok for the clone helmet as it did for many boba helmets... the only problem you could run into might be that the dips and curves on the inside of a Boba Fett helmet allow room for the bolts and caps to adhere too effectively, but you might not be too fortunate with a clone helmet. IDK though.. give it a shot and i'd love to see what you come up with, after all cosplaying and prop building are all about trial and error no?;)


Alex
 
Thanks for the links. The last helmet I did was a Jango helmet and I was not happy with the result, but it was the second helmet I ever did. Like you said, this is all trial and error and honing your skills.

I am still working on the helmet itself and should be in a position to try and get the visor installed this weekend. The casting on this helmet is so clean, I want to take extra care to keep it that way.

Here is where I am at now.


4B707425-98C5-4E41-8759-11D967D70EE6_zpsu1xffs42.jpg


BFFFB83F-9EA1-4F69-85C8-E7985C4A216E_zpsvyooobo1.jpg


78901278-0216-435E-BF8E-AFAA4CFB499B_zpsv01a1grn.jpg


2ED64042-D9C6-4B92-B68D-8905224FC7F3_zpsramftedf.jpg


-Eric
 
That's beautiful cast work and I would agree with you as to not wanting to mess it up. I did a test run on using the bolts and caps I talked about like I did on the boba helmet I did previously and it worked out fine. I secured a bolt at each of the 8 corners around the visor with gorrila epoxy, and placed my visor in and capped it down. The spacing looks good and there isn't any epoxy mess around the visor.

Goodluck,
Alex
 
Well, I had some progress over the last few days. More like one step forward and two steps back.

I traced the opening on the face of the helmet on to some carded paper. Then I figured, I would need at least 1/4" extra to handle the edges and give me some flexibility.

I bought some smoked acrylic off eBay to make the visor from. Previously, I had 1/8" acrylic and it was just too stiff for me to heat bend it to fit the contours of a helmet. This time, I used 1/16" thinking it would bend easier.

I used a heat gun and 1 gallon paint can to give me something curved to bend the acrylic over. I am the first to admit, I need more practice in heat bending acrylic.

Here is the result of the first attempt:

15C4C744-0D2E-4118-AD3E-34C2EA282E80_zpslkfrfohq.jpg


I think it It broke because of the tight corner at the bridge of the nose and the eyes. I didn't even get a chance to break out the heat gun.

I guess this is why others use 1/8".

I tried again removing that inside corner and giving myself something to bolt on to if I used the screw down method.


06A3E694-1F69-4867-A715-7698FB662F9F_zpsok19rq4l.jpg


The design was more durable than the other. The heating worked "OK", but not perfect. It broke again when I was test fitting it in the helmet. You can see on the right side it started to crack as well.

As brittle as this acrylic is, I have reservations about torquing it down to hold it in place. I don't think it is the technique, but the material I bought. Would love to have had something more flexible than this that doesn't require the need to heat bend it. I know 1/8" is preferred from what I have been researching, but my heat bending skills are lacking to do that right. I have seen window film recommended, but that is just too flimsy I think.

I have a few more attempts left from this sheet of acrylic before I have to find something different.

-Eric
 
29086.jpg

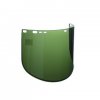
I used a faceshield for welding class 3, it fits pretty perfect and you can see through it very good.
these are made out of polycarbonate so thy are very flexible and more resistant against scratches too. I know some people also using faceshields for motorcycling helmets, so I did for my gree helmet.
 
The one thing I've learned about doing visors for both jango/mandolorian helmets and a phase 2 clone is that you've gotta be patient with it and not rush into it...and the one thing I wish I did from the get go - ALWAYS fit your visor before you paint!!

As for your particular situation, you used Acrylic. That would be fine if you had proper forming/heating equipment to give it the proper curves, however, if you're like me, only having a heat gun, you're gonna have a bad time. Like what alienbuilder recommended, that is something you should use. It's not terribly thick and can be cut easily with a dremel. Additionally, it's already got a natural curve to it. Yes, you may need to tweak it, but it's a very good starting point. If you look around, you may be able to find even thinner material. The thinner it is (not paper thin) the easier it is to get it to sit "flush" against the inner edge, making it appear much nicer and "cleaner" in the long run

For the clone helmet I did do, you've got the right idea of tracing the visor area, but remember that while the visor shape itself is a part of the helmet, the visor material doesn't need to be that shape, so long as when viewed from the outside, there are no visible gaps. This allows you to have more material on the interior to attach it to.

Attaching the visor. There's really nothing special in my experience. The majority of my previous commissions have had the visor hot-glued in using HIGH temprature type hot glue. If you use the cheap stuff from a craft store, you're more than likely going to have issues later on. Believe it or not, not just the heat from the sun but even extreme colds can cause hot glue to be come brittle or detach itself from the surface. Not that you're planning to be in either but when it comes to transport and storage, it's something to consider. Fortunately, I have not had much trouble with hot glue, except for one instance (didn't use High temp!). When you go to install the visor, don't smother it with the hot glue. Tack it in place with small globs around the material so that it can hold itself in place. Check the fit, see what other issues there are and adjust accordingly. It's much easier to pull it off and start over with the small globs than it is to cover the whole thing on the first attempt. Once you got it how you like, it's now much easier for you to add more hot glue in a controlled manner, since it's tacked in place and you're not fumbling around trying to hold the visor down.

The other method, which is much more tedious, difficult but works well if done correctly, is adding threaded female posts to the interior of the helmet along key points around the visor and using bolts to secure the visor down. The biggest issues you'll have with this, is 1) ensuring what ever adhesive you use to hold down those posts is good enough to withstand the pressure of tightening a bolt. 2) Placement/alignment can be tricky, as easy as it may look, if your post's angle is off in one direction, you may find your visor itself won't allow you to line up the holes. 3) you may need to "sink" the female/post ends into the surface of the helmet interior. I say this because if you use something that has a wide base (preferably) and you simply stick it on the inside, you're going to have a small, but noticeable gap between the visor and helmet. Marking, and taking a dremel to carve a shallow pit for the post to sit inside will allow you to get the visor material as tight to the helmet as possible.

If done correctly, the bolt method will allow you to "pull" the trouble areas of the visor that don't want to sit flush if you used hot glue. I have done multiple Jango fett/mando helmet builds and the visor is always a pain. I built my Montross helmet, using bolts to hold the visor and it looks way better than any of my previous helmet's visors.

Again though, this is how I've done some things, but everyone has their own thoughts..
 
Last edited by a moderator:
I've fitted several visors to clone helmets using 1/8" acrylic, a heat gun and hot glue. Cut out the shape of the visor, allowing a little extra for a good fit and no gaps. Heat it with the heat gun. This will take some time because you can't heat the whole thing evenly. If you have a craft oven of some description this would be better, but your kitchen oven might not be a great idea. The acrylic needs to be heated to the point where it is almost floppy and bends easily over its whole shape. Pick it up (wearing gloves please) and place it inside the helmet, exactly where you want to install it. Hold it in place until it cools to the point where it no longer bends easily, this should only take a minute or so.

Once it's cooled, do NOT try to force it to bend at all. Acrylic that has been heated and cooled like this becomes very brittle, as you've already discovered. If the fit isn't quite right, heat it up again and refit it.

I use a dab of hot glue in a couple of spots once I'm ready to glue it in, and then mix up some 2 part epoxy for a more permanent hold.
 
I was able to get the visor in this weekend. I ended up cutting two more visors. I broke the first one (again). However, the last one fit!

I went back to my smaller design and worked out some of my issues with a heat gun. I still need more practice at it, but it worked for this helmet.

I ended up using hot glue to get it in there. I had a good enough bend on it. It fit pretty tight. I dabbed some glue at the top and then the bottom. Once it dried, I added some more around the nose area and spread out some more at the top focusing on one side at a time. Once I was happy, I put a little on the far edge and then went to the other side and repeated the process.

A8329BB5-2BA9-47AB-8F8A-68F6BC6AB7FB_zpsto1rspne.jpg


I did a little more paint afterward. I still need to do the black seam around the top and the gray across the back.


1847C186-C7D7-4C12-98E7-D7D27D174F85_zpszfu3npfx.jpg


-Eric
 
I have yet to make it to the store to get the gray and black paint for my airbrush. I don't want to brush it on. I should have painted those colors first, but live and learn.

-Eric
 
looking for the finished helmet than:)
but of course a good decision not to brush it. but I think its also easier to do it this way. if these parts are painted first, especially the seam its not so easy to put the tape on. I always did it as you do now. just painted the vocoder in black before the white came on. that part is not so easy to tape around in my opinion.
 
For those that are curious, I broke out some paint and tried out my airbrush and painted the trim piece and Vocoder today. I am going to give it a few days and then tape off for the gray.

BB800A9B-AFAE-4F4D-B1D8-40B389815521_zpsec3qjiv3.jpg


26E2DE38-ECDE-437F-ABC8-4A69A1BF09A8_zpskn7js36e.jpg


5104A4A6-A3CC-42BE-96B8-2BDB7DDE55EE_zpseldnqmoh.jpg


I think I should get some thinner tape to make the curves a little better.

-Eric
 
I finished this up over the weekend. I got some 1/4" tape and taped off the curves and finished up the grey. The smaller width on the tape was a big help for the tighter turns than with 3/4". This is a far better helmet than the last few I did. Appreciate the advice.

Now to go figure out what helmet to do next.

2FCE219D-3D69-4E3B-BA91-3F0C68C54FE9_zps5dhjex9q.jpg


45B2DBA5-162C-49B2-A67B-C62A9C24E22C_zpsntwbranh.jpg


7CEBDD13-CC6E-458D-B829-3843AAF8EA86_zpshk9u54t8.jpg


65A3D431-7B51-4E4B-B1D5-3095FA761324_zpsbs8cygyx.jpg
 
Looks fantastic! I really want to get to this level someday and try making my own clone trooper helmet. I currently just have a hasbro voice changer helmet that I'm refinishing. This build is super inspiring! Keep it up
 
Wow it looks great!
Next time you could go the way they did Boba Fett in production.....
IMG_4847.PNG
Yep that's just tape! I think I have another picture that clearly shows silver duct tape, just can't find it right now. But I like the hot glue way, seems more forgiving.
 
Looks fantastic! I really want to get to this level someday and try making my own clone trooper helmet. I currently just have a hasbro voice changer helmet that I'm refinishing. This build is super inspiring! Keep it up

Thanks! This helmet is a far cry from my first one. That is one I want to just go back and redo. It's embarrassing compared to this one, but it just shows how my skills have grown since I got into this hobby.

-Eric

- - - Updated - - -

Wow it looks great!
Next time you could go the way they did Boba Fett in production.....
View attachment 668412
Yep that's just tape! I think I have another picture that clearly shows silver duct tape, just can't find it right now. But I like the hot glue way, seems more forgiving.

Of course they needed it to last for a short time to get the shots they need and had plenty of handlers when it fell apart. :)
 
This thread is more than 7 years old.

Your message may be considered spam for the following reasons:

  1. This thread hasn't been active in some time. A new post in this thread might not contribute constructively to this discussion after so long.
If you wish to reply despite these issues, check the box below before replying.
Be aware that malicious compliance may result in more severe penalties.
Back
Top