You are using an out of date browser. It may not display this or other websites correctly.
You should upgrade or use an alternative browser.
You should upgrade or use an alternative browser.
An elegant weapon for a more civilized age
- Thread starter The Terminator
- Start date
Roy is working on getting the best possible deal on metal replica MPP shrouds including wrinkle painted ... so bear with him
Chaim
Oh yeah
I was going to do wrinkle paint on the Parks shroud, but then I noticed the not so accurate D-ring and decided to just sell it.
Metallijosh
Well-Known Member
Just how inaccurate is the d ring on this thing?
Just how inaccurate is the d ring on this thing?
That isn't really the issue(I think), it's more about the placement. It's attached directly under it, which it shouldn't be.
Metallijosh
Well-Known Member
Oh, I can live with that.
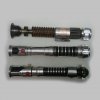
More elegant weapons! 


ANH Obi-Wan
My 10 year old "Obi inspired"
TPM Obi-Wan
 View attachment RustyObi2.jpg
and some close ups of my distressing-in-progress, far from finished. No rust just an acrylic wash(red and tiny bit of yellow paint)


ANH Obi-Wan
My 10 year old "Obi inspired"
TPM Obi-Wan
 View attachment RustyObi2.jpg
and some close ups of my distressing-in-progress, far from finished. No rust just an acrylic wash(red and tiny bit of yellow paint)
Excellent paintjob ... looks real rusty indeed ... about your pommel ... the hole for the D-ring should be around 4 o'clock in regards to the clamp ... not almost in line with the clamp
Chaim
Thanks
Might be better to ask Roman directly but is the, um cylinder part between the emitter and the grenade supposed to lose? :unsure

Sym-Cha
Master Member
That is called the 'windvane' and yes it should be able to rotate ... as for the 'screws' you mean 'transistors' ... well the Tunesia OB1 saber had the same 2 still on completely, whereas the one OB1 saber in Mechanismo/Chronicles book had the first transistor without a 'washer' attached.
Chaim
Chaim
Darth Lars
Master Member
If the windwane is too loose then you could place a small piece of tape on the shaft and screw the vane over it. That is what I did.
BTW. It seems that the grenade is on backwards in these pics. The beveled end should be at the top.
BTW. It seems that the grenade is on backwards in these pics. The beveled end should be at the top.
Sym-Cha
Master Member
BTW. It seems that the grenade is on backwards in these pics. The beveled end should be at the top.
Now that you mention it ... that's what looked off to me ... I just could not figure out what was going on ... :wacko
Chaim
Added some more fake rust to another.... part of the saber and I think the "rust texture" is a lot better than what I achieved on the grenade. I also flipped the grenade around :$
I skipped my cellphone and used my Nikon instead.
View attachment morerust.jpg
Different lighting setups for each of the full photos.
Great idea
Amen, va faa-aan :facepalm GO ME :lol
transistors huh? Okay "transistors" it is. I guess I will go with both washers attached. Dank je
I skipped my cellphone and used my Nikon instead.
View attachment morerust.jpg
Different lighting setups for each of the full photos.
If the windwane is too loose then you could place a small piece of tape on the shaft and screw the vane over it. That is what I did.
BTW. It seems that the grenade is on backwards in these pics. The beveled end should be at the top.
Great idea
Amen, va faa-aan :facepalm GO ME :lol
That is called the 'windvane' and yes it should be able to rotate ... as for the 'screws' you mean 'transistors' ... well the Tunesia OB1 saber had the same 2 still on completely, whereas the one OB1 saber in Mechanismo/Chronicles book had the first transistor without a 'washer' attached.
Chaim
transistors huh? Okay
Small update - destroyed the lever and got it a little closer to ESB accuracy 

A HUGE thank you and shout out to Roy the Man dank je @roygilsinghttp://www.therpf.com/member.php?u=107792


A HUGE thank you and shout out to Roy the Man
Last edited by a moderator:
More Obi-Wan Kenobi goodness:

Finally added the D-ring and also added a lot more weathering.


Checking out how it looks with a different pommel


And a none-lightsaber related xmas gift from myself to me:

I haven't done many model kits in my years, so this fiarly simple and very straight forward kit was very nice
Will post a few beauty shots after I have added the necessary CG setting for it.

Finally added the D-ring and also added a lot more weathering.


Checking out how it looks with a different pommel


And a none-lightsaber related xmas gift from myself to me:

I haven't done many model kits in my years, so this fiarly simple and very straight forward kit was very nice
Will post a few beauty shots after I have added the necessary CG setting for it.
smells like six digits
Similar threads
- Replies
- 5
- Views
- 898
- Replies
- 5
- Views
- 719
- Replies
- 7
- Views
- 720
- Replies
- 5
- Views
- 553


