VanOaksProps
Sr Member
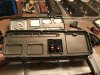
For those following this thread and have built their own HIC, is the puckering on the glue typical or is that a sign that something's not quite right?
For those following this thread and have built their own HIC, is the puckering on the glue typical or is that a sign that something's not quite right?
Great videos!!! I love how your doing this is your living room!
Sent from my iPhone using Tapatalk
") .
.great build!!
How did did you paint the recessed parts of the panels? Did you hand paint it or spray and tape everything? I’m thinking of cutting it out and gluing in some actual sheet metal.
- - - Updated - - -
I have more pics and video of the gluing I’ll add soon. I waited for each layer to dry, sanded it down a bit, and added the next layer.


looking good, you sand the glue as well?