bishopdonmiguel
Active Member
In my experience, there are two basic prop personalities: those who focus on extreme screen accuracy and everyone else. I'm in the everyone else category. Strict adherence to "screen accurate" is fine but the thing about many classic props... they're junk, designed to last exactly how long they are needed to capture the shot. When I recreate a prop, I want it to evoke the nostalgia of false memory. What I thought it looked like is the important factor, not the lump of junk that is reality.
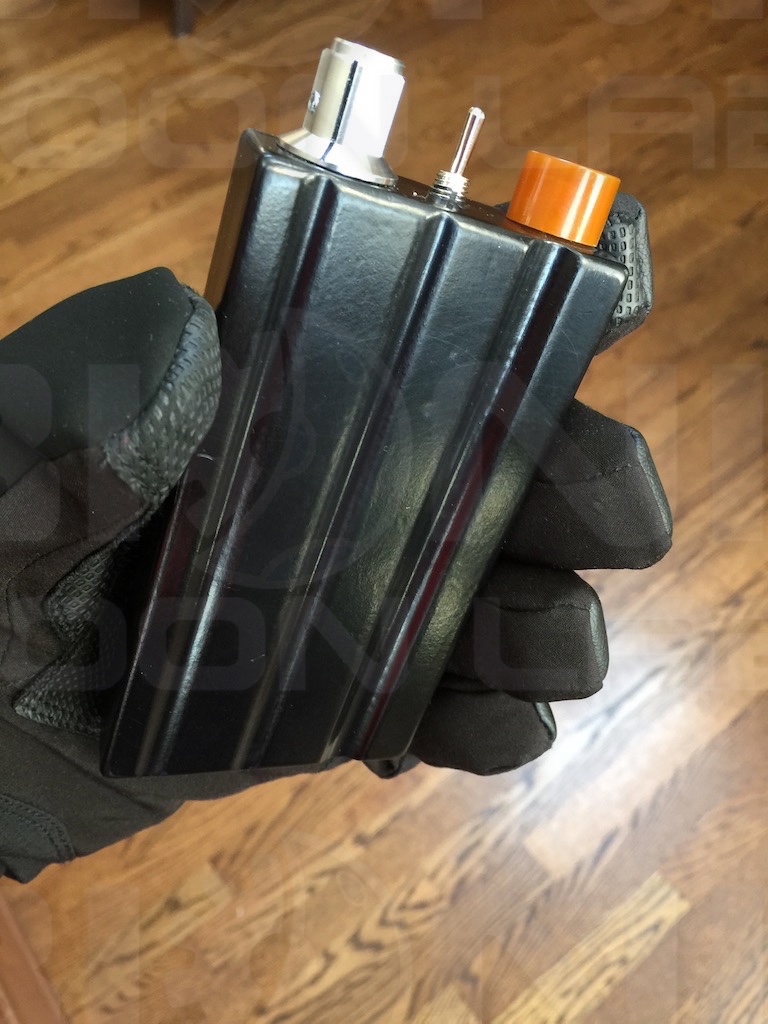
For the Solonite Charge, I wanted it to function as "implied" on screen. The prop was likely a two-piece vacuformed prop. In many scenes, the top switch is non-functional. There is a small slide-switch on the side. Also, despite the illusion that it contained magnets or such to hold it in place, if you watch carefully, the charges are placed with a gentle pressing/twisting motion... most likely attached with double-sided tape. I want none of that.
So here we go.
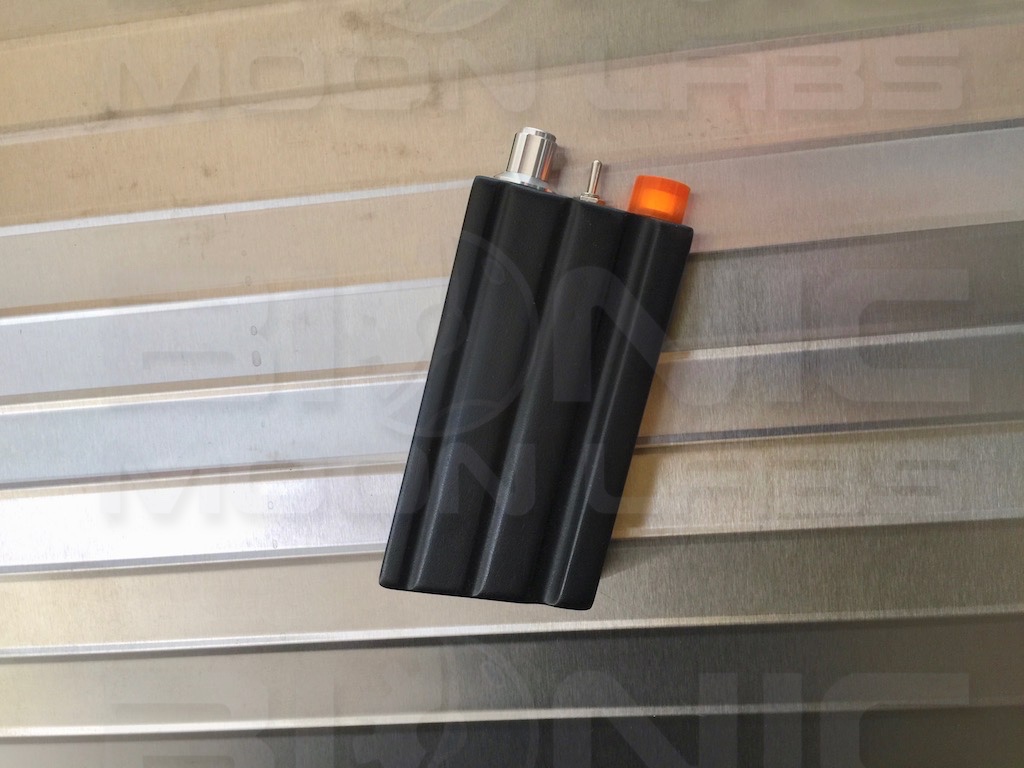
Reference shot...

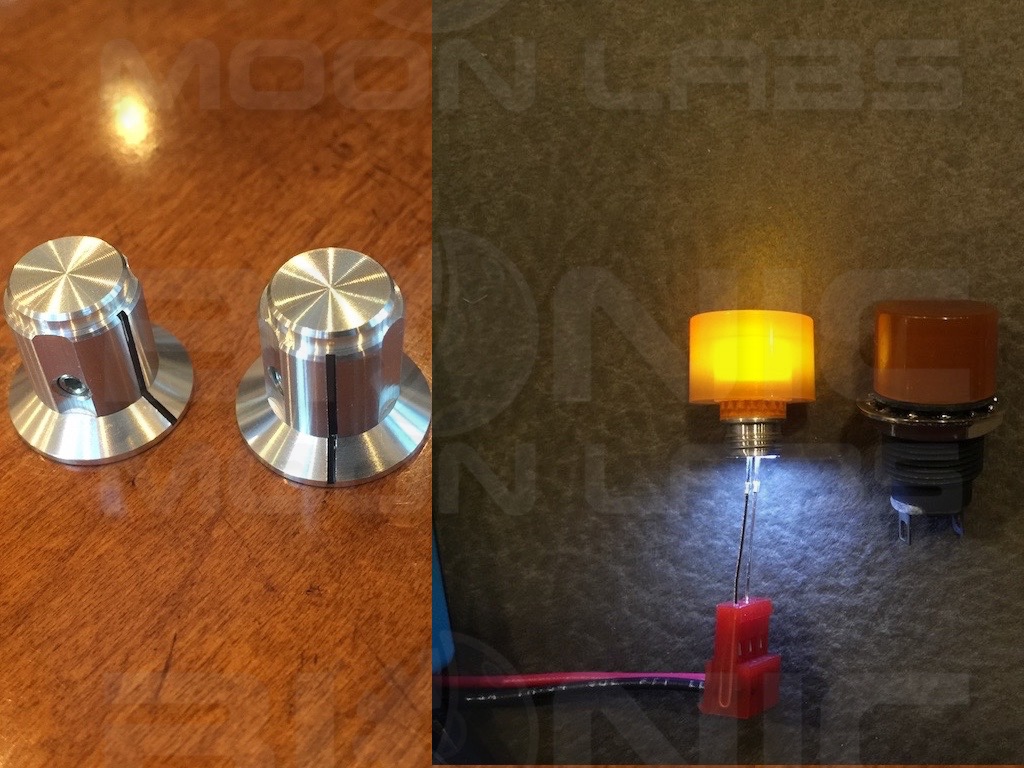
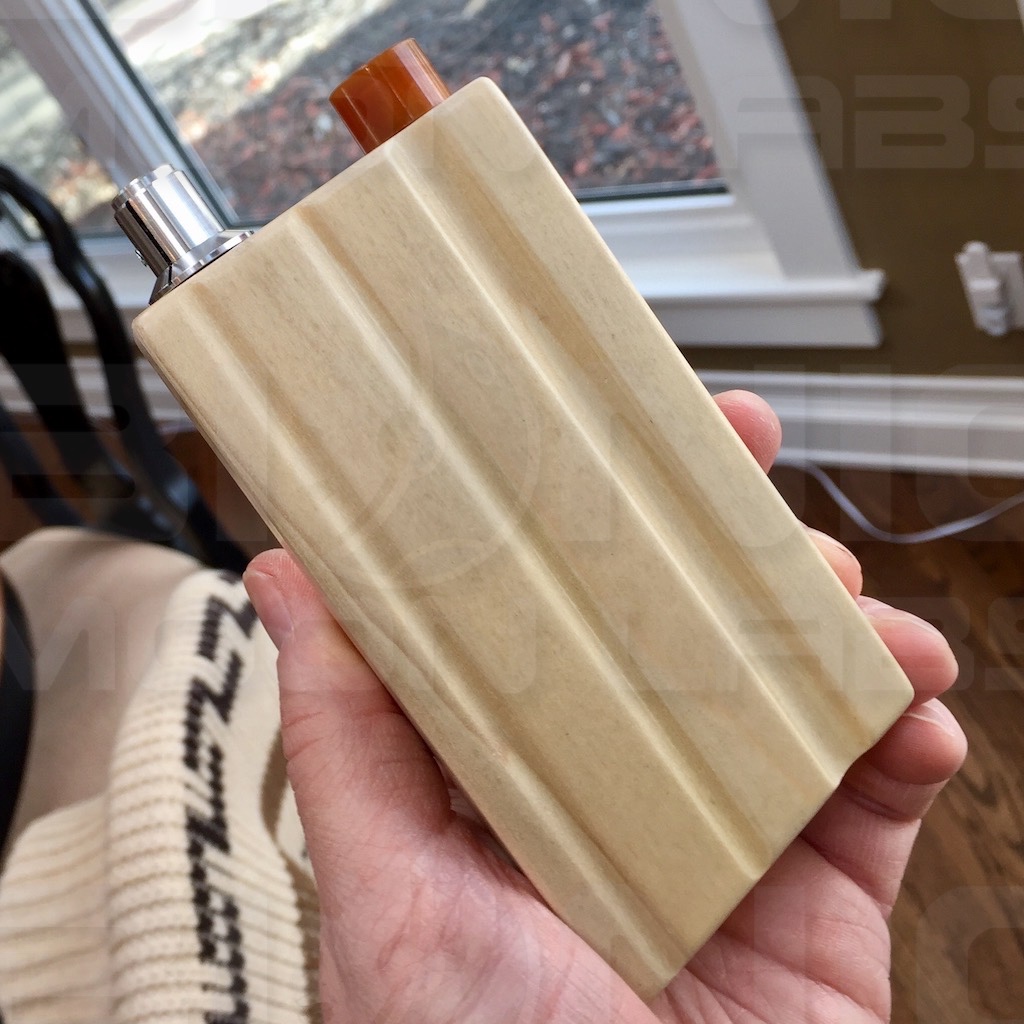
First to locate the important components, the aluminum knob and panel light. Fortunately, I found a source for both that were close matches...
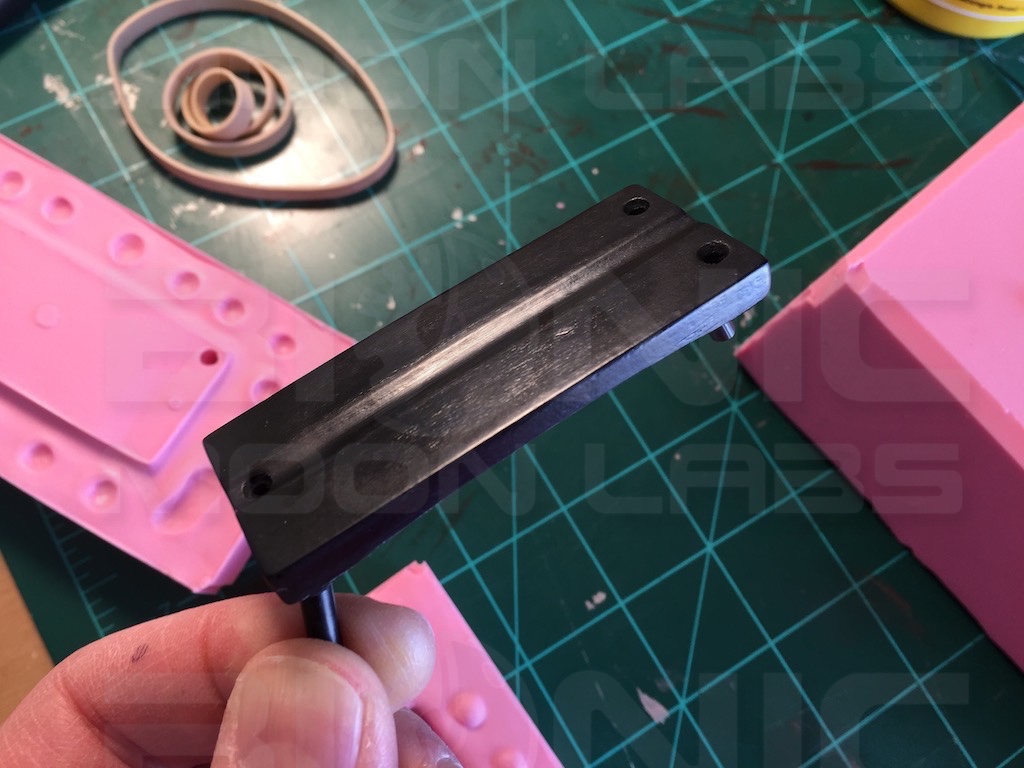
The prop was based on a 20 round M16 (AR-15) magazine. Modifying a real one would likely take more effort than a scratch build so I opted for the latter (it's also cheaper). Using published dimensions, I created a basic wood model with routed grooves simulating the magazine...

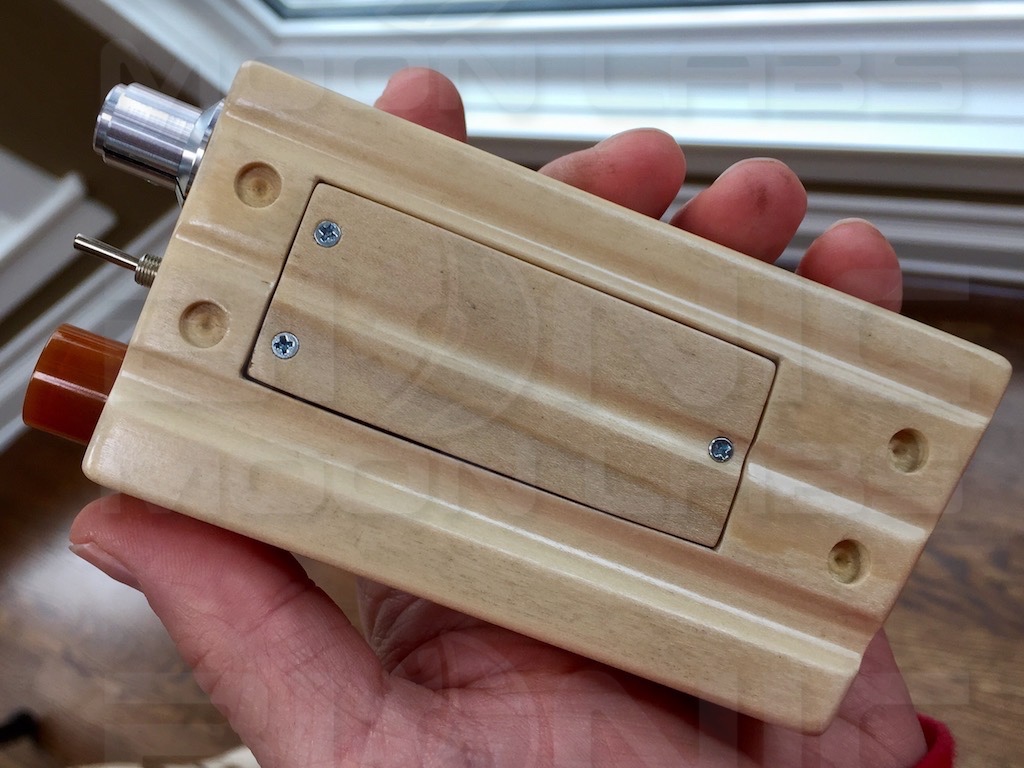
I needed a compartment to house the batteries so I split the model down the middle, sanded until the thickness was appropriate and cut a hole in one half...
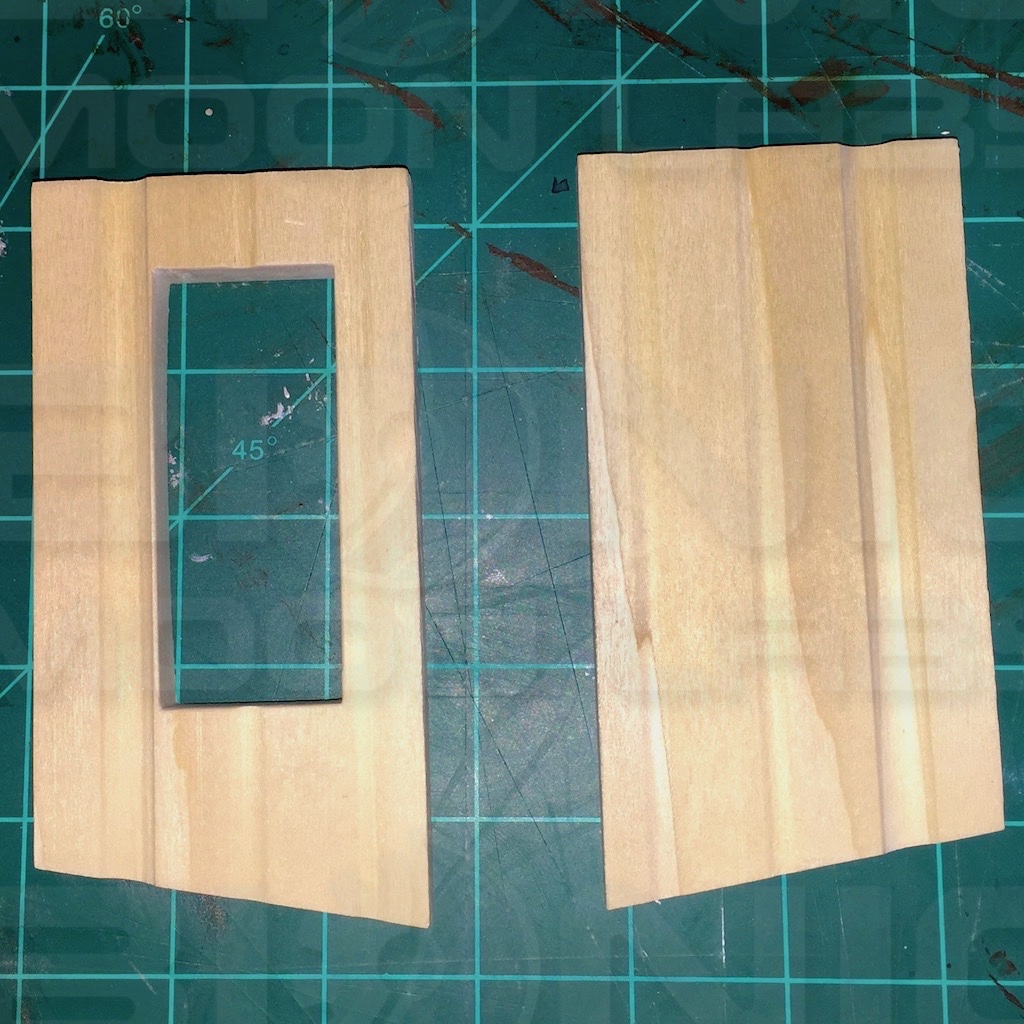
Added a shelf for the battery cover and rounded out the edges to align with the screen shots...
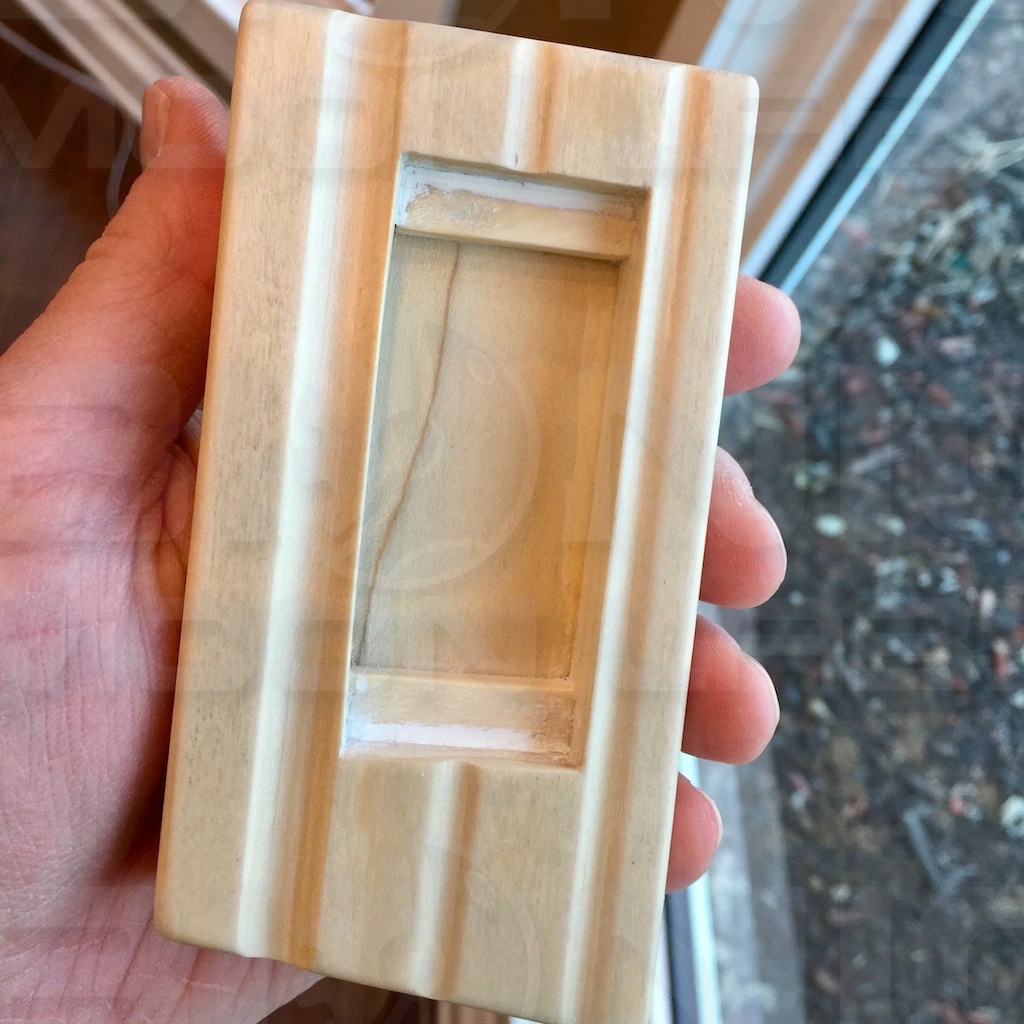
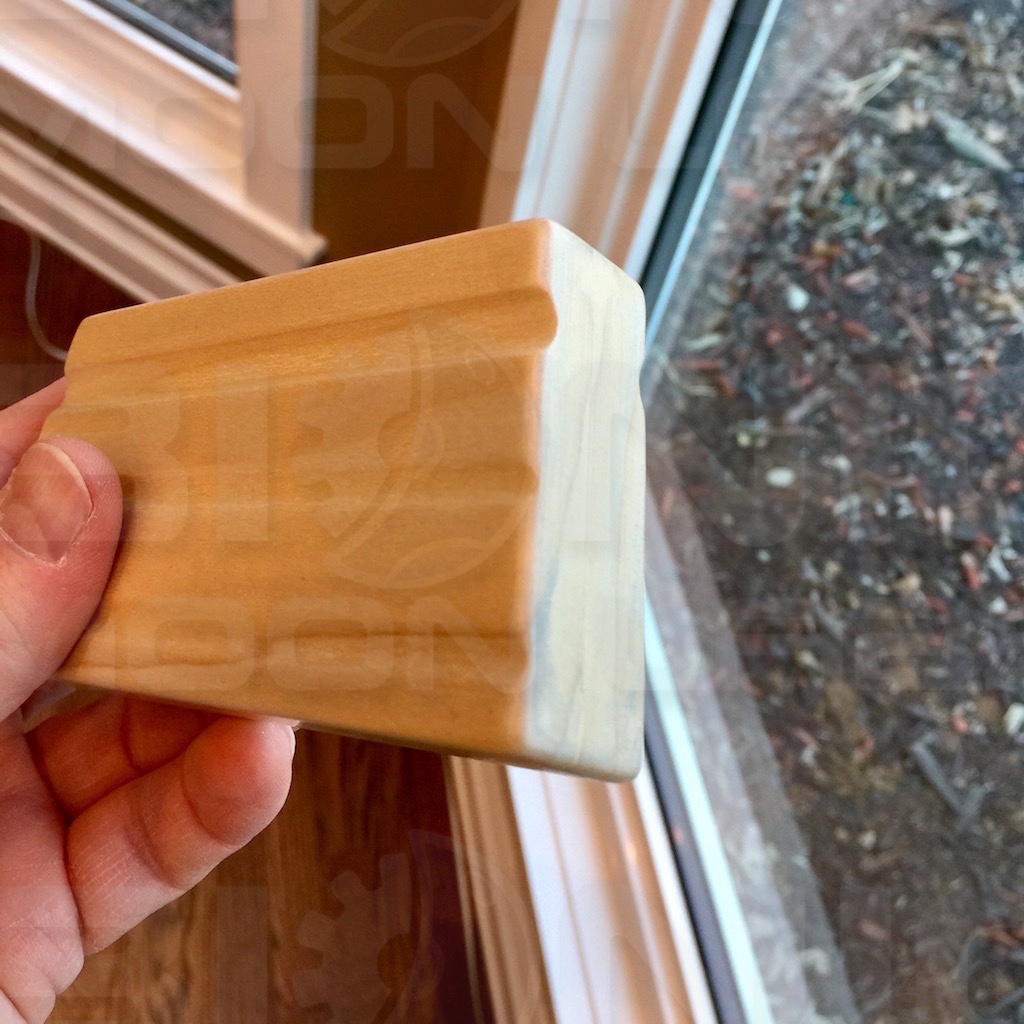
For the battery cover, I had to route grooves in another piece of wood so when it was cut down, it would match the model. I won't bore you with those details. After drilling a few holes for the components and magnets, we have a model ready for molding...
To be continued....
For the Solonite Charge, I wanted it to function as "implied" on screen. The prop was likely a two-piece vacuformed prop. In many scenes, the top switch is non-functional. There is a small slide-switch on the side. Also, despite the illusion that it contained magnets or such to hold it in place, if you watch carefully, the charges are placed with a gentle pressing/twisting motion... most likely attached with double-sided tape. I want none of that.
So here we go.
Reference shot...
First to locate the important components, the aluminum knob and panel light. Fortunately, I found a source for both that were close matches...
The prop was based on a 20 round M16 (AR-15) magazine. Modifying a real one would likely take more effort than a scratch build so I opted for the latter (it's also cheaper). Using published dimensions, I created a basic wood model with routed grooves simulating the magazine...
I needed a compartment to house the batteries so I split the model down the middle, sanded until the thickness was appropriate and cut a hole in one half...
Added a shelf for the battery cover and rounded out the edges to align with the screen shots...
For the battery cover, I had to route grooves in another piece of wood so when it was cut down, it would match the model. I won't bore you with those details. After drilling a few holes for the components and magnets, we have a model ready for molding...
To be continued....