Hemble
Well-Known Member
Hi All,
Recipe.
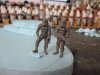
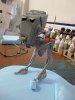
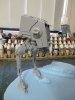
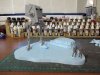
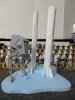
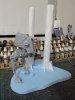
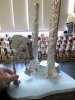
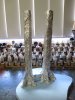
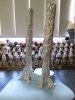
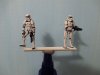
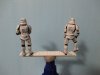
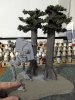
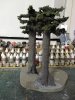
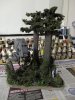
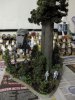
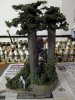
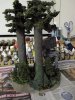
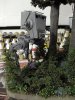
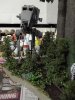
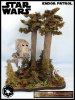
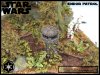
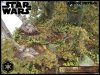
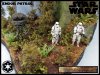
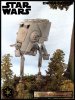
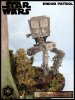
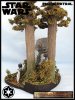
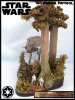
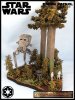
AT-ST & figures- is from Bandai and has been built straight out of the box. The figures are from the Imperial Assualt box set and the troopers are been modified.
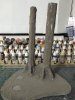
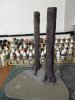
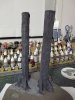
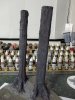
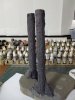
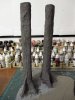
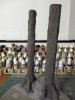
Base - is high density foam and cut out and the trees have been done by using aluminium foil and then spakfilla was used to cover the foil and a wide brush was used to make the bark. The branches are from Woodland Scenics, I also used woodland Scenics for the smaller trees.
The ground work is spakfilla mixed with dirt and then spread across the base and once dry I used a mix of static grass, ground up leaves, dirt, railway model foam clumps and blended the lot together and glued to the base. The mud is a mix of spakfilla and paint and it was dapped over the base and once dry I used Woodland Scenics Realistic Water to give it a more wet look.
The undergrowth is from a company called MiniNatur and also Army Painter and once applied to the base it was sprayed with Matt Sealant.
Ron
Recipe.
AT-ST & figures- is from Bandai and has been built straight out of the box. The figures are from the Imperial Assualt box set and the troopers are been modified.
Base - is high density foam and cut out and the trees have been done by using aluminium foil and then spakfilla was used to cover the foil and a wide brush was used to make the bark. The branches are from Woodland Scenics, I also used woodland Scenics for the smaller trees.
The ground work is spakfilla mixed with dirt and then spread across the base and once dry I used a mix of static grass, ground up leaves, dirt, railway model foam clumps and blended the lot together and glued to the base. The mud is a mix of spakfilla and paint and it was dapped over the base and once dry I used Woodland Scenics Realistic Water to give it a more wet look.
The undergrowth is from a company called MiniNatur and also Army Painter and once applied to the base it was sprayed with Matt Sealant.
Ron
Attachments
-
 IMG_0022.JPG170.2 KB · Views: 156
 -
 IMG_0055.JPG174.1 KB · Views: 169
 -
 IMG_0053.JPG219.8 KB · Views: 167
 -
 IMG_0051.JPG199.6 KB · Views: 180
 -
 IMG_0042.JPG151.5 KB · Views: 151
 -
 IMG_0038.JPG163.8 KB · Views: 140
 -
 IMG_0034.JPG167.1 KB · Views: 138
 -
 IMG_0028.JPG171.7 KB · Views: 144
 -
 IMG_0026.JPG170.8 KB · Views: 171
 -
 IMG_0024.JPG173.2 KB · Views: 168
") !!!
!!!