You are using an out of date browser. It may not display this or other websites correctly.
You should upgrade or use an alternative browser.
You should upgrade or use an alternative browser.
1:1 Millennium Falcon Cockpit Replica - Group Build
- Thread starter SteveStarkiller
- Start date
Hi Gang,
I'm LONG overdue for that "End of the Weekend" Update! Unfortunately, the laser cutter is STILL acting up. We're not sure if its weather related or perhaps water/cooling (which coincides with the weather. But the hotter it is, the less she works. I was having some serious issues over the last few days. We'll figure it out. Anywho...
I hope you enjoy the update!")
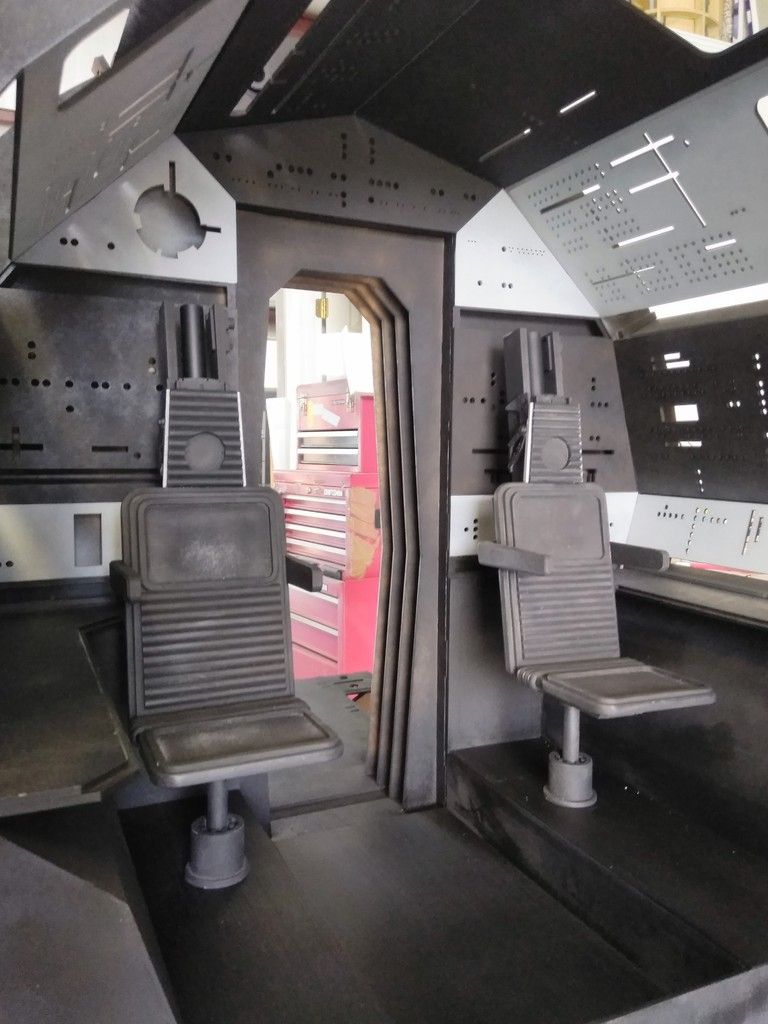
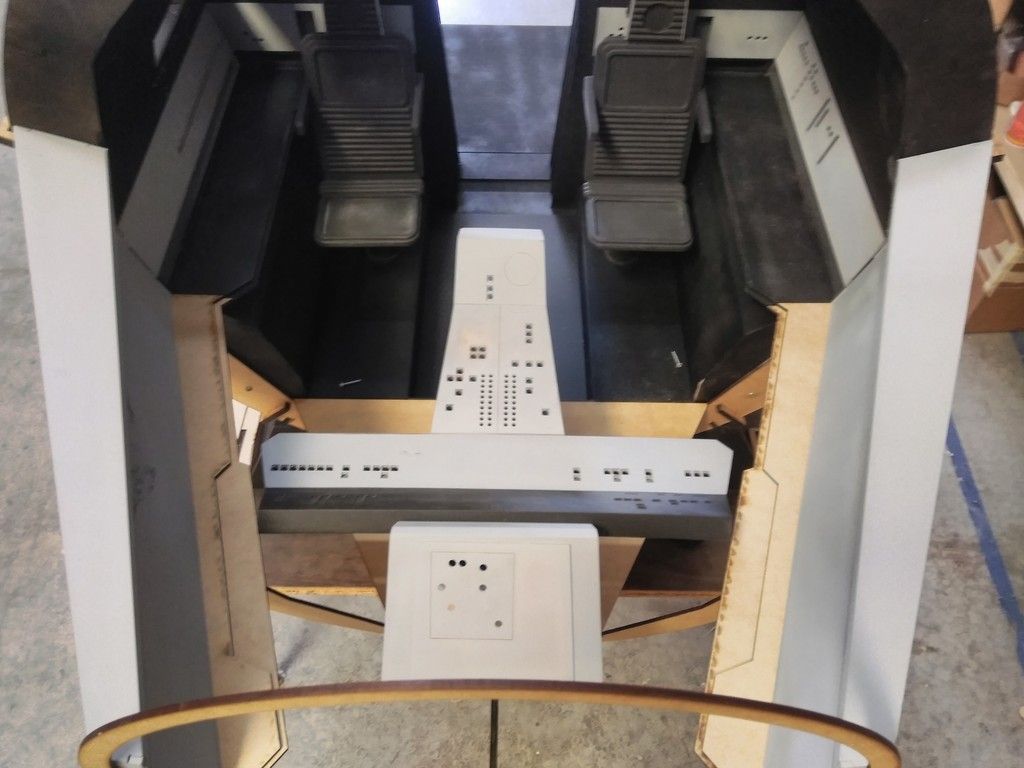
I really wanted to get to further along with the 1/6th Nav Chair but I can't find a few plastic pieces I ordered so... I only worked the base
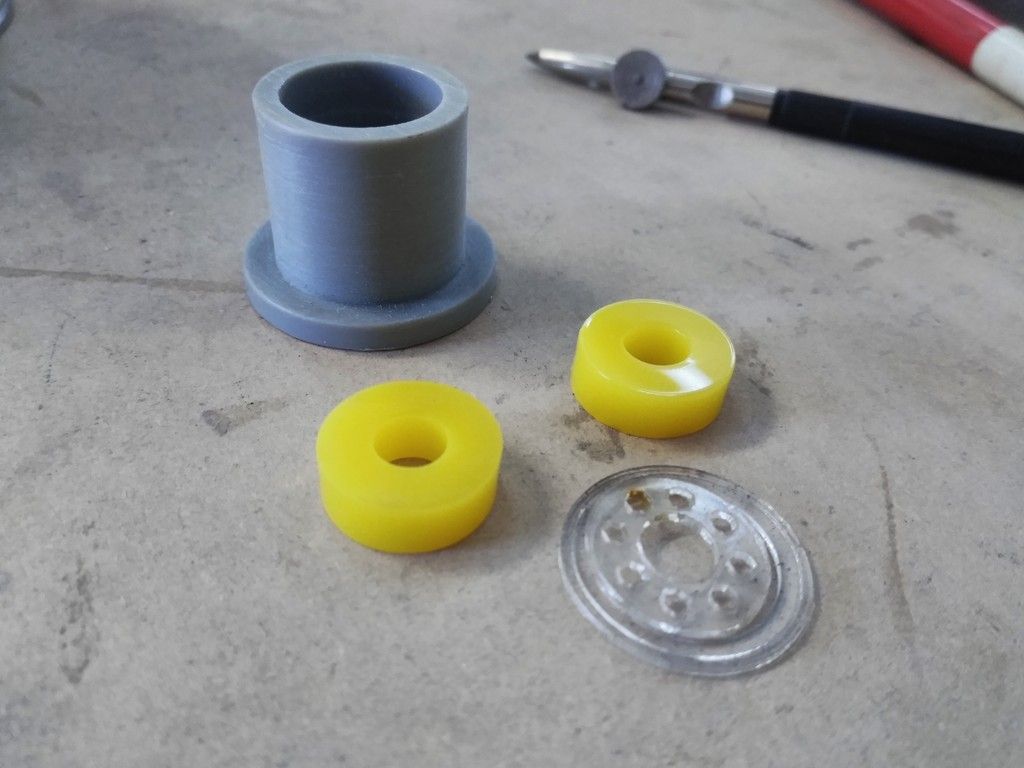
The post looks really dinky. It's not exactly too scale but it does look neat!
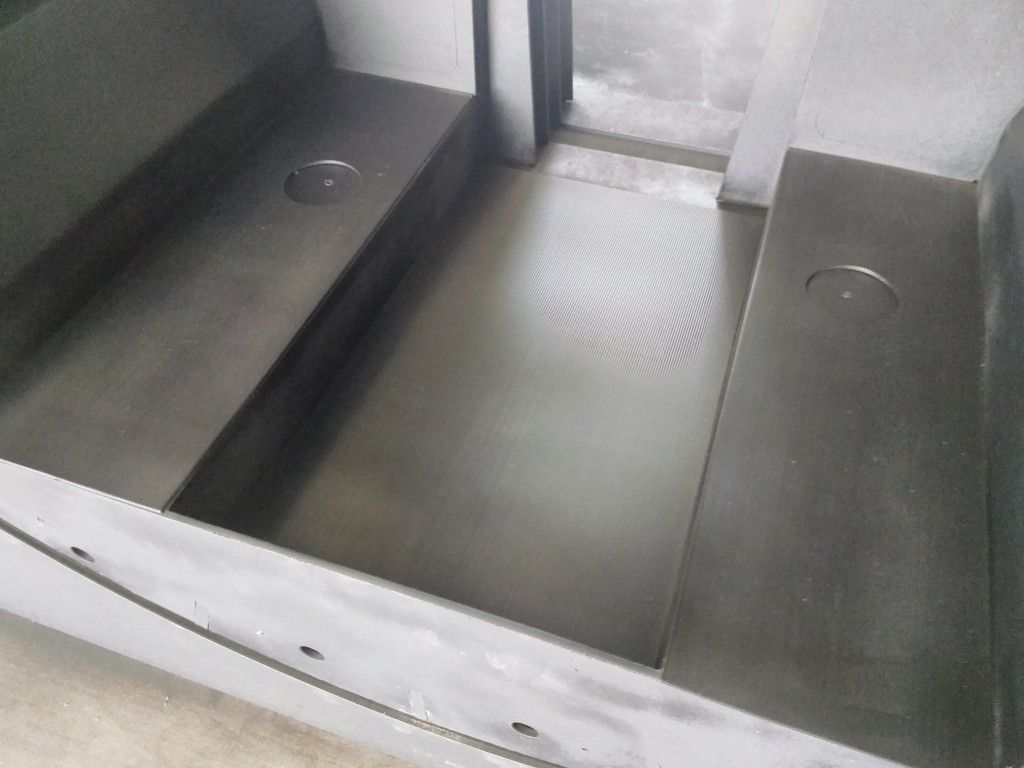
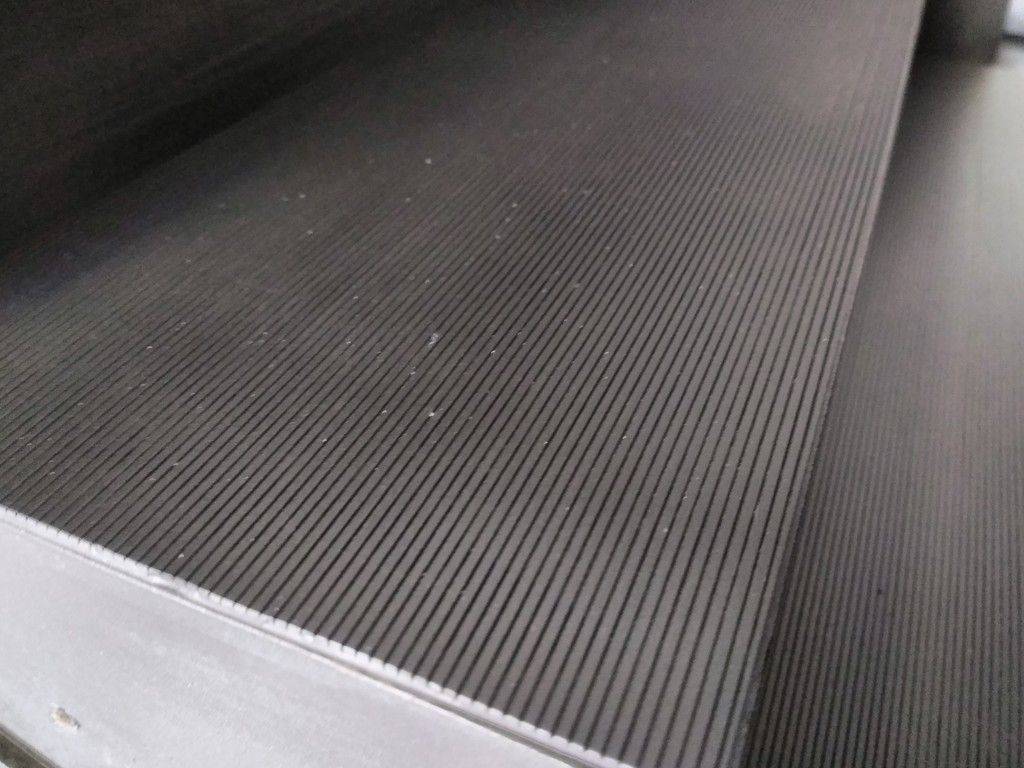
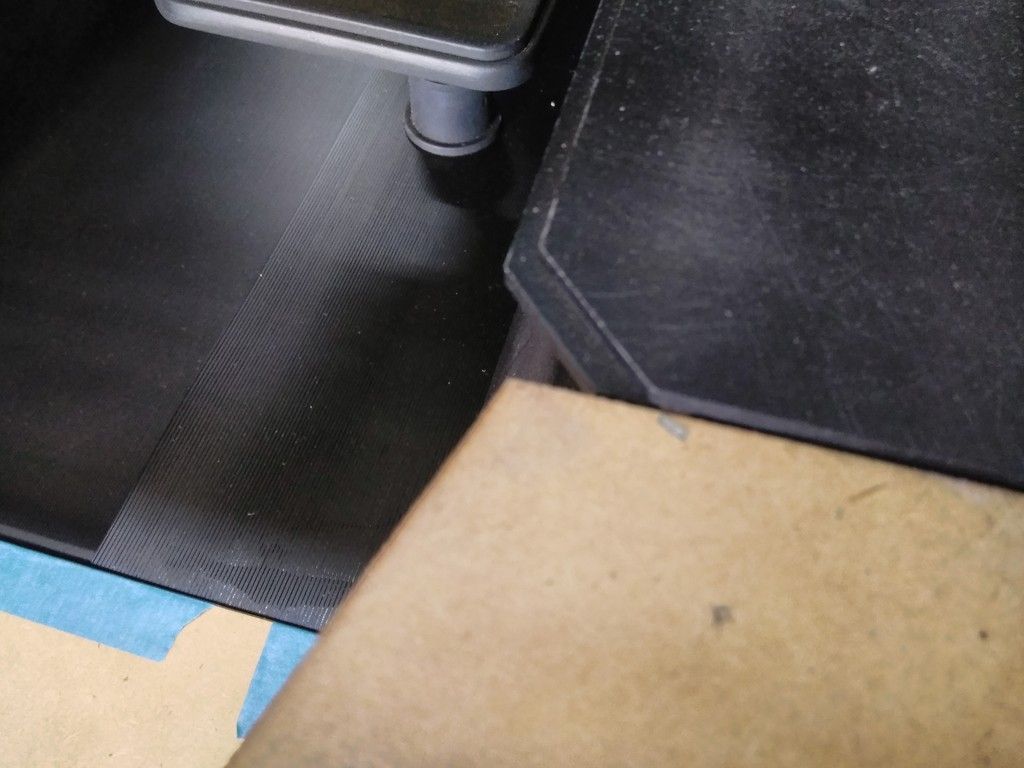
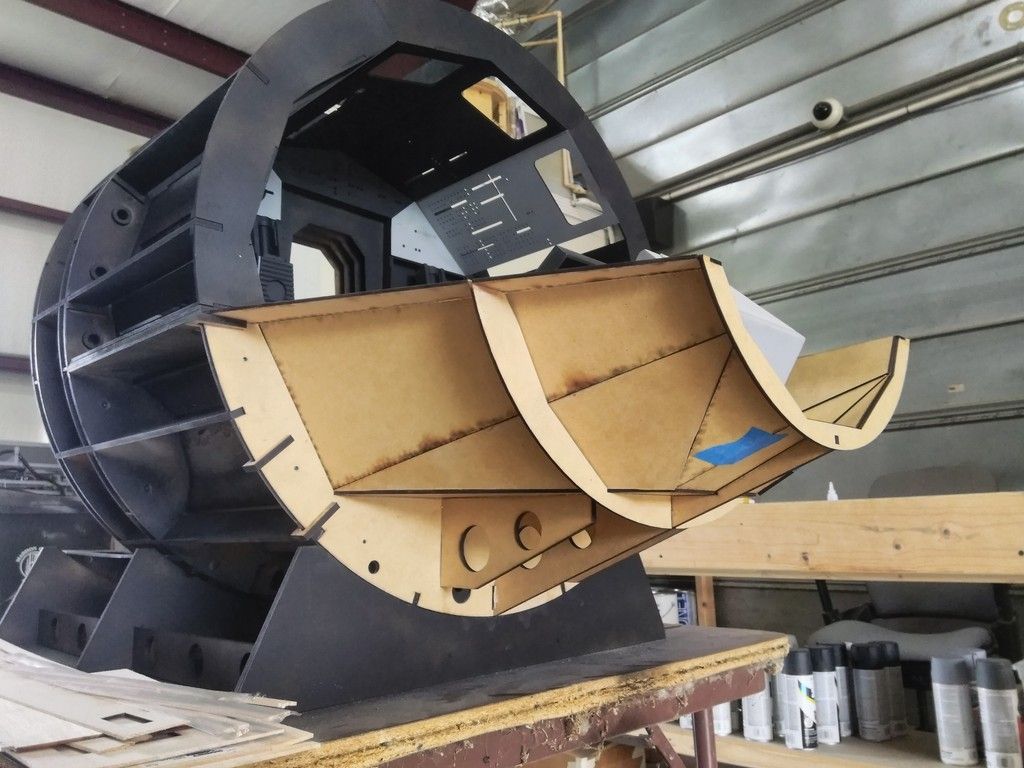
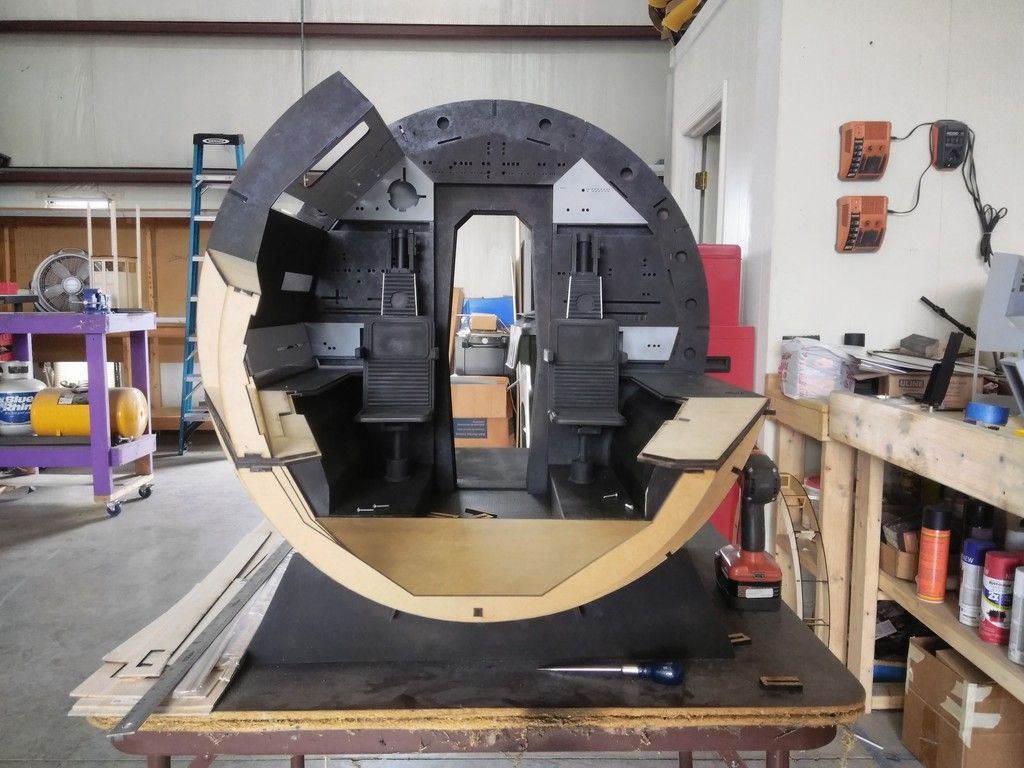
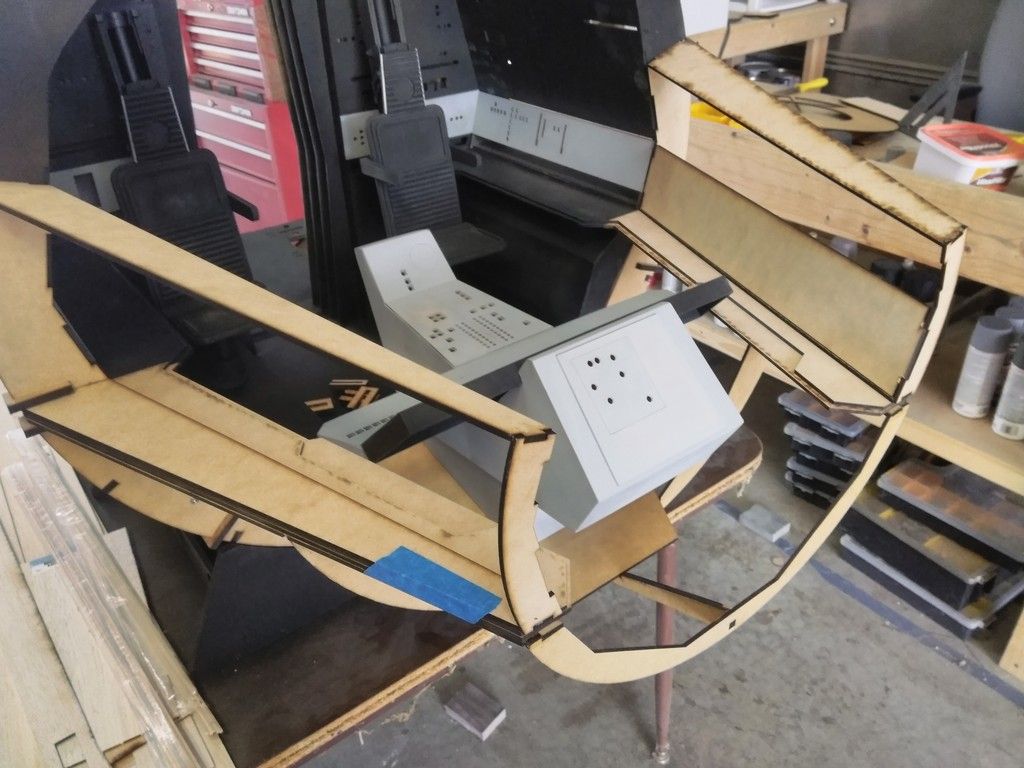
I FINALLY wrestled the large "corrugated" floor mats, which had warped from the heat of the laser cutter, into shape and got them adhered in place
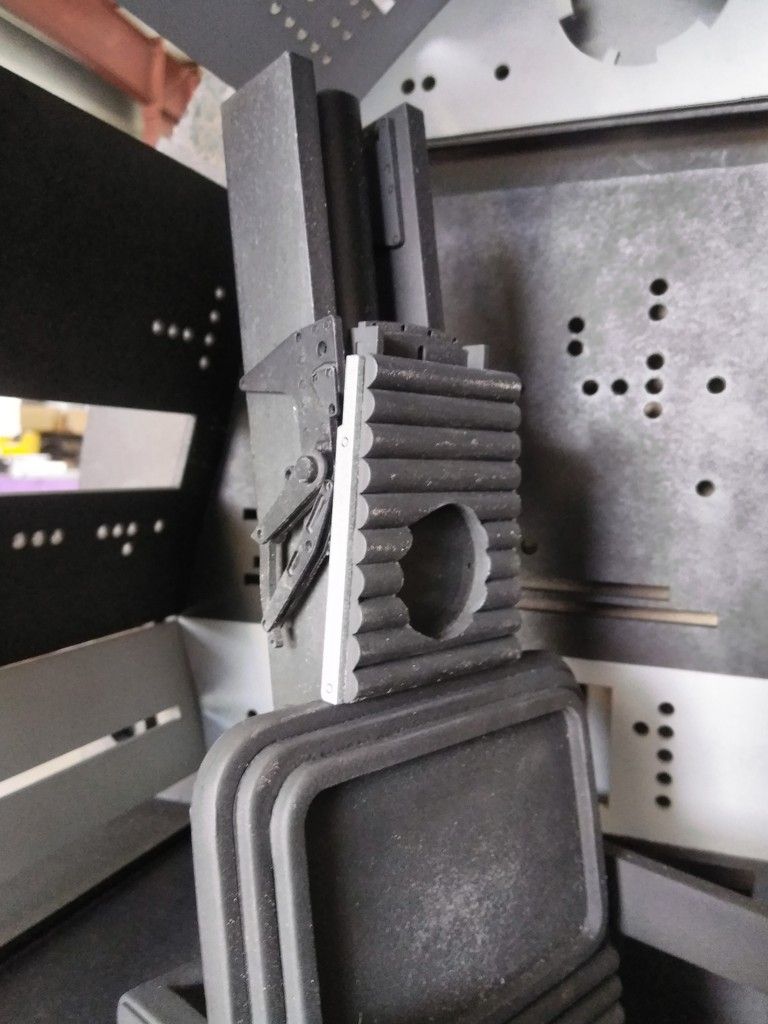
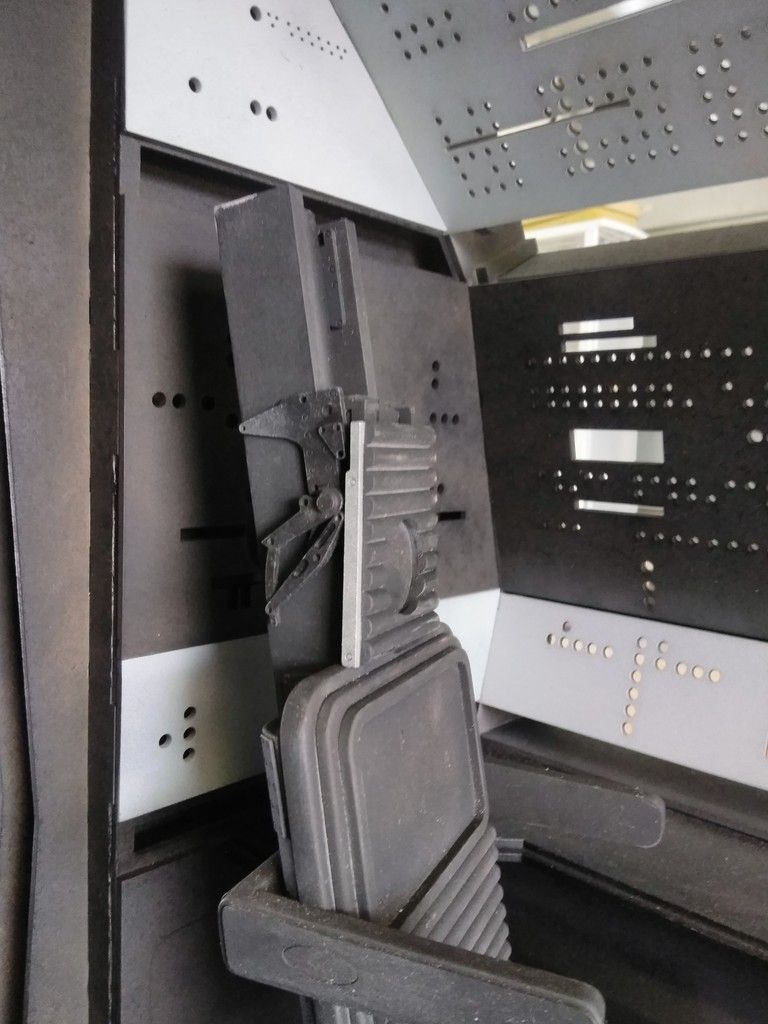
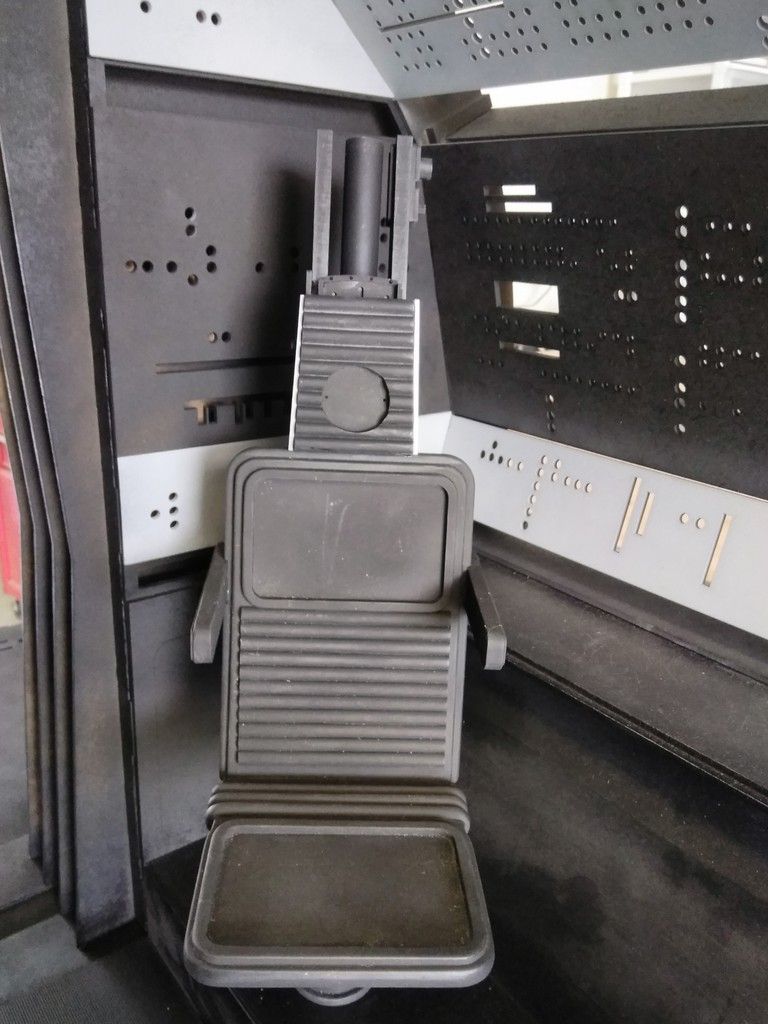
After that I adhered the side greeblies and headrest to the nav chairs
I figure a good cleaning and one more shot of black before a layer of satin clear to seal everything in place
You would be amazed how many little creatures have made their home inside the cockpit

It's so weird looking knowing this is 1/4 scale
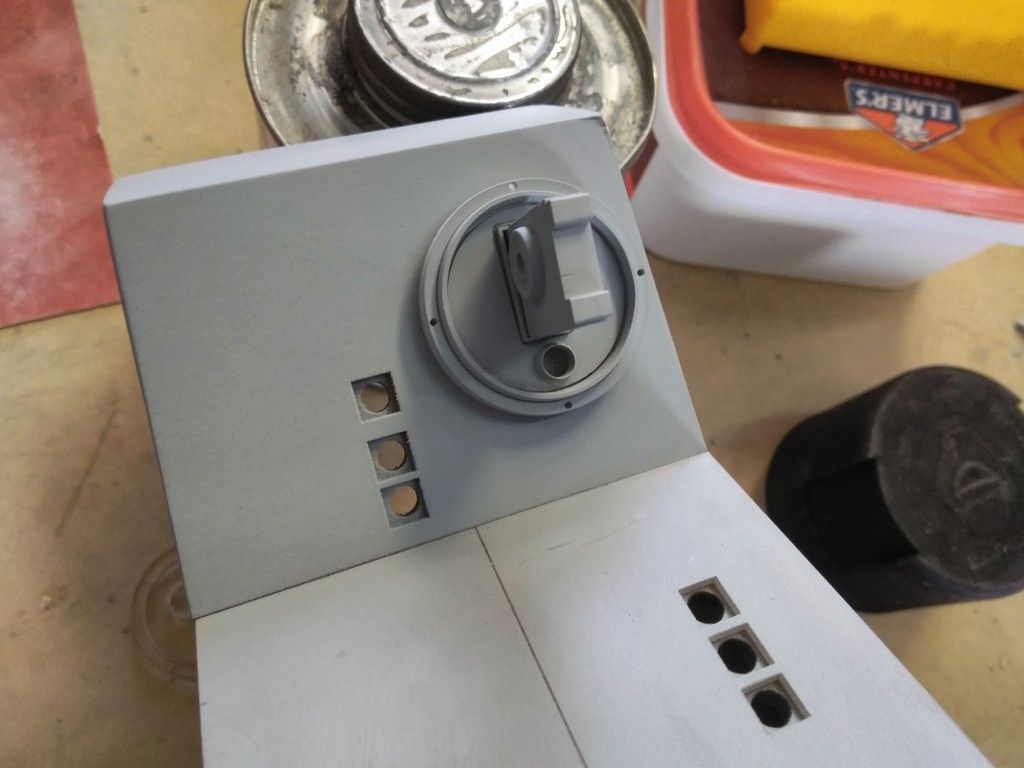
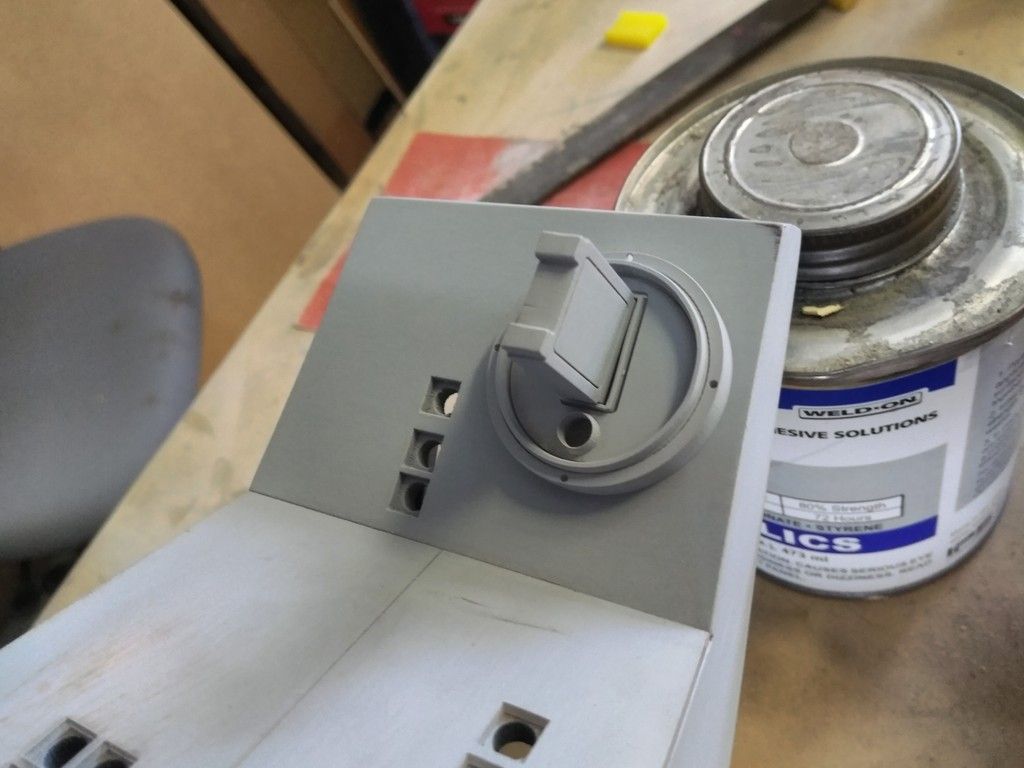
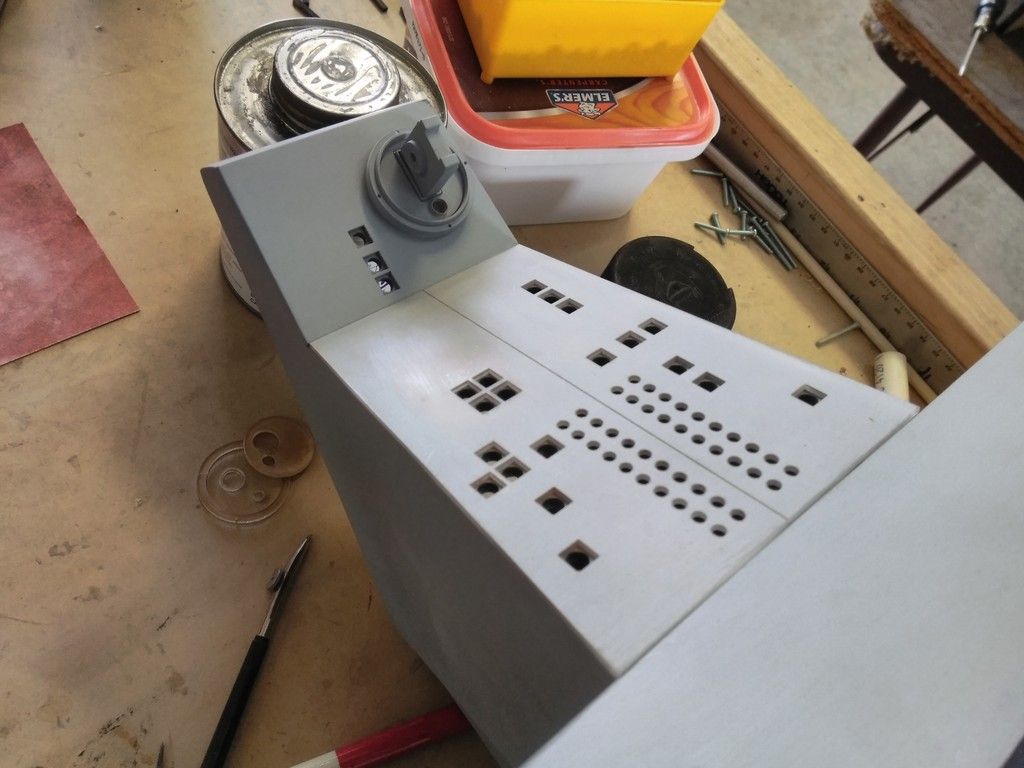
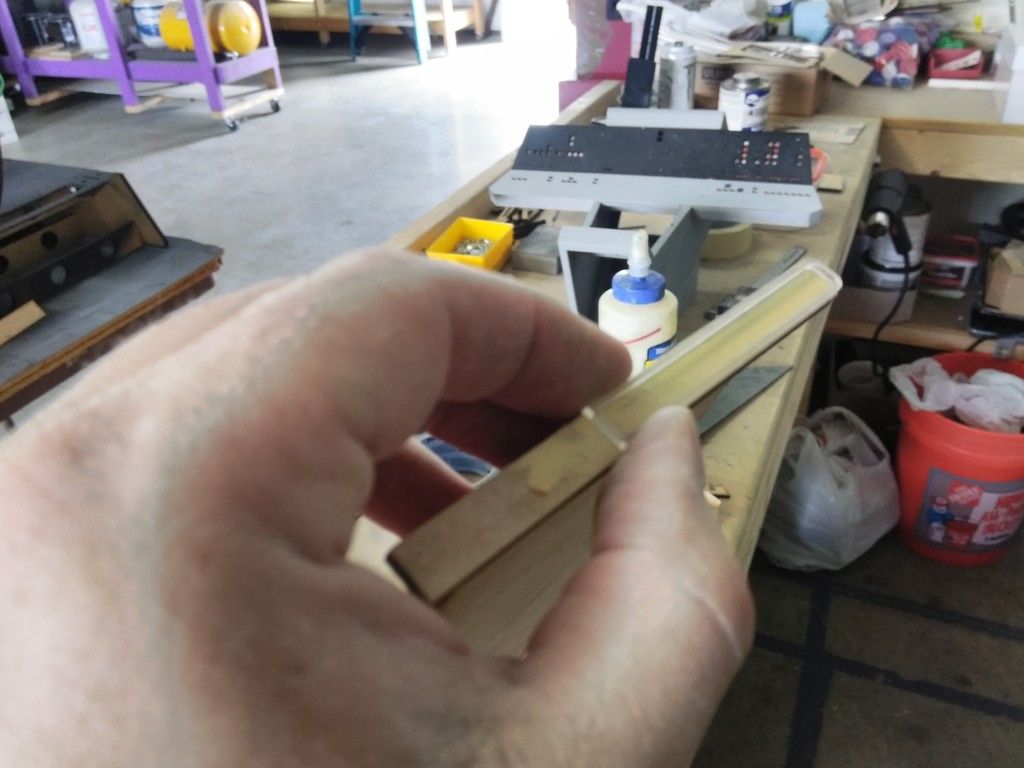
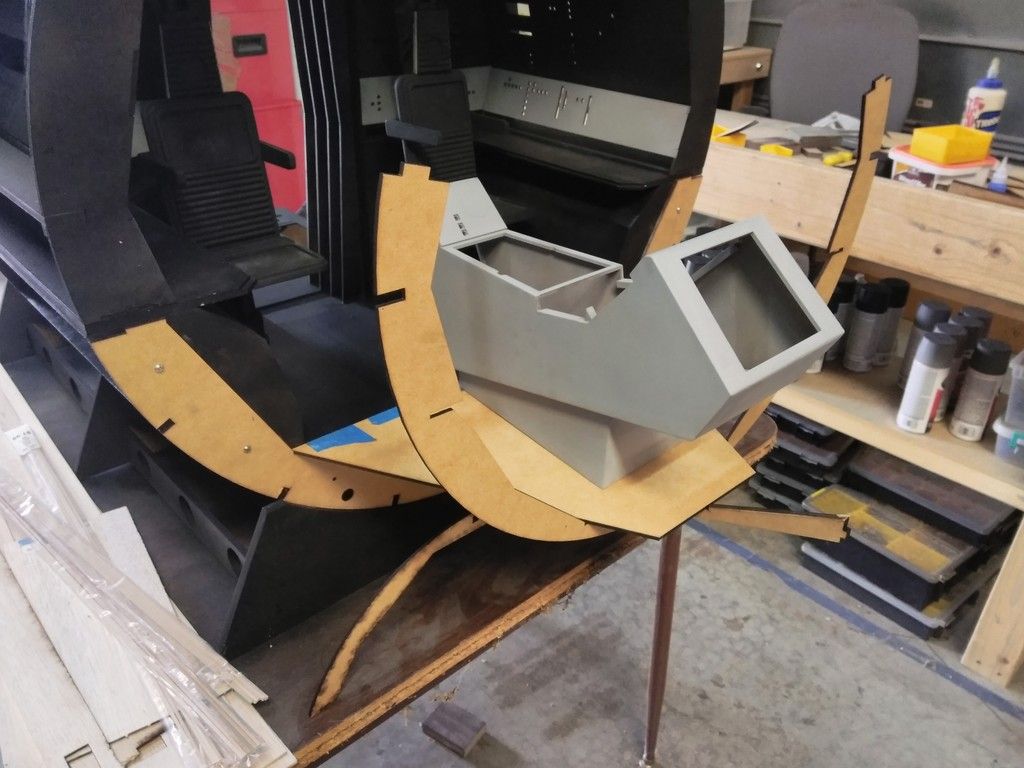
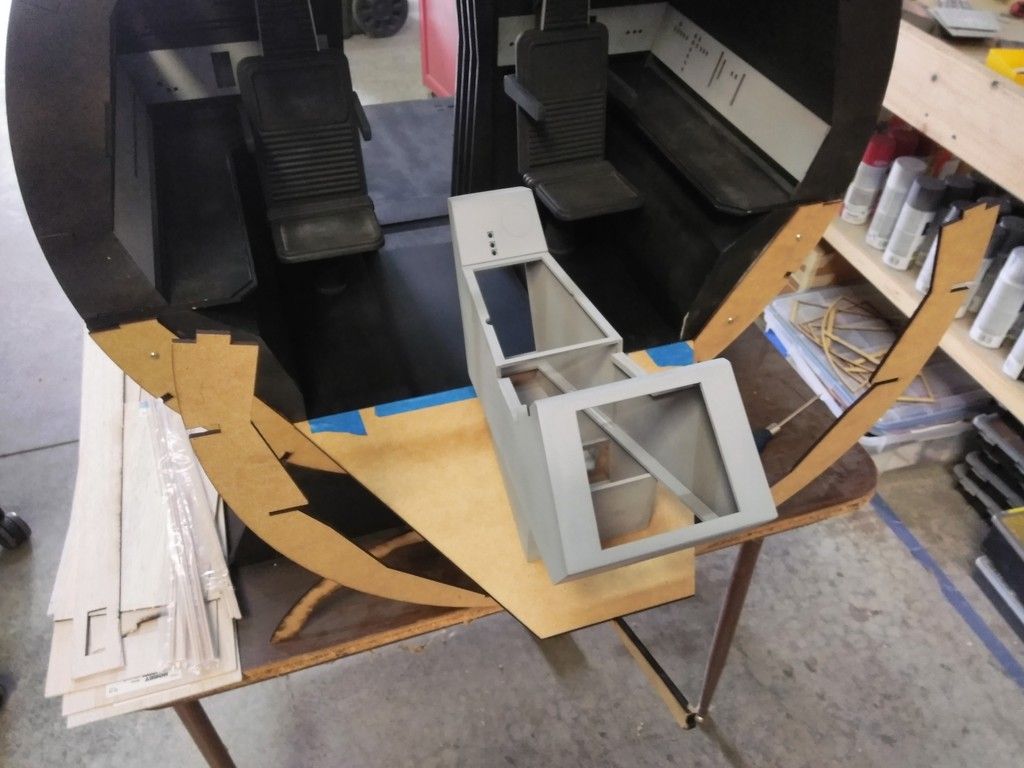
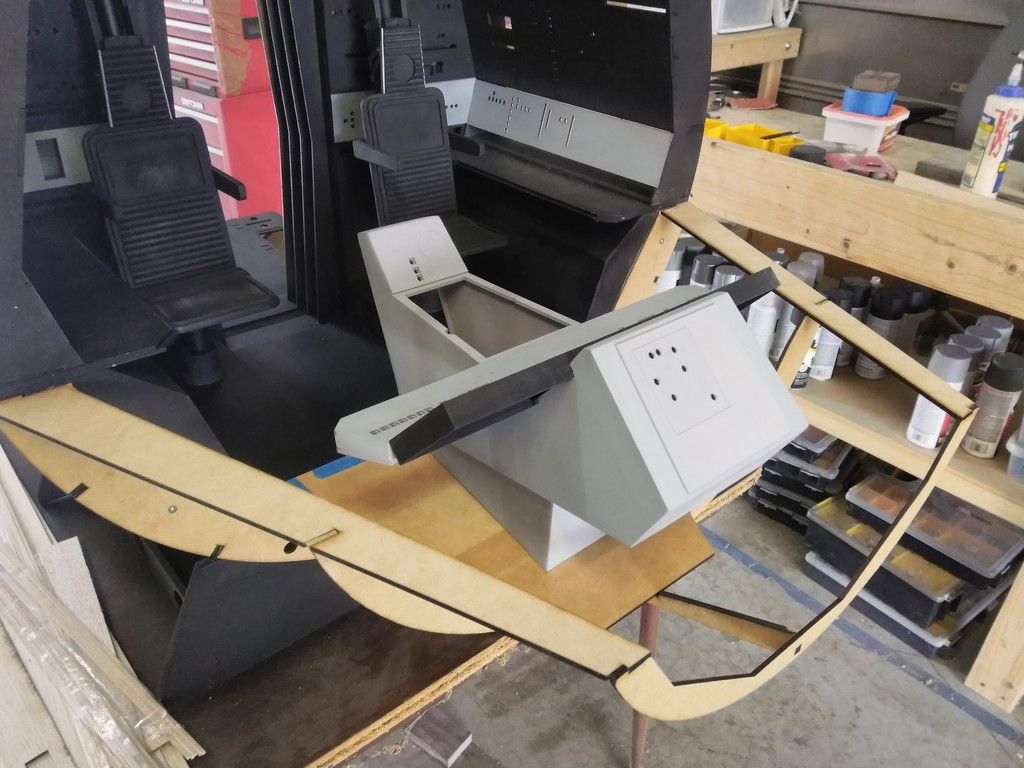
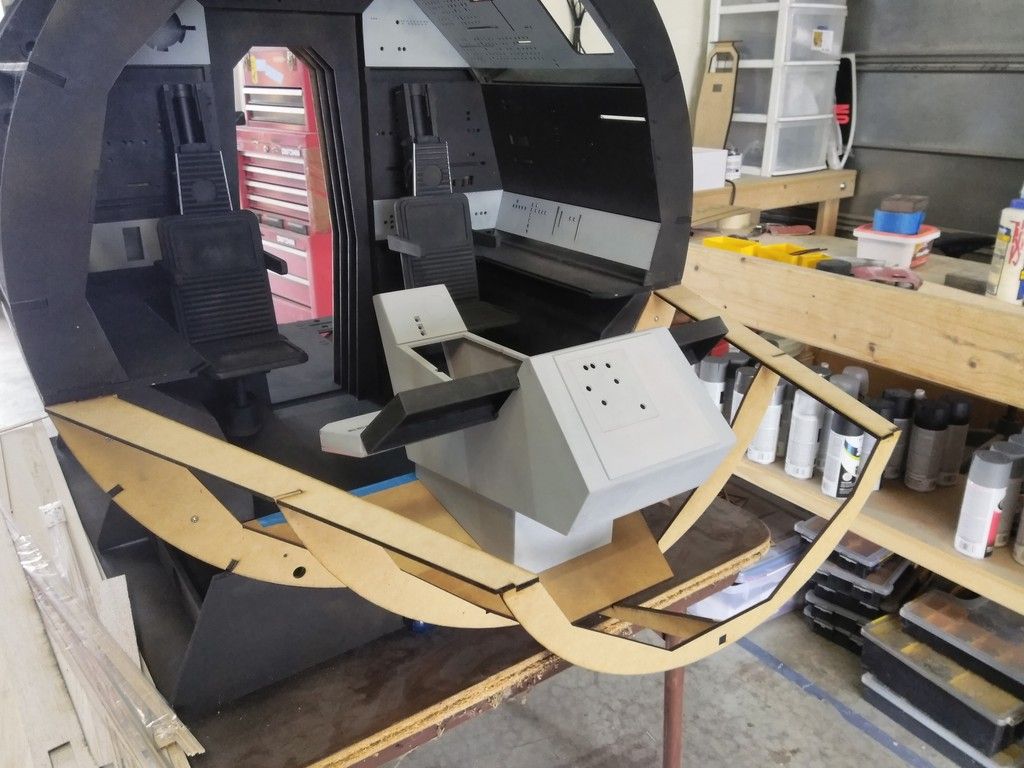
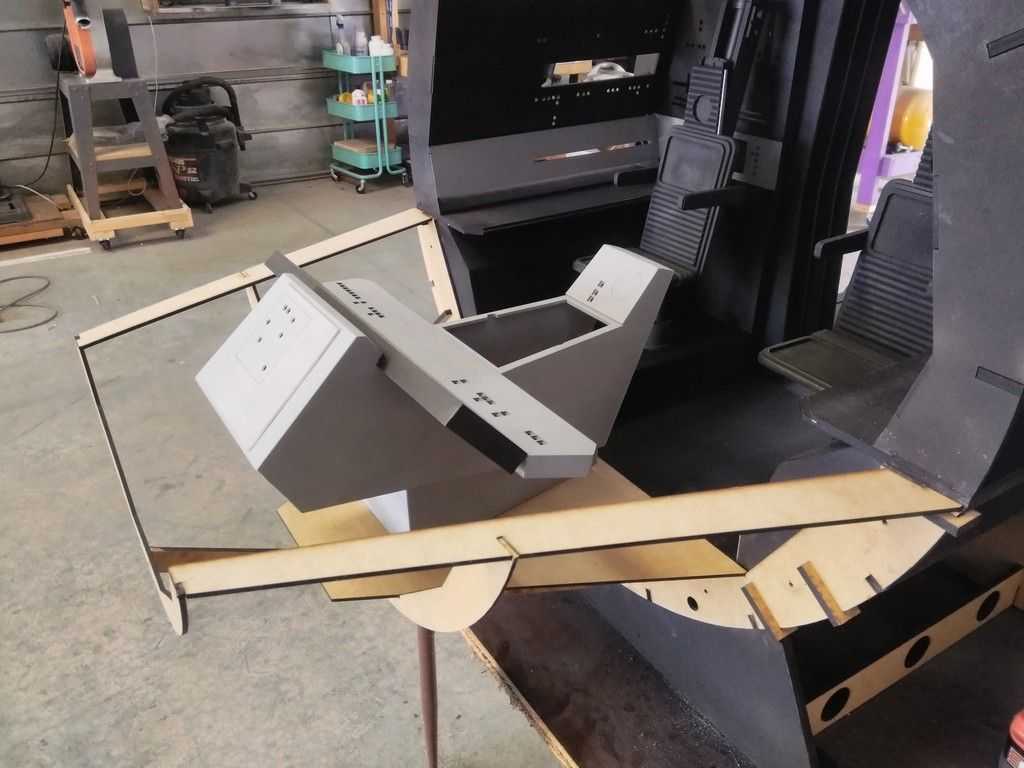
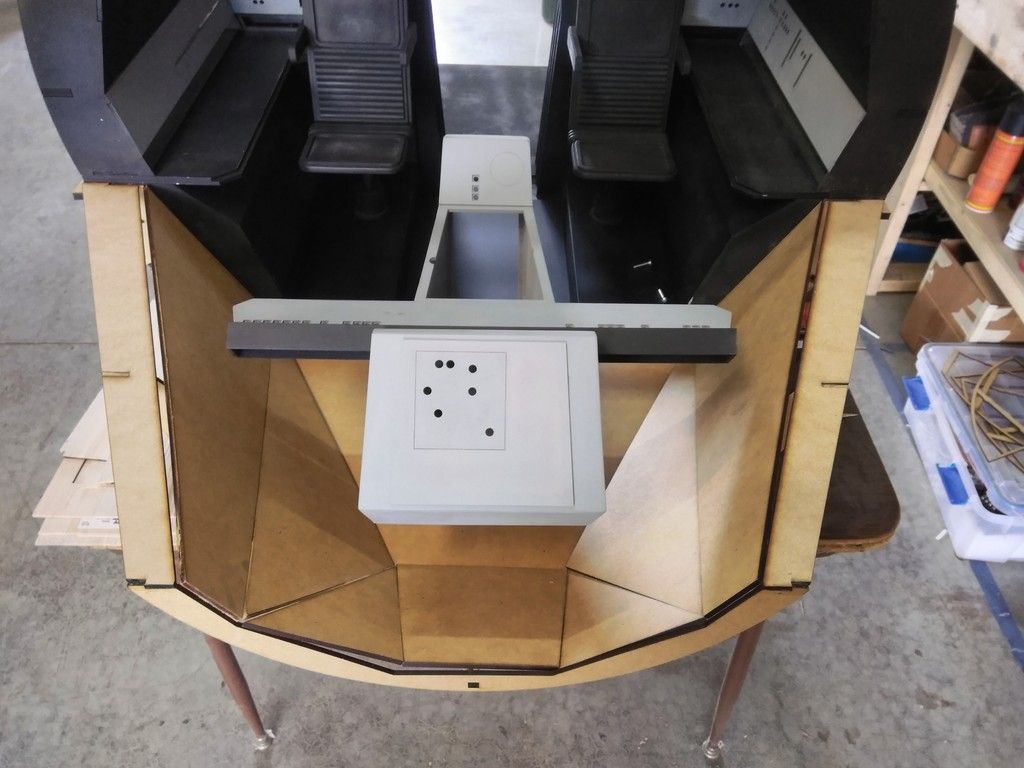
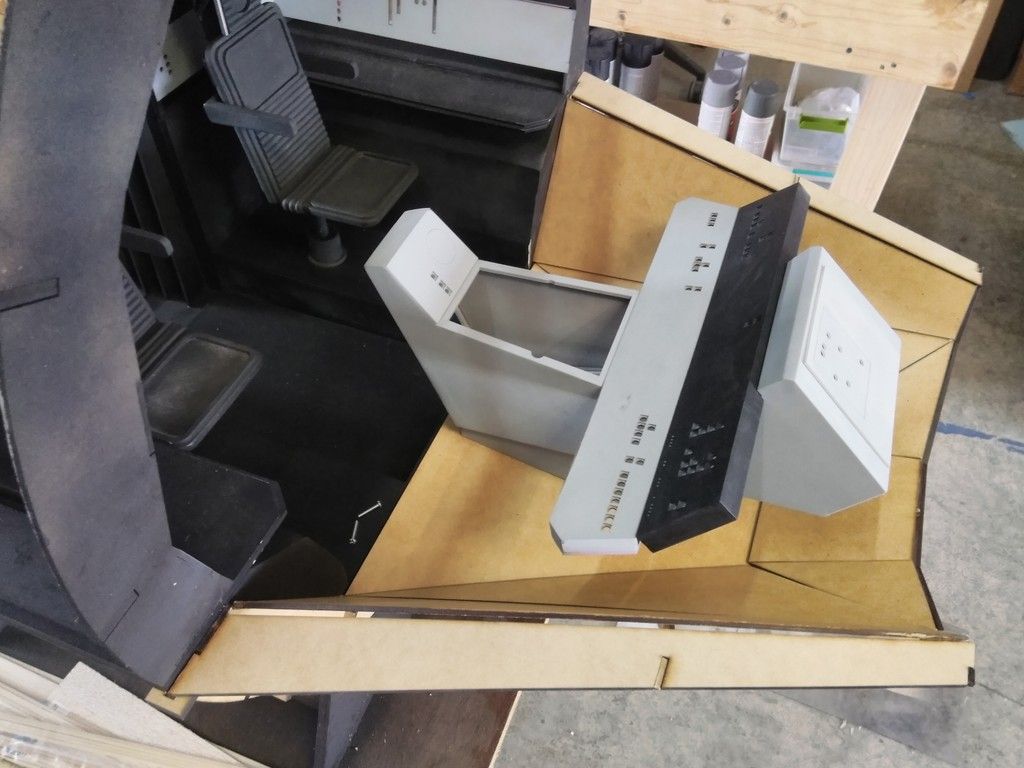
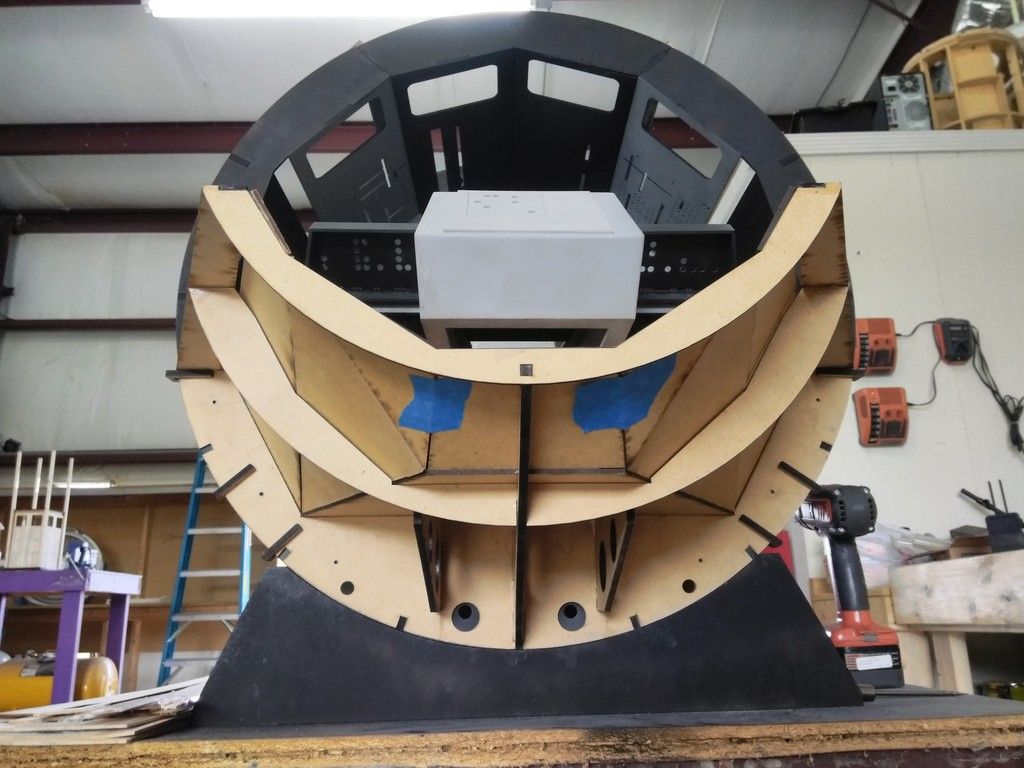
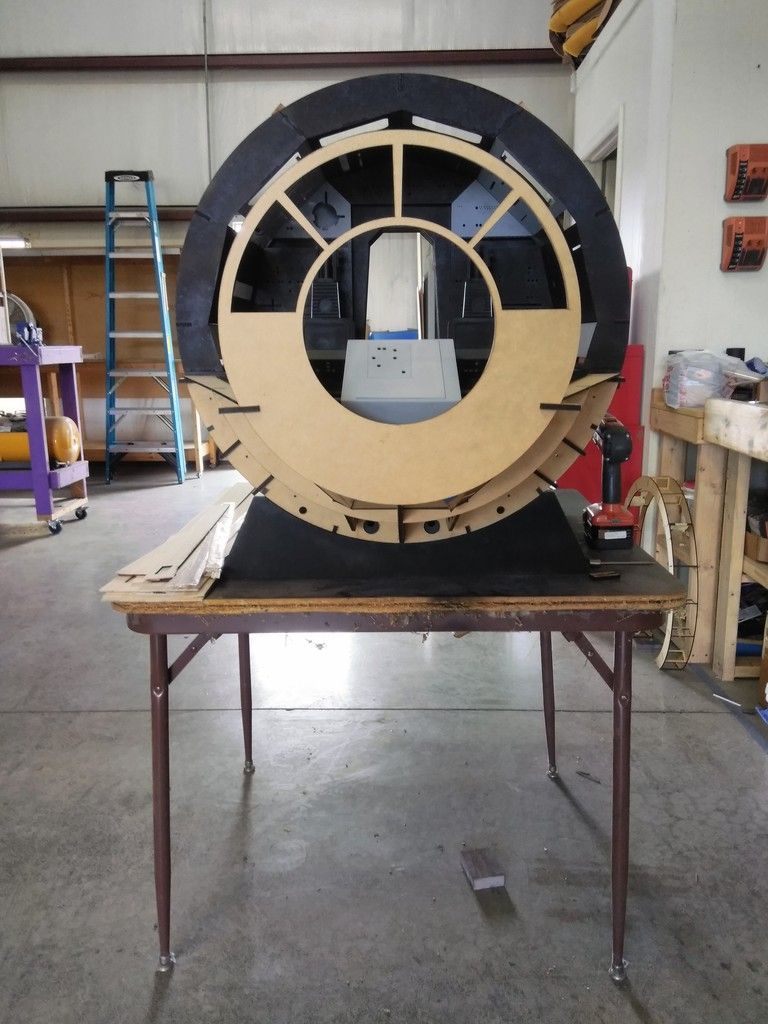
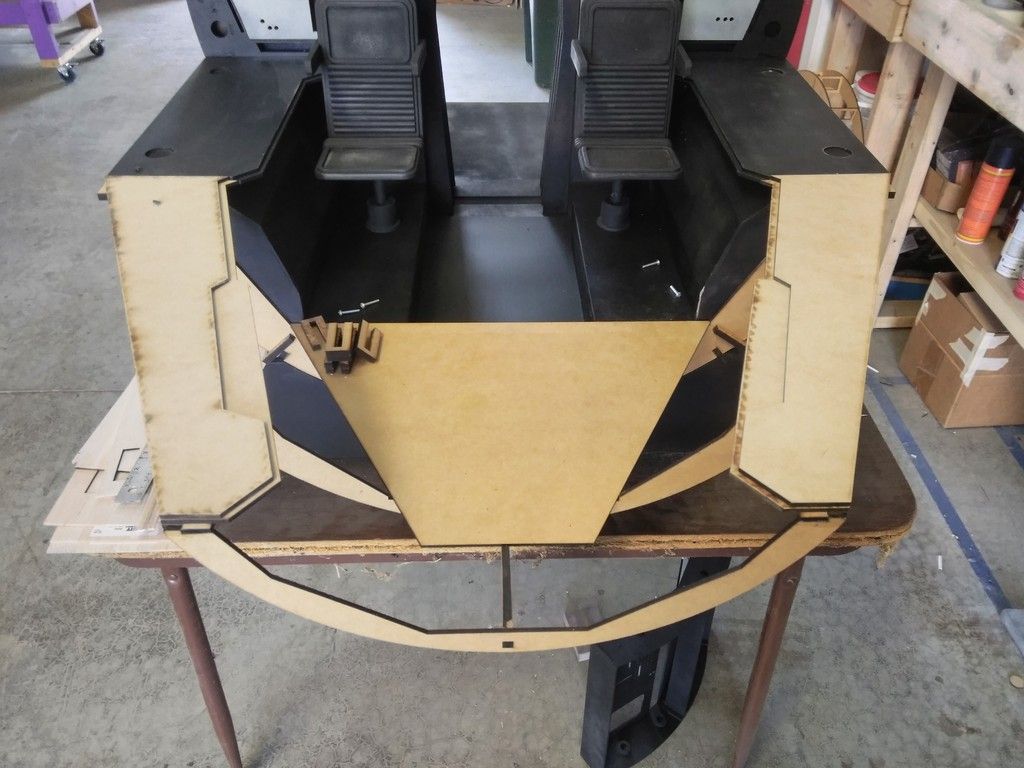
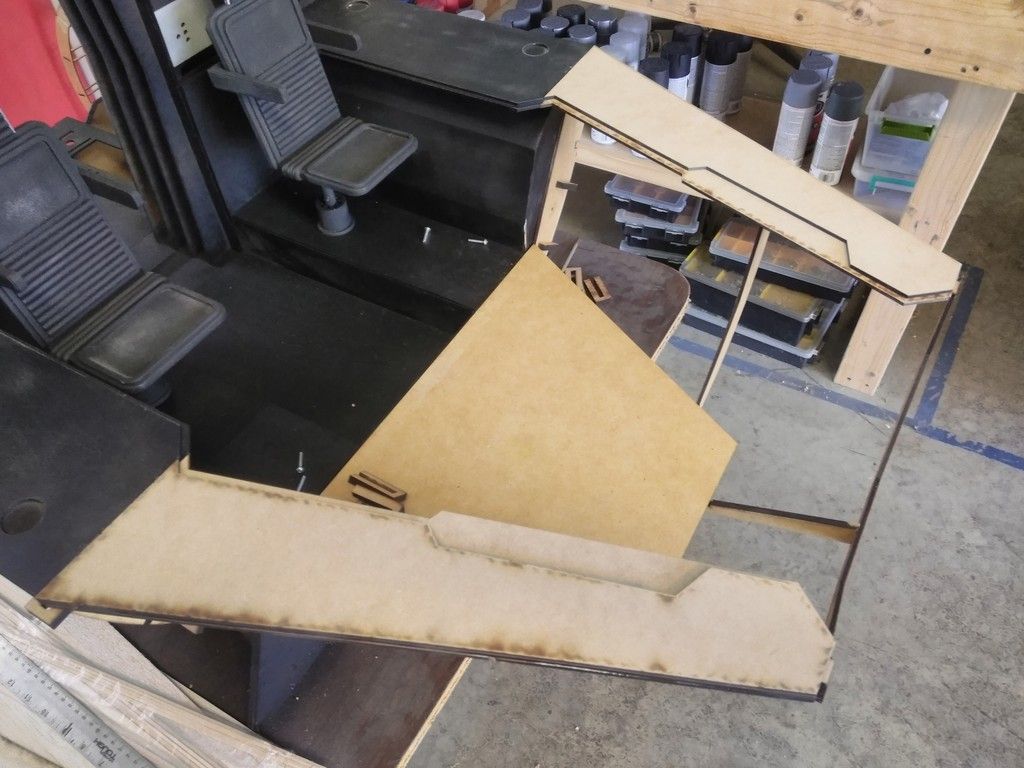
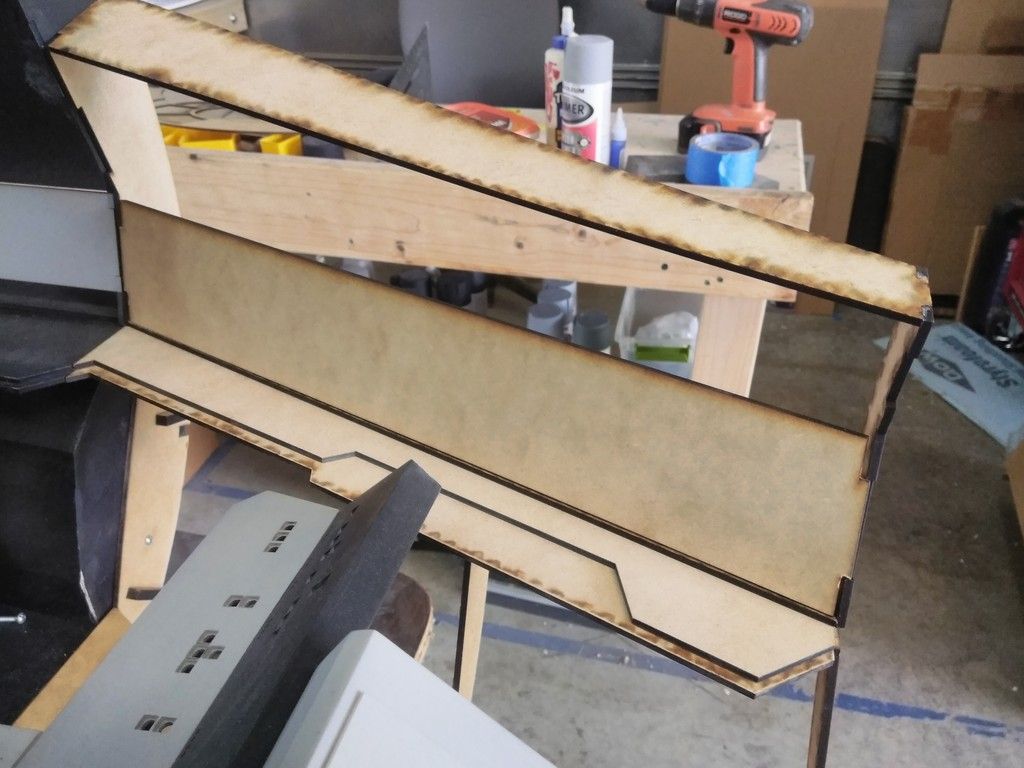
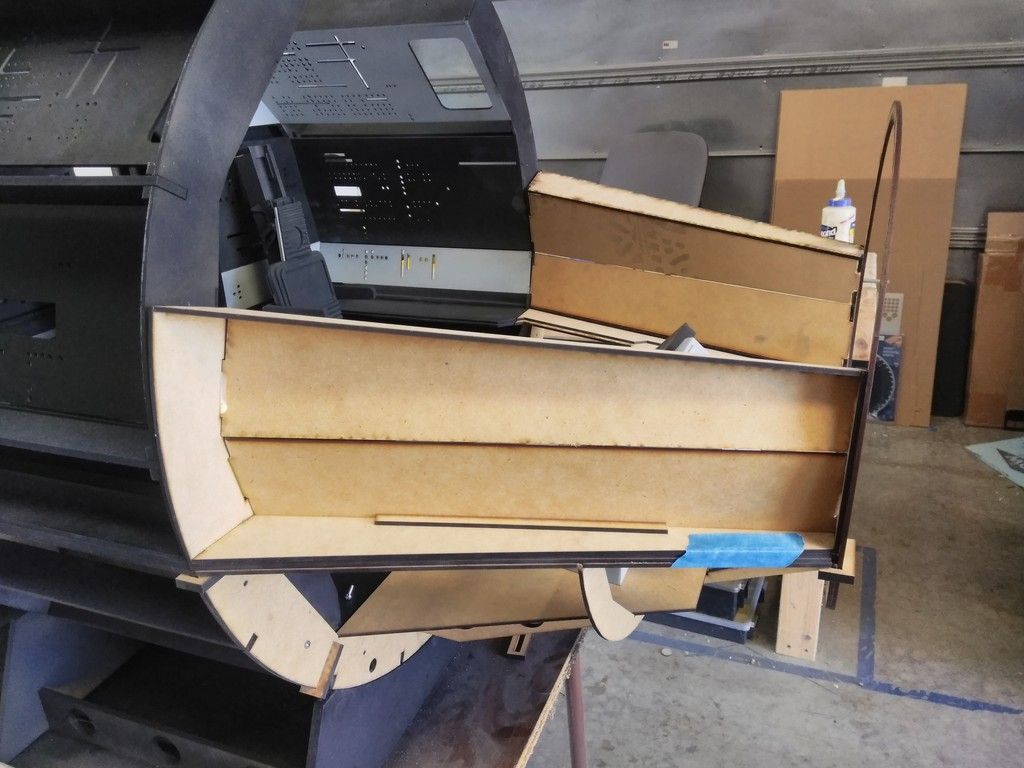
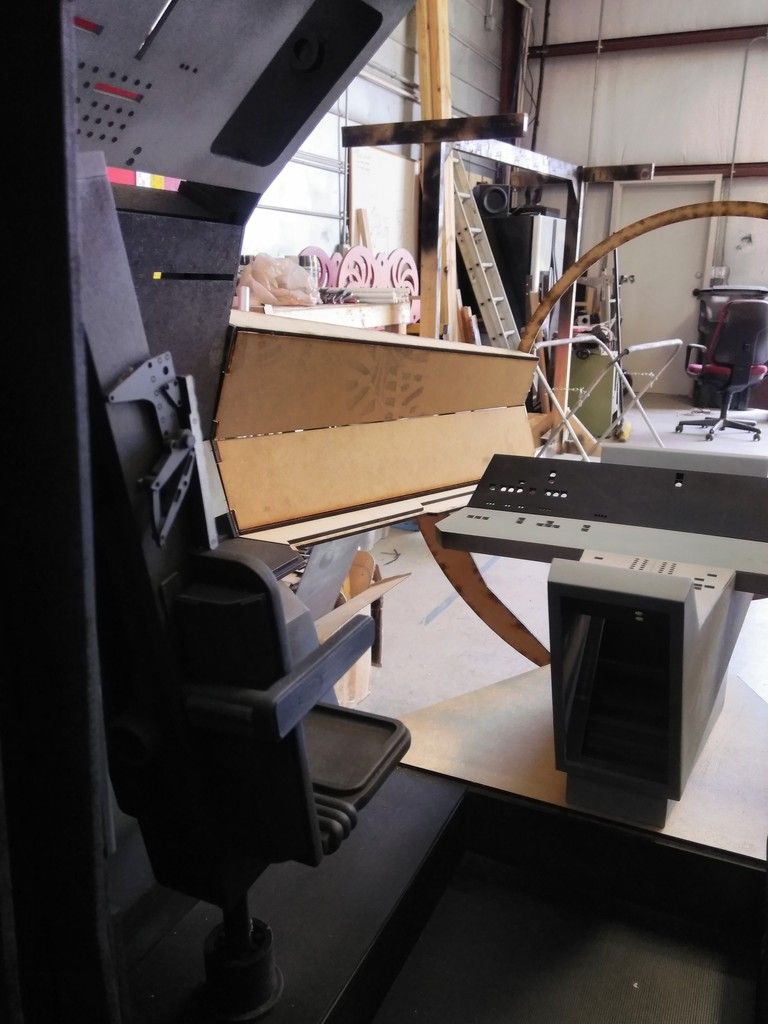
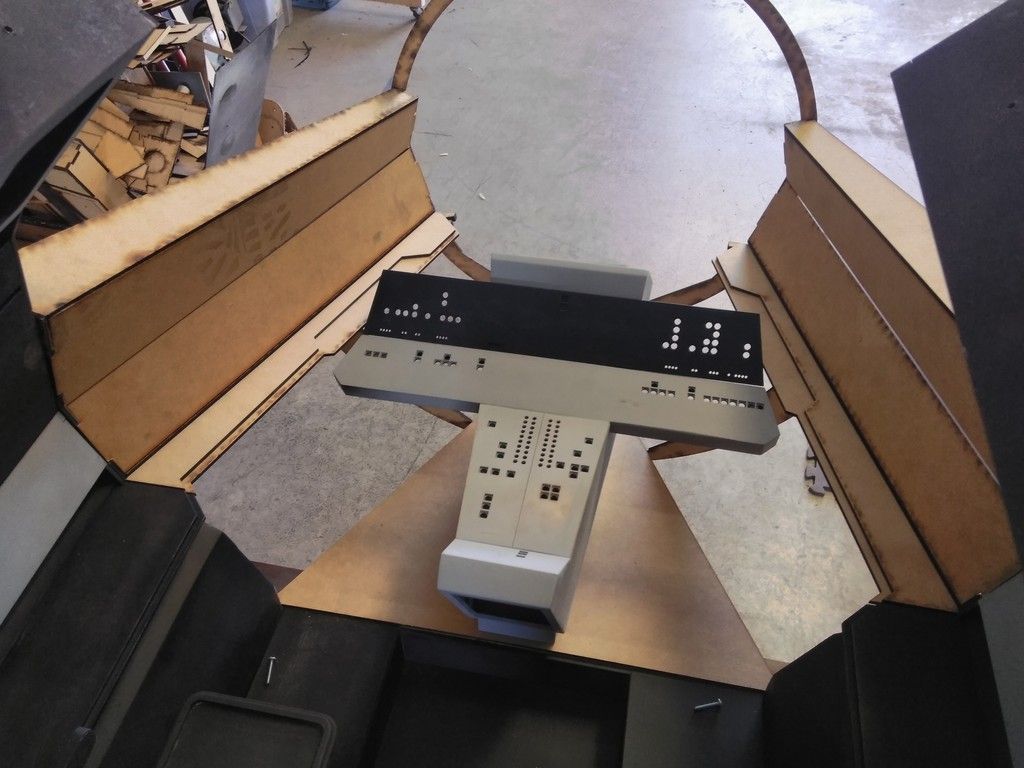
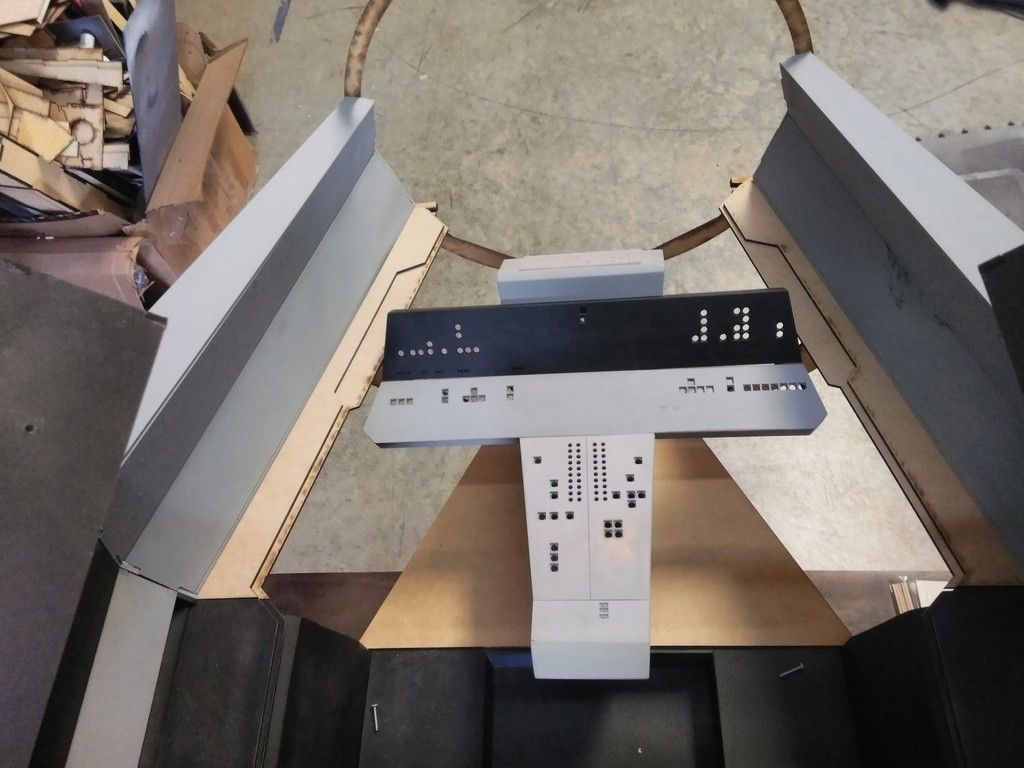
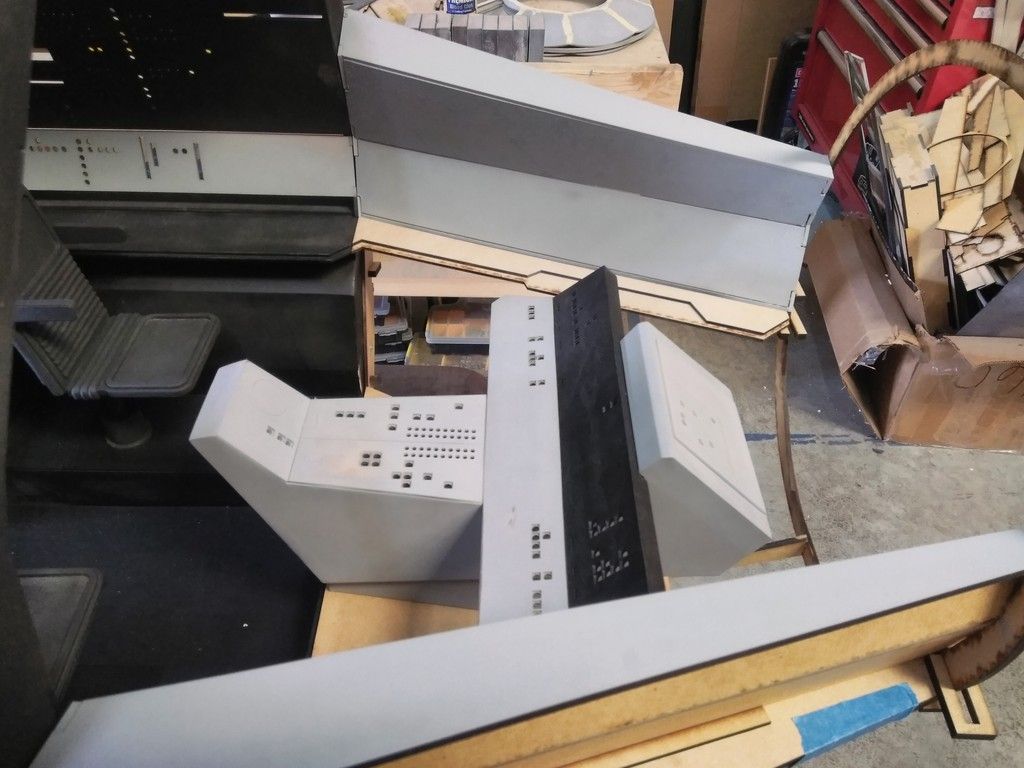
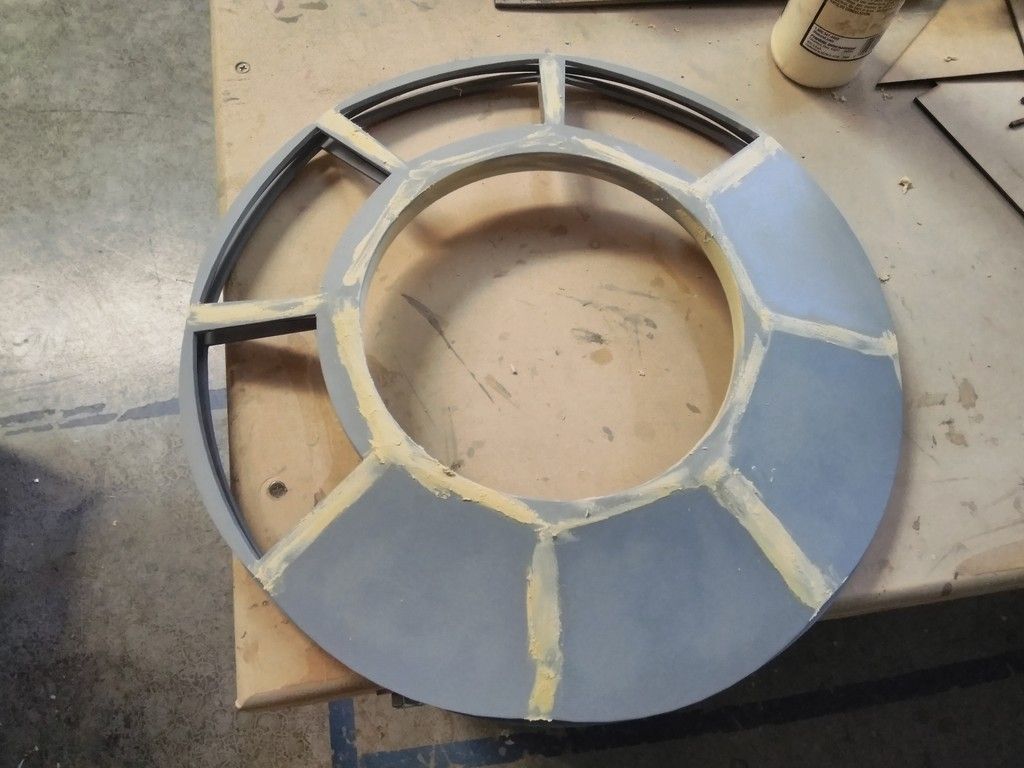
I then worked on the center console
I love filler...
Most of the time...
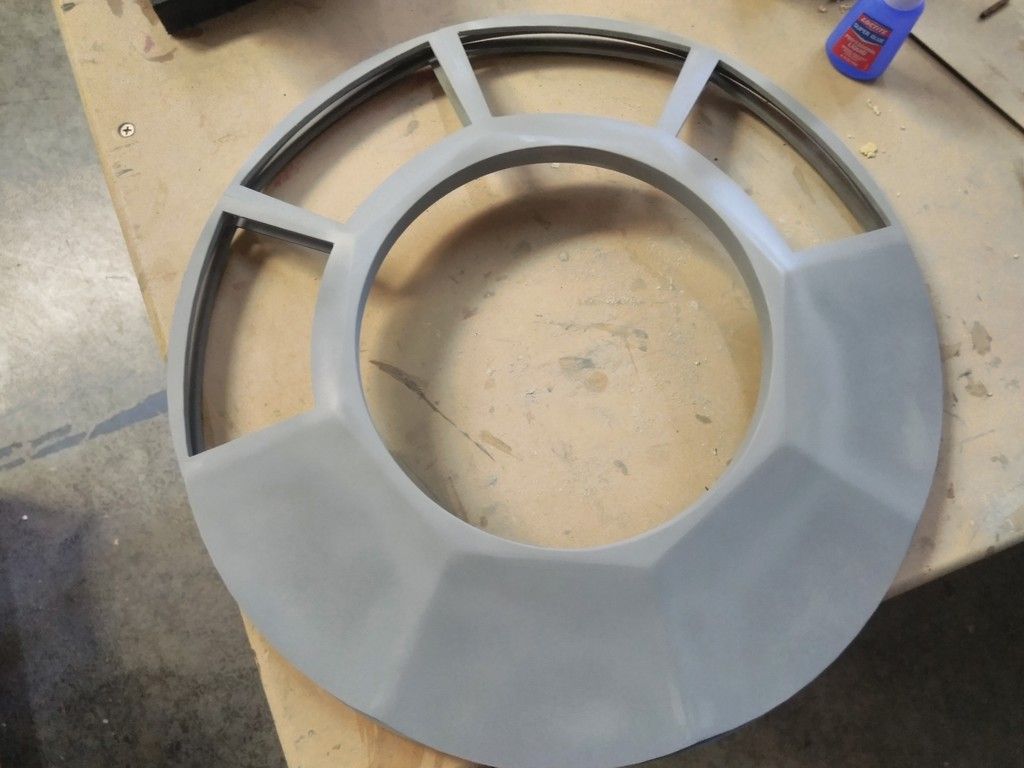
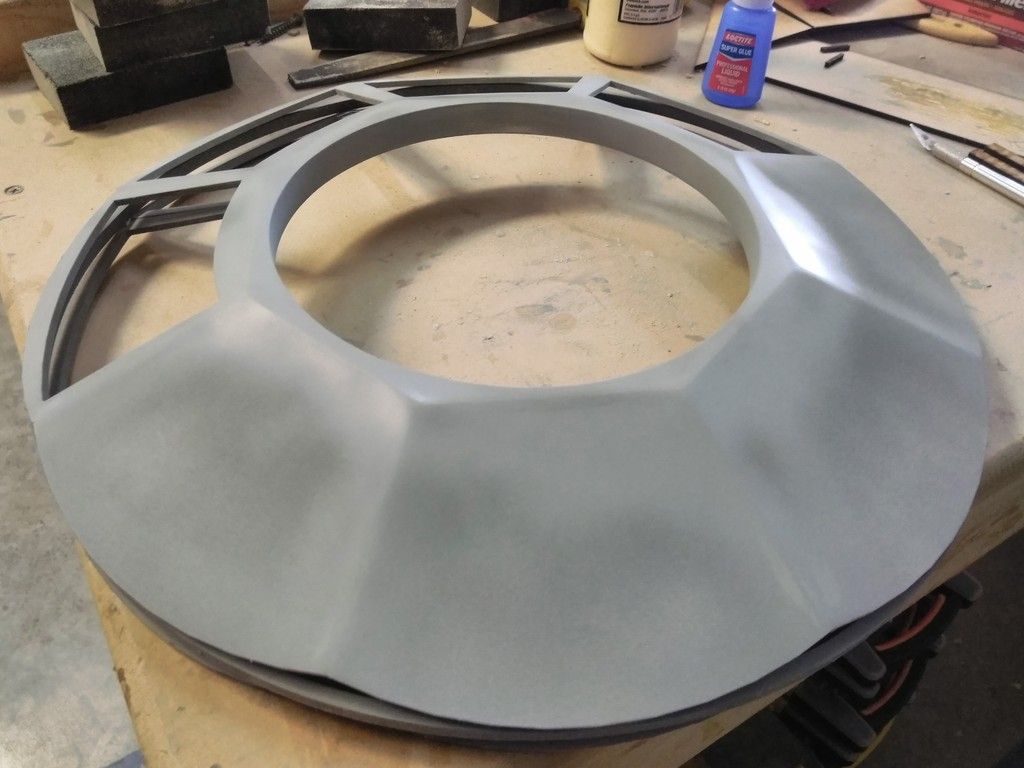
Getting there
This would make a cool kit!
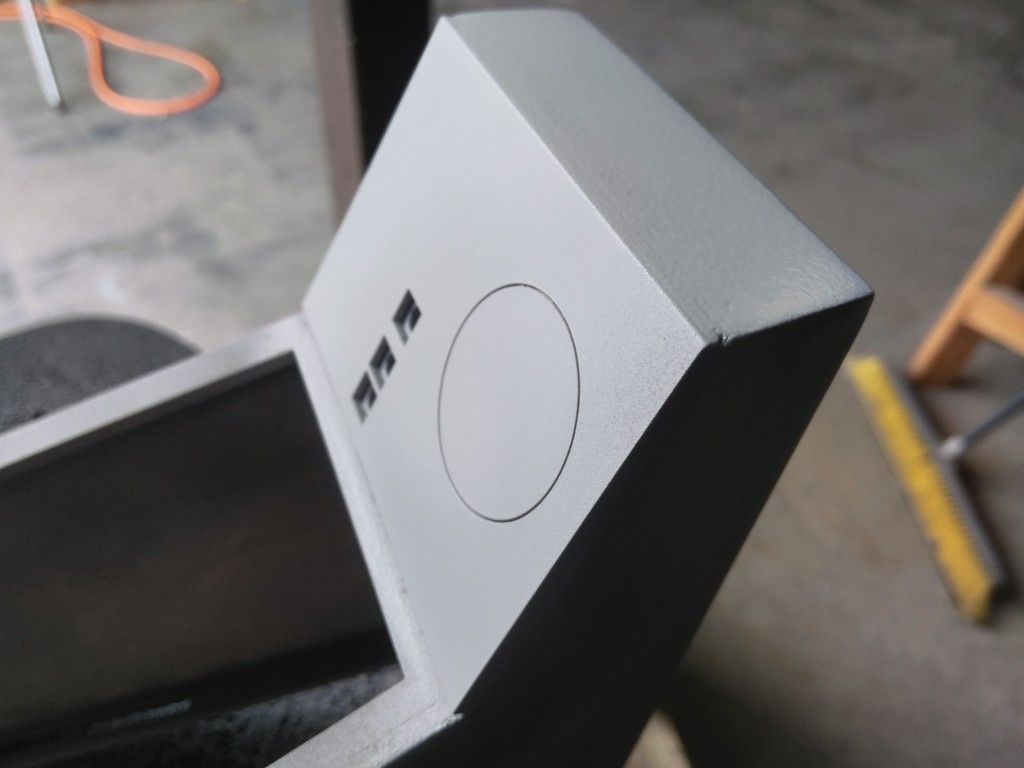
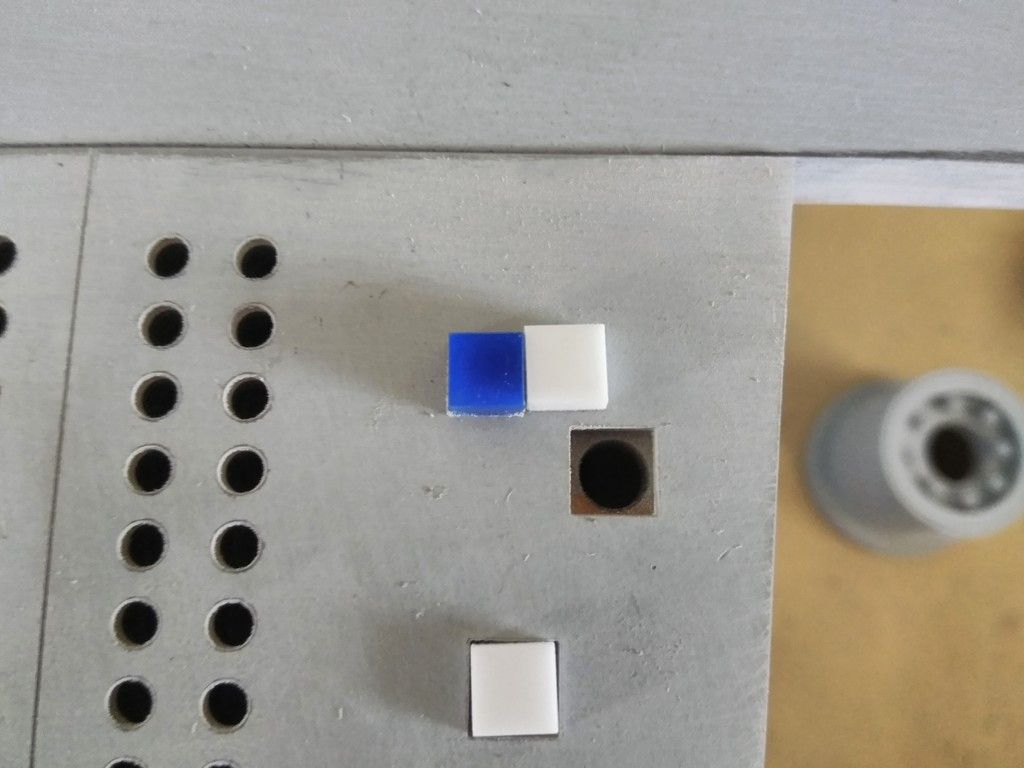
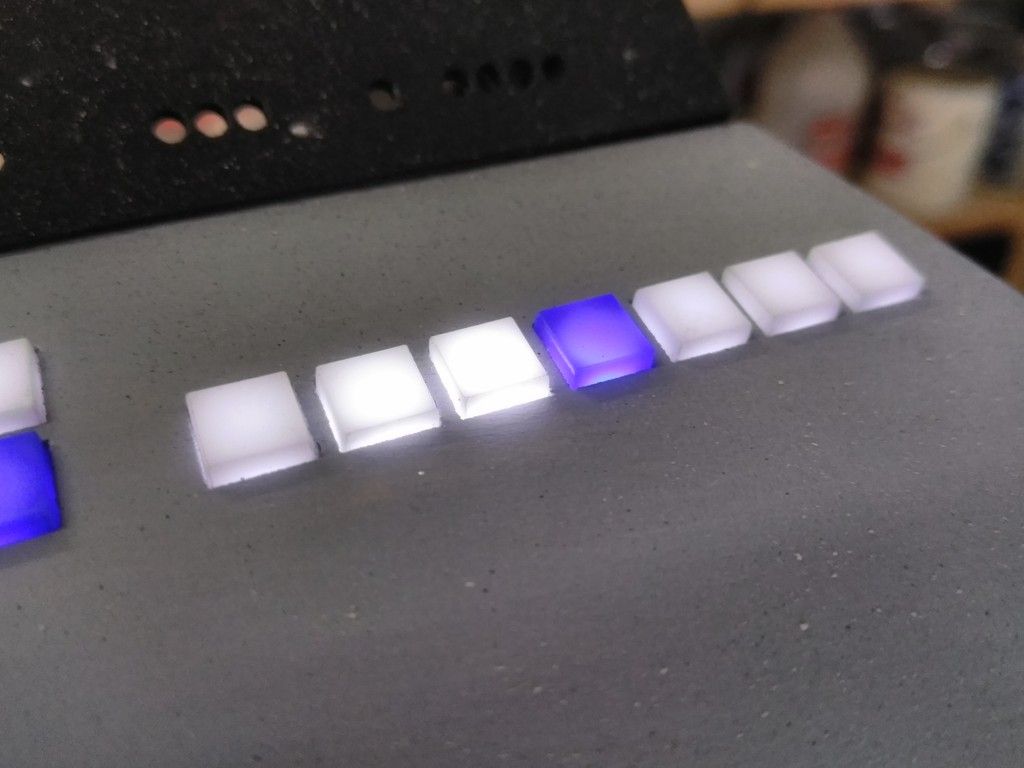
Painted the instrument panel interiors black - I might add reflective tape to help spread out the illumination when back lit
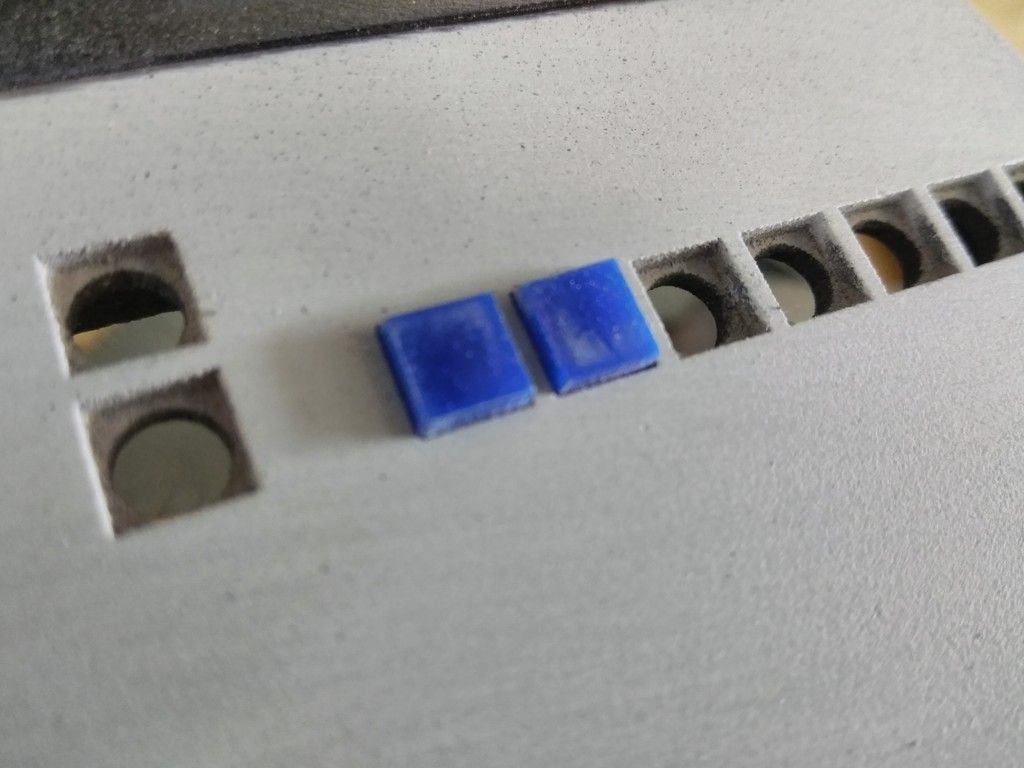
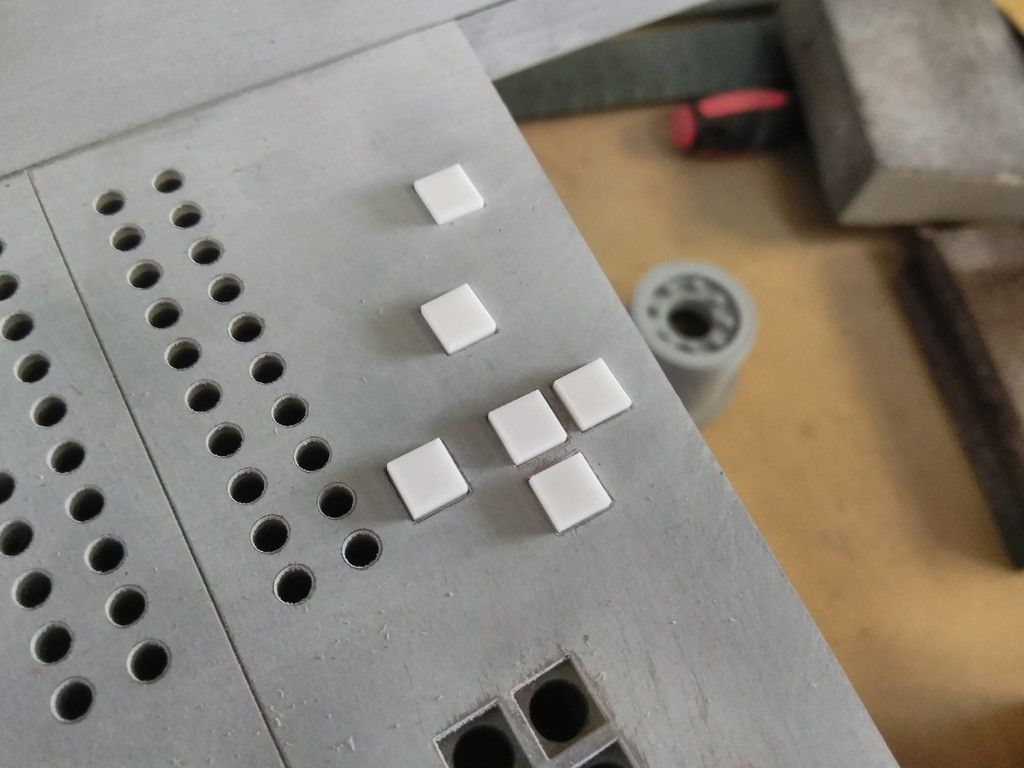
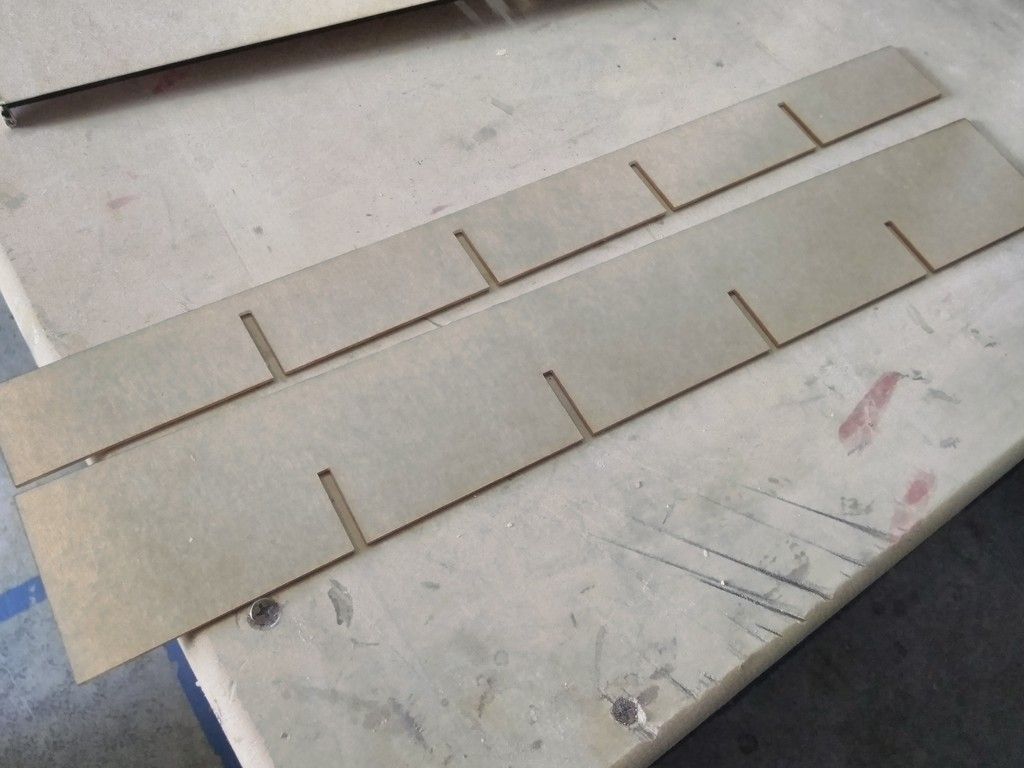
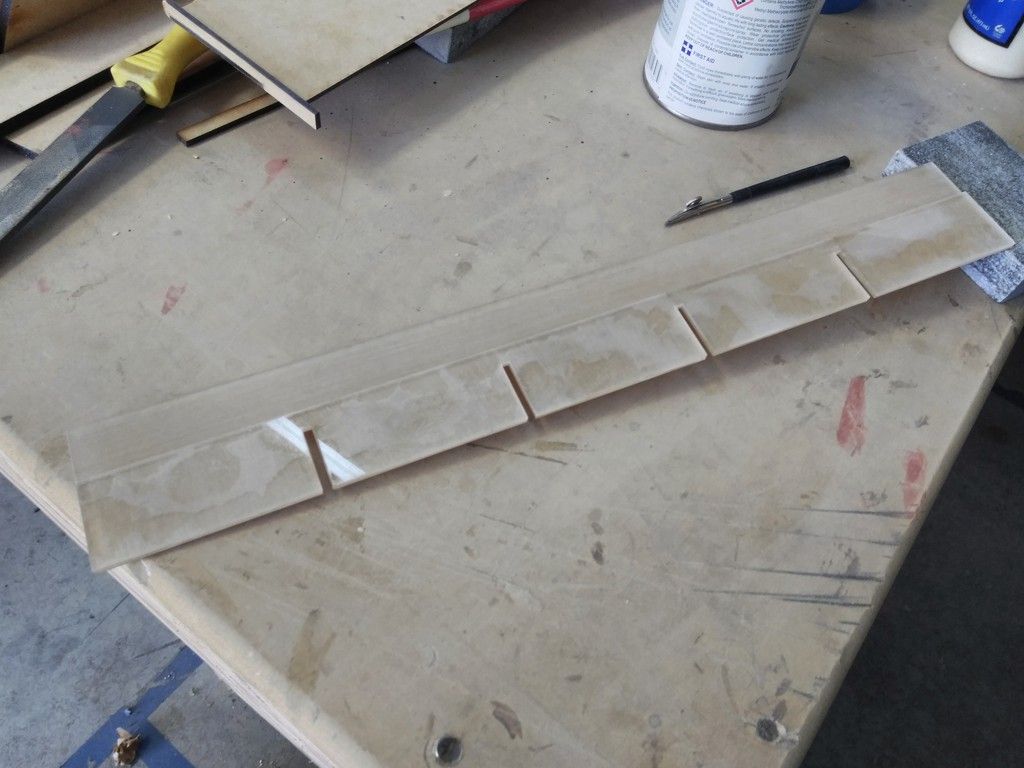
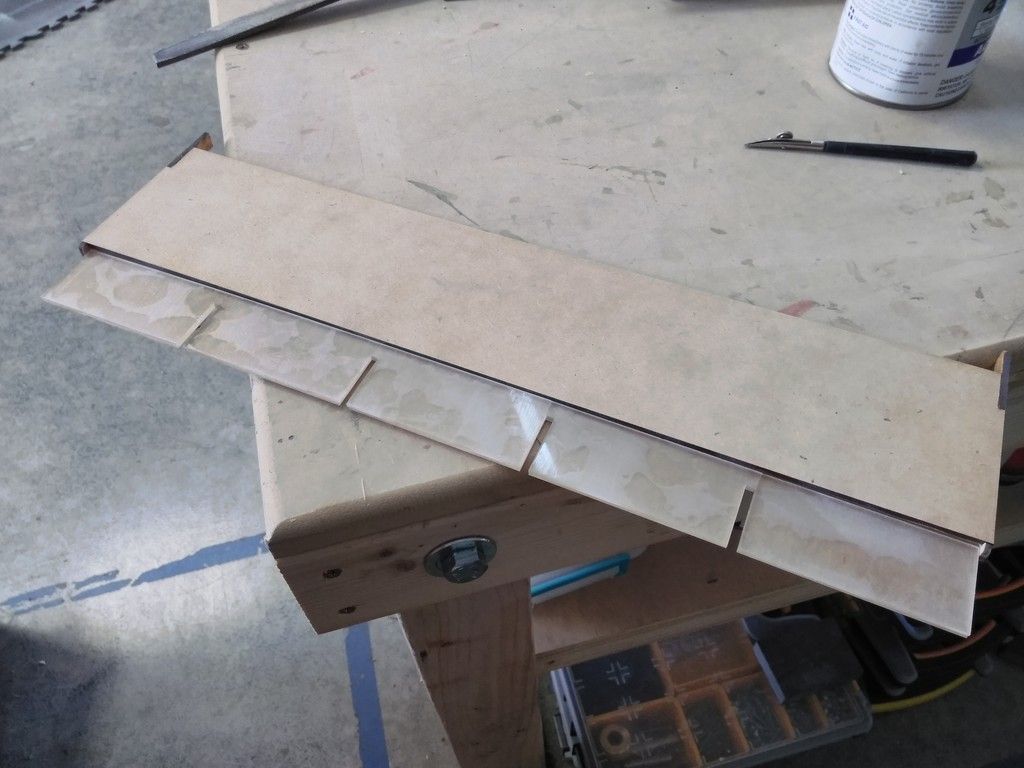
I resized the .25" tiles to fit snug
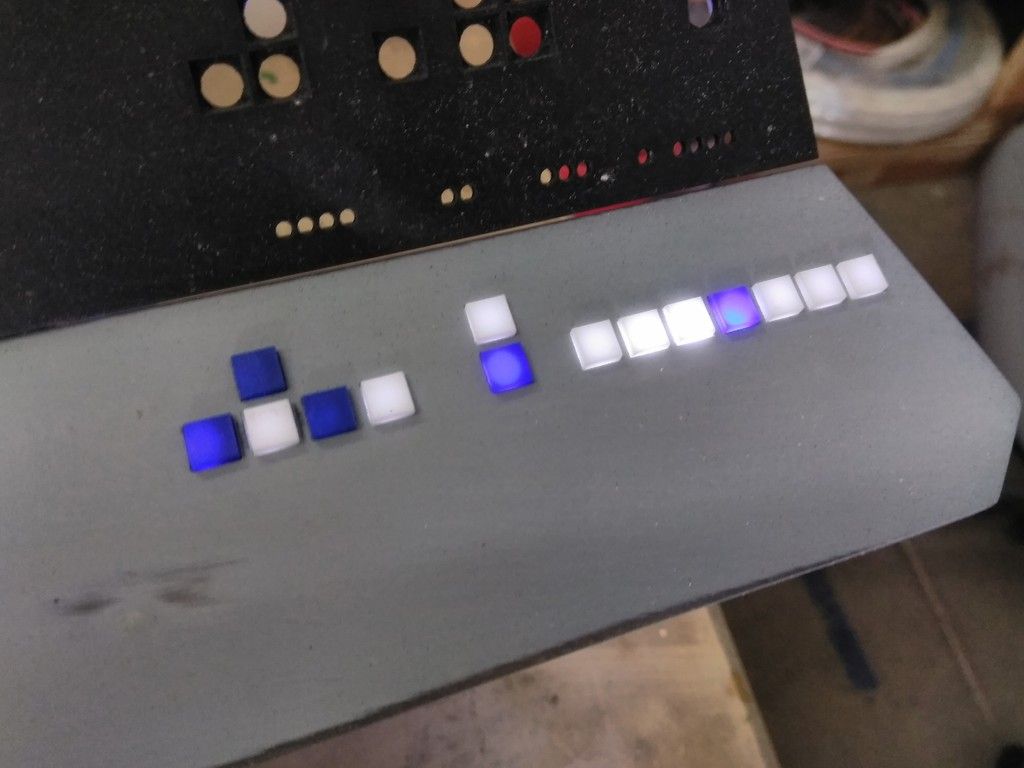
You guys/gals HAVE to see this backlit!
Note the size difference
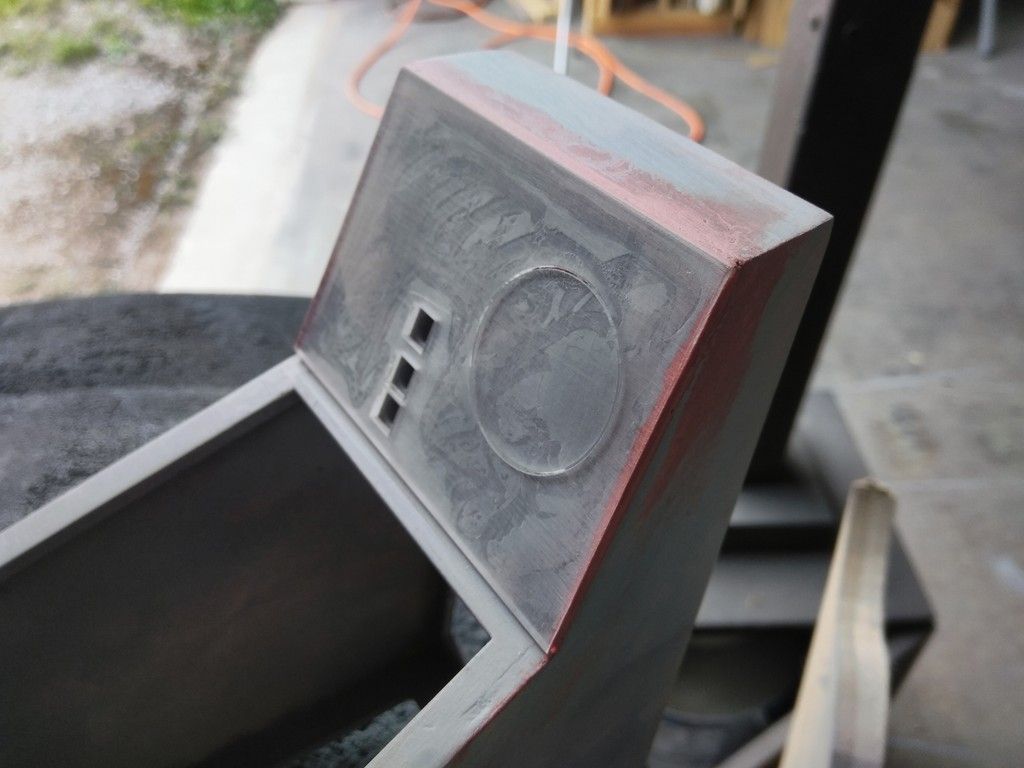
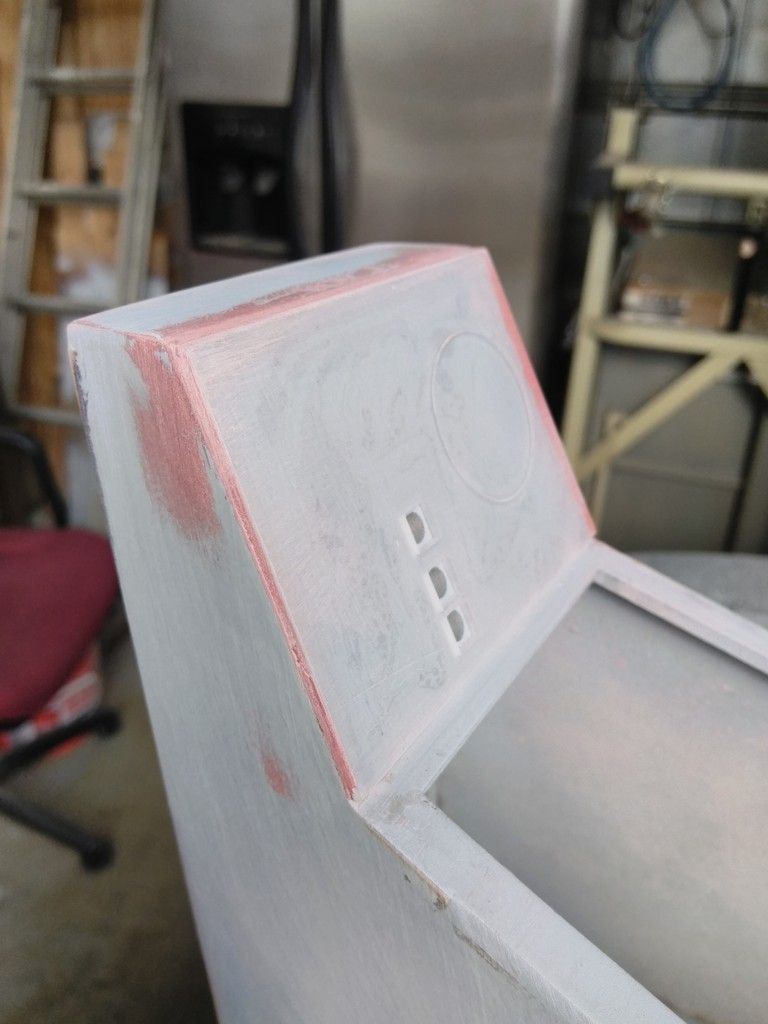
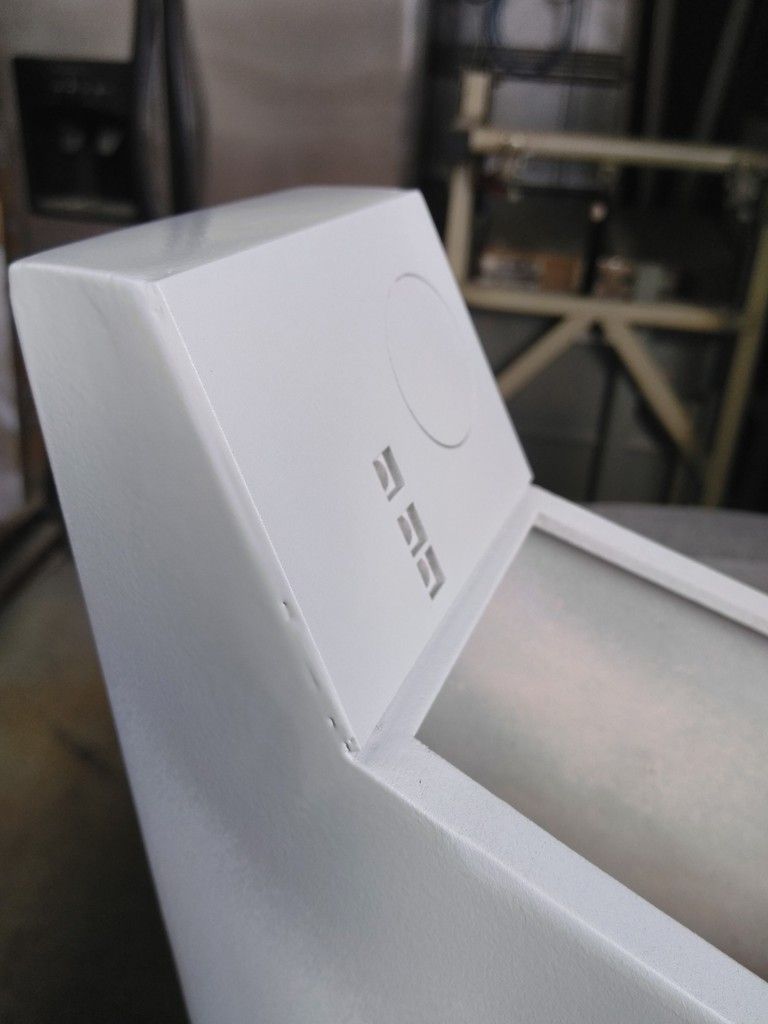
Another part of the console getting some attention
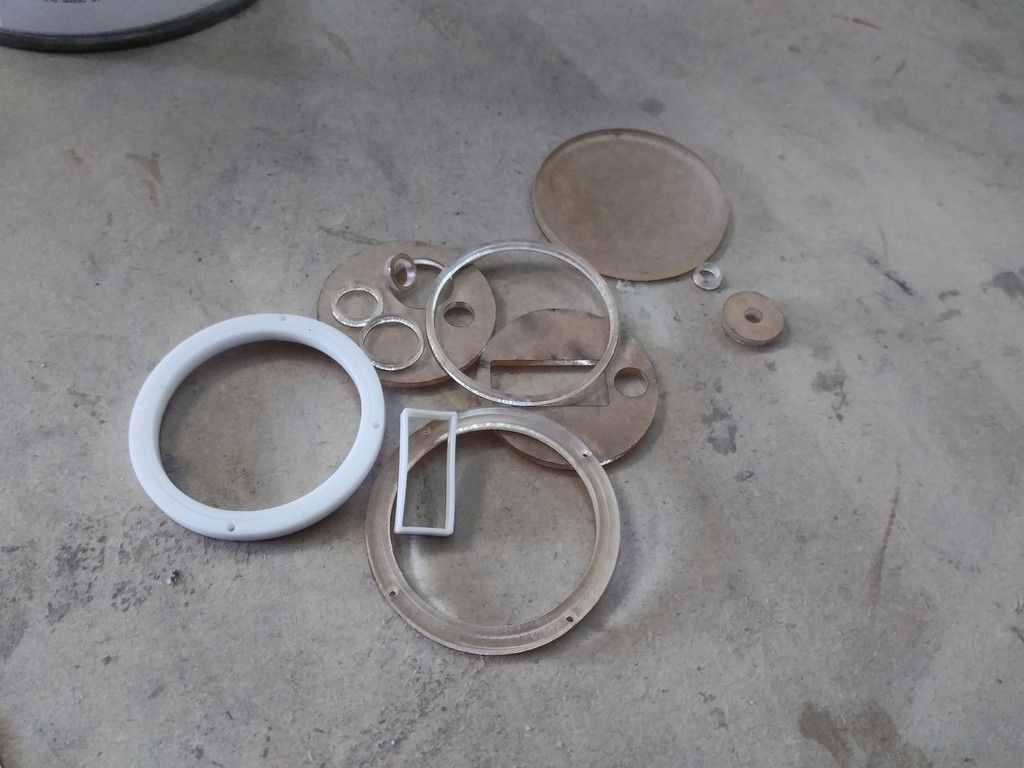
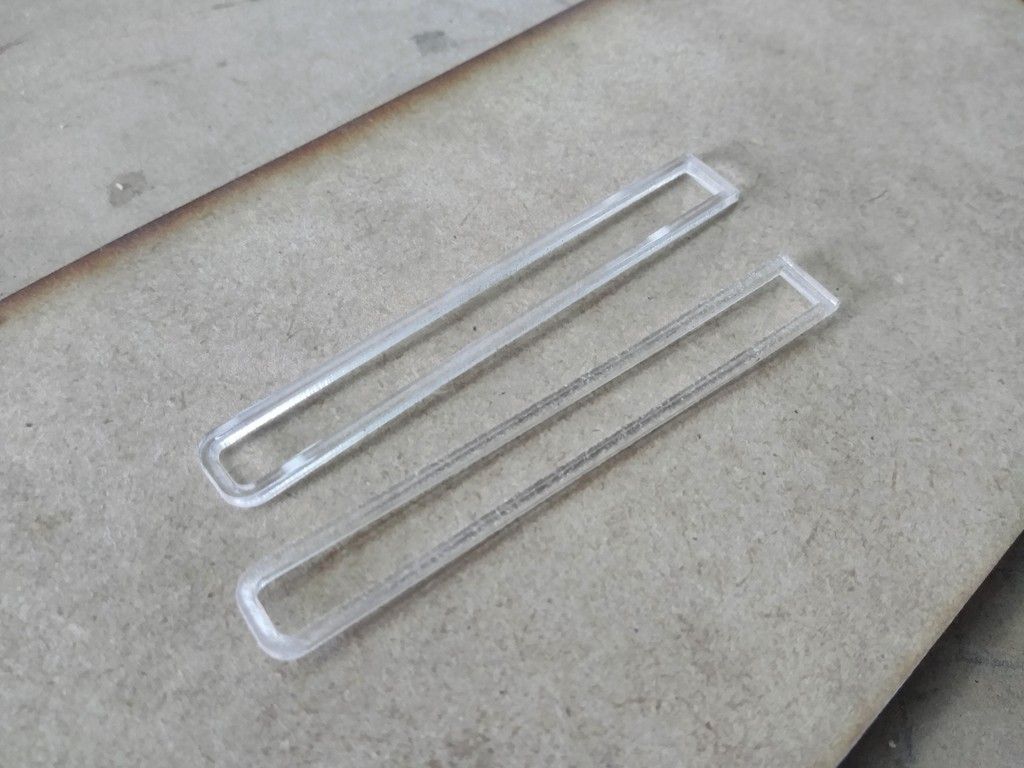
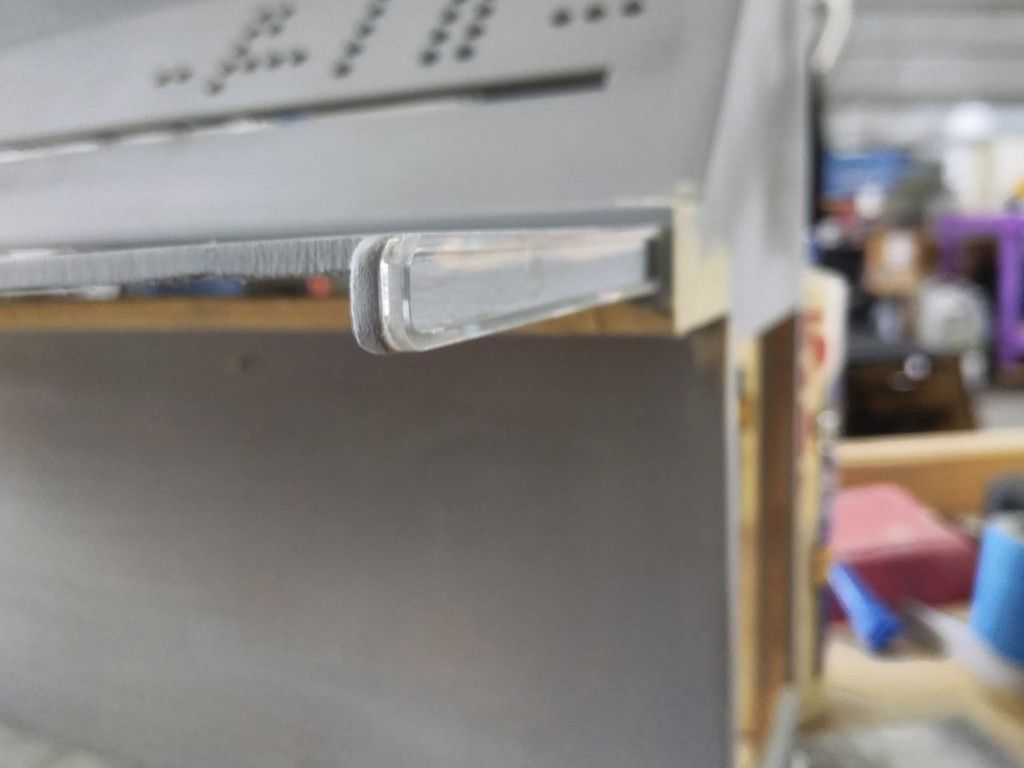
Laser cut acrylic parts
Primer - still a few more bits to add
Speaking of back lighting...
It has the exact look and feel of the original 1" tiles

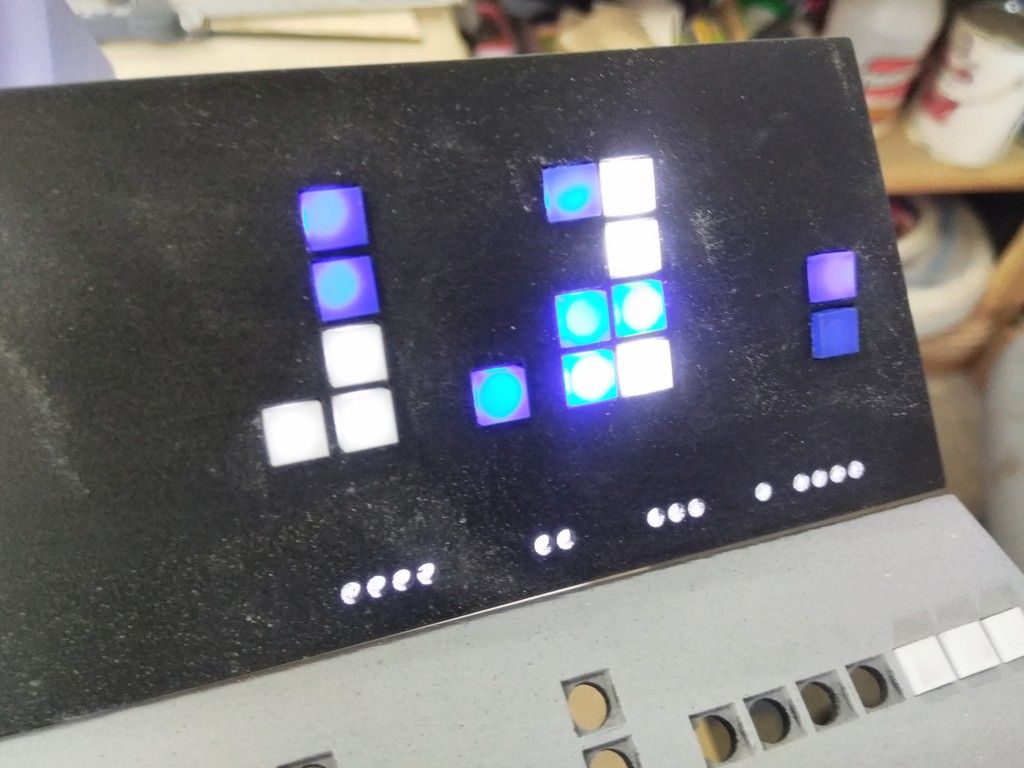
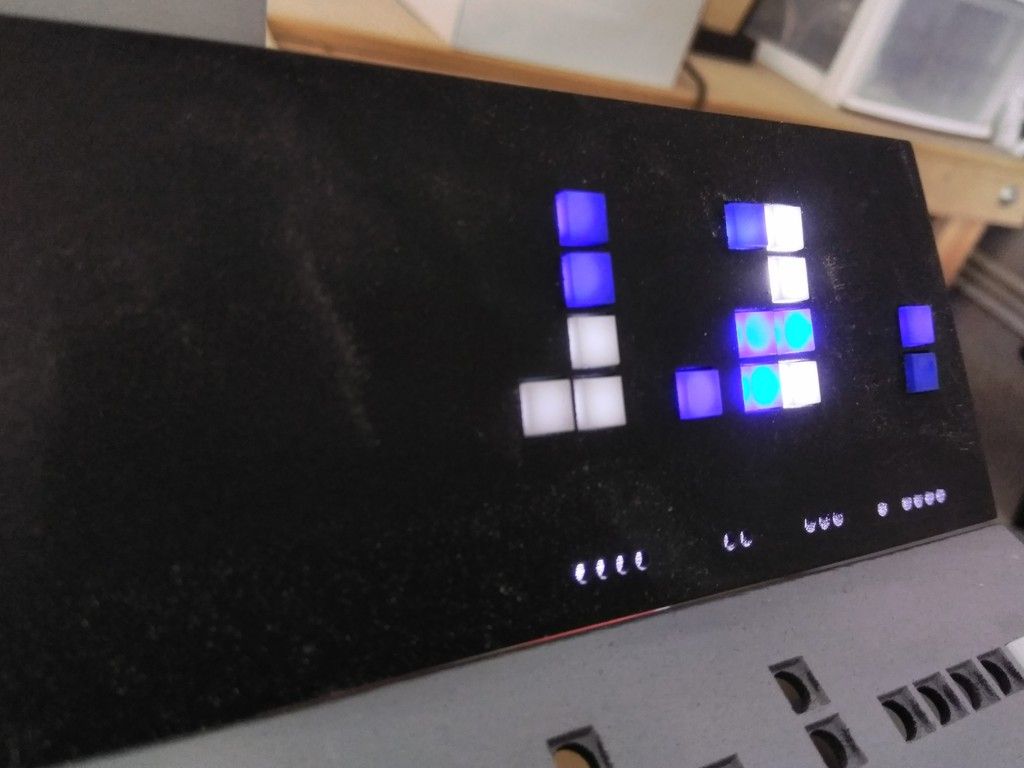
My Fav

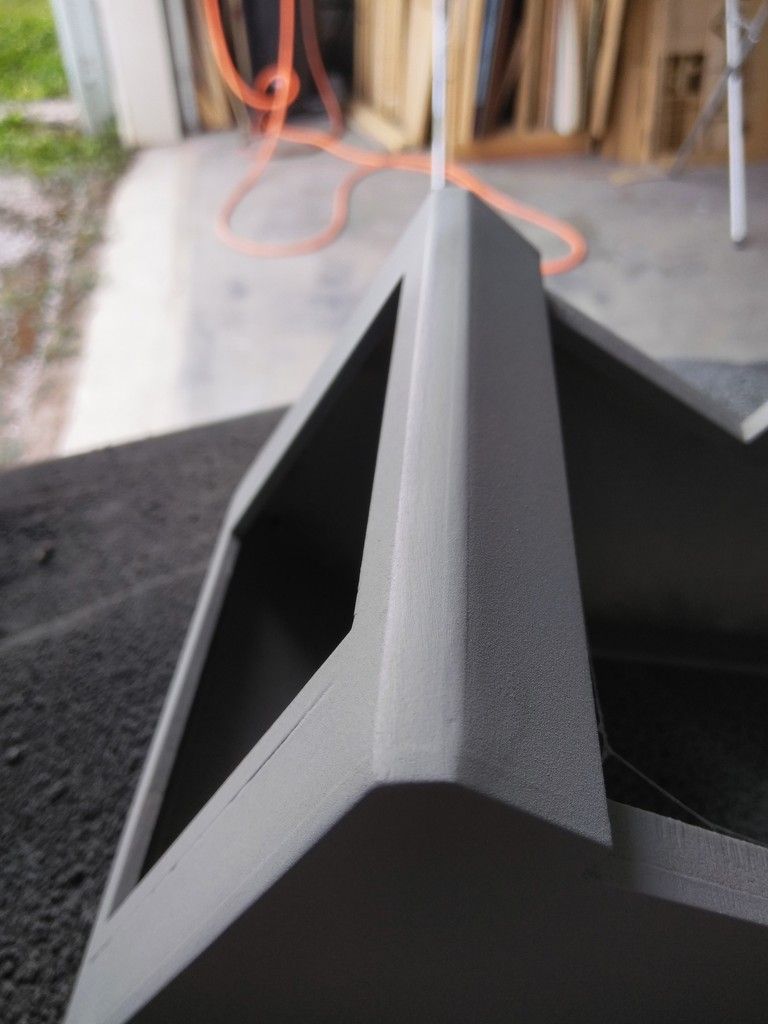
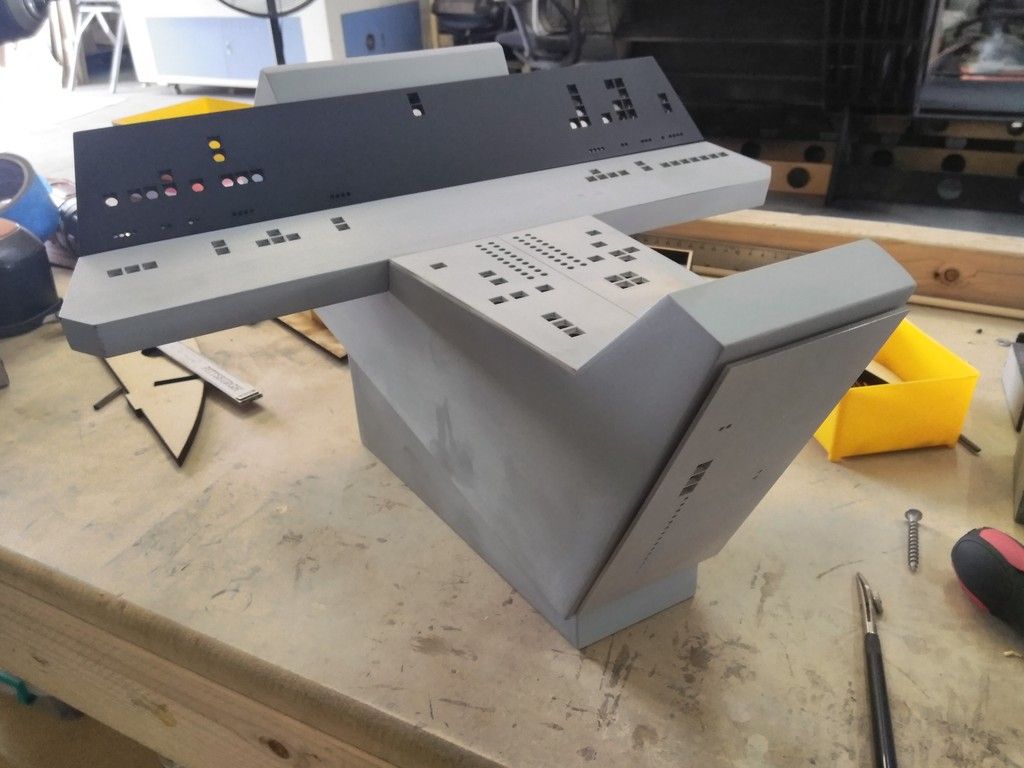
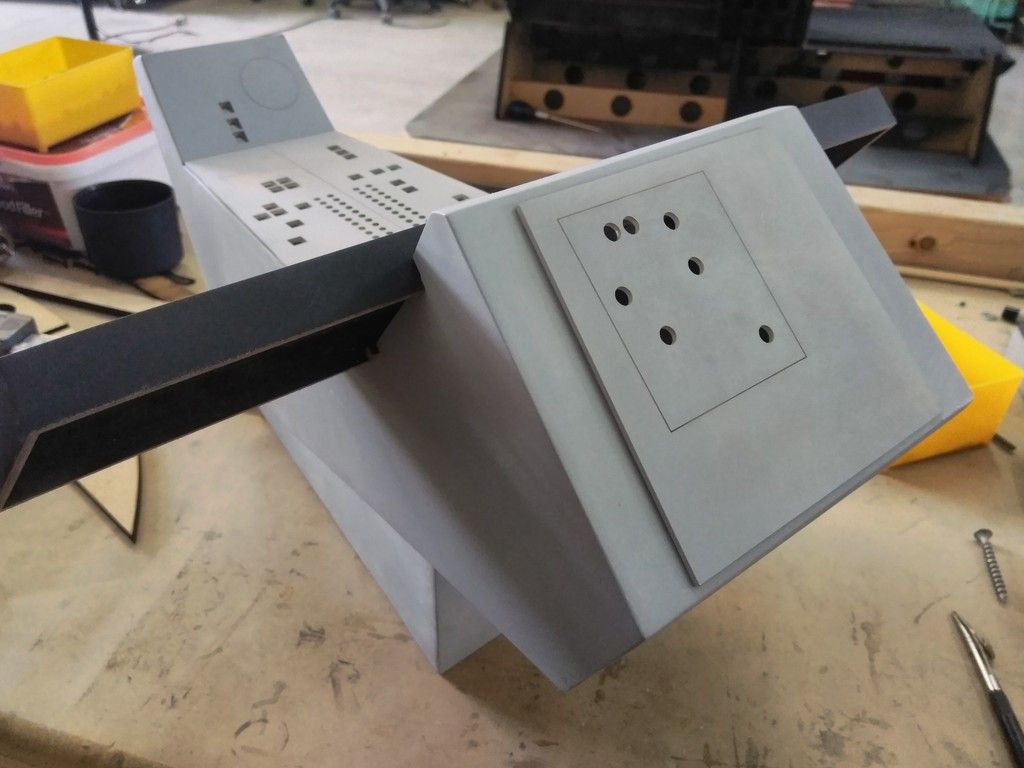
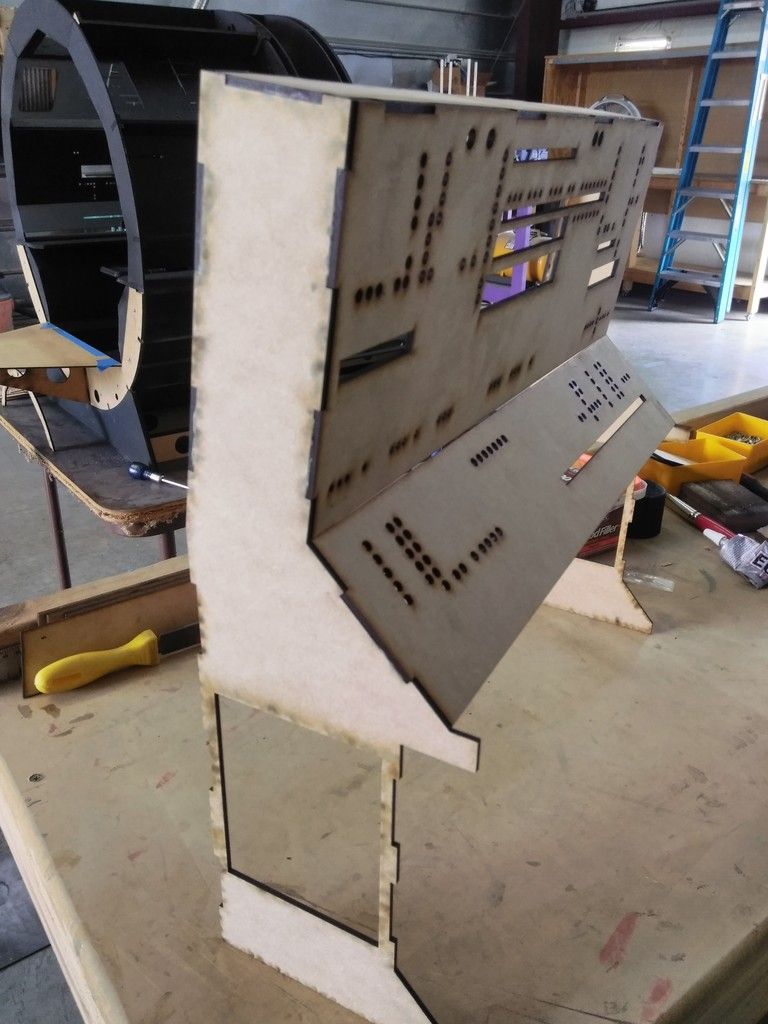
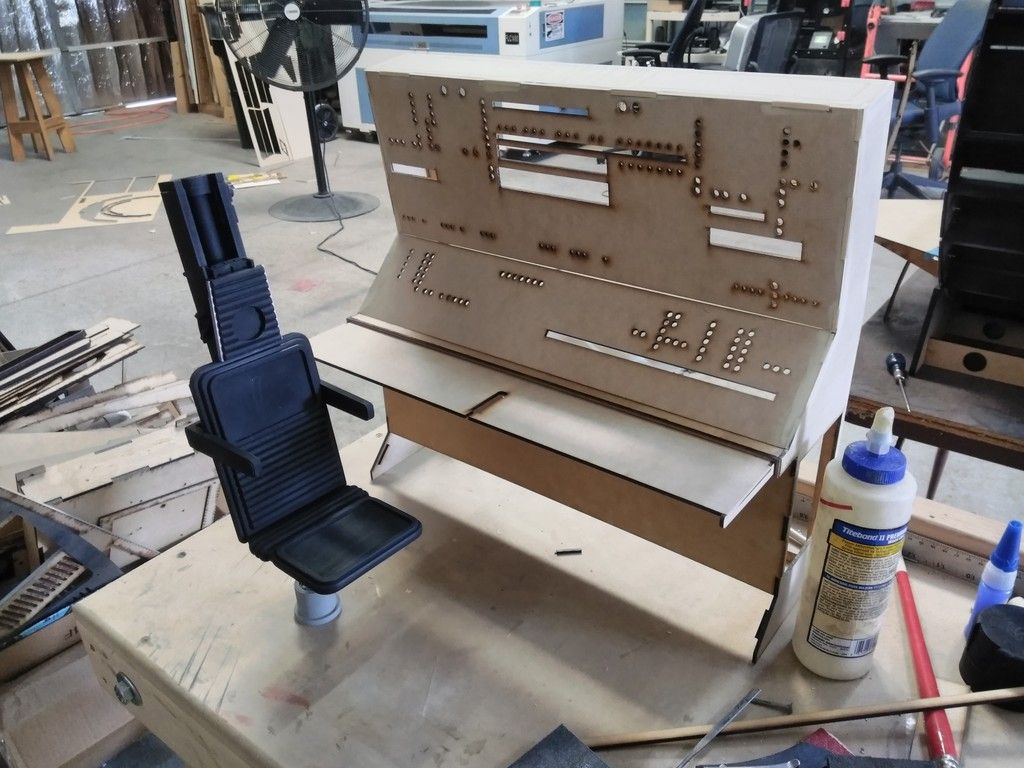
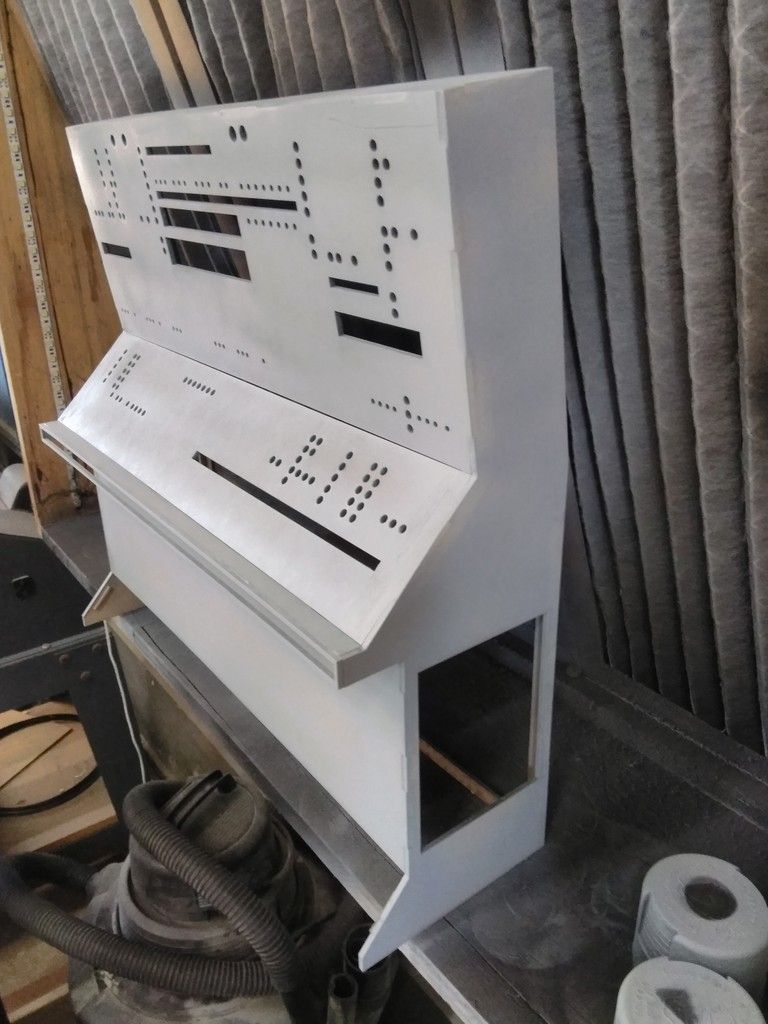
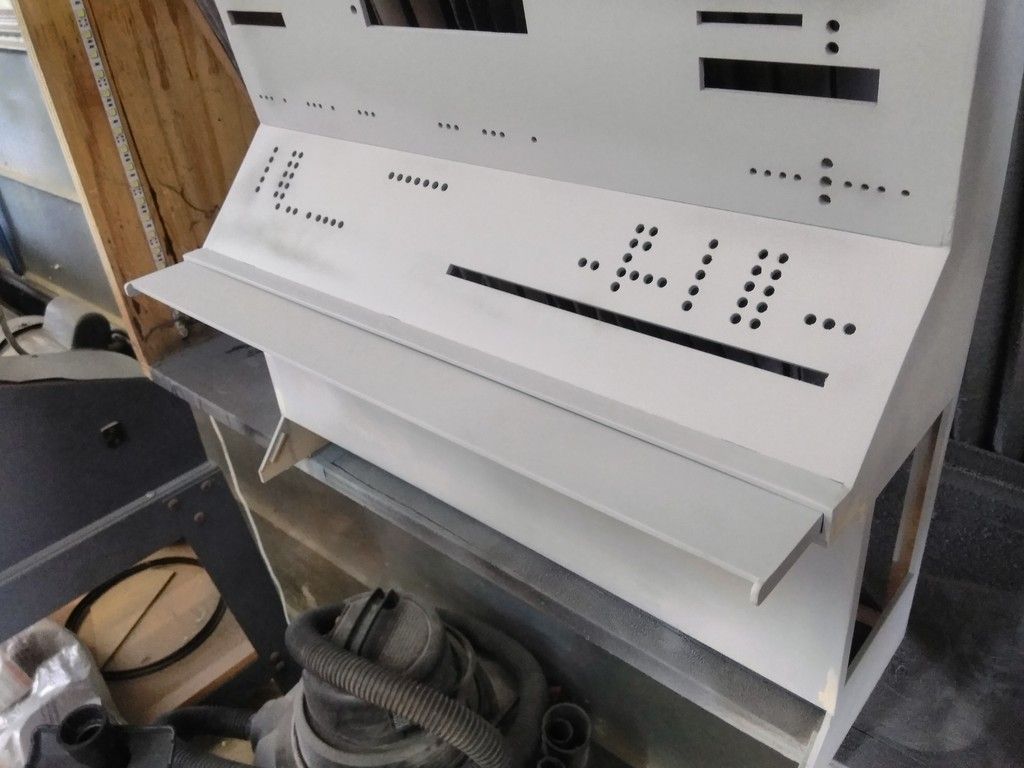
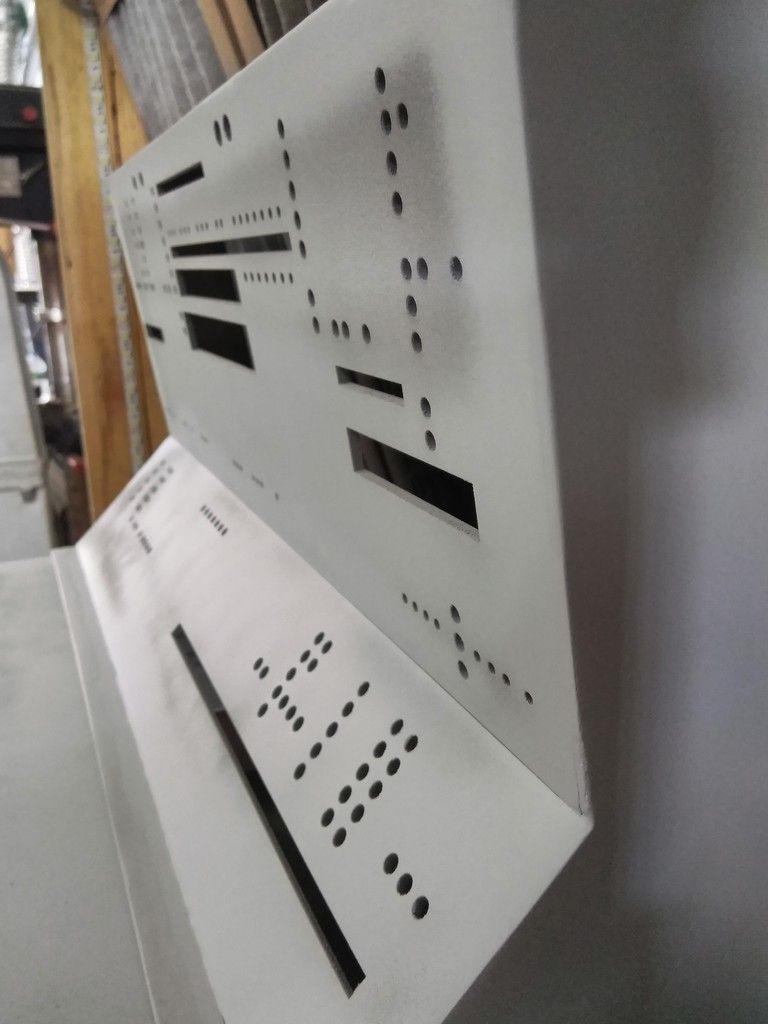
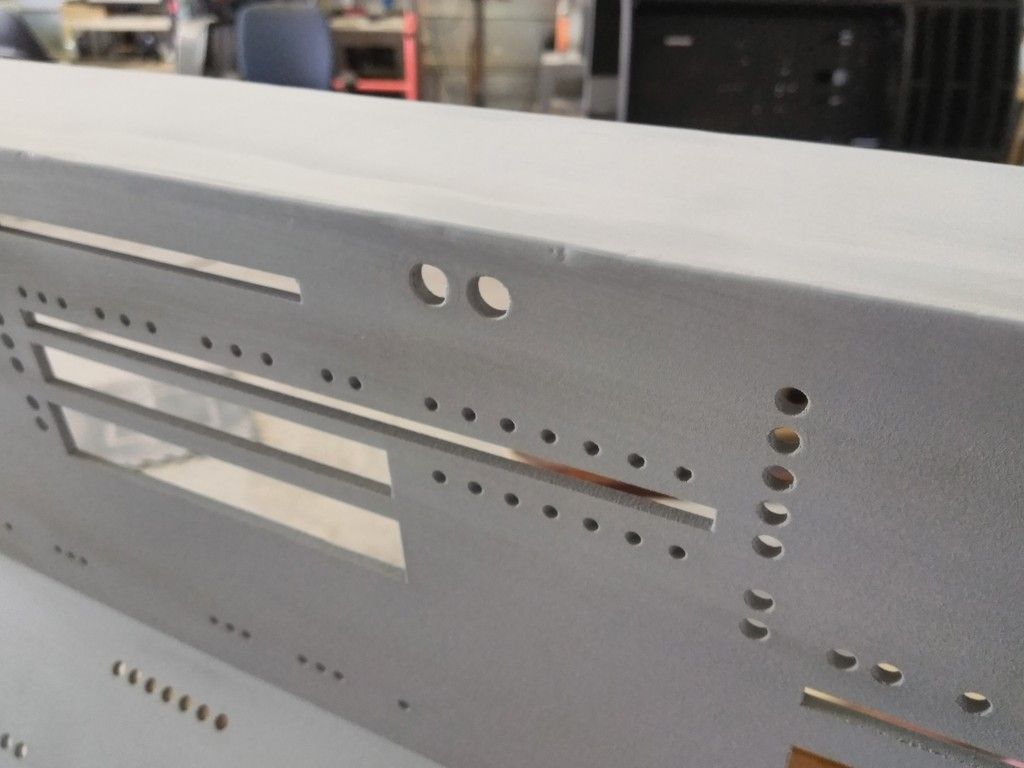
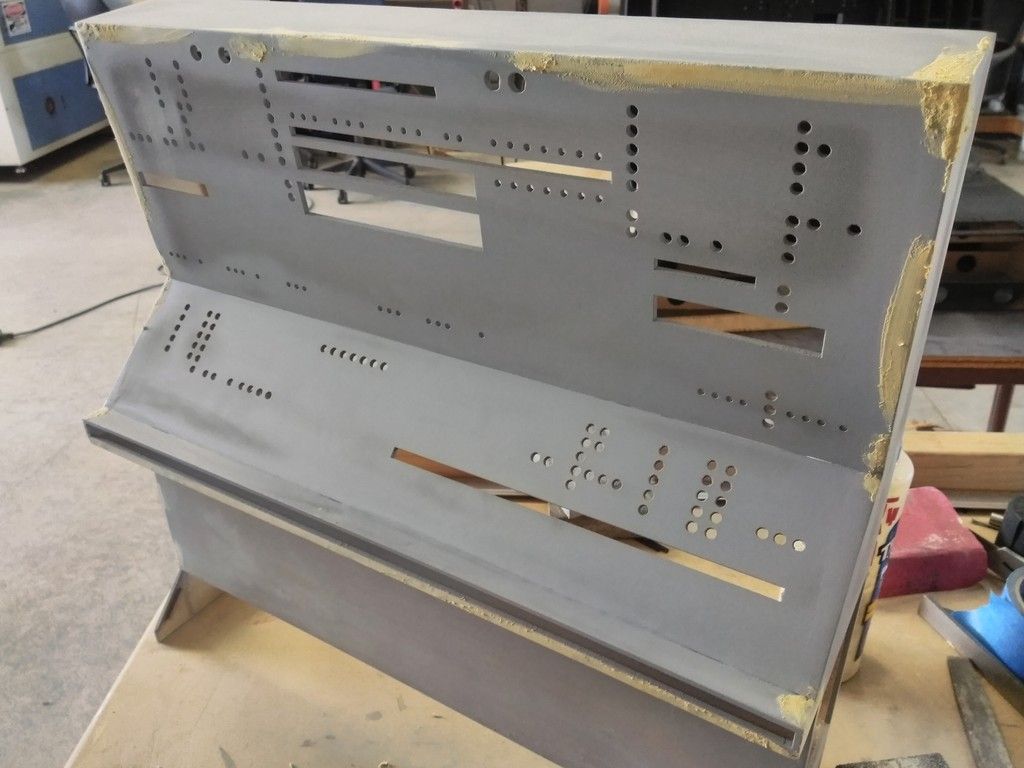
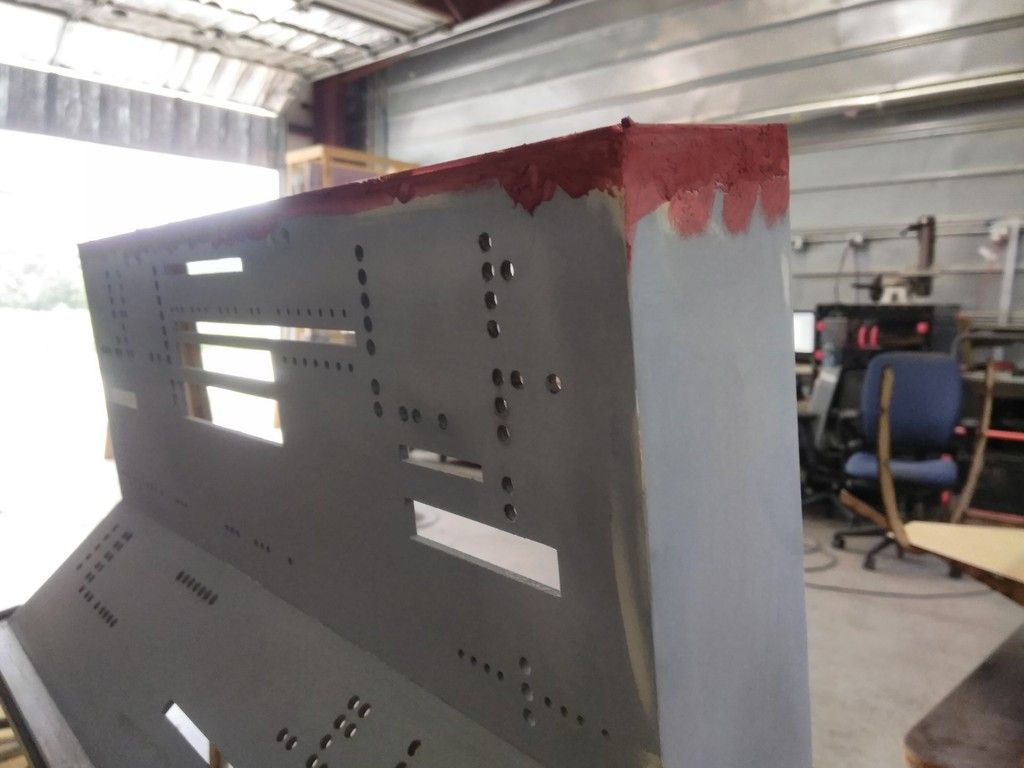
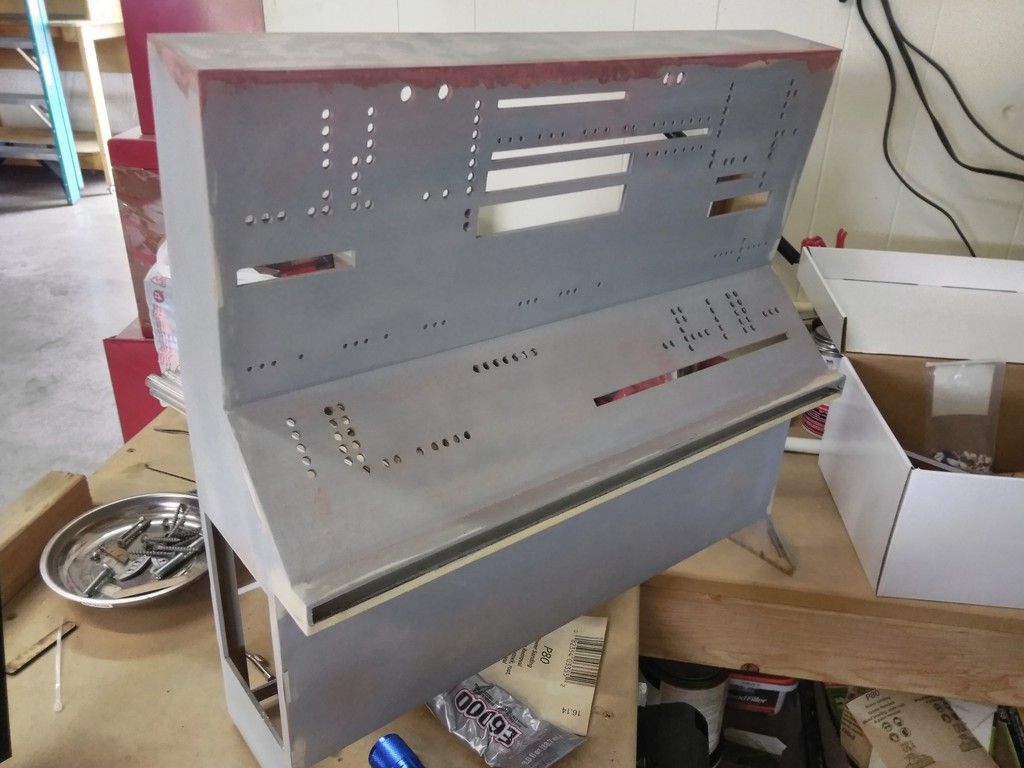
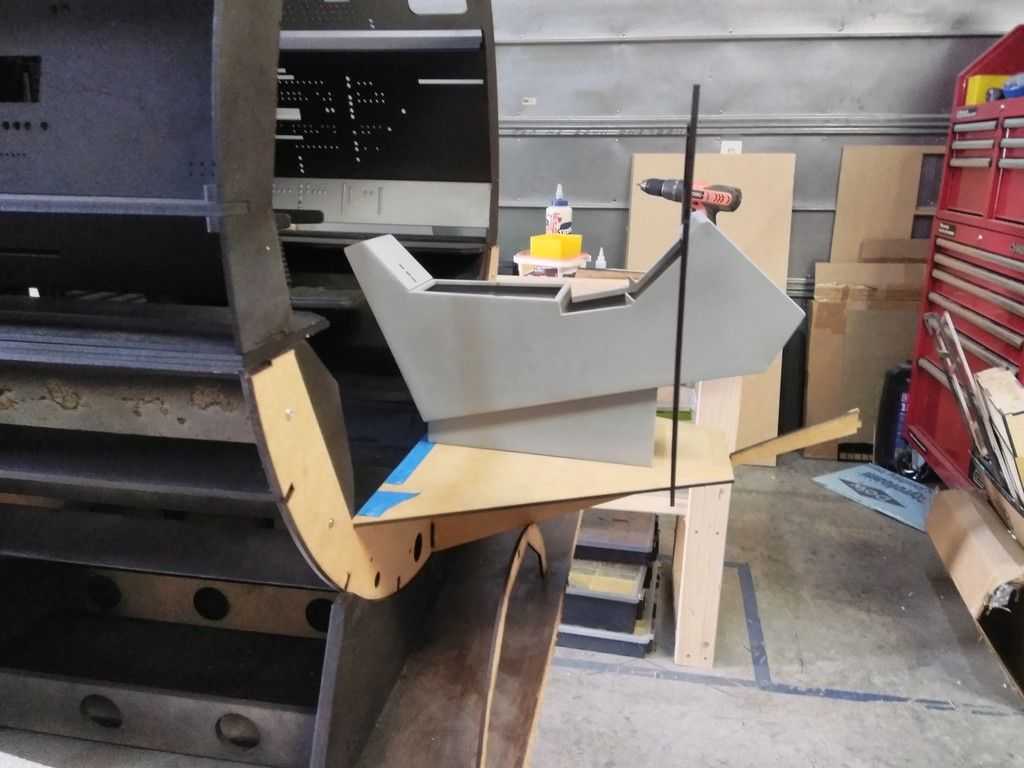
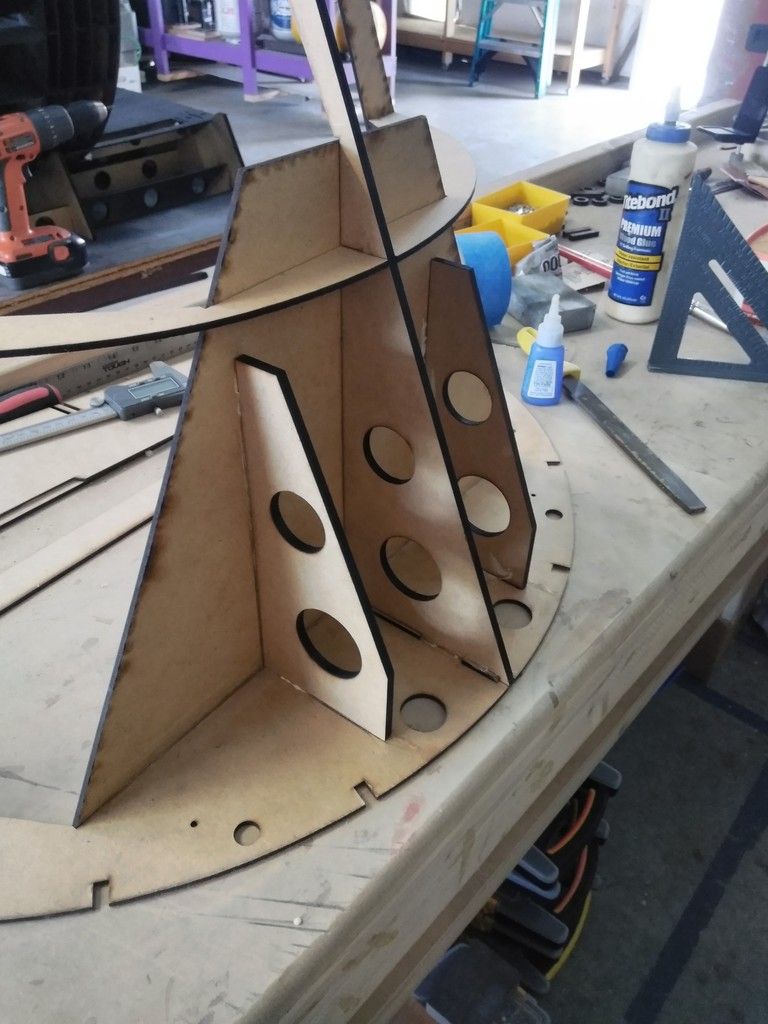
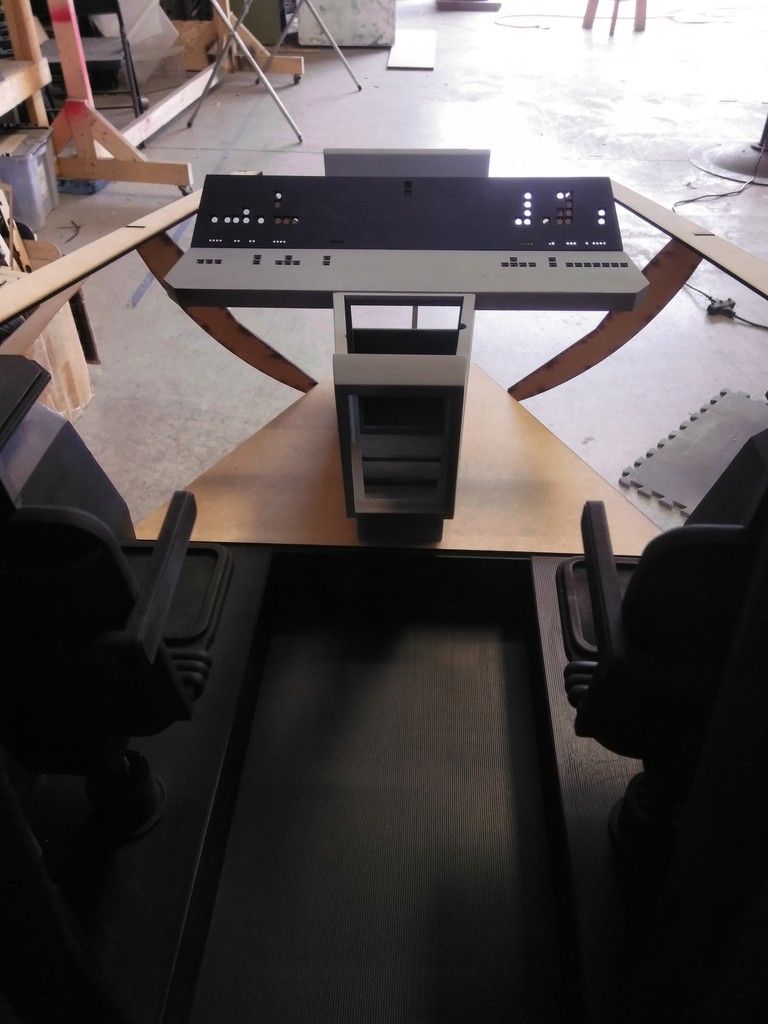
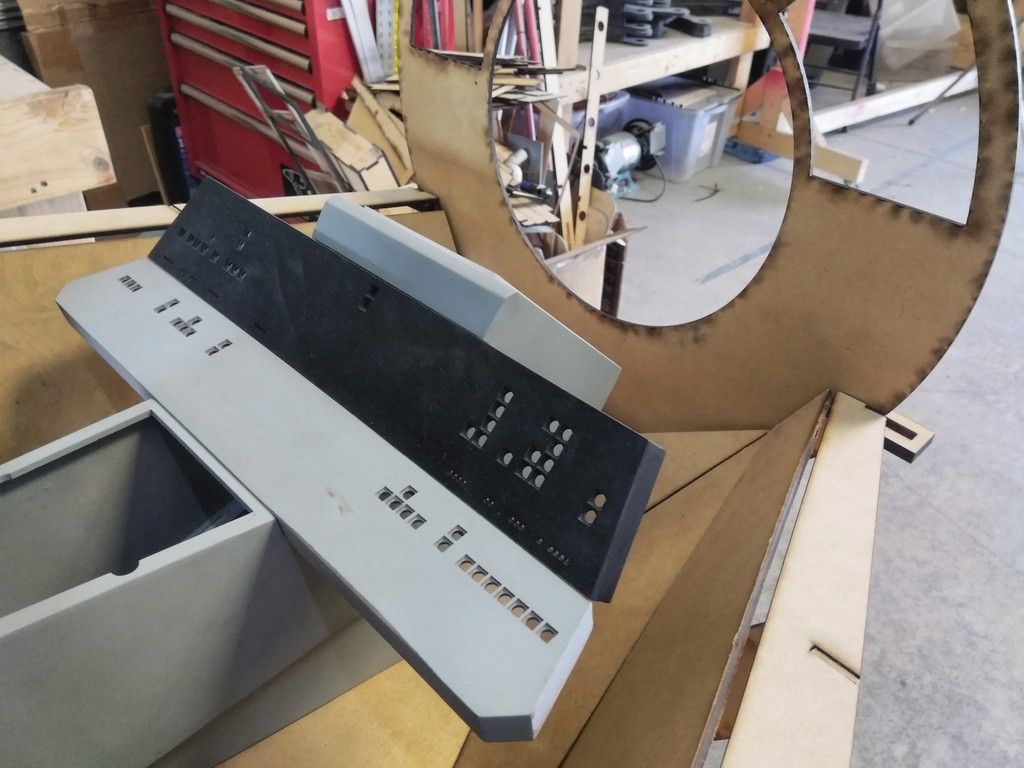
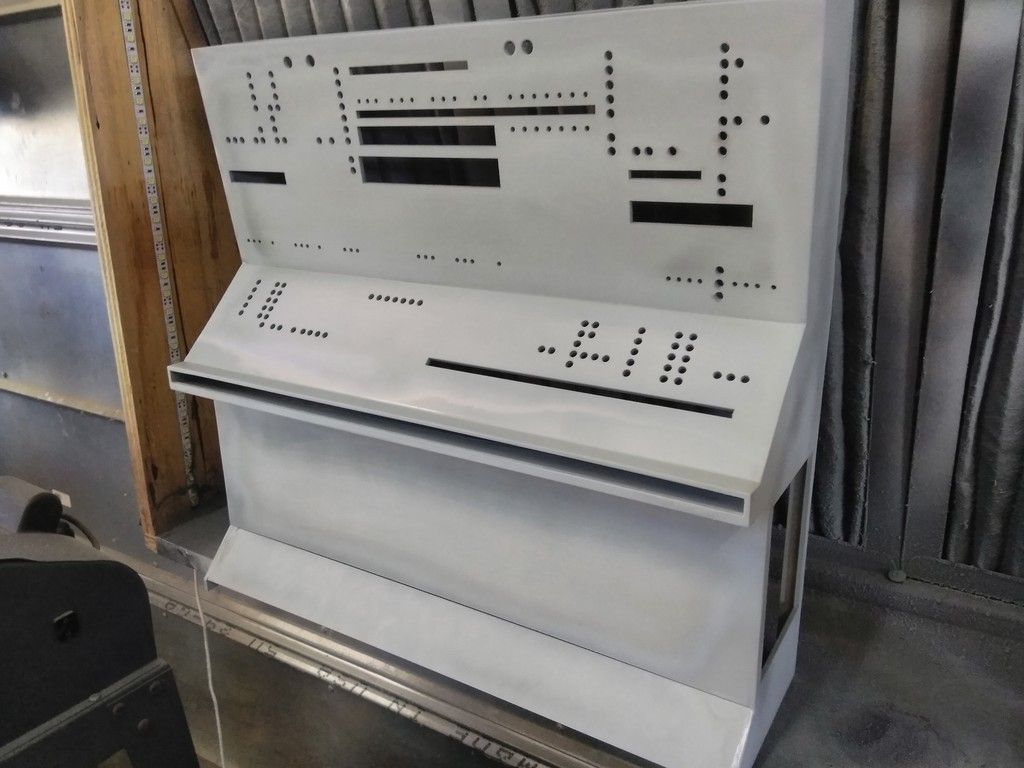
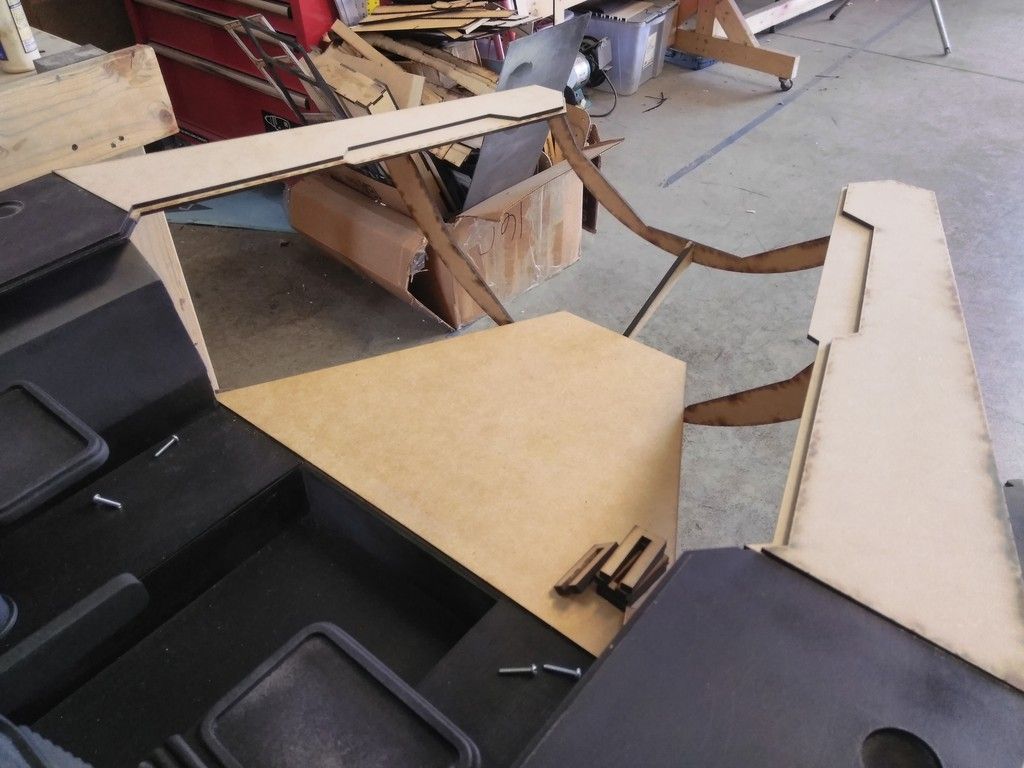
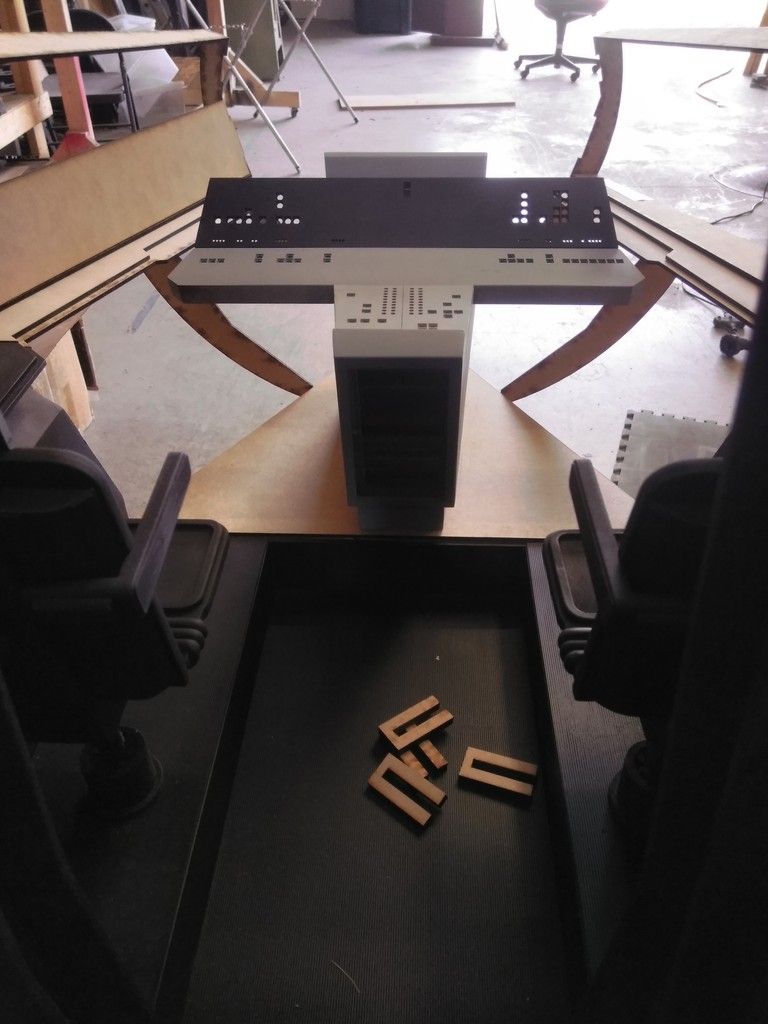
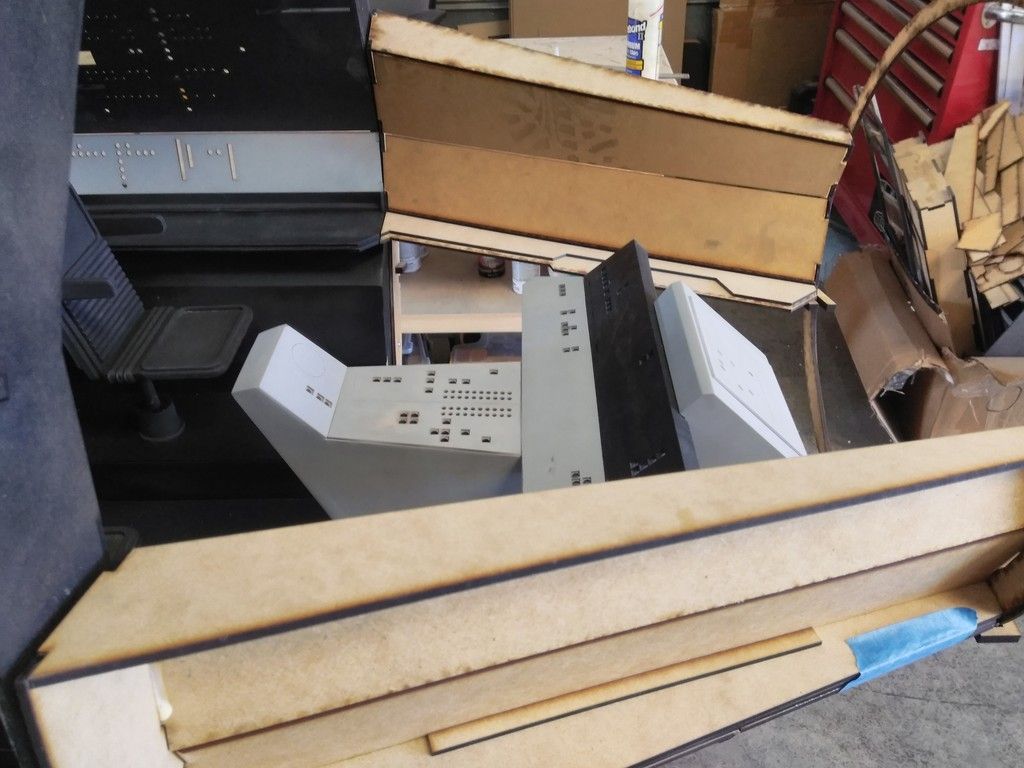
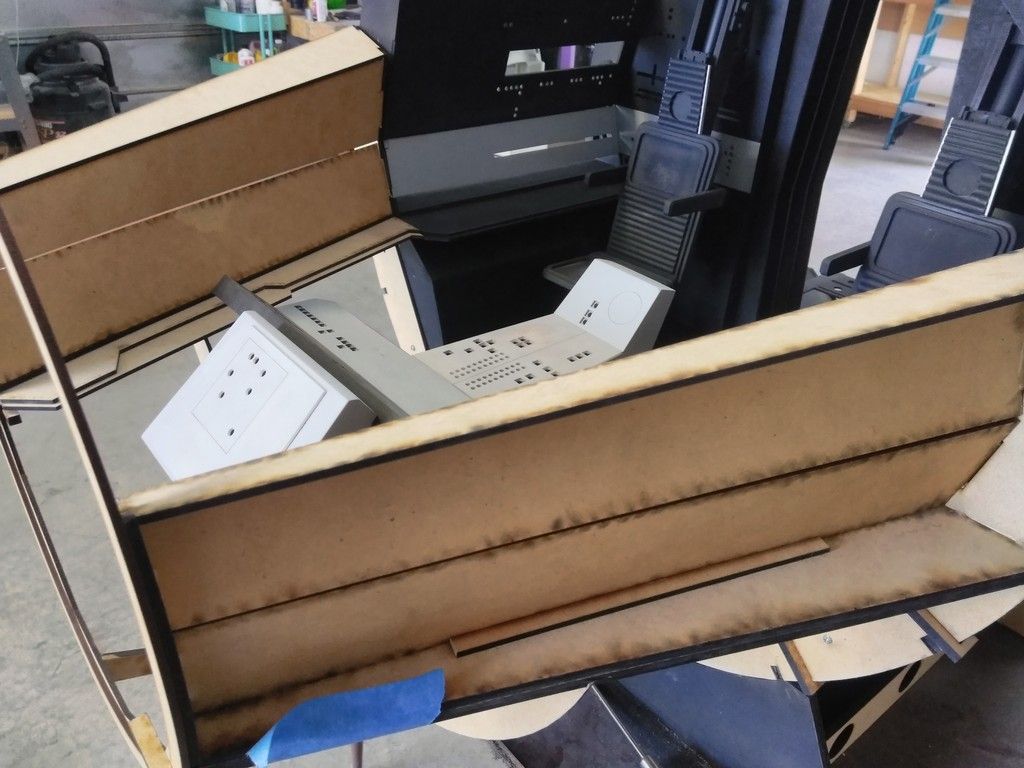
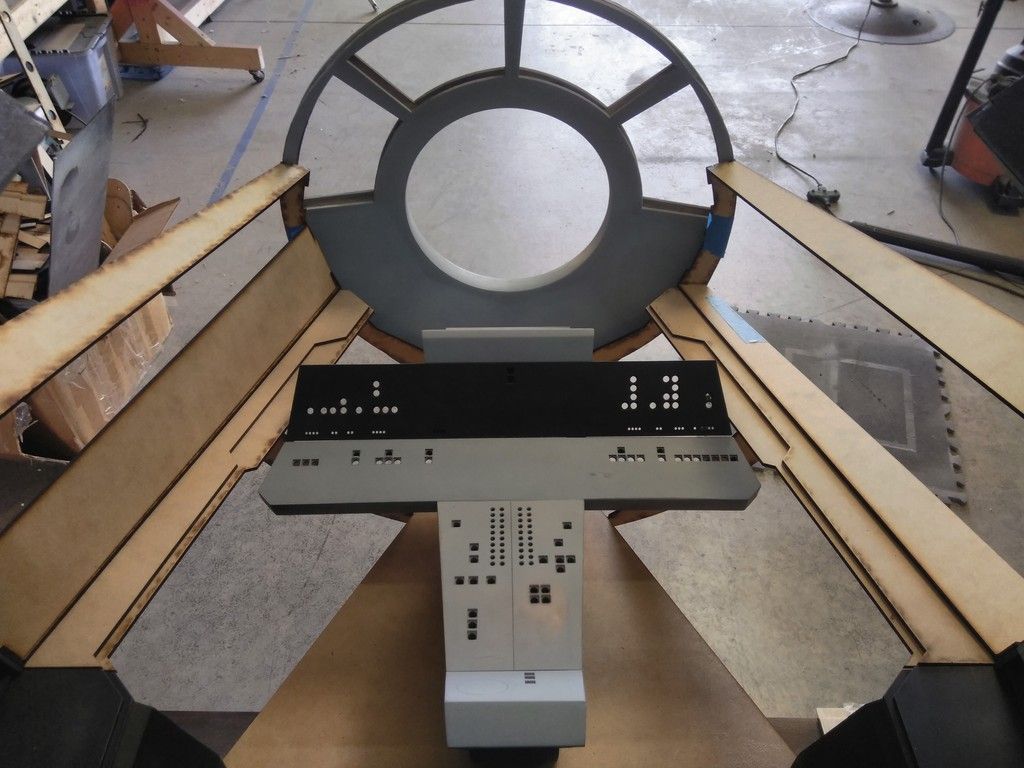
I then worked on the Nav Computer
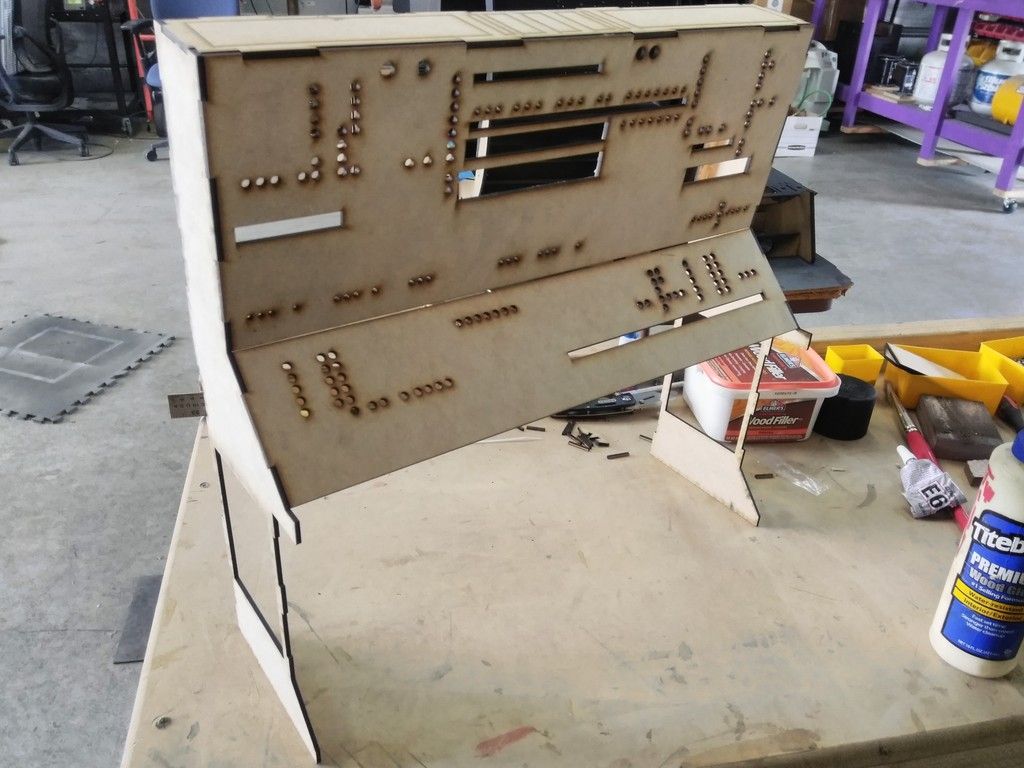
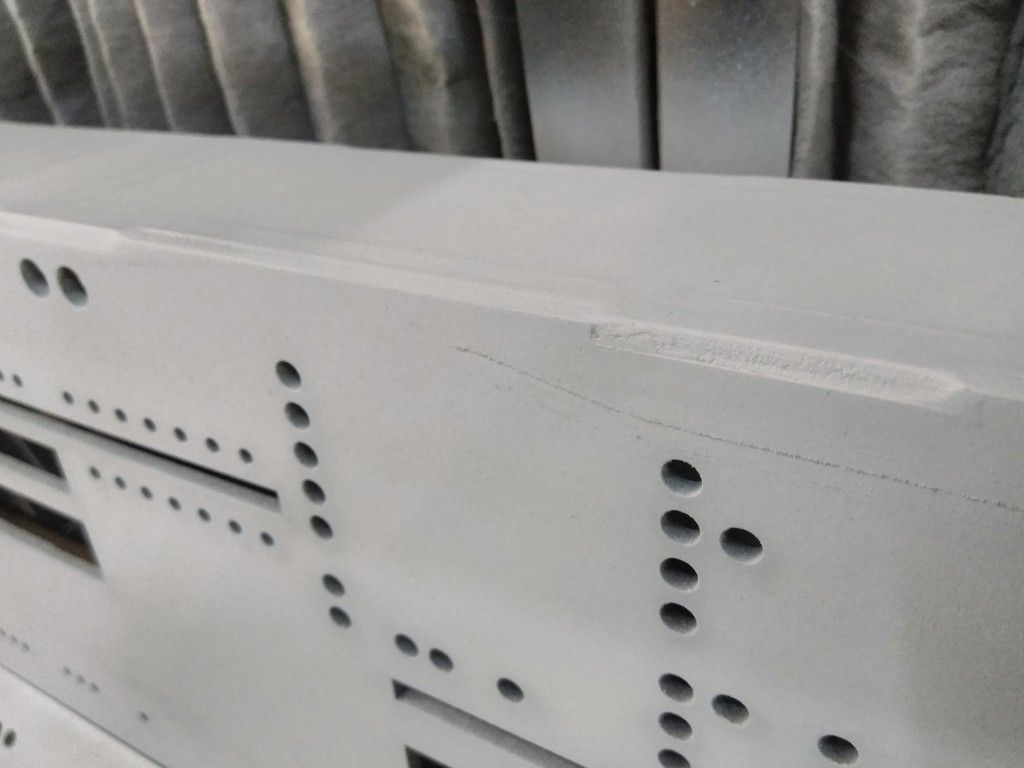
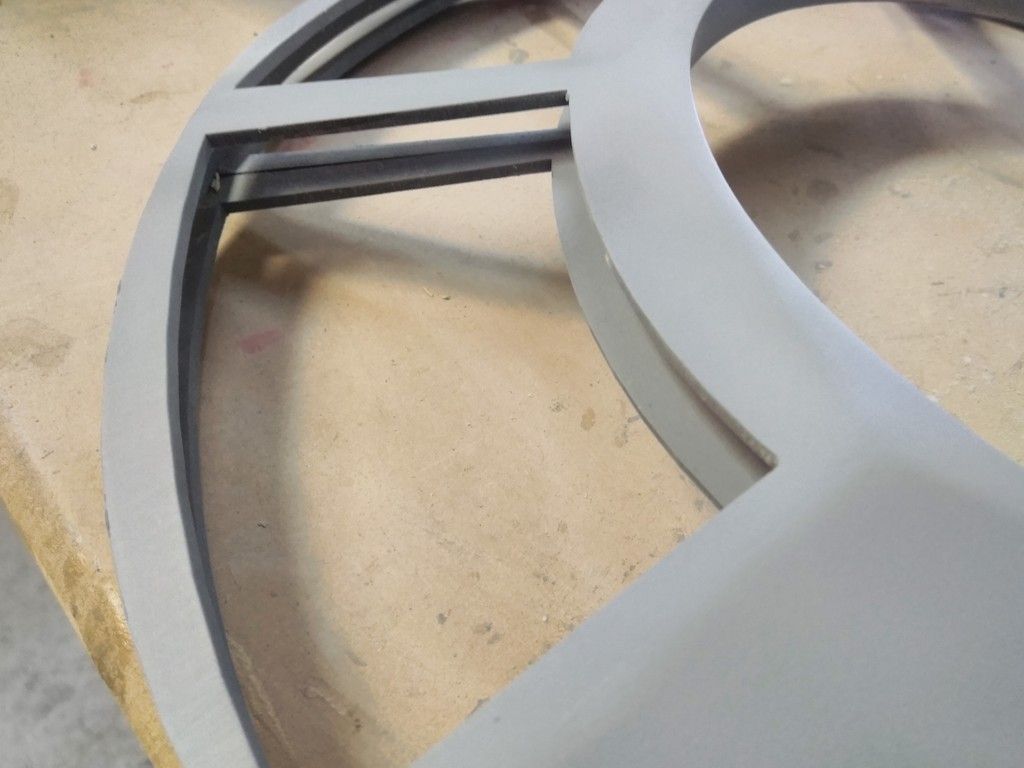
Note all the tabs to keep all the panels in place
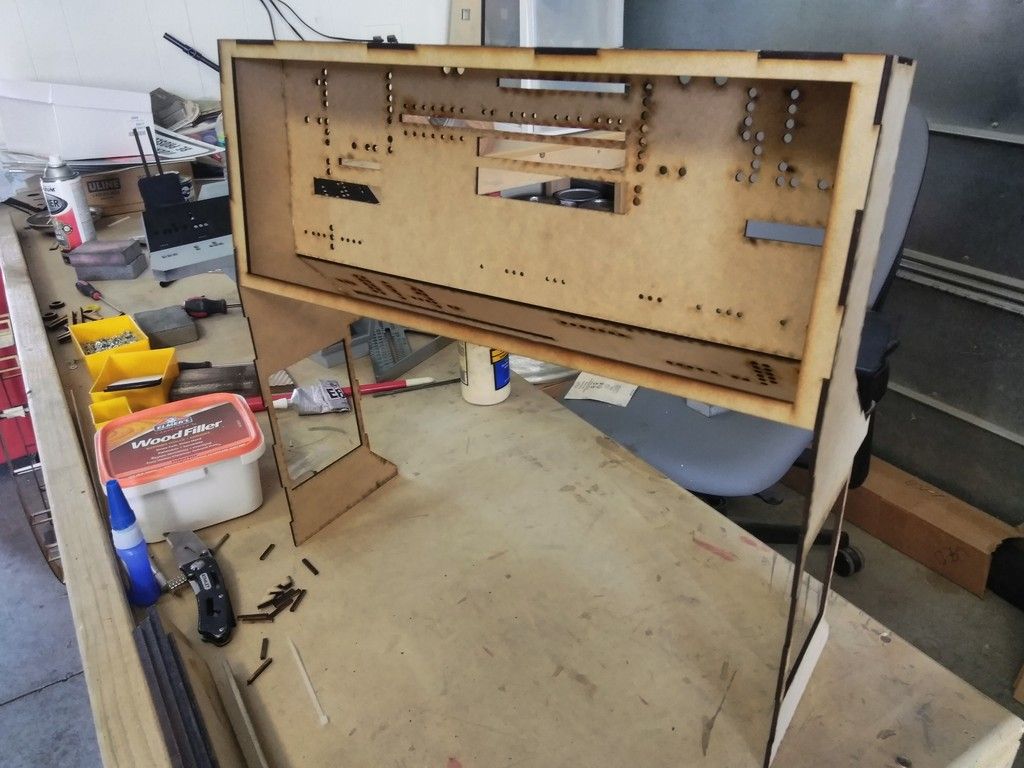
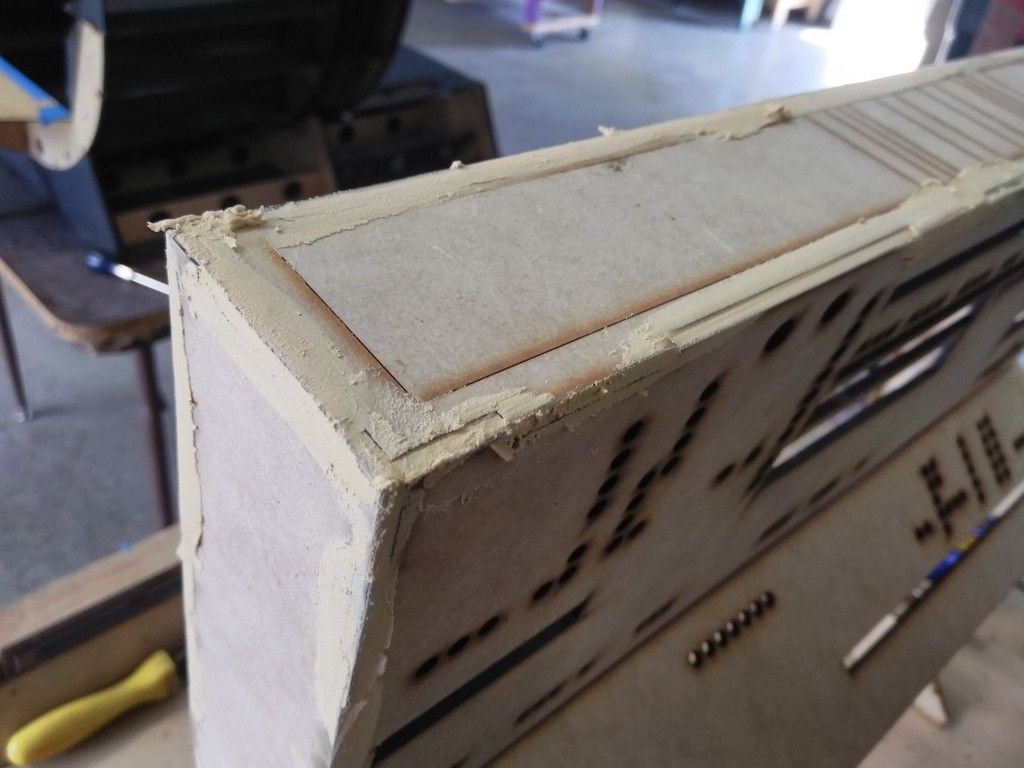
Filler - gotta smooth out the tab lines
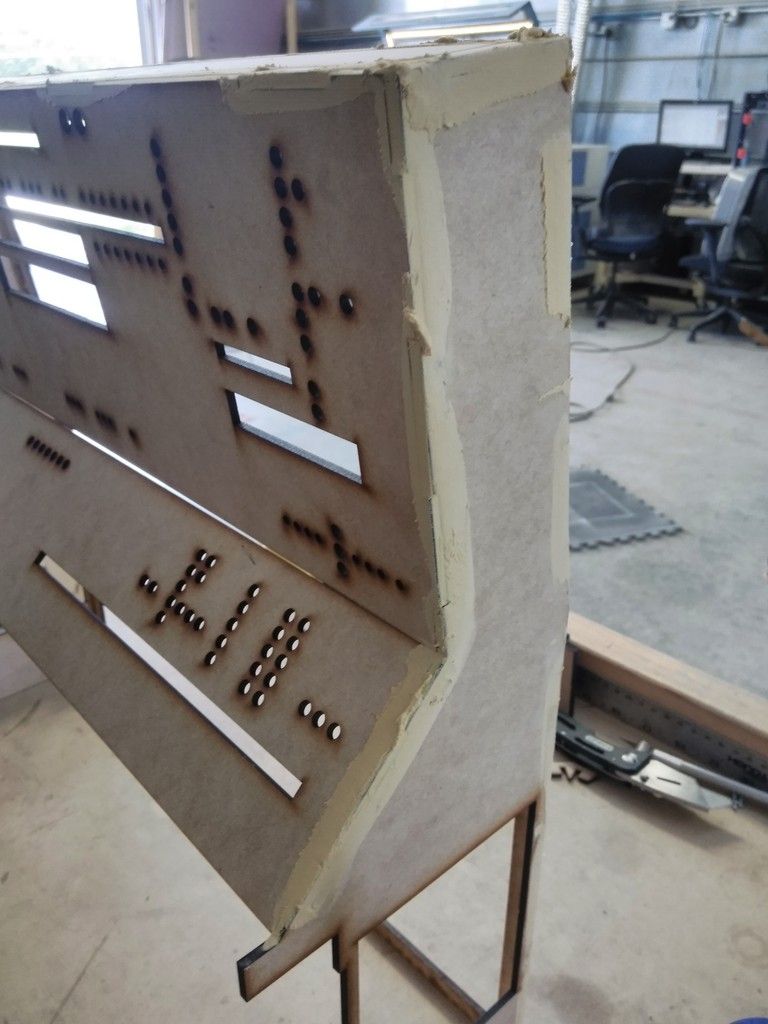
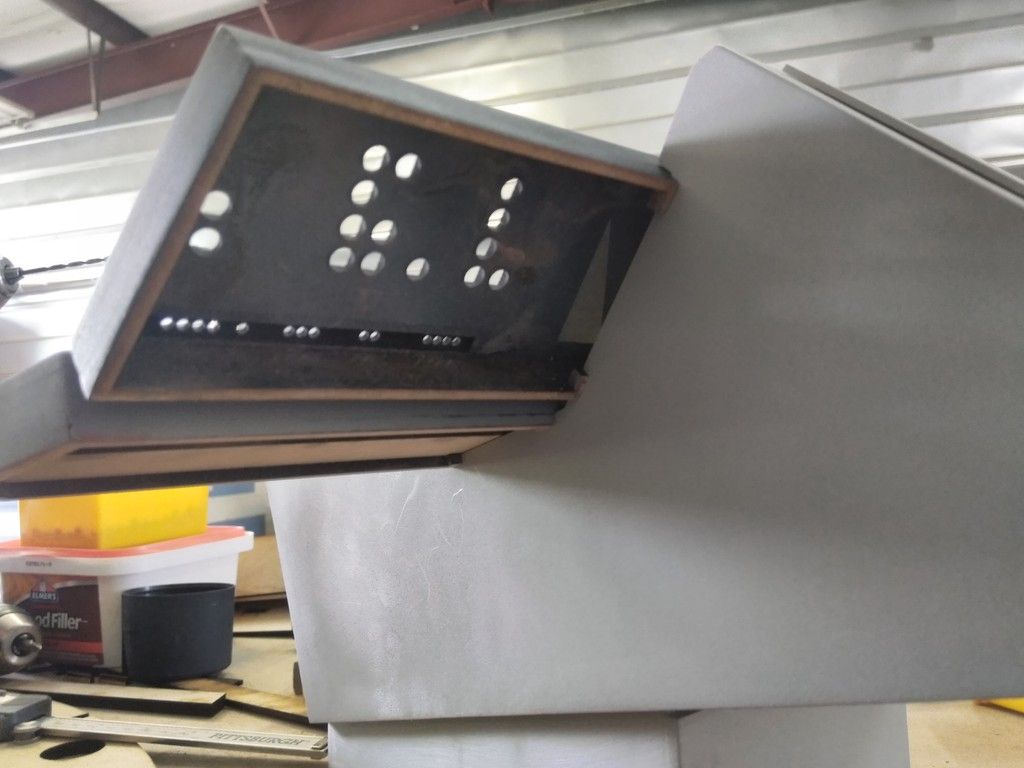
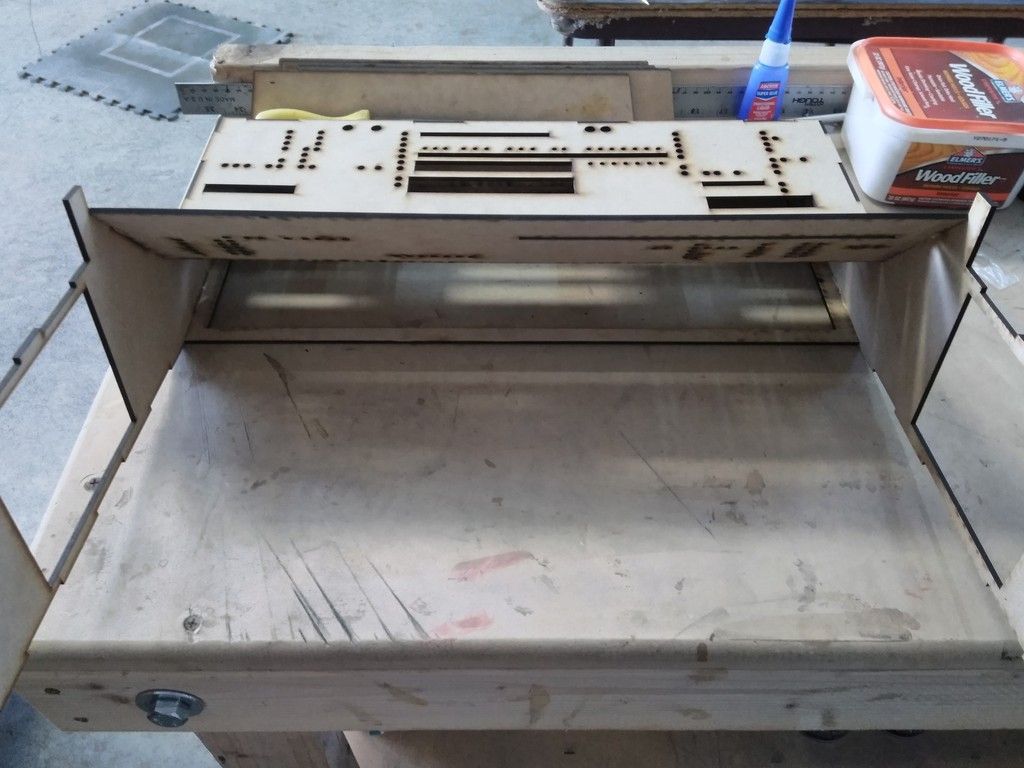
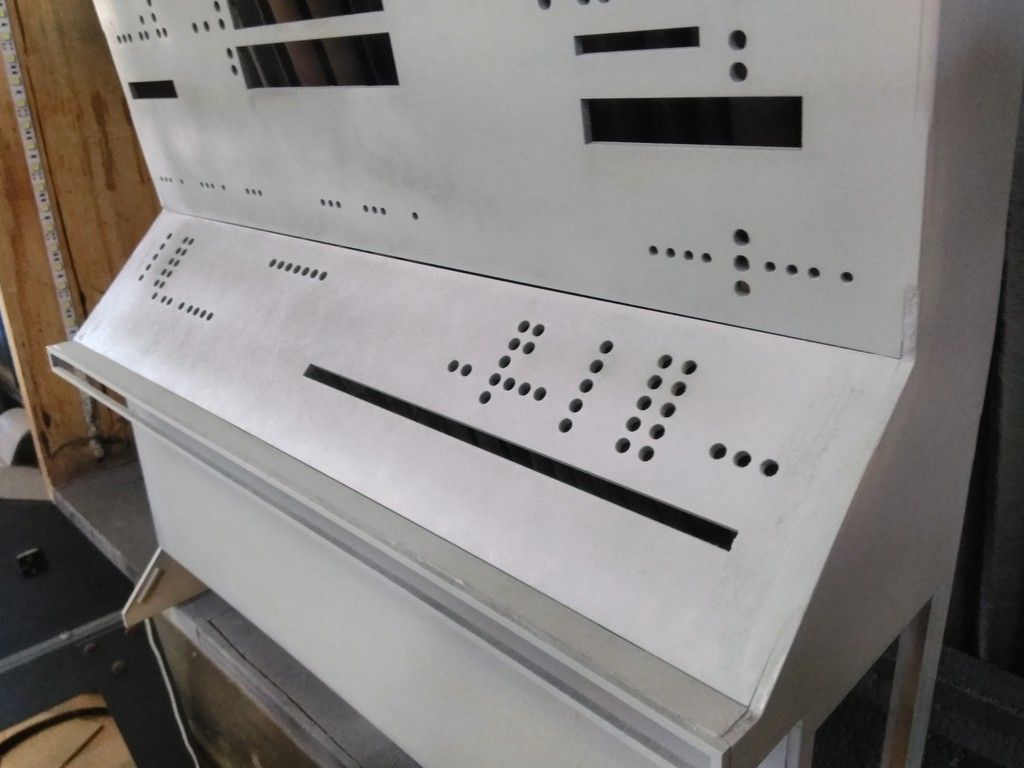
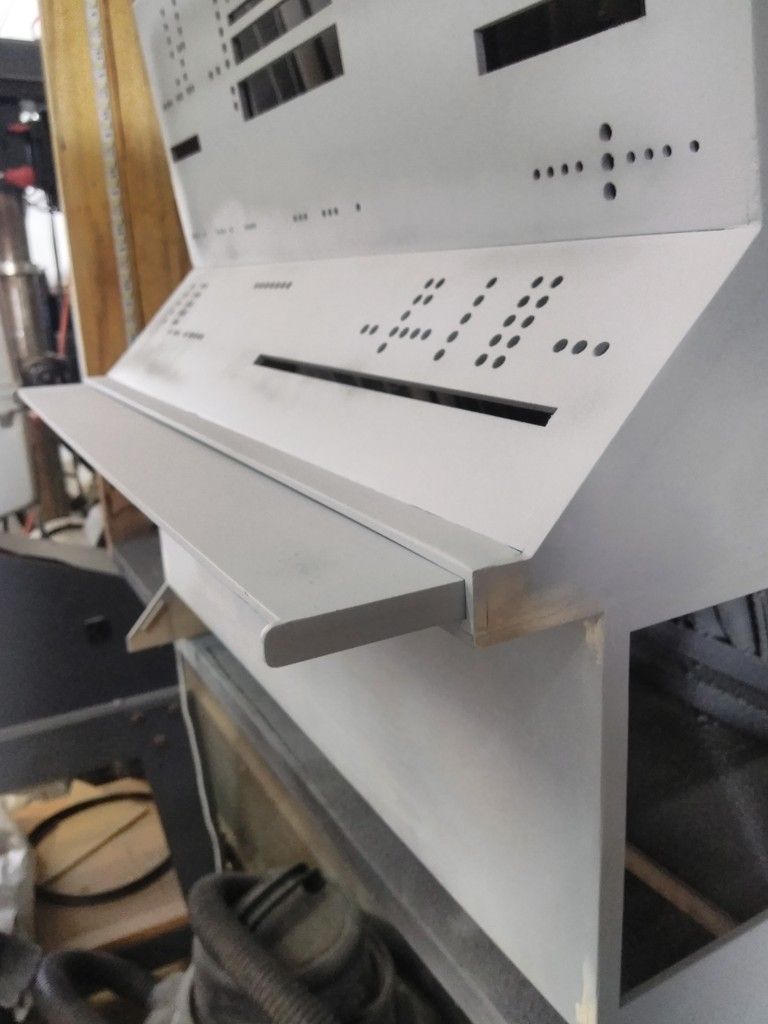
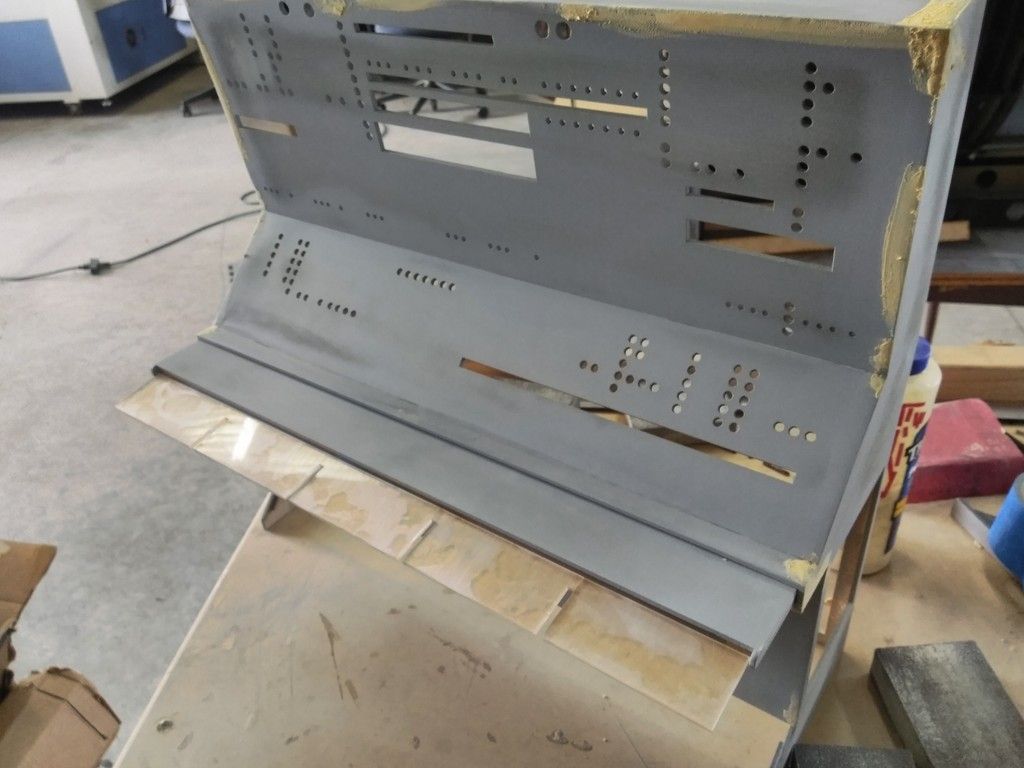
Shelf detail
When I first placed the nav chair next to the computer I thought "... OH NO! The scale is wrong..." Turns out the chair looks rather tiny next to the computer
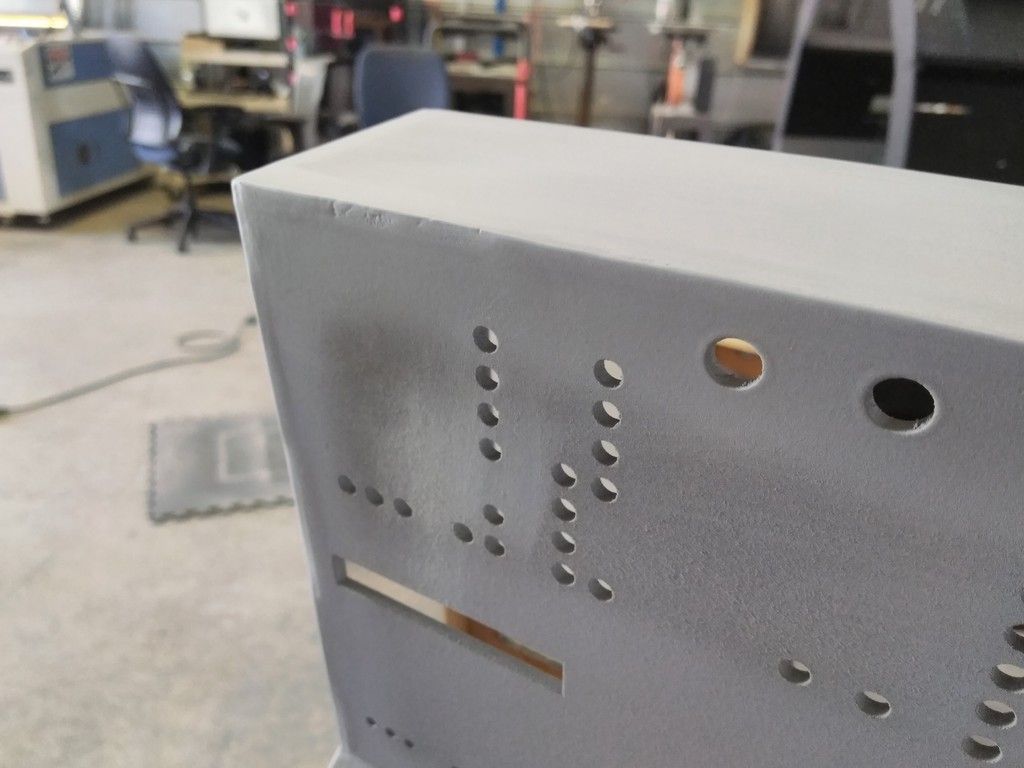
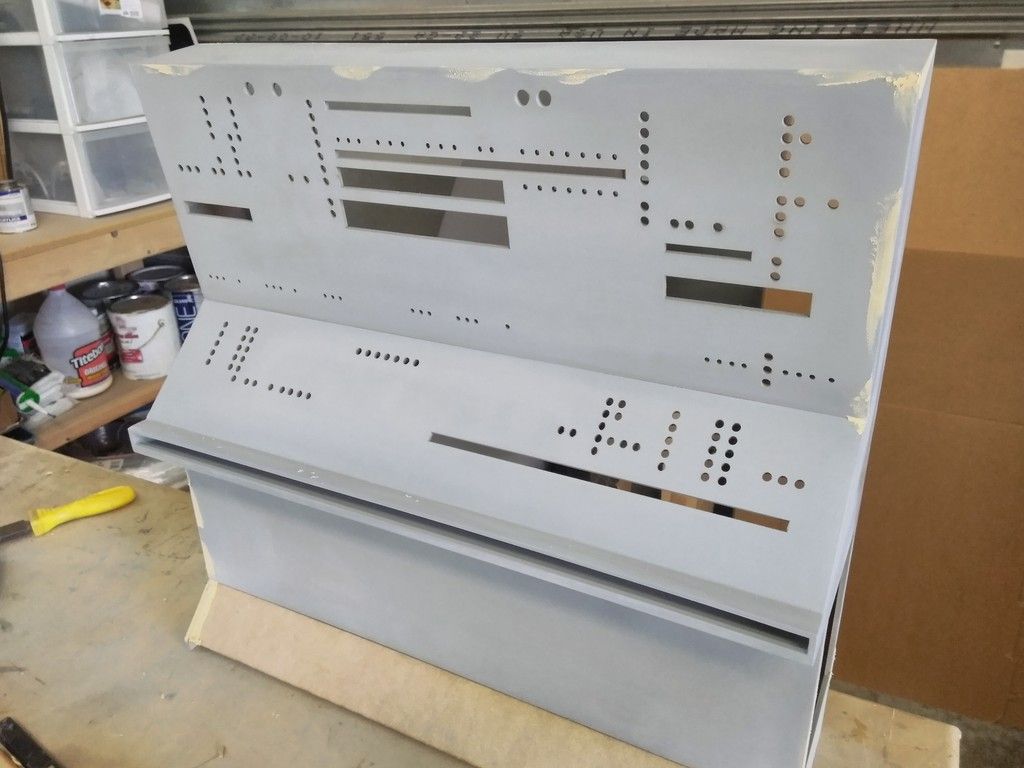
Primer!

UGH... I tried to use the least amount of tabs as possible for this exact reason!
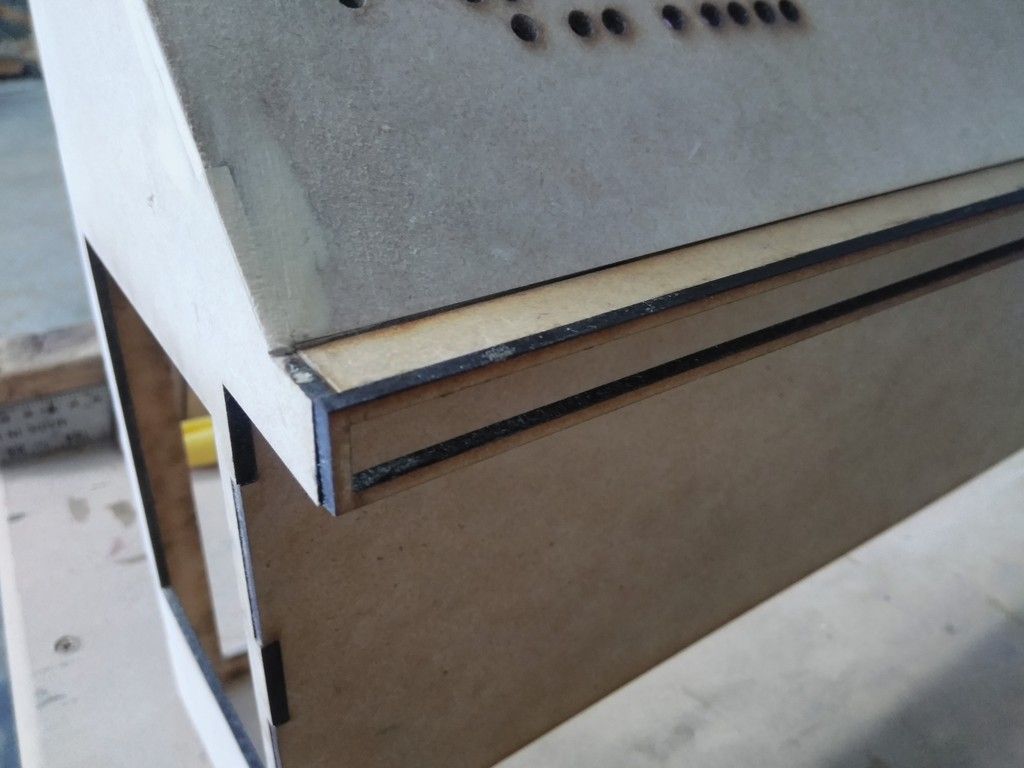
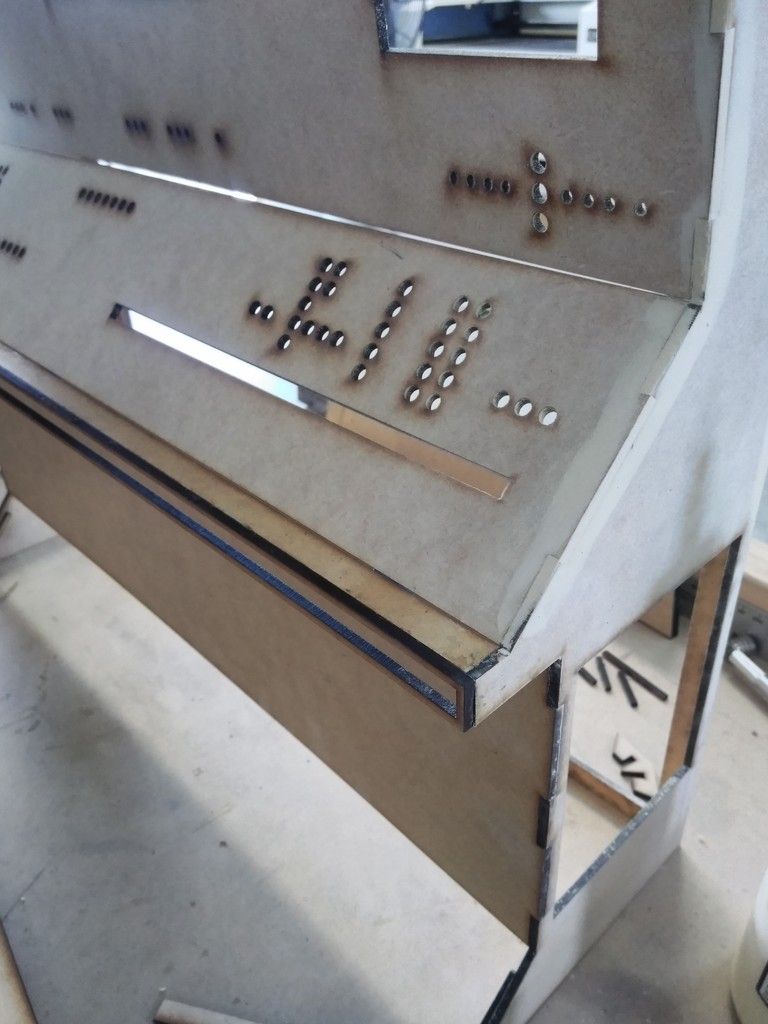
Shelf details
More shelf details
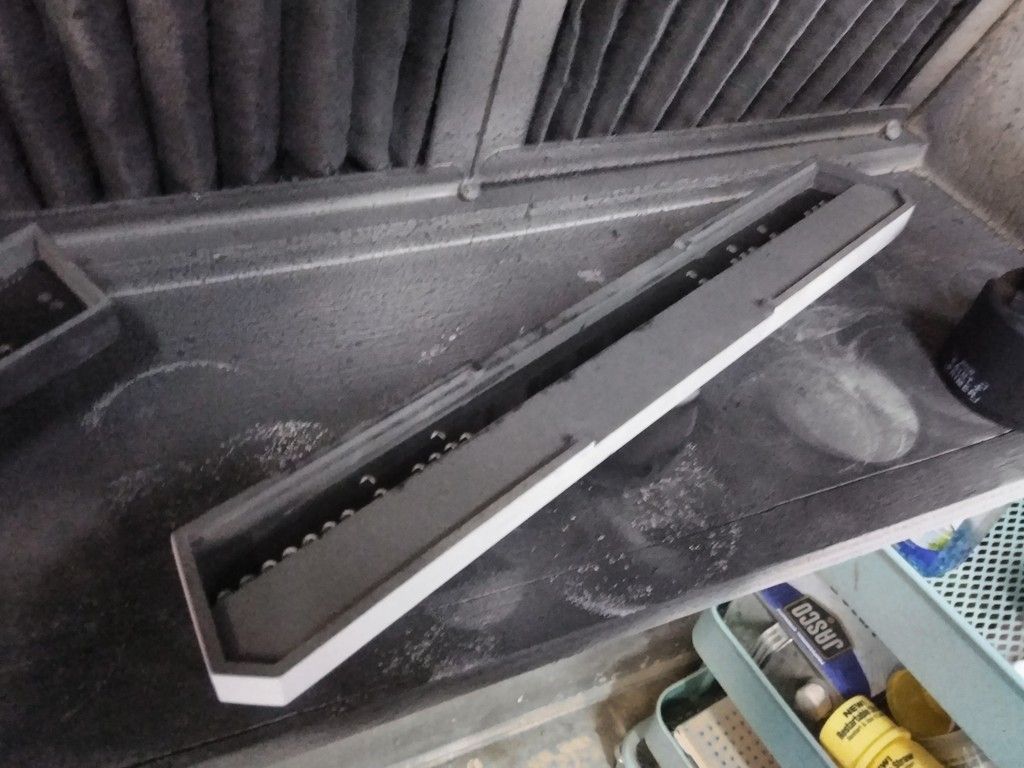
The shelf is really deep... but the measurements are accurate!
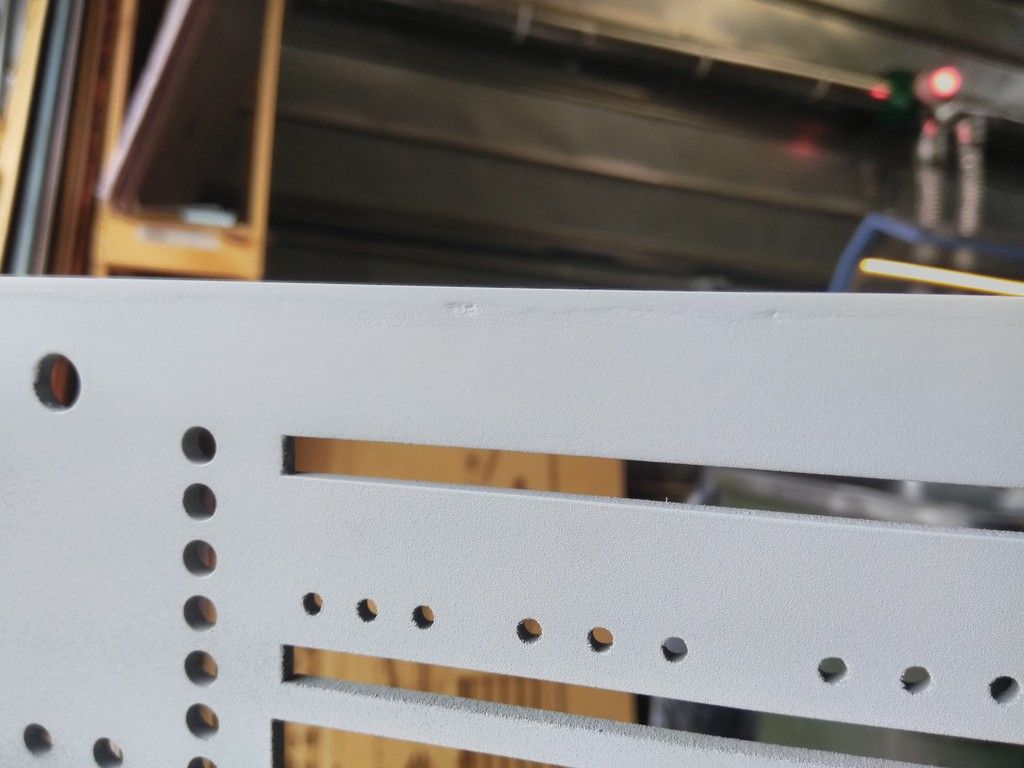
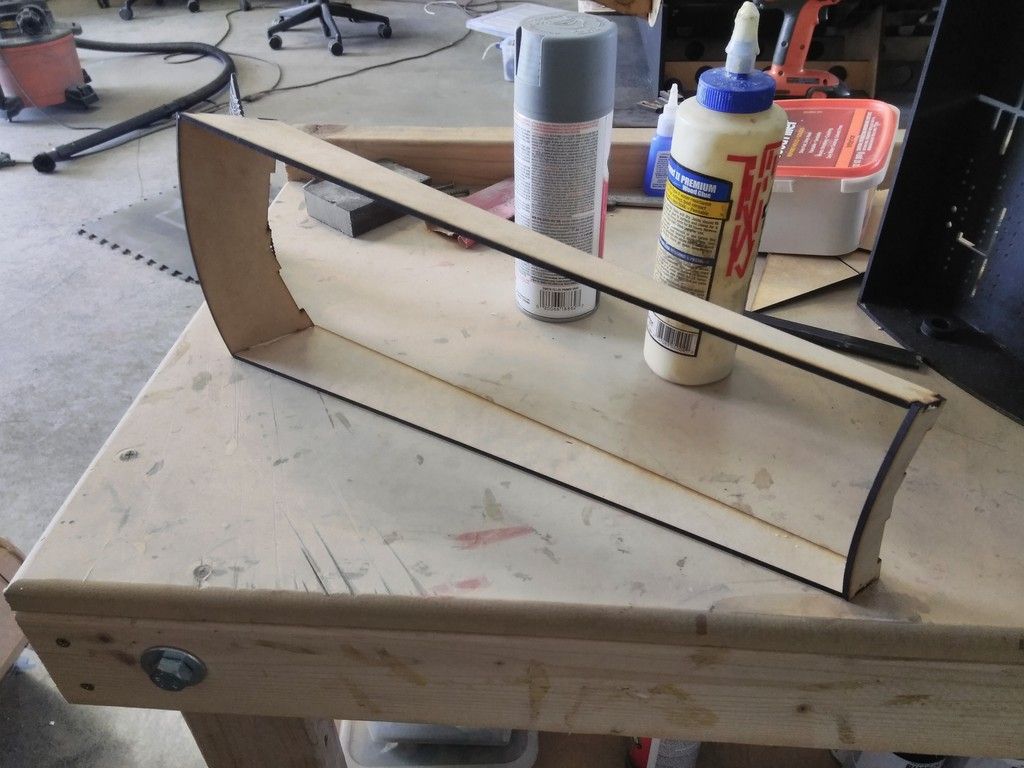
The down side to NOT having tabs are having to create support brackets to keep panels from drooping
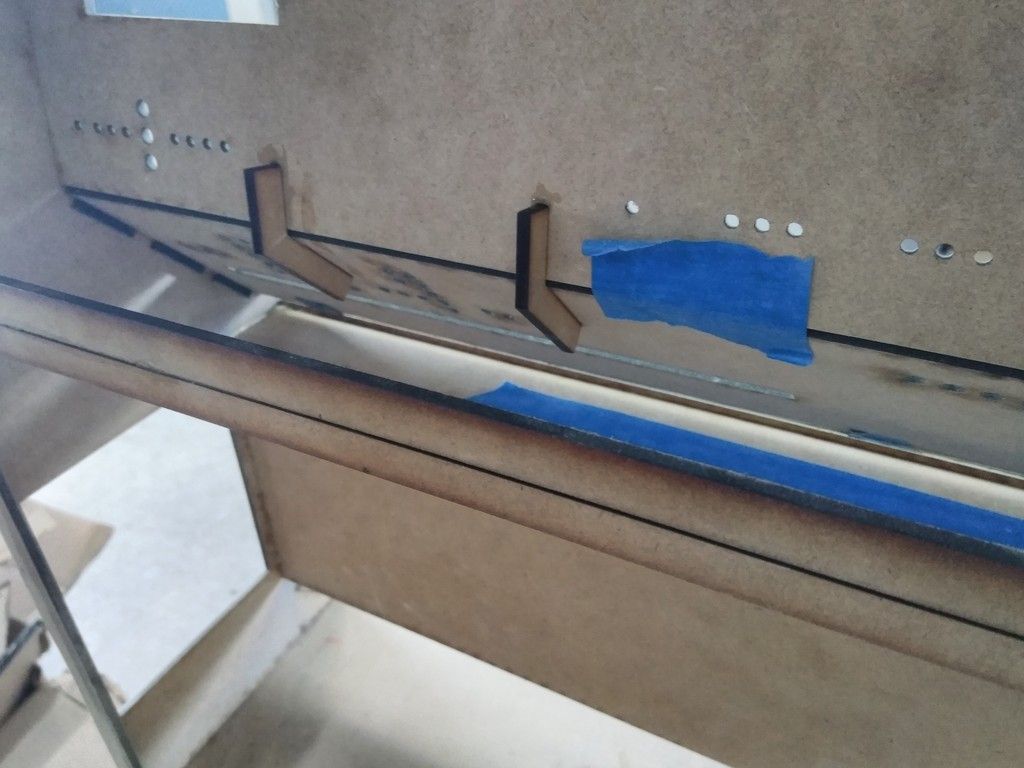
Tape helps too
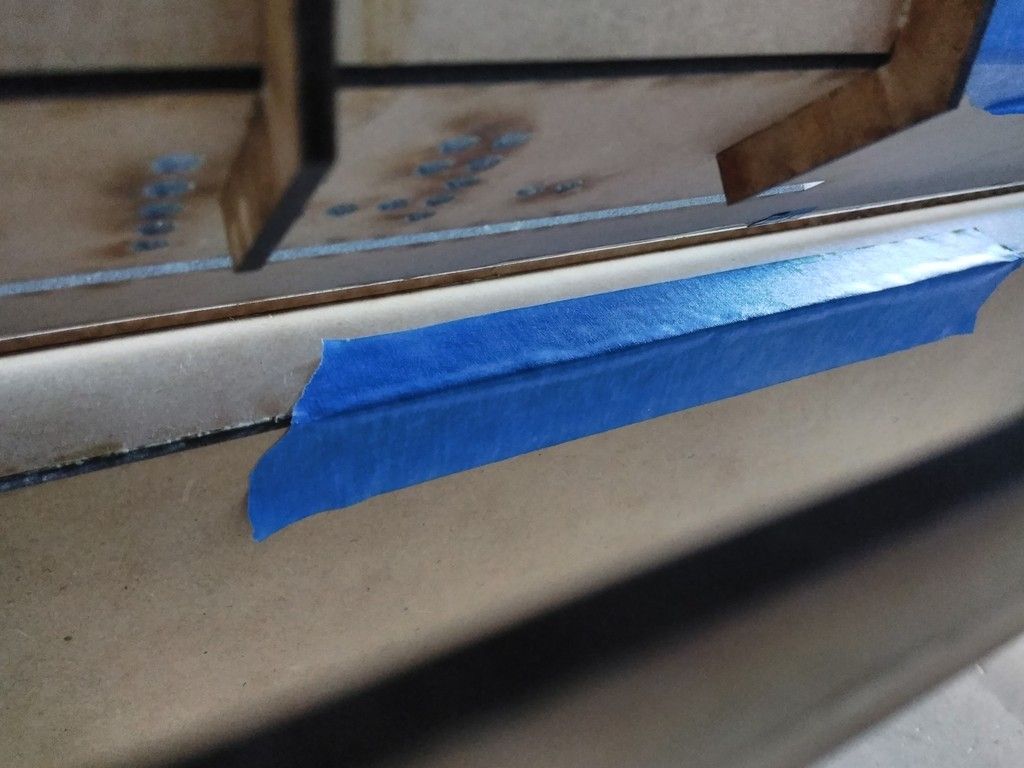
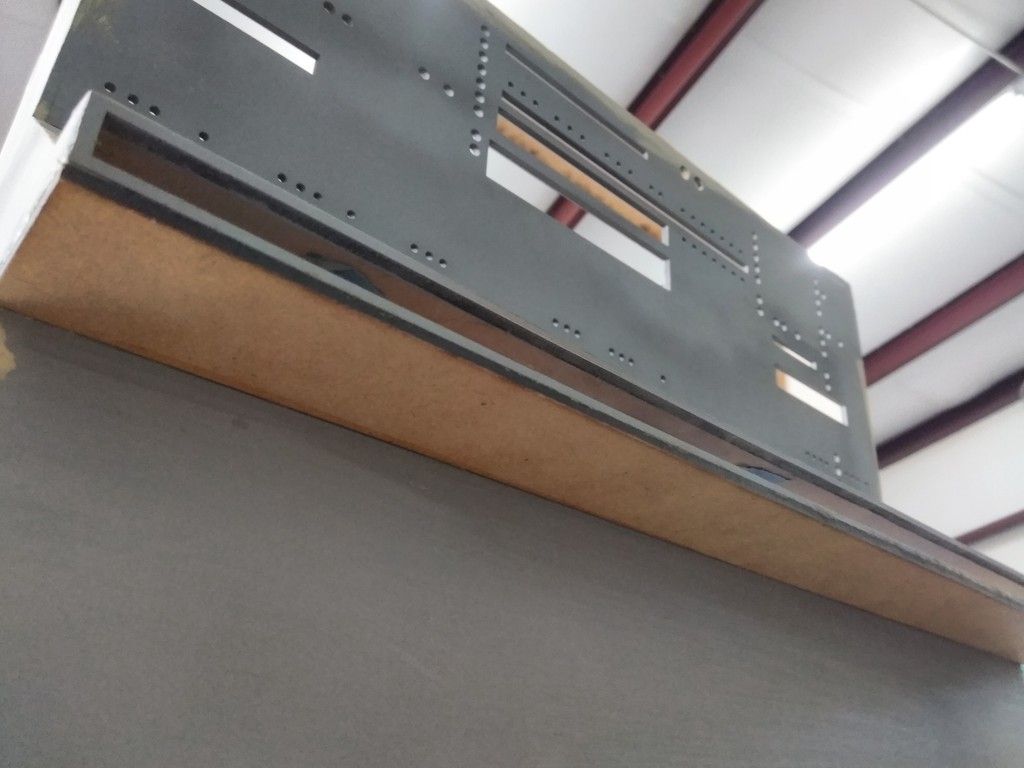
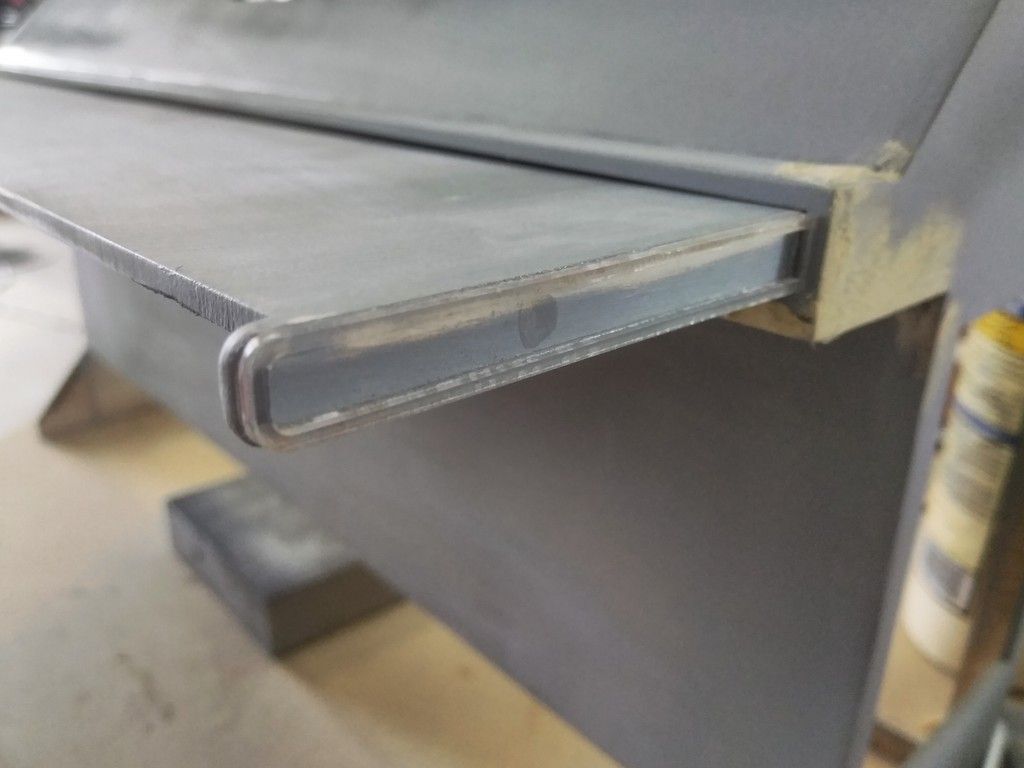
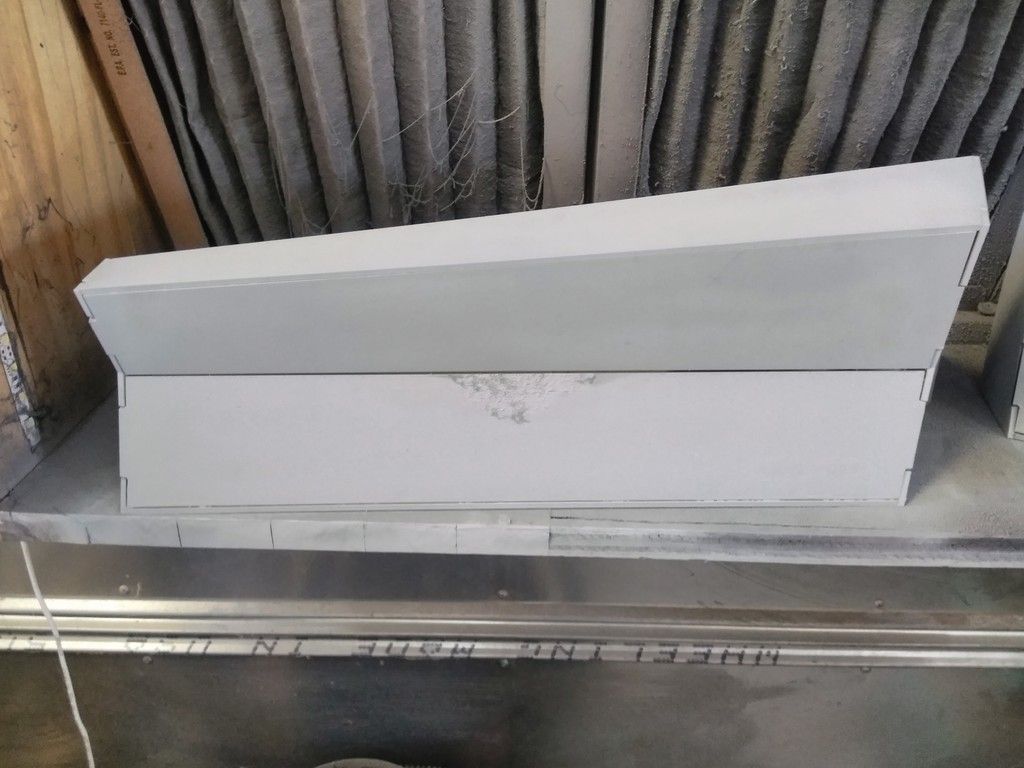
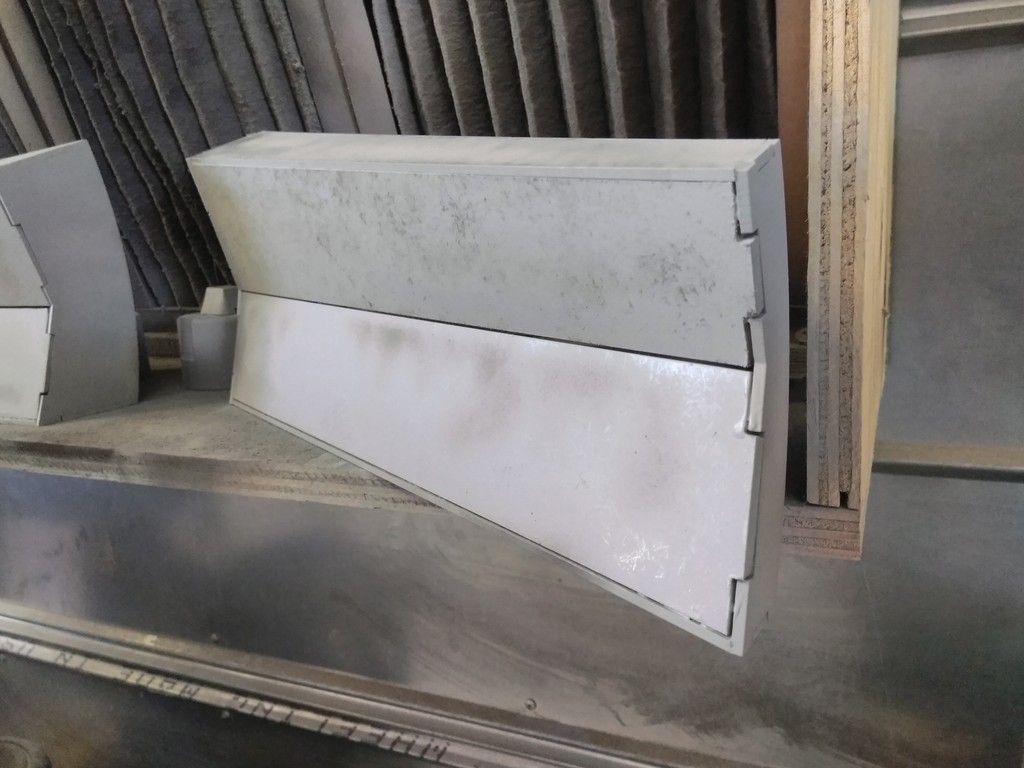
Underside of the shelf housing
I think this is round 3 or 4 of primer

Shelf dry fit in place
UGH... dang tabs
OH LOOK! Filler
Shelf dry fit in place. It's not as far out as it needs to be

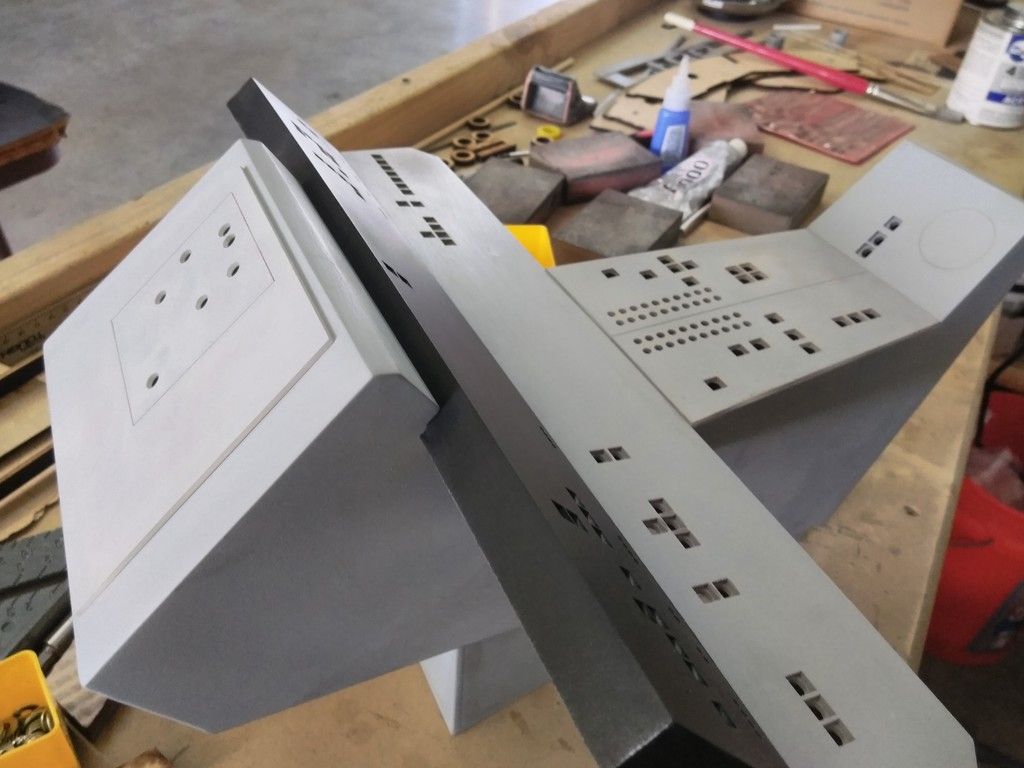
End cap details now in place
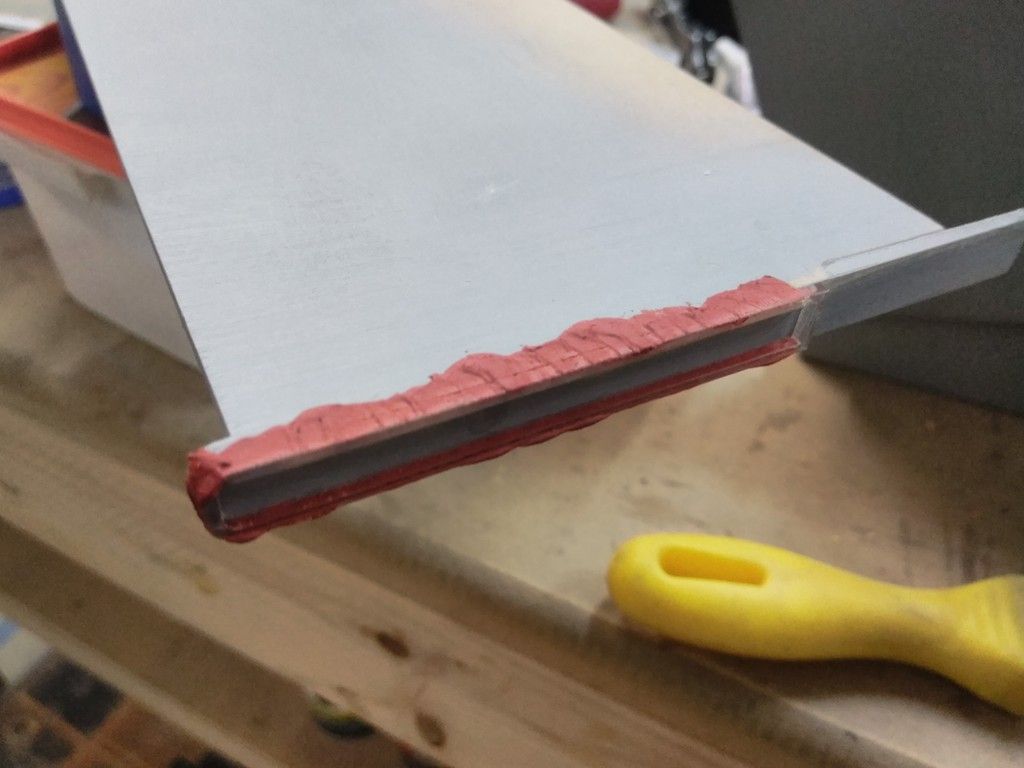
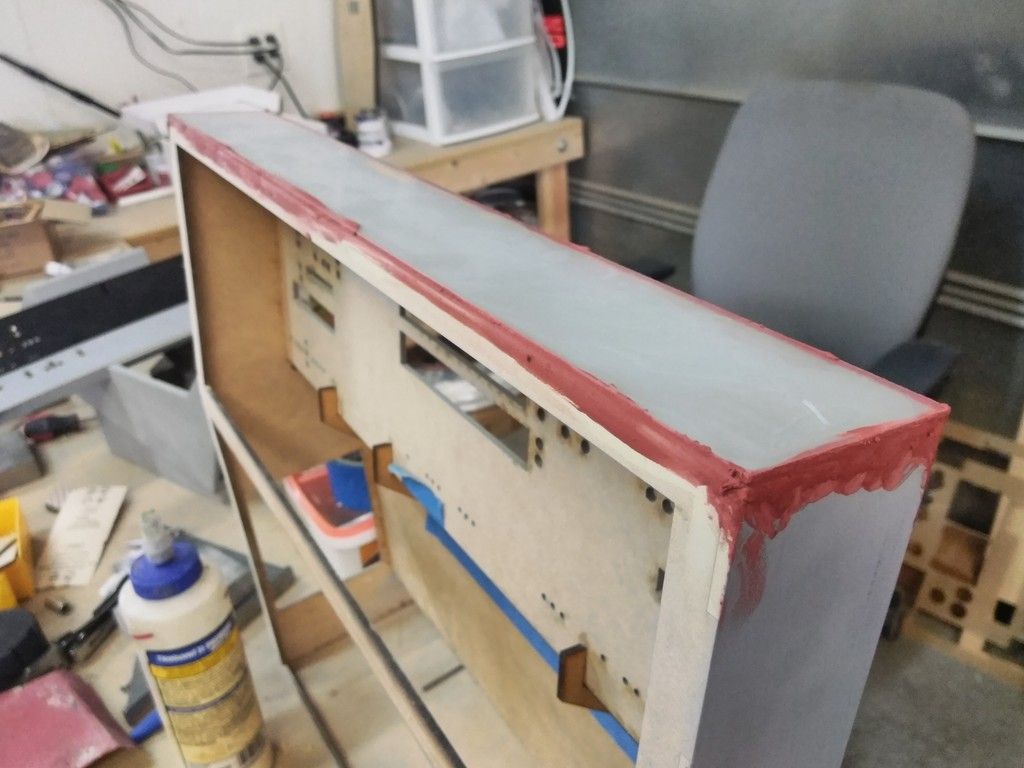
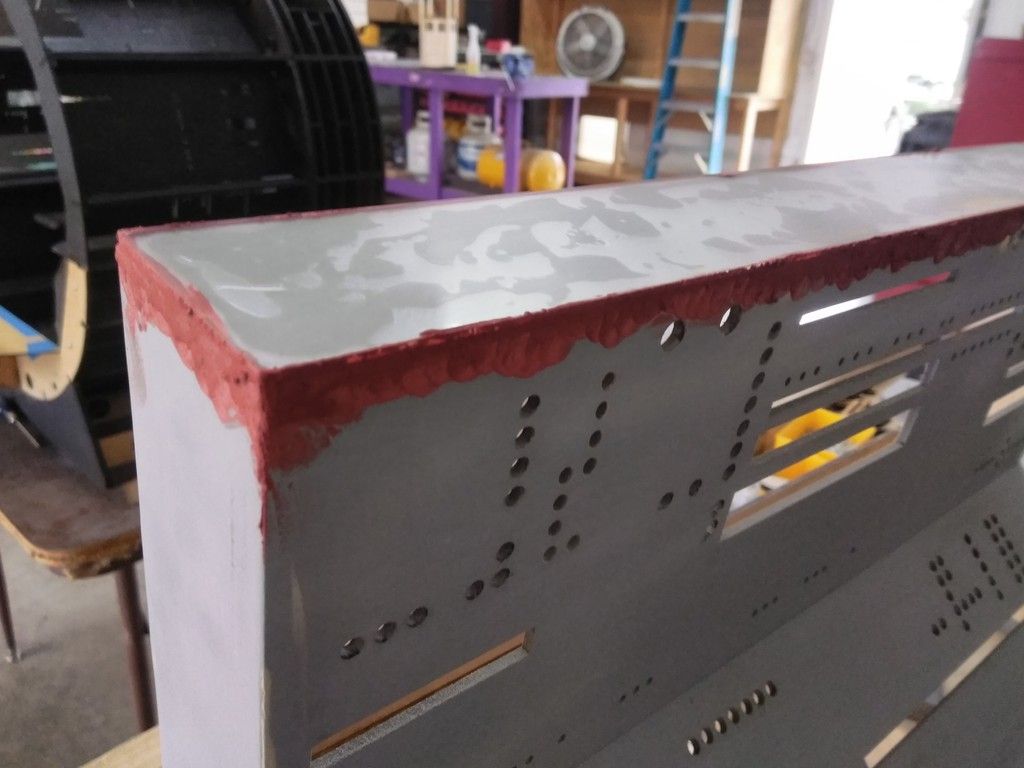
More filler... more primer...

I laser cut a 1/16th sheet of acrylic, adhered to the top and added filler. This SHOULD help with the Tabs vs Filler issue I'm having
More sanding and filler
Getting close! But still need a few more panel faces cut and adhered

UGH
And more filler
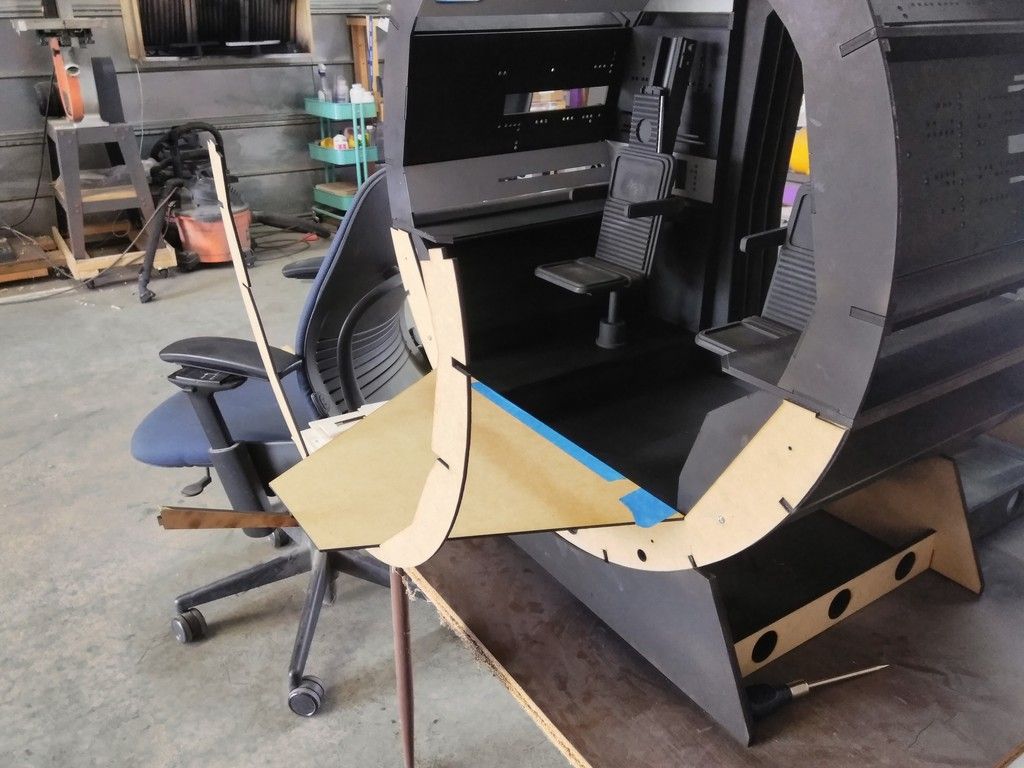
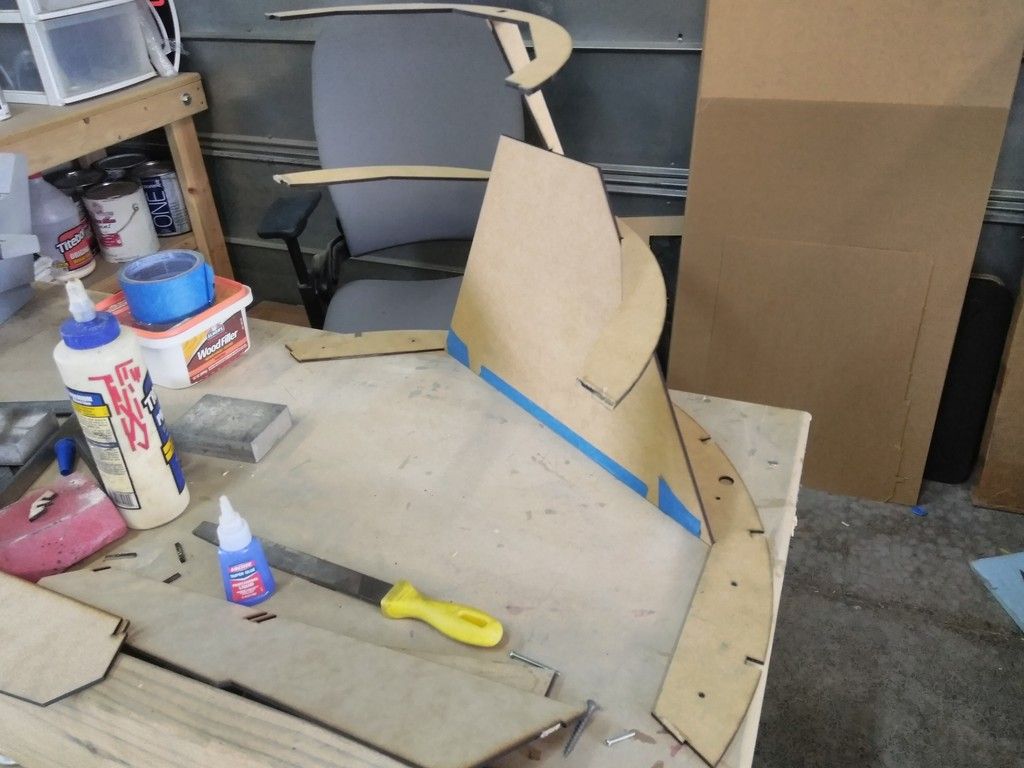
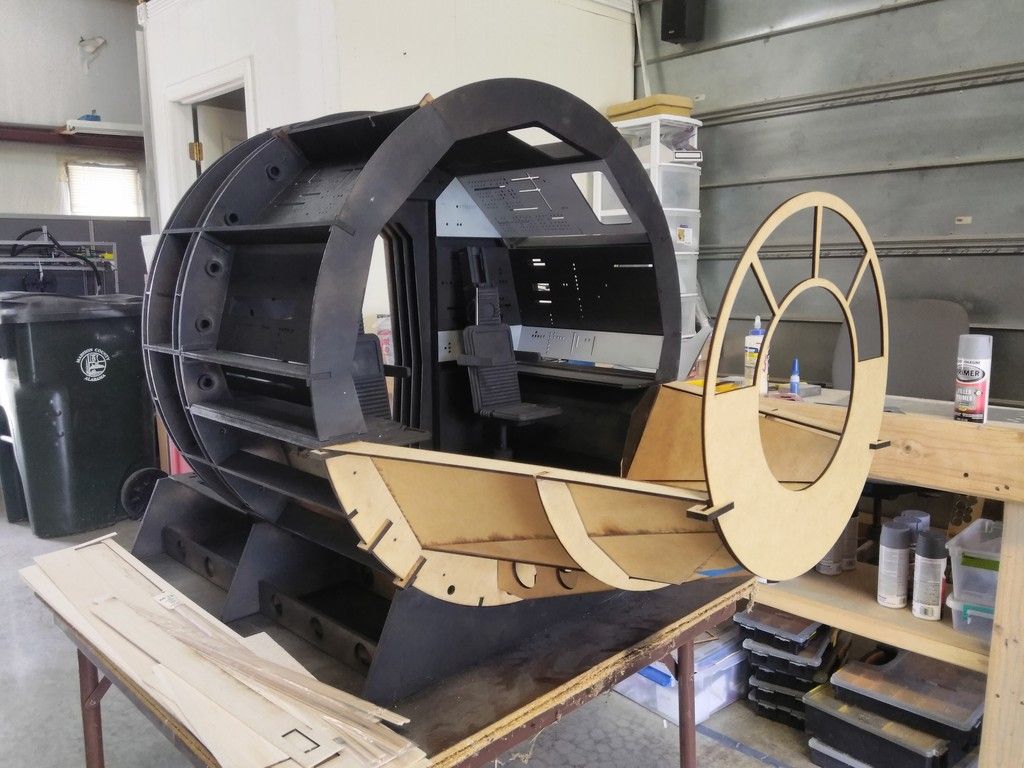
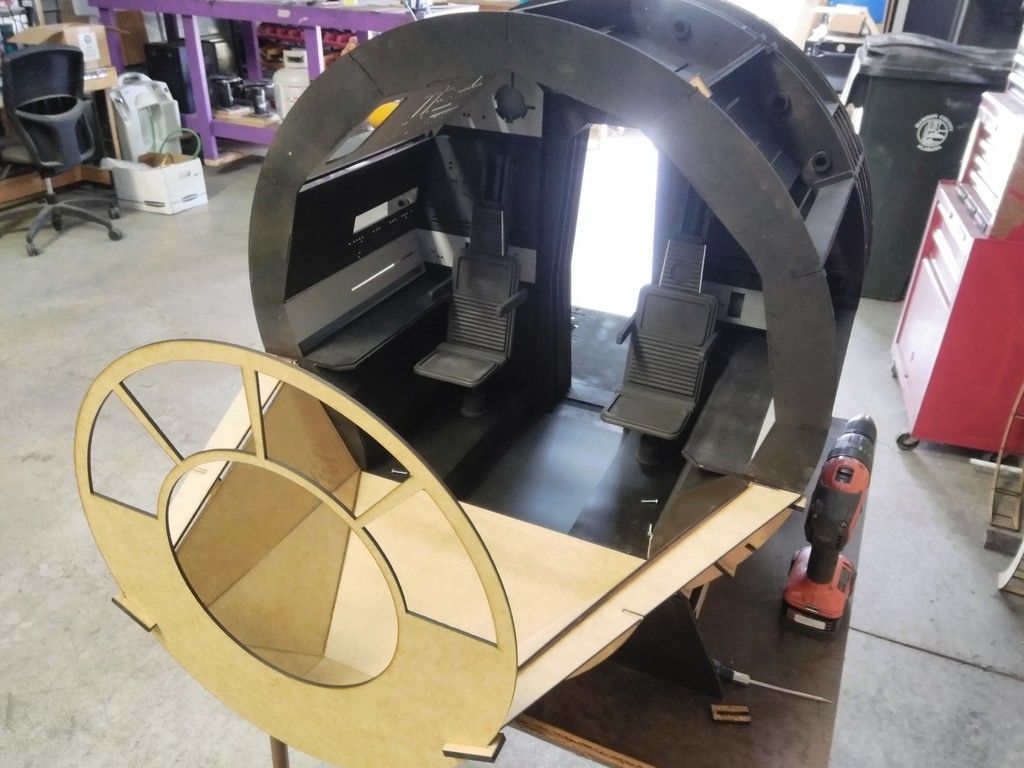
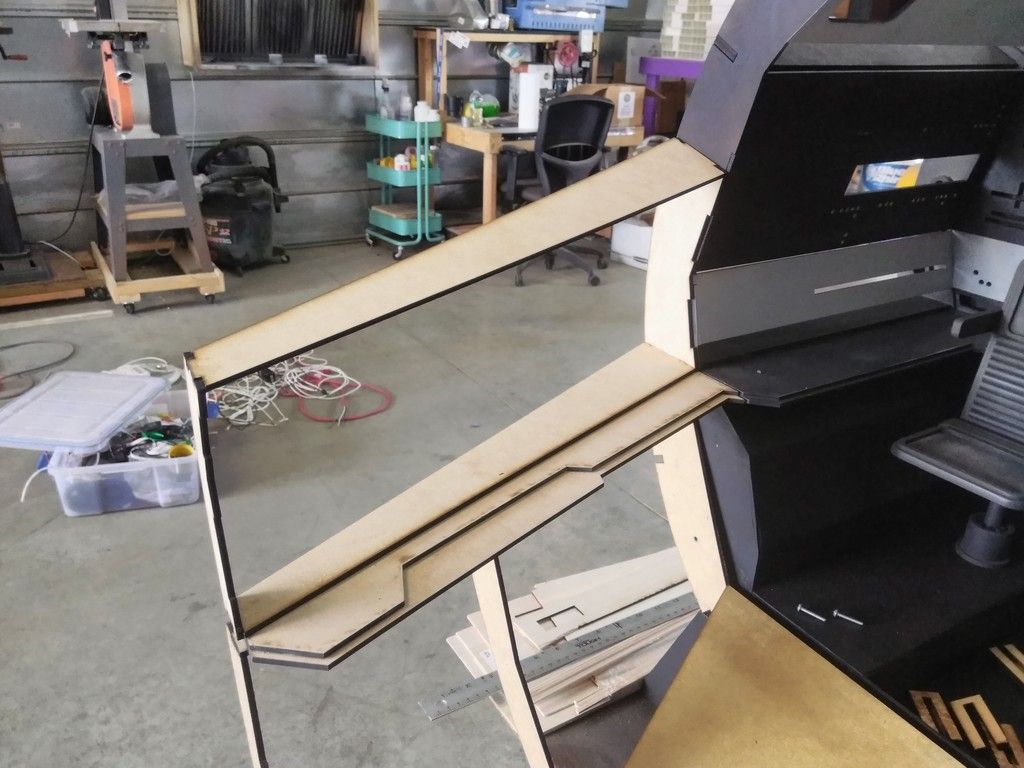
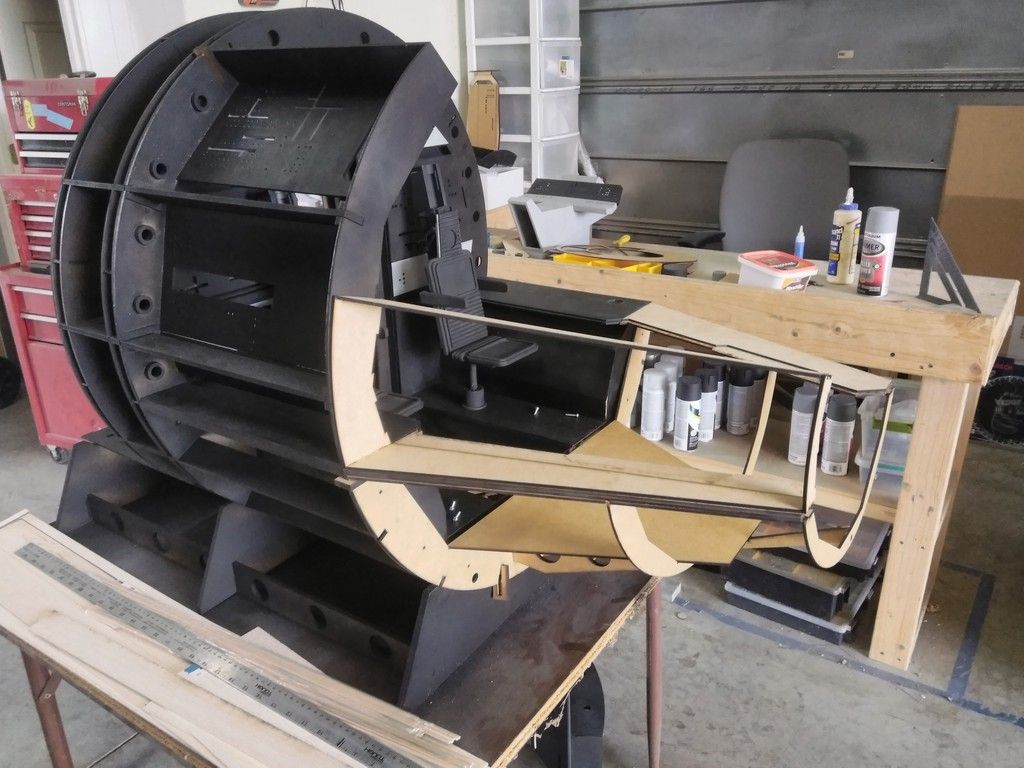
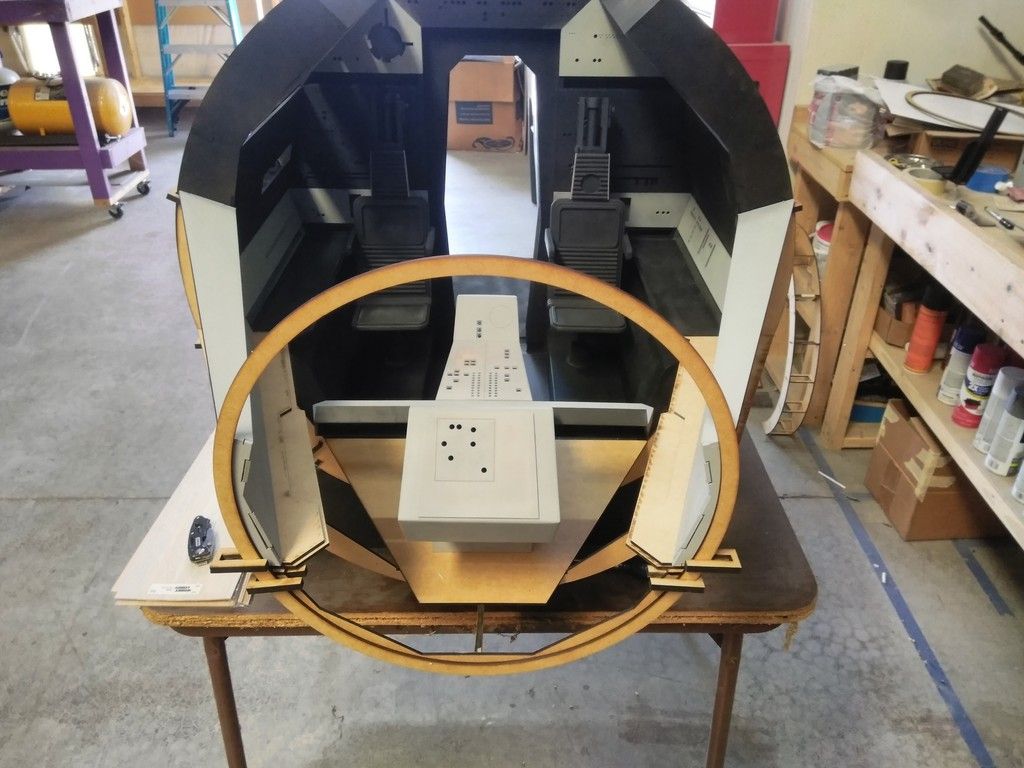
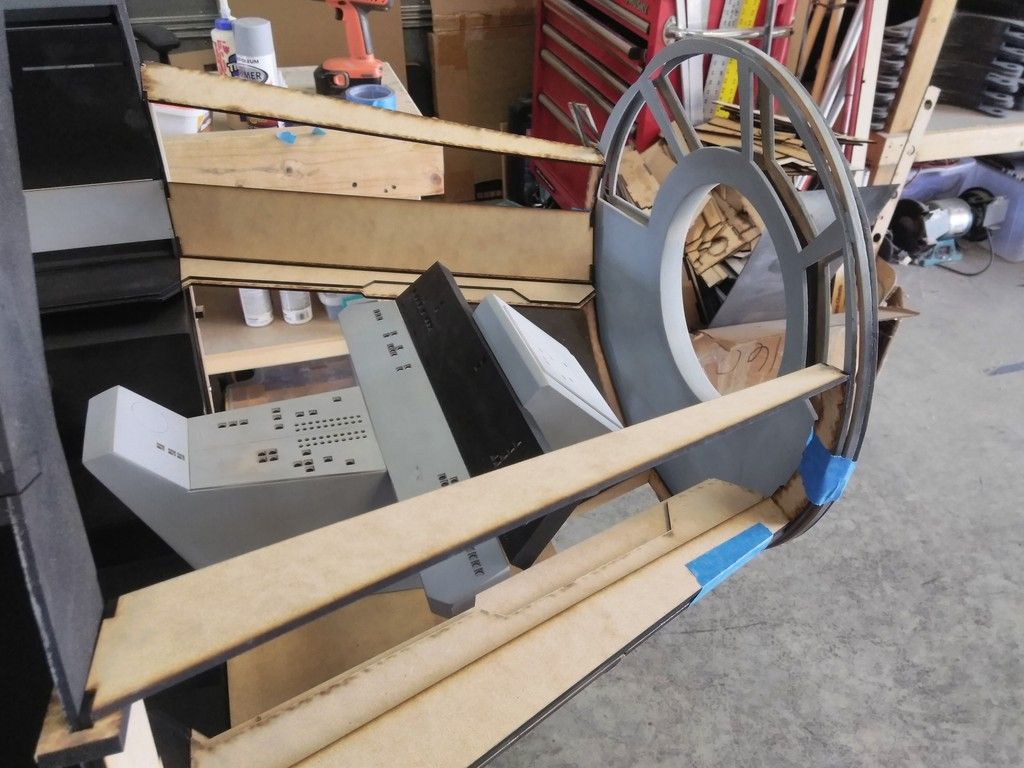
Now on to the highlight of the build... So Far! Opera Scot worked like mad to get these nose parts to align to the 28". Check it out!
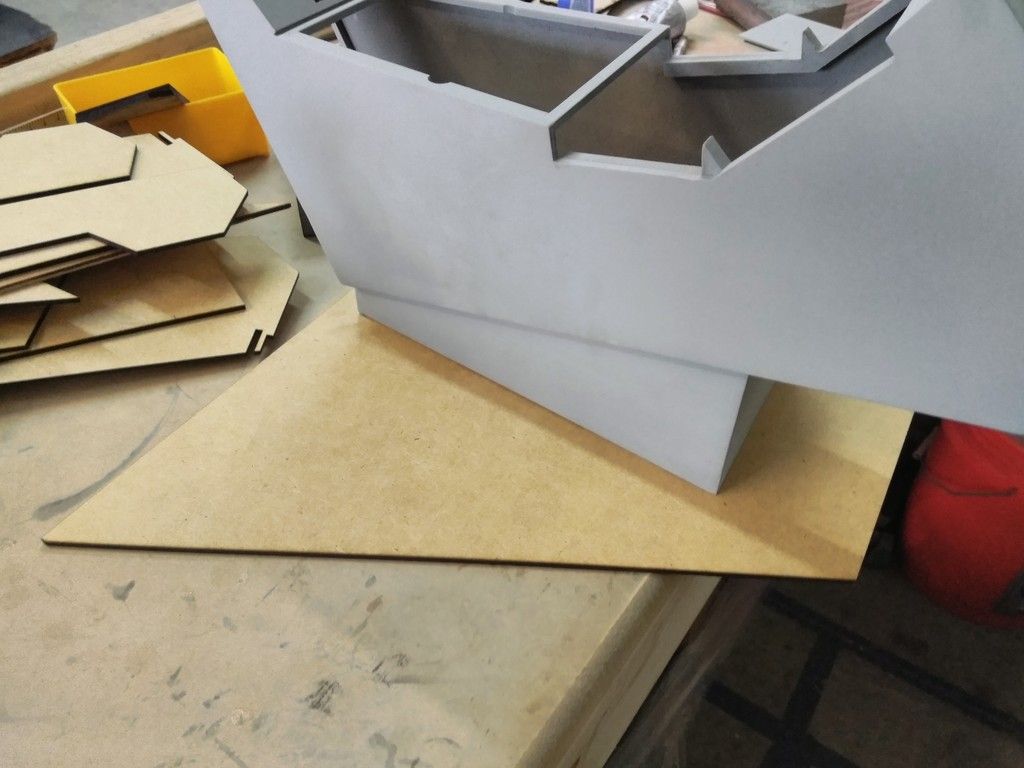
Console platform
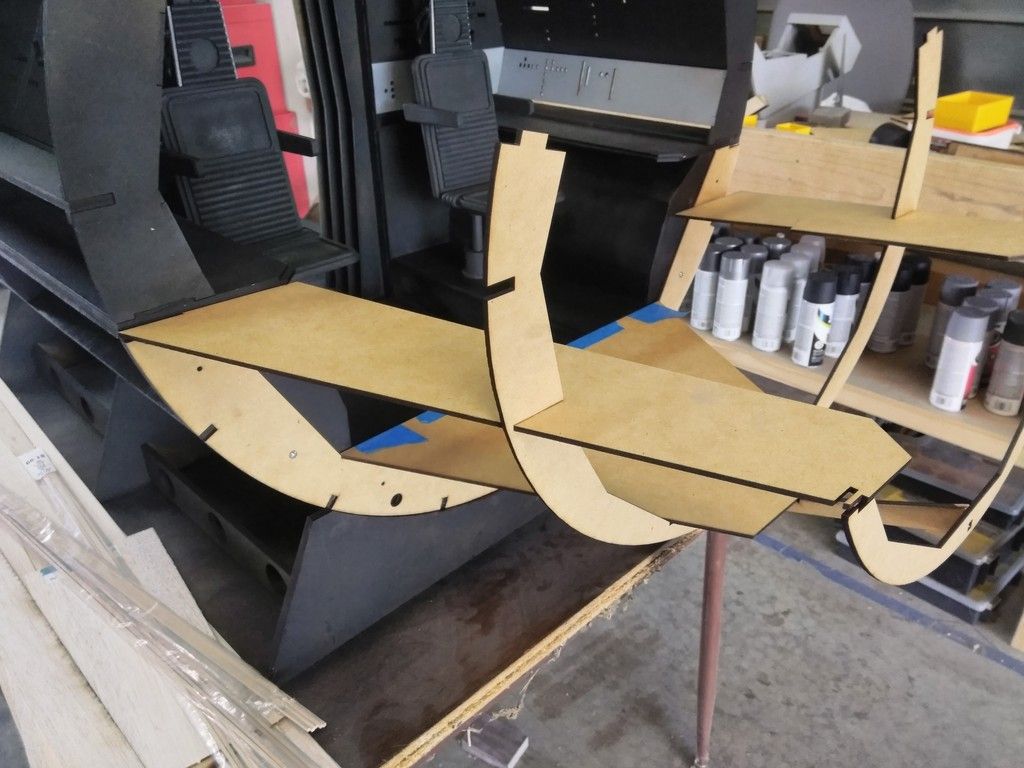
A nose takes shape!
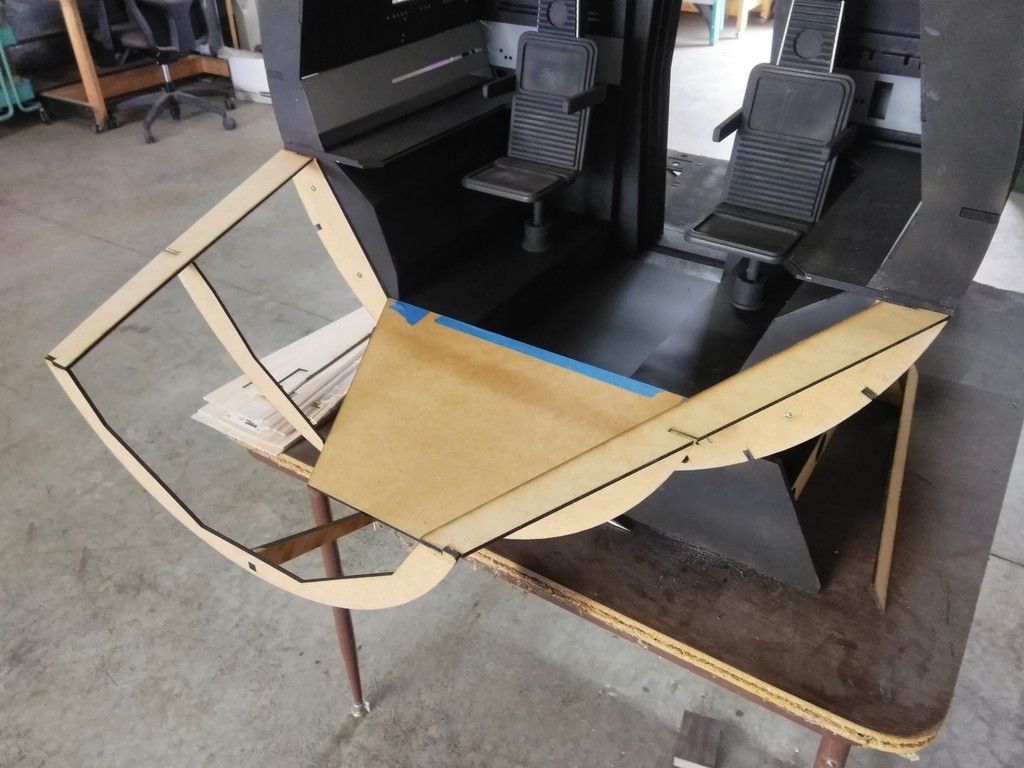
Opera Scot added the Volvo panels to the top - I wound up having to remove these parts of the nose in order to align the base structure
We DEF ran into some issues along the way. It can't be smooth sailing all the time - the shelves didn't align
I might remove the shelves from the main body and redo. I'm just not sure how much damage/chaos (if any) I'll create
After mod'ing the frame to remove the Volvo panels... I marched forward
Basic frame
So far so good...
The lower console base might need to be raised just a bit higher in order to clear the shelves
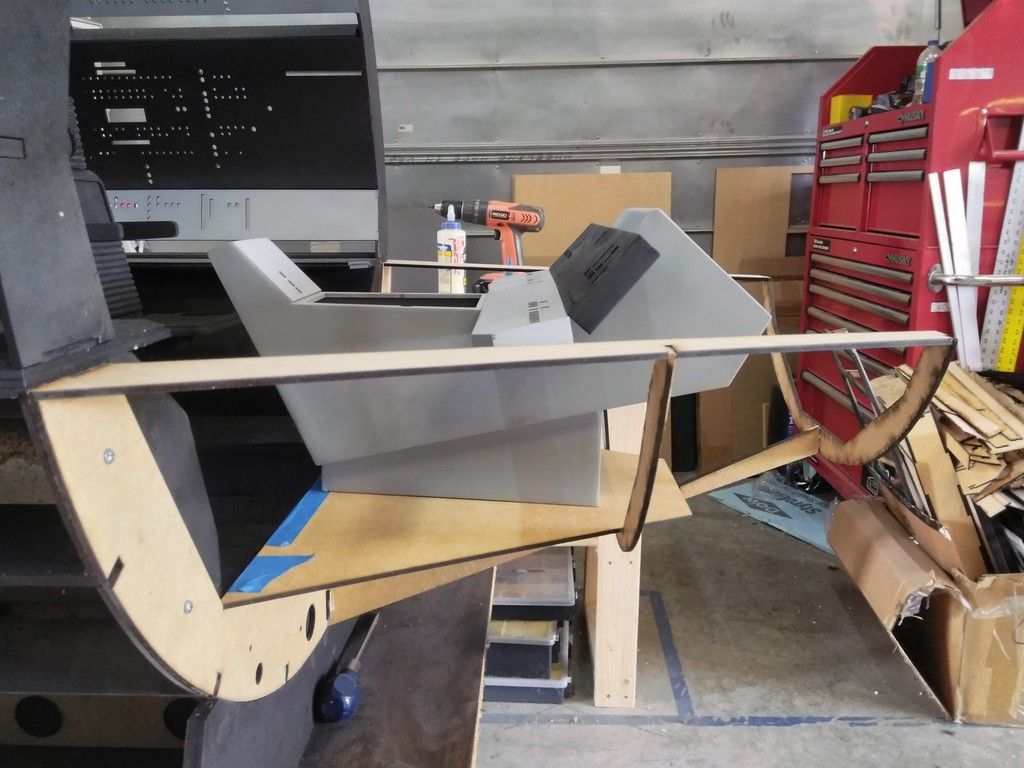
I added some extra support to the underside
Better - not much sag
Temp added the floor panels - most of these have to be recut and/or sanded/mod'd in order to fit perfectly

But it looks cool!
They will also get the "corrugated" mat look

Looking up from the underside
I found some scrap MDF and cut a temp window - wanted to see how bad the nose cone looked with the 28" diam
I think it works!
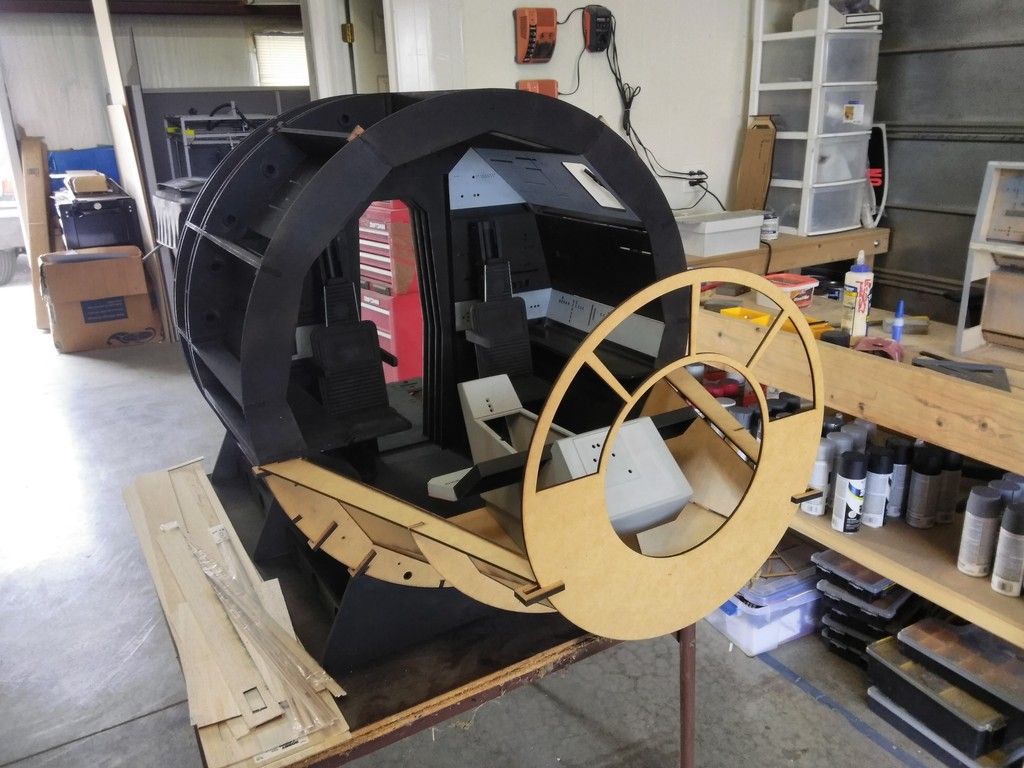
The main window also pokes forward a little bit so I dont think it's going to be that bad?
I think its going to work!
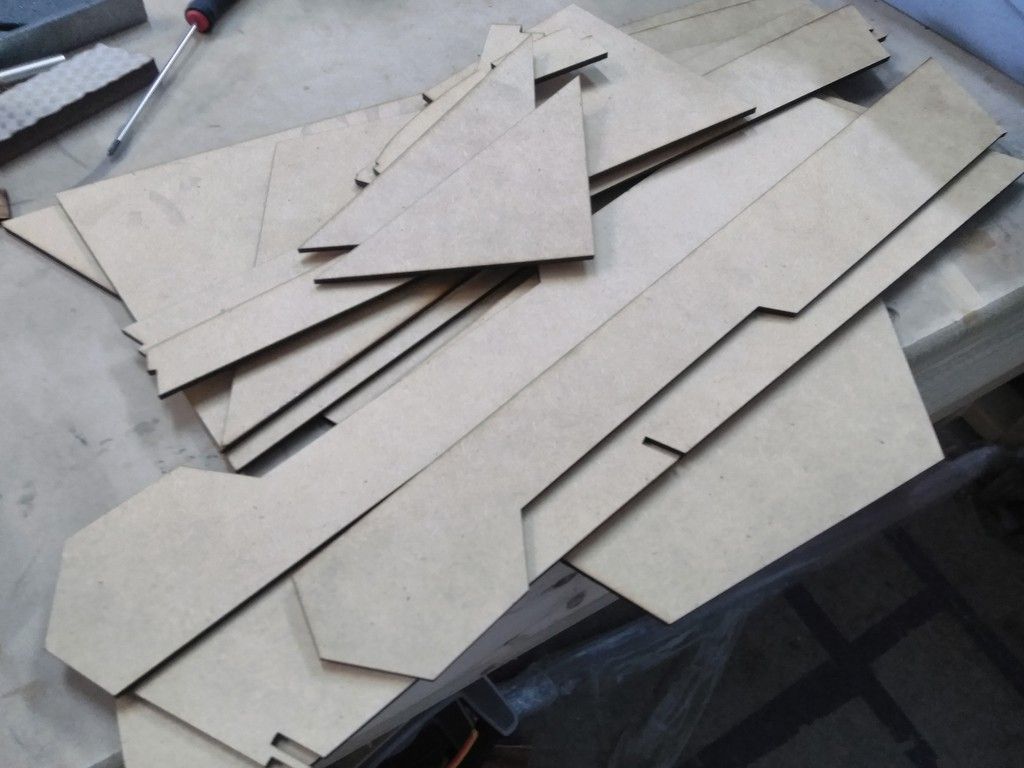
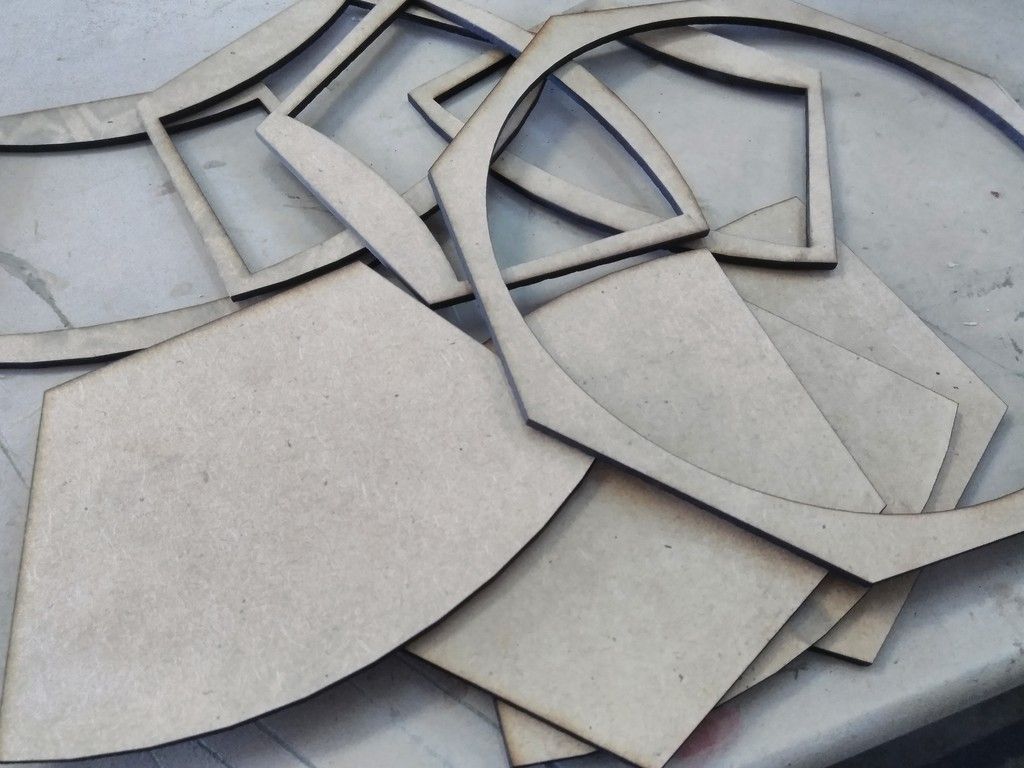
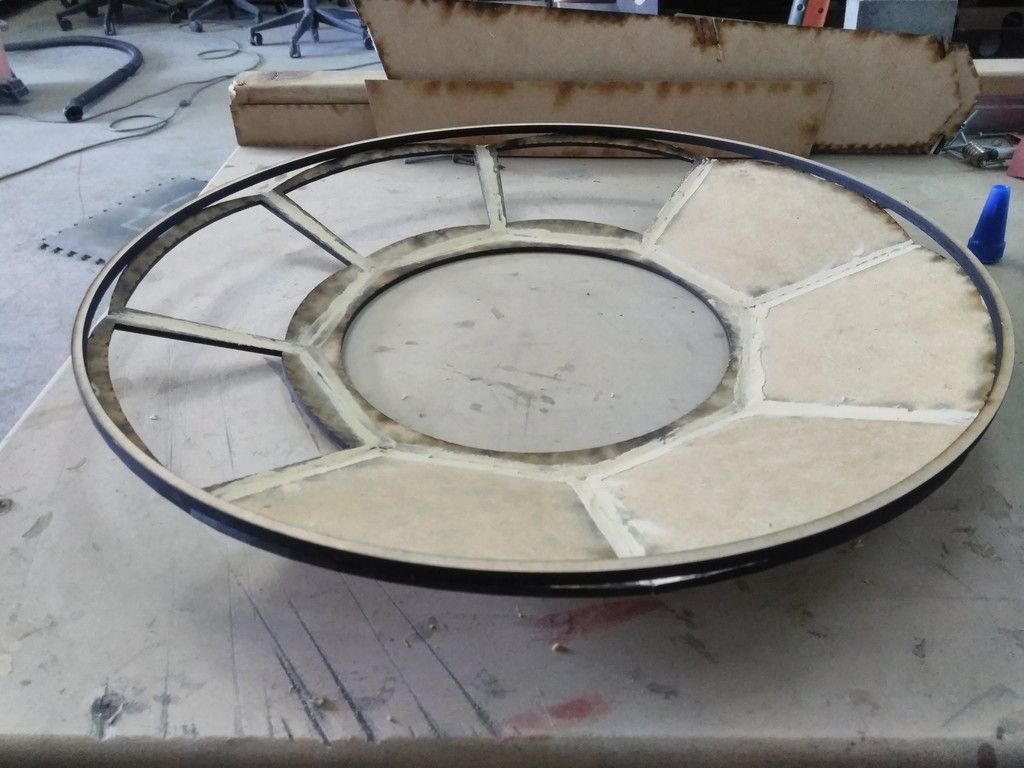
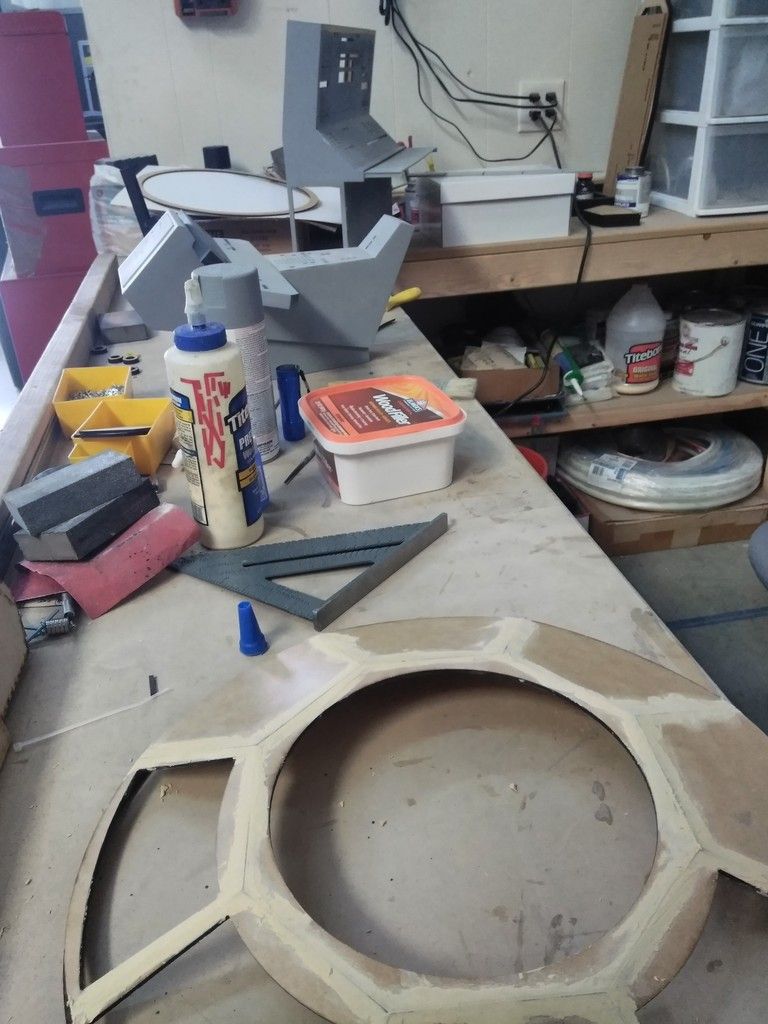
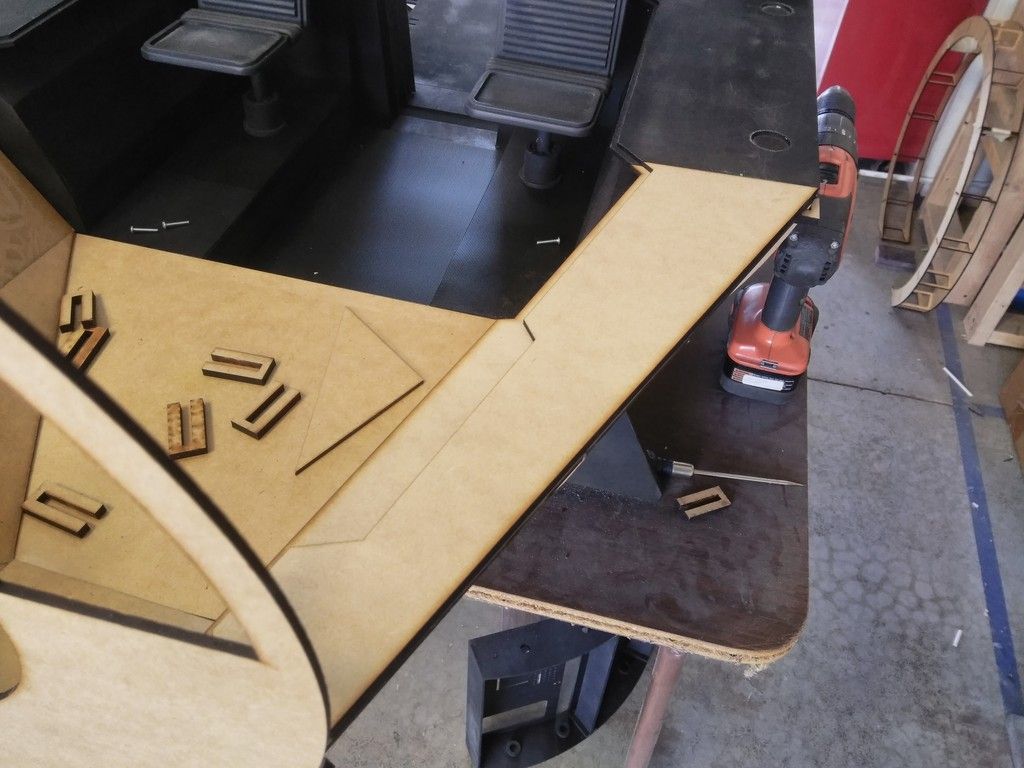
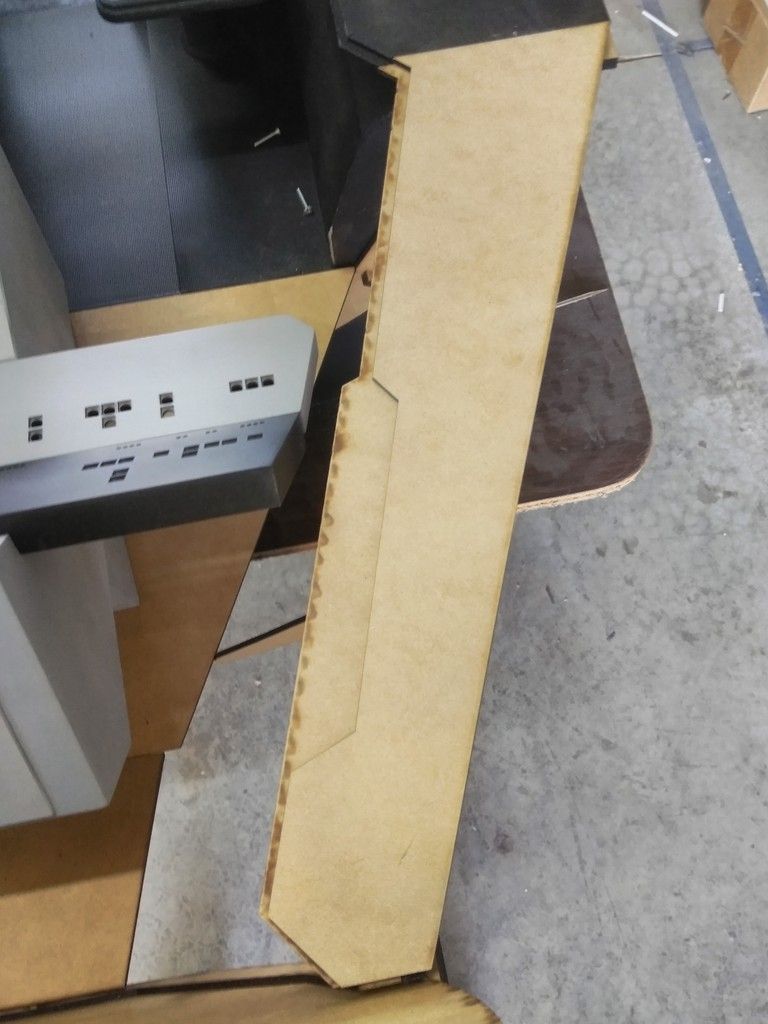
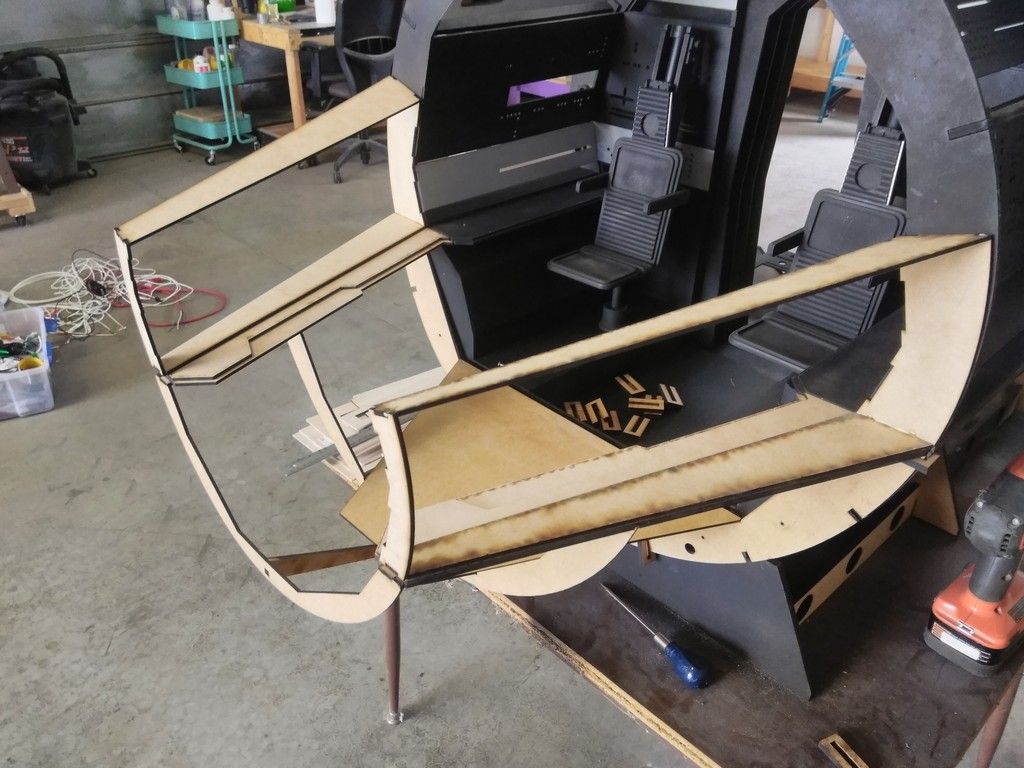
I then laser cut these oddly shaped pieces - laser cutter worked today but I had to cut the speeds in HALF to what they were prior to alignment

I take this pile of goodness and...
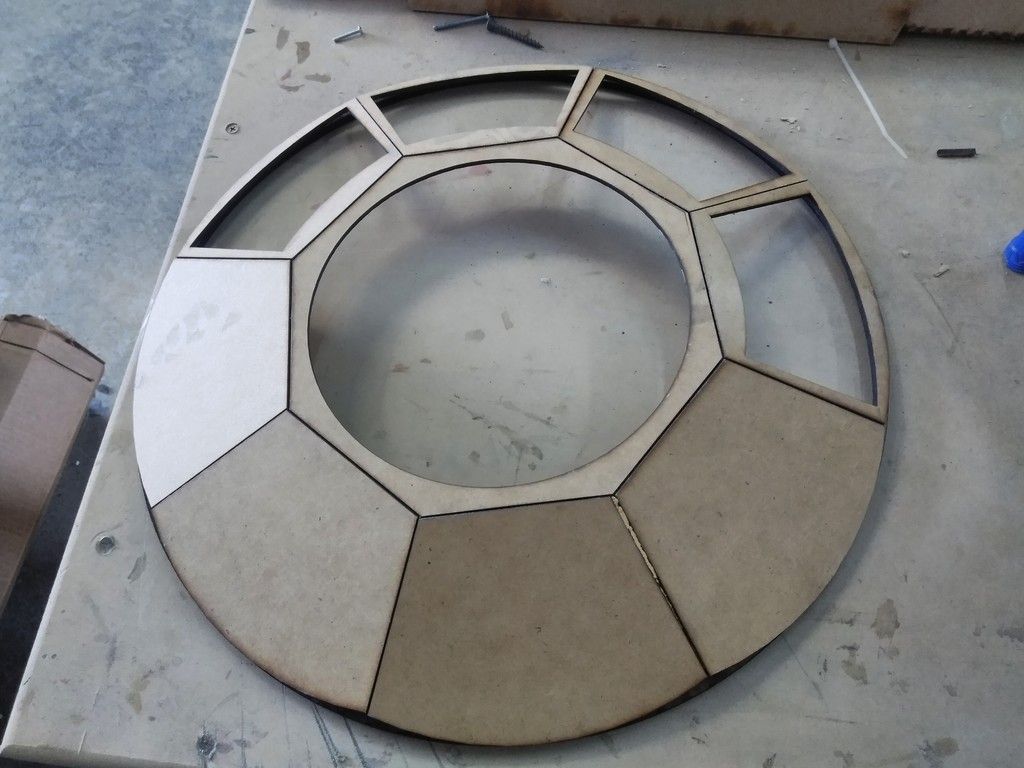
Adhere a few parts together like this
Finish it off like this
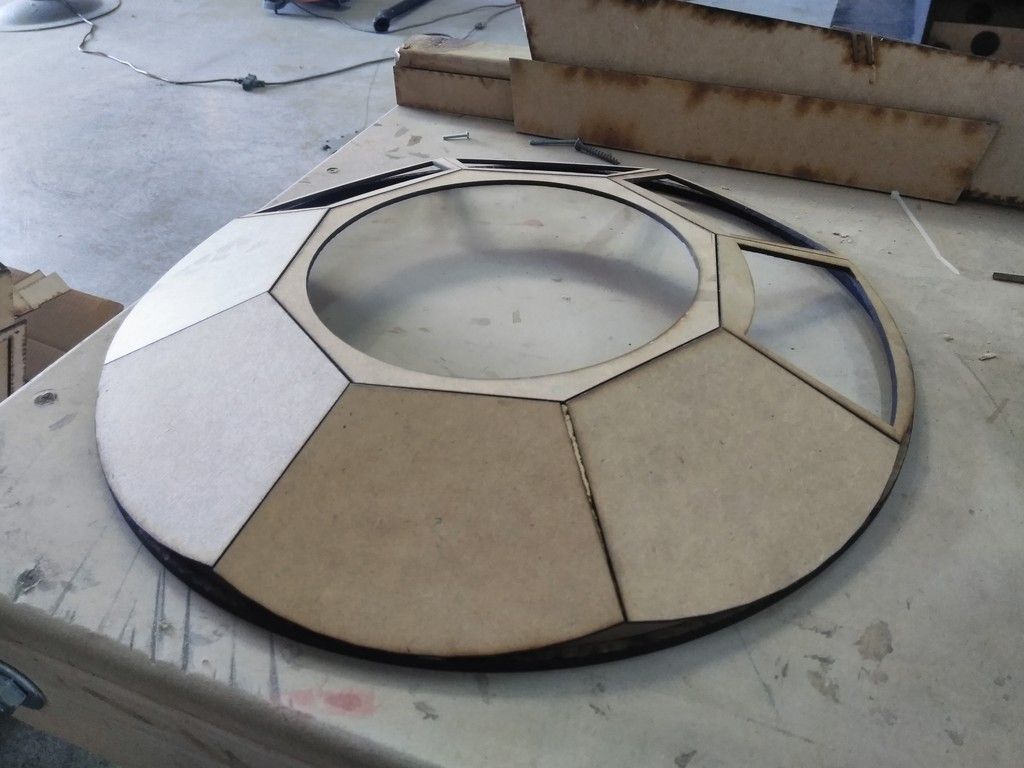
Add some filler to the inside
I think that's a window!
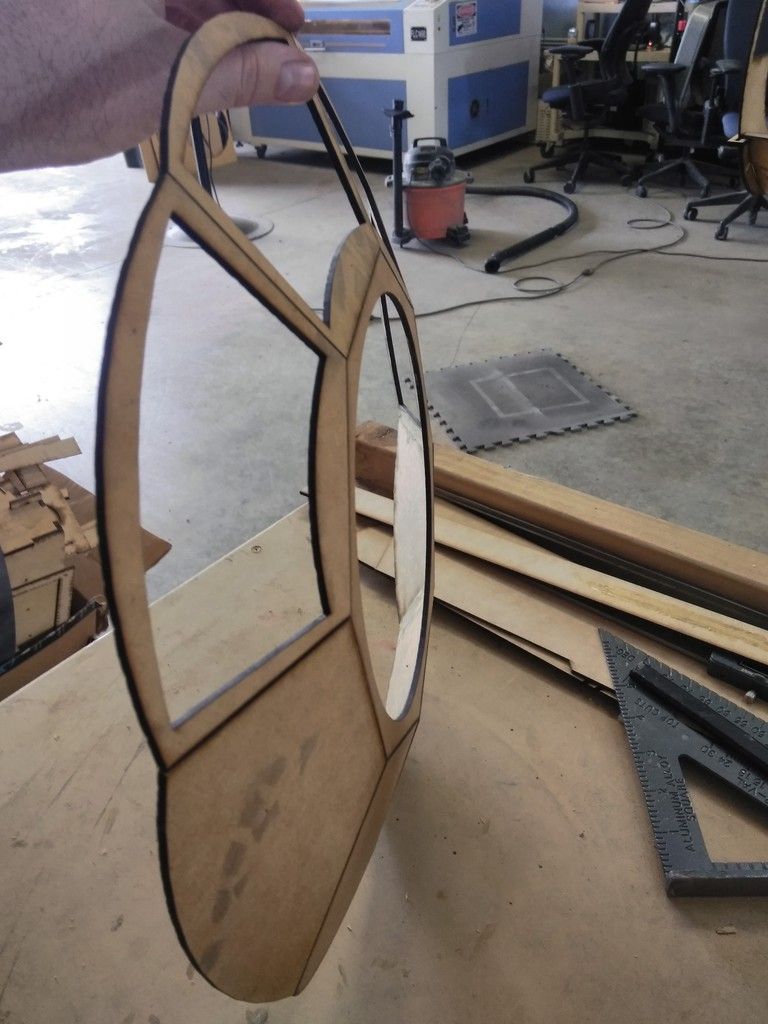
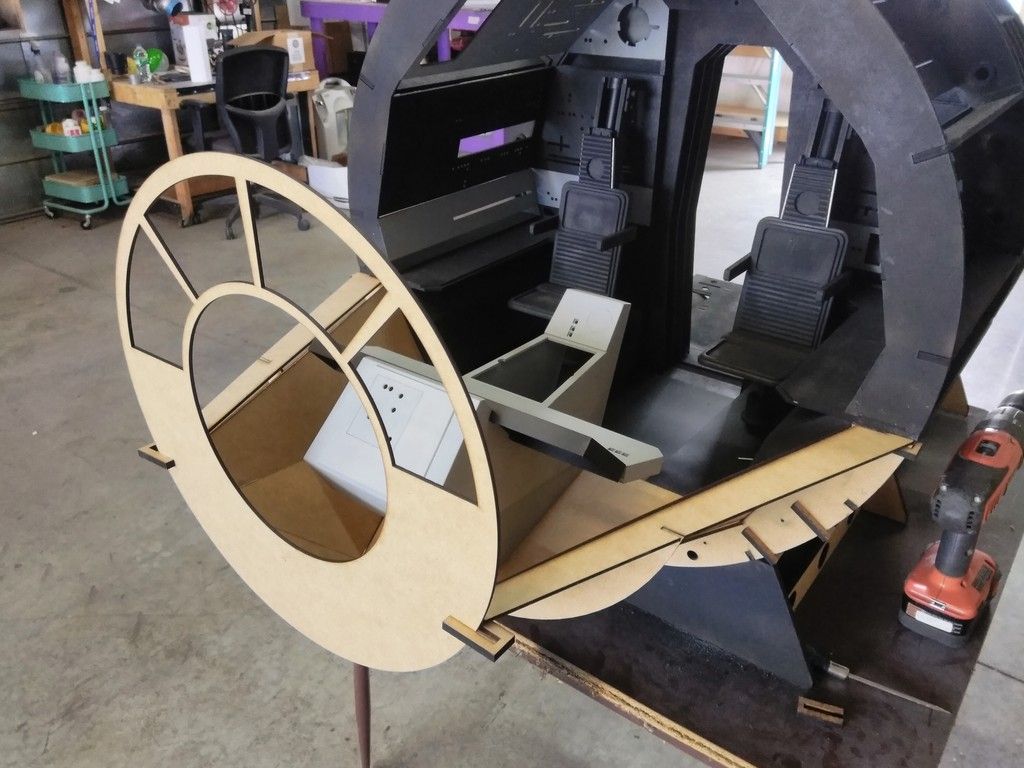
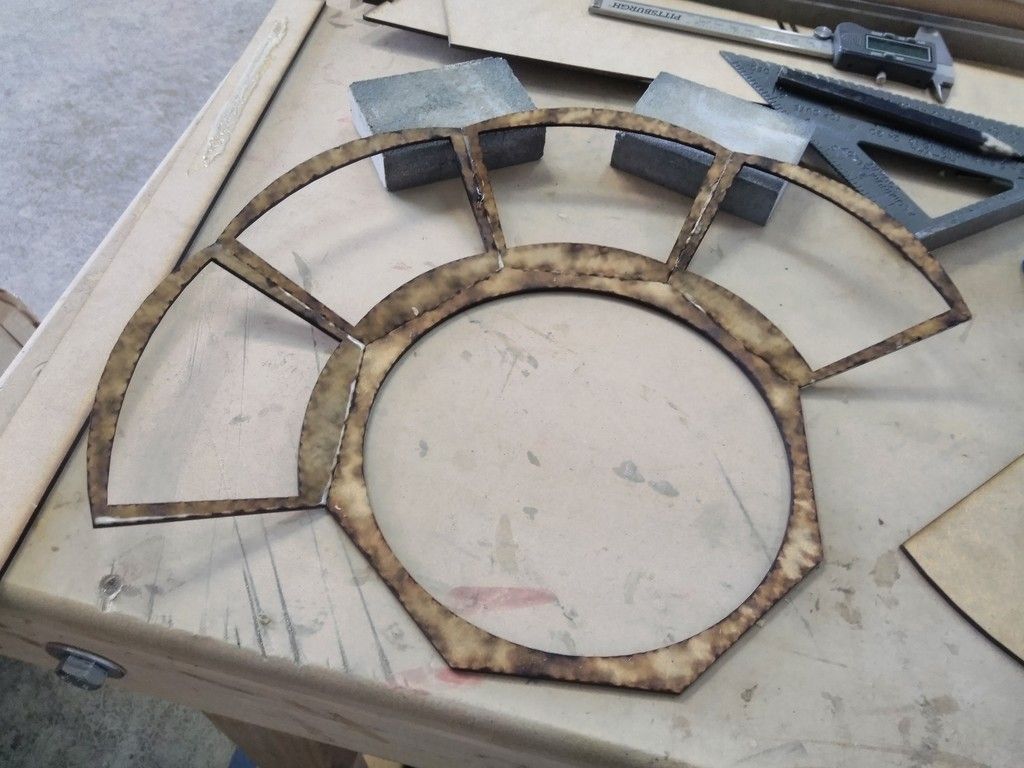
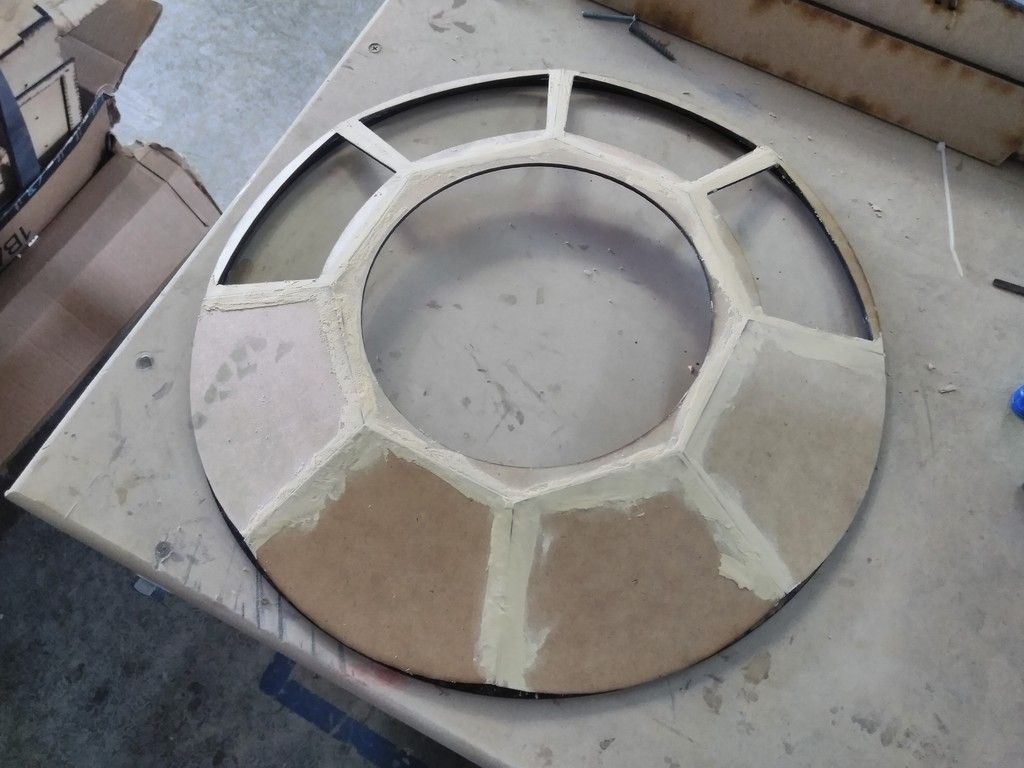
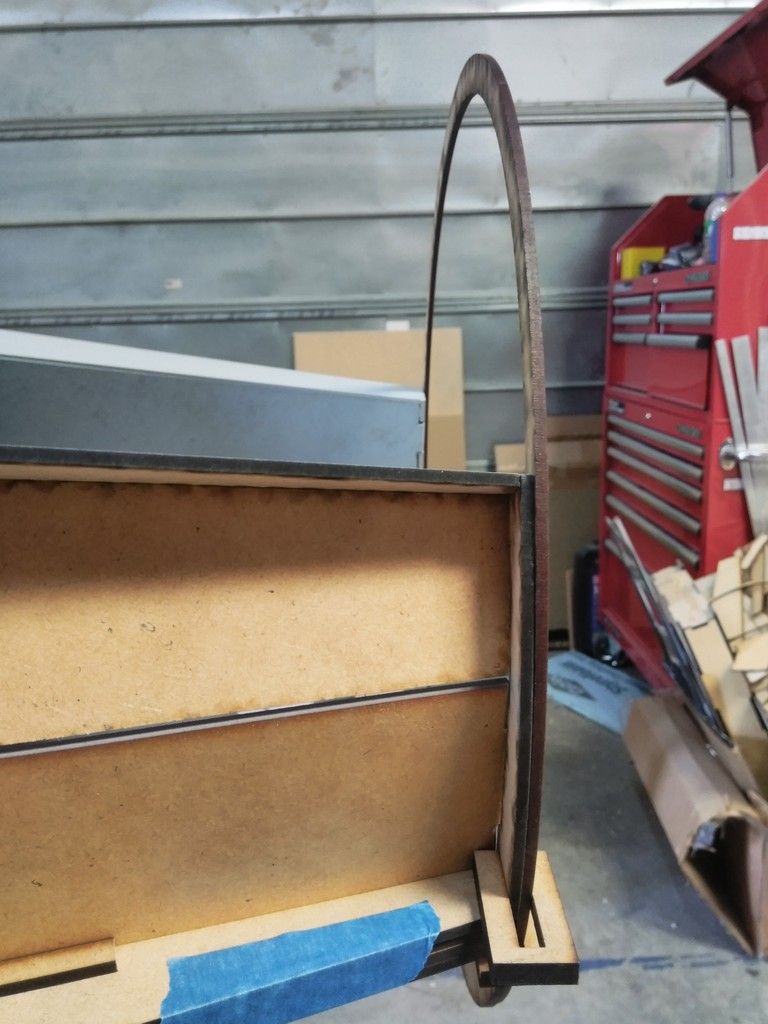
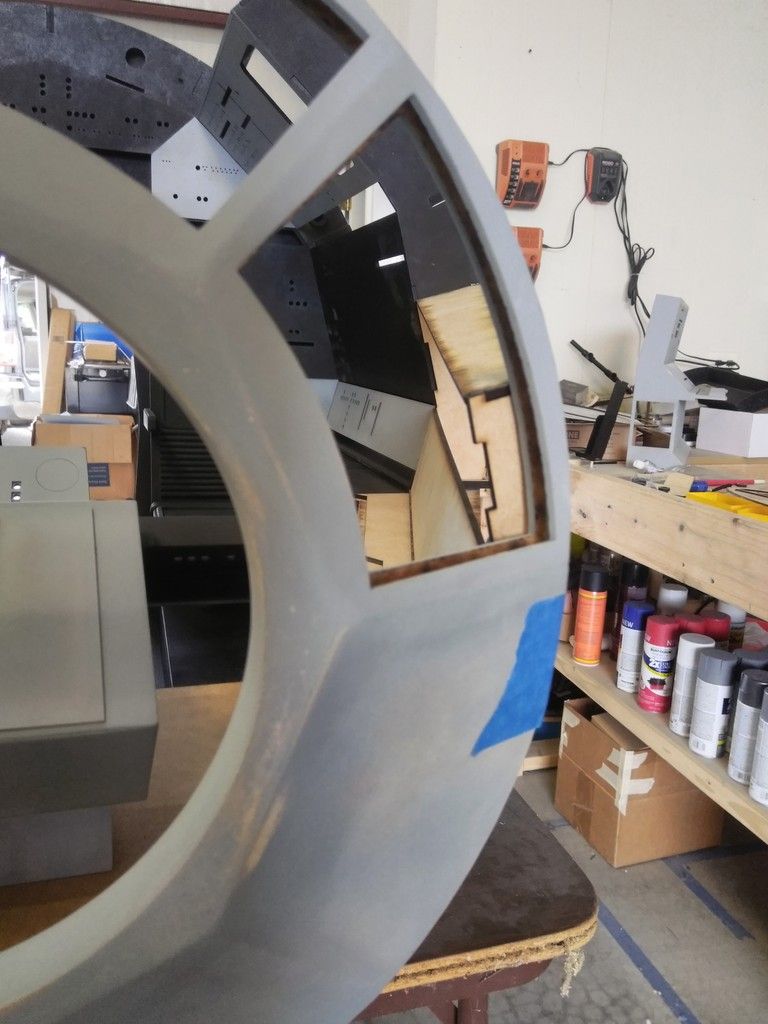
I then laser cut the outer ring and adhered the parts together for rigidity
So cool looking!
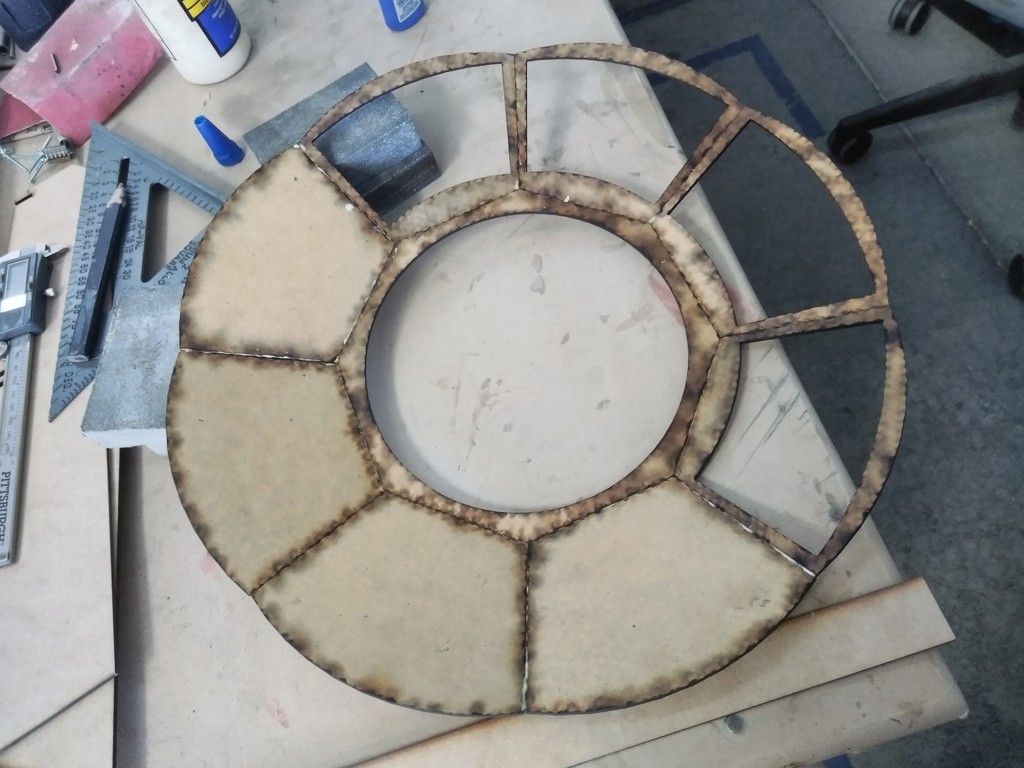
More filler... of course
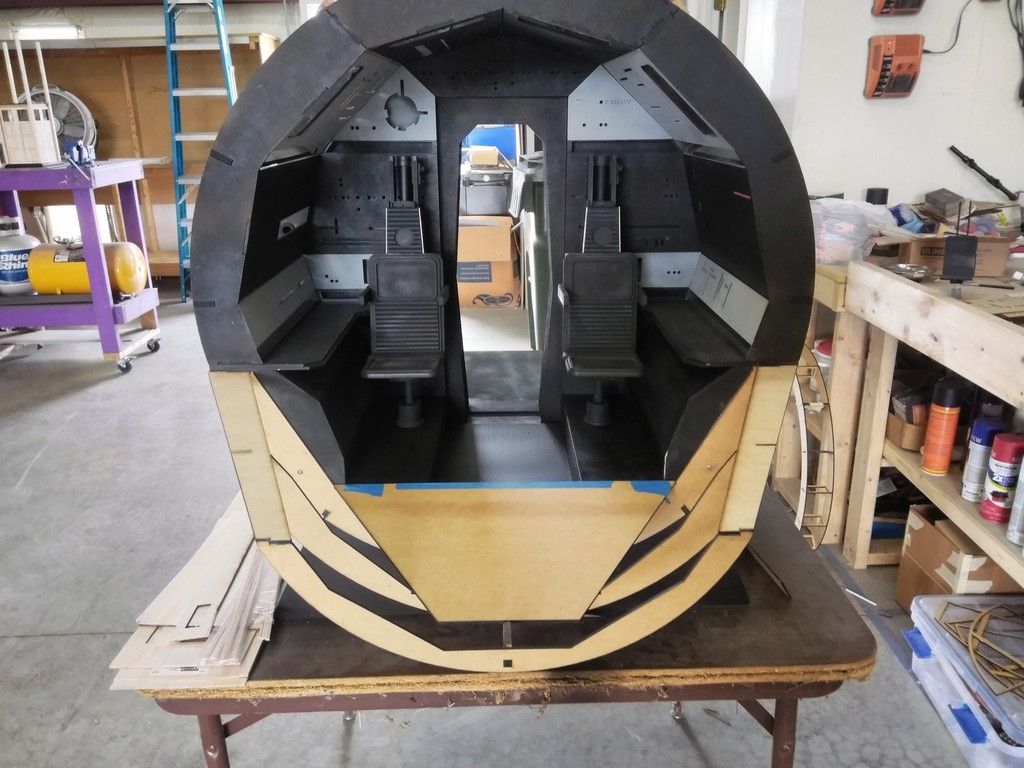
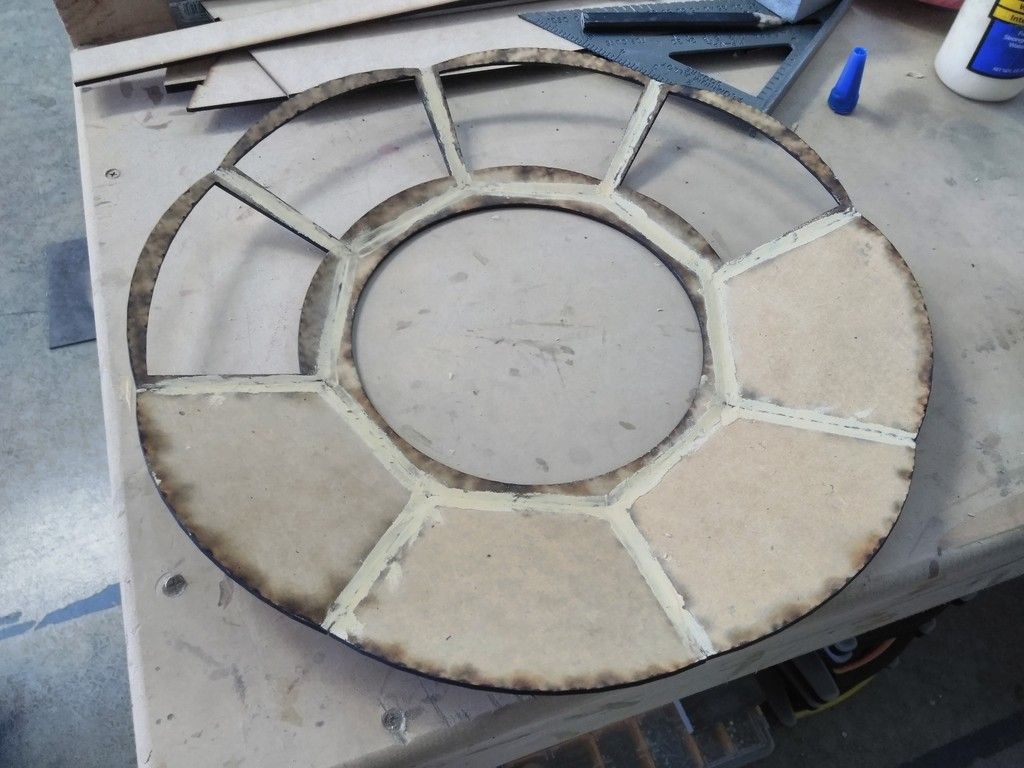
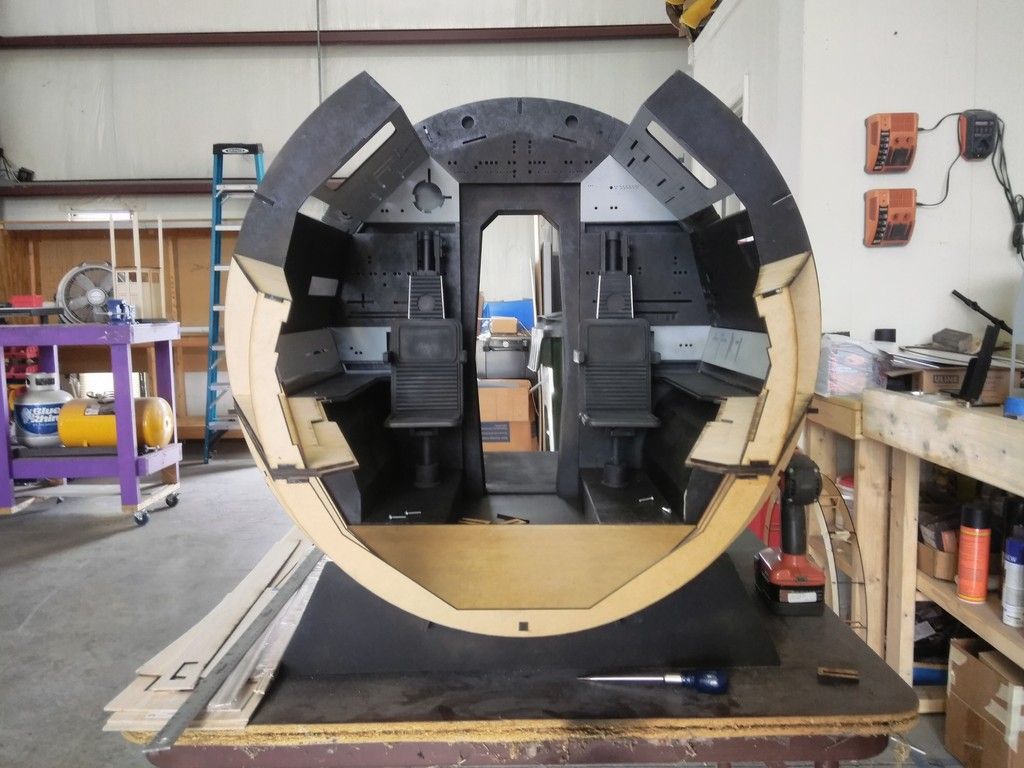
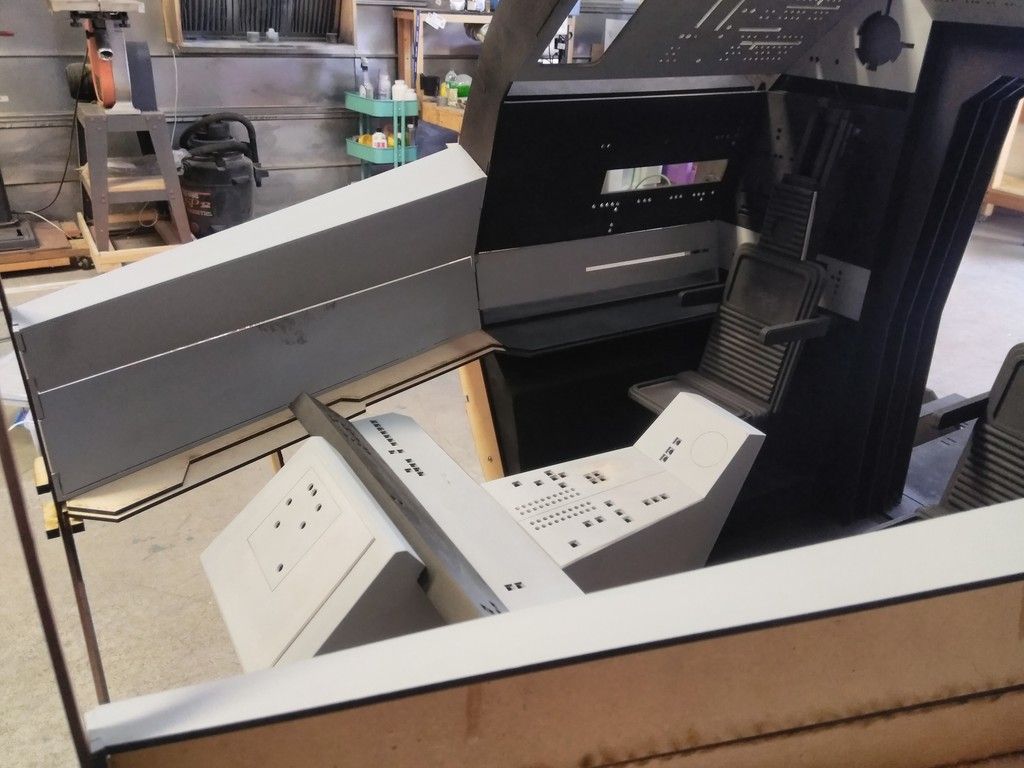
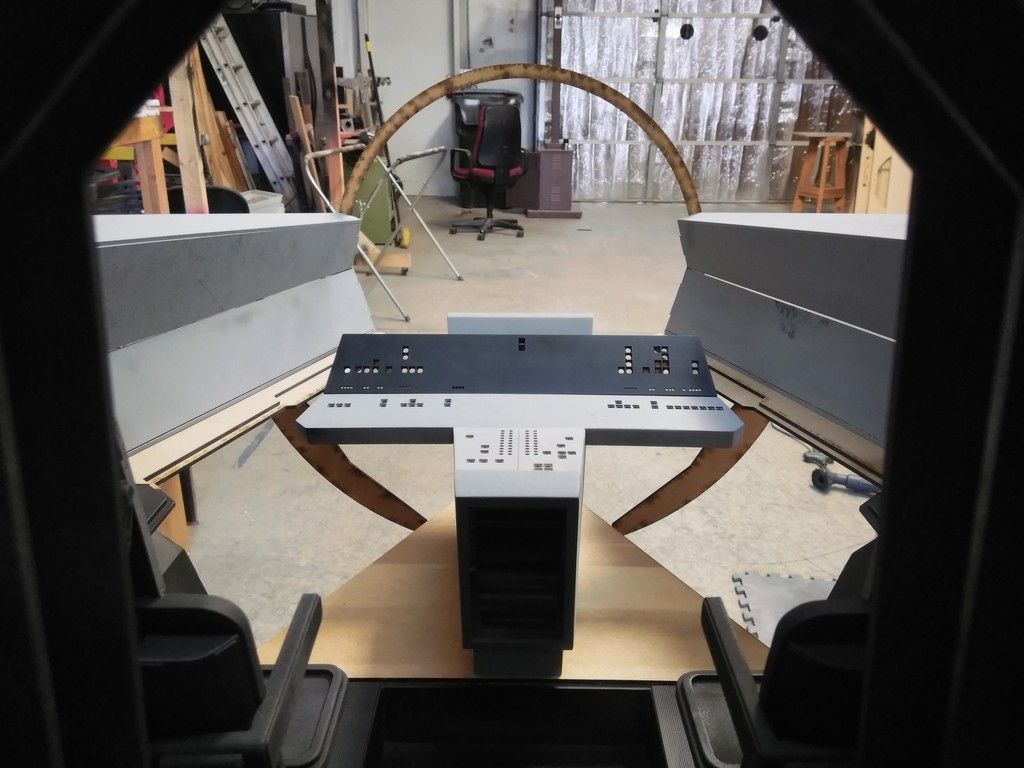
And this... a window, a console, a door and a Nav Computer, is...
Where we are!
Stay Tuned for more!
I'm LONG overdue for that "End of the Weekend" Update! Unfortunately, the laser cutter is STILL acting up. We're not sure if its weather related or perhaps water/cooling (which coincides with the weather. But the hotter it is, the less she works. I was having some serious issues over the last few days. We'll figure it out. Anywho...
I hope you enjoy the update!
I really wanted to get to further along with the 1/6th Nav Chair but I can't find a few plastic pieces I ordered so... I only worked the base
The post looks really dinky. It's not exactly too scale but it does look neat!
I FINALLY wrestled the large "corrugated" floor mats, which had warped from the heat of the laser cutter, into shape and got them adhered in place
After that I adhered the side greeblies and headrest to the nav chairs
I figure a good cleaning and one more shot of black before a layer of satin clear to seal everything in place
You would be amazed how many little creatures have made their home inside the cockpit
It's so weird looking knowing this is 1/4 scale
I then worked on the center console
I love filler...
Most of the time...
Getting there
This would make a cool kit!
Painted the instrument panel interiors black - I might add reflective tape to help spread out the illumination when back lit
I resized the .25" tiles to fit snug
You guys/gals HAVE to see this backlit!
Note the size difference
Another part of the console getting some attention
Laser cut acrylic parts
Primer - still a few more bits to add
Speaking of back lighting...
It has the exact look and feel of the original 1" tiles
My Fav
I then worked on the Nav Computer
Note all the tabs to keep all the panels in place
Filler - gotta smooth out the tab lines
Shelf detail
When I first placed the nav chair next to the computer I thought "... OH NO! The scale is wrong..." Turns out the chair looks rather tiny next to the computer
Primer!
UGH... I tried to use the least amount of tabs as possible for this exact reason!
Shelf details
More shelf details
The shelf is really deep... but the measurements are accurate!
The down side to NOT having tabs are having to create support brackets to keep panels from drooping
Tape helps too
Underside of the shelf housing
I think this is round 3 or 4 of primer
Shelf dry fit in place
UGH... dang tabs
OH LOOK! Filler
Shelf dry fit in place. It's not as far out as it needs to be
End cap details now in place
More filler... more primer...
I laser cut a 1/16th sheet of acrylic, adhered to the top and added filler. This SHOULD help with the Tabs vs Filler issue I'm having
More sanding and filler
Getting close! But still need a few more panel faces cut and adhered
UGH
And more filler
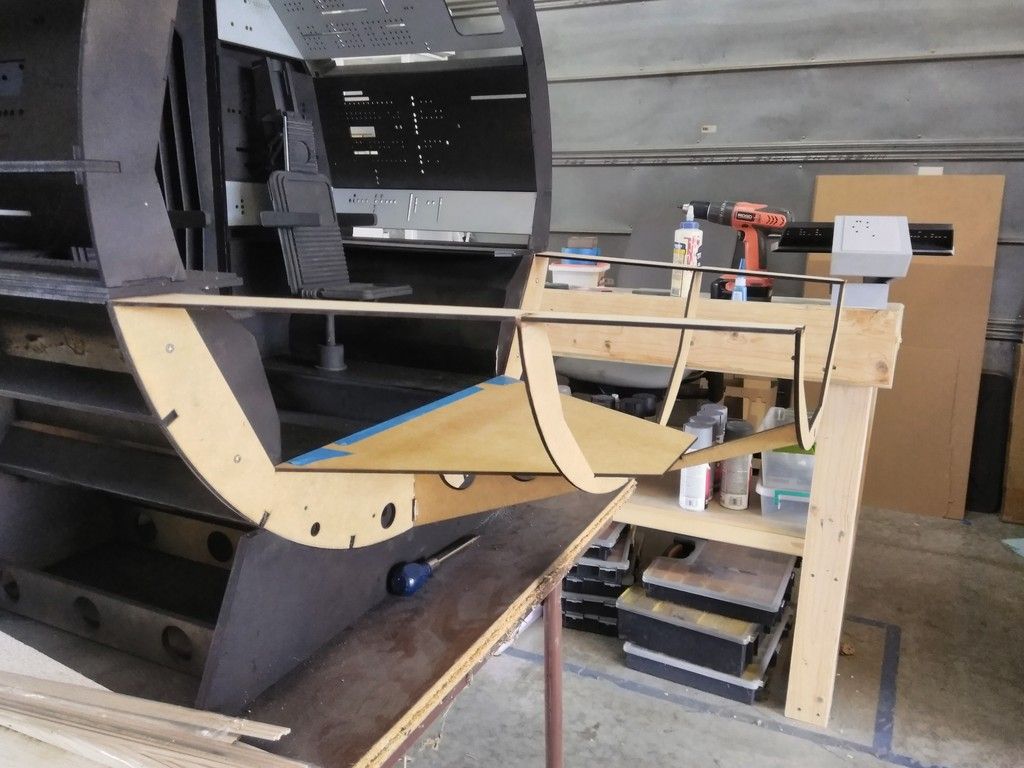
Now on to the highlight of the build... So Far! Opera Scot worked like mad to get these nose parts to align to the 28". Check it out!
Console platform
A nose takes shape!
Opera Scot added the Volvo panels to the top - I wound up having to remove these parts of the nose in order to align the base structure
We DEF ran into some issues along the way. It can't be smooth sailing all the time - the shelves didn't align
I might remove the shelves from the main body and redo. I'm just not sure how much damage/chaos (if any) I'll create
After mod'ing the frame to remove the Volvo panels... I marched forward
Basic frame
So far so good...
The lower console base might need to be raised just a bit higher in order to clear the shelves
I added some extra support to the underside
Better - not much sag
Temp added the floor panels - most of these have to be recut and/or sanded/mod'd in order to fit perfectly
But it looks cool!
They will also get the "corrugated" mat look
Looking up from the underside
I found some scrap MDF and cut a temp window - wanted to see how bad the nose cone looked with the 28" diam
I think it works!
The main window also pokes forward a little bit so I dont think it's going to be that bad?
I think its going to work!
I then laser cut these oddly shaped pieces - laser cutter worked today but I had to cut the speeds in HALF to what they were prior to alignment
I take this pile of goodness and...
Adhere a few parts together like this
Finish it off like this
Add some filler to the inside
I think that's a window!
I then laser cut the outer ring and adhered the parts together for rigidity
So cool looking!
More filler... of course
And this... a window, a console, a door and a Nav Computer, is...
Where we are!
Stay Tuned for more!
Last edited:
As always, beautiful work. Sorry you're still struggling with the laser cutter.
Katuna
Member
Gee, look how easy the nose was in 1/4 scale. Don't know why you have such a hard time in 1:1. Lol!
I never realized how little footwell room there is in there until seeing this layout. That must be real comfy on long trips. Like driving a T-Bucket through space.
So the inevitable question, is there a 1/4 scale Falcon in the future? Maybe you touched on that and I missed it. I would definitely fill up a two car garage! Probably more.
Keep up the incredible work!
Wow...you're a busy bee Sofa! I didn't realize the size of that cockpit until I saw a regular chair near by:eek...I wouldn't mind that size in my house:thumbsup
Hey J,
Thanks! Spent more time in front of the PC than actual fabrication but its all forward progress. I've been meaning to get pics with a regular can of soda next to everything for scale.
I am considering a kit of the various parts but I have no idea what the demand, if any, would be.
- - - Updated - - -
Looking good sofa! Gonna have to stop by again and take a look.
Thanks, C! Stop by anytime!
As always, beautiful work. Sorry you're still struggling with the laser cutter.
Thanks, SB! The nose was a real struggle. I still have to mod the shelves to fit but we'll get there.
The laser cutter... UGH... We're pretty sure it's heat related. The shop can reach well over 100 degrees during those HOT Alabama summers. I have to limit my cutting to early in the mornings only.
Gee, look how easy the nose was in 1/4 scale. Don't know why you have such a hard time in 1:1. Lol!
I never realized how little footwell room there is in there until seeing this layout. That must be real comfy on long trips. Like driving a T-Bucket through space.
So the inevitable question, is there a 1/4 scale Falcon in the future? Maybe you touched on that and I missed it. I would definitely fill up a two car garage! Probably more.
Keep up the incredible work!
I know, right?! What the heck!
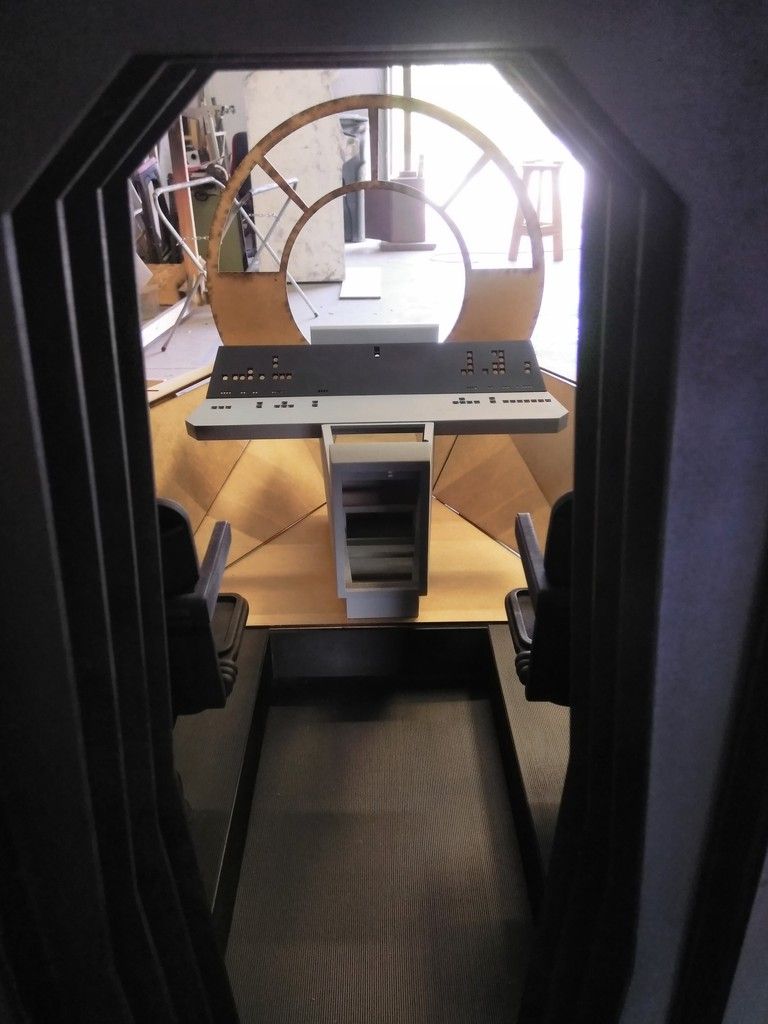
The foot well area is very tight. You're not sitting straight forward, you actually have to turn the chair toward the center to get the most leg room. And even then, you're legs are sometimes crossed.
Is there 1/4 scale Falcon in the future? I would do it if I had the room. I'm sure I could knock it out MUCH faster than a full scale version. It would be approx 20ft wide by 28.5ft long. It would be fun to build. Should DEF be a group effort!
Lt Washburn
Sr Member
Is the footwell based on reference, or is it an interpretation?
IzzyMel
Sr Member
I think it’s based on the actual shape of the nose. In ANH I think they had an opening for the actors legs to provide them some space. I could be wrong
- - - Updated - - -
I think it’s based on the actual shape of the nose. In ANH I think they had an opening for the actors legs to provide them some space. I could be wrong
- - - Updated - - -
I think it’s based on the actual shape of the nose. In ANH I think they had an opening for the actors legs to provide them some space. I could be wrong
Hi Gang,
Time for the "End of the Weekend Update"!
Got a little sidetracked with helping a friend work on his Alien EV Suit and had a few personal things to take care of. Also, the weather was a bit hot on Sunday so didn't want to stress the laser cutter too much.
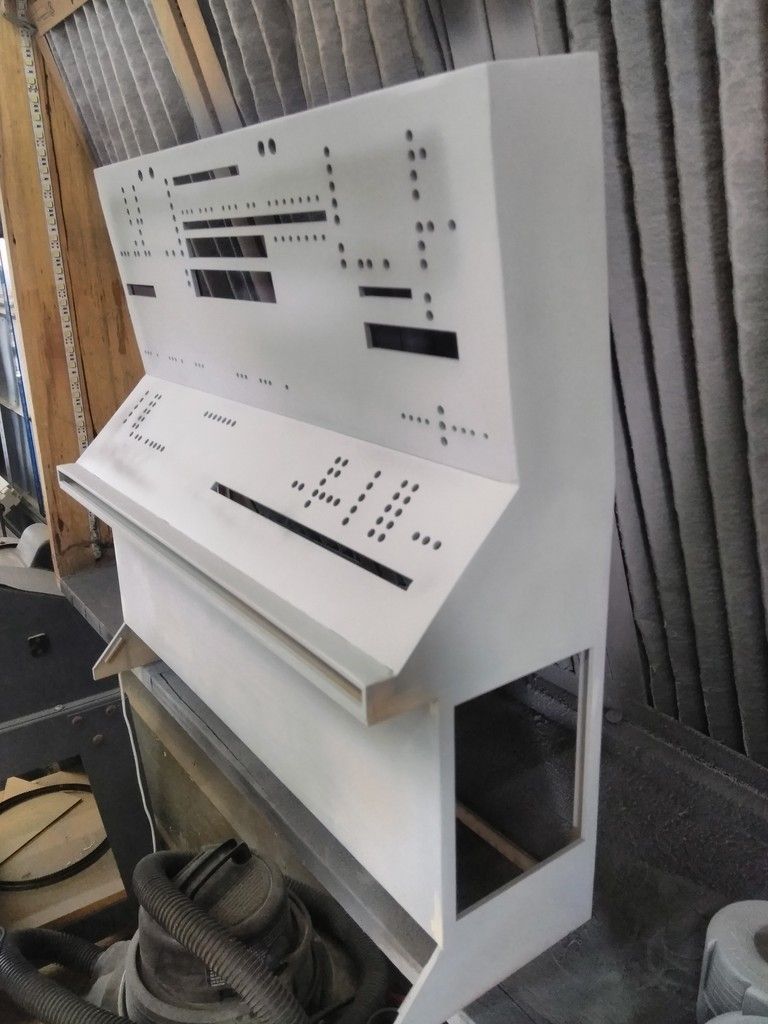
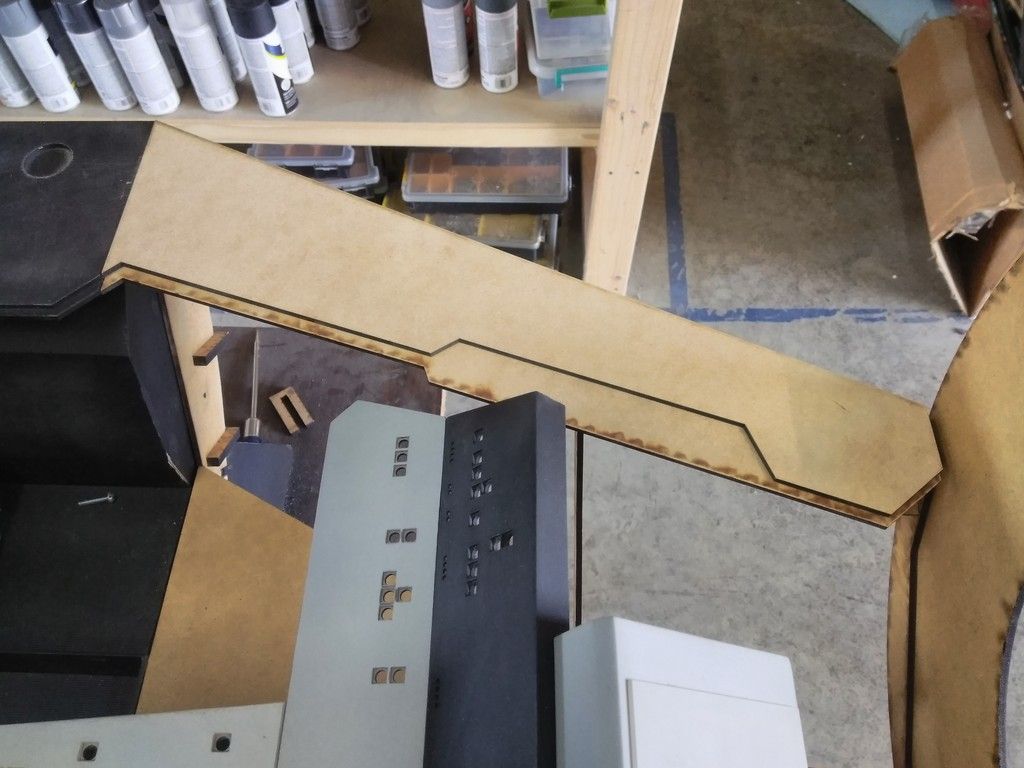
Anywho... FINALLY got the upper panel on the Nav Computer smooth out. Just need to finish adhering all the other panels, adding and filler and then we can think about illumination!
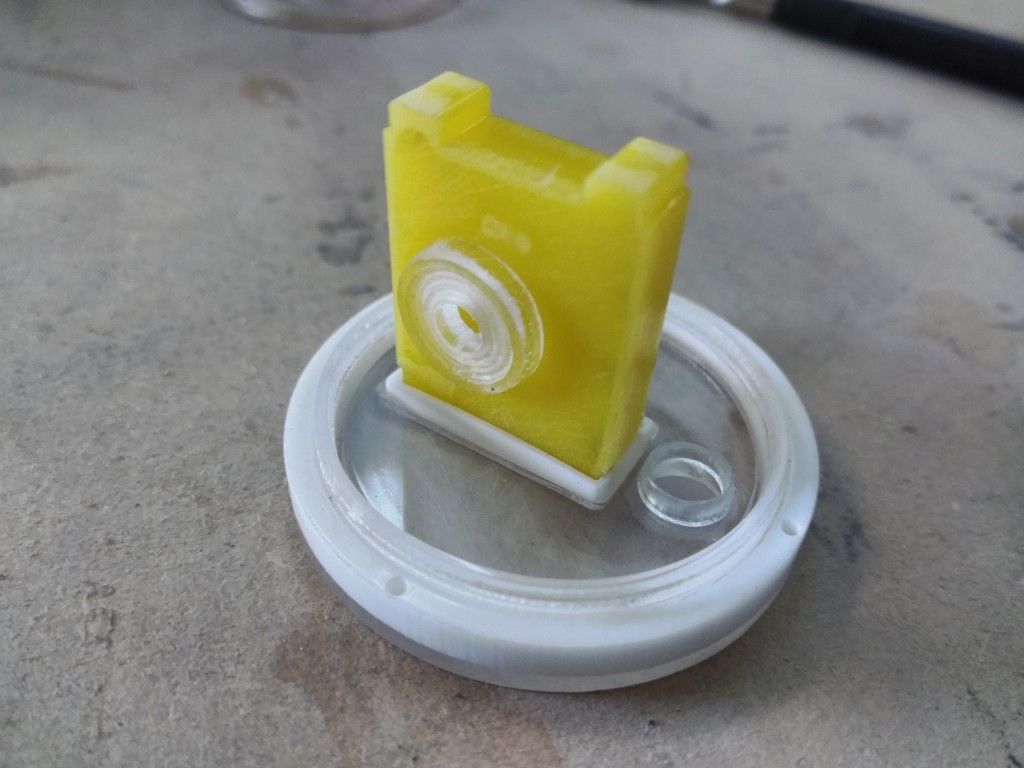
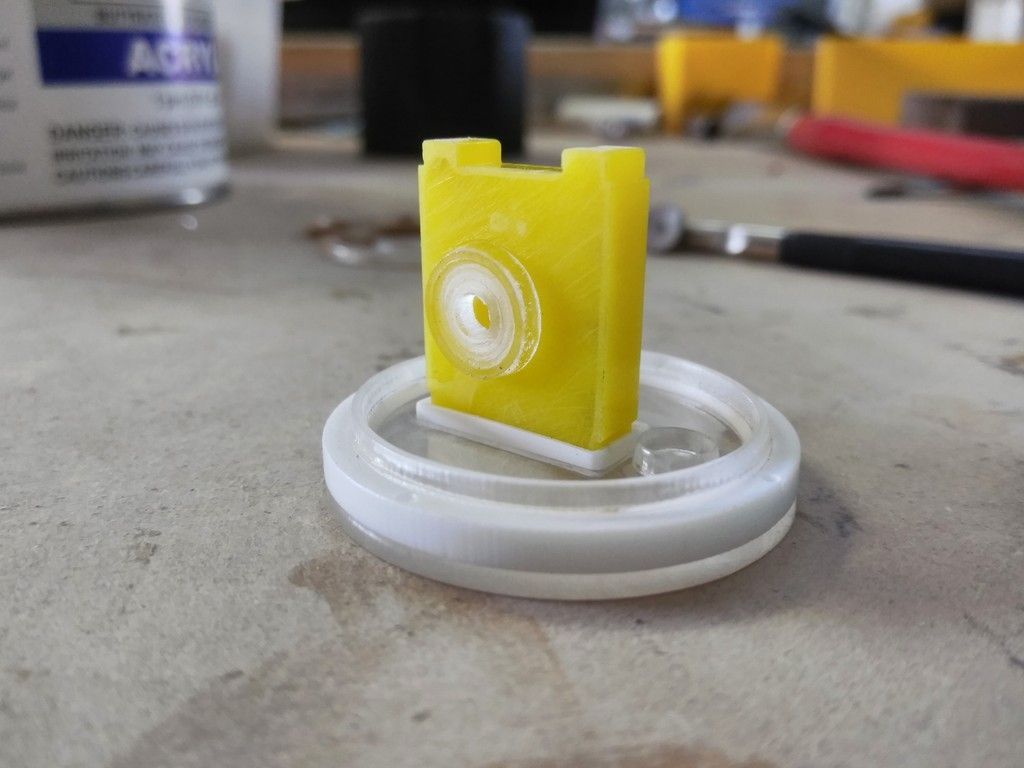
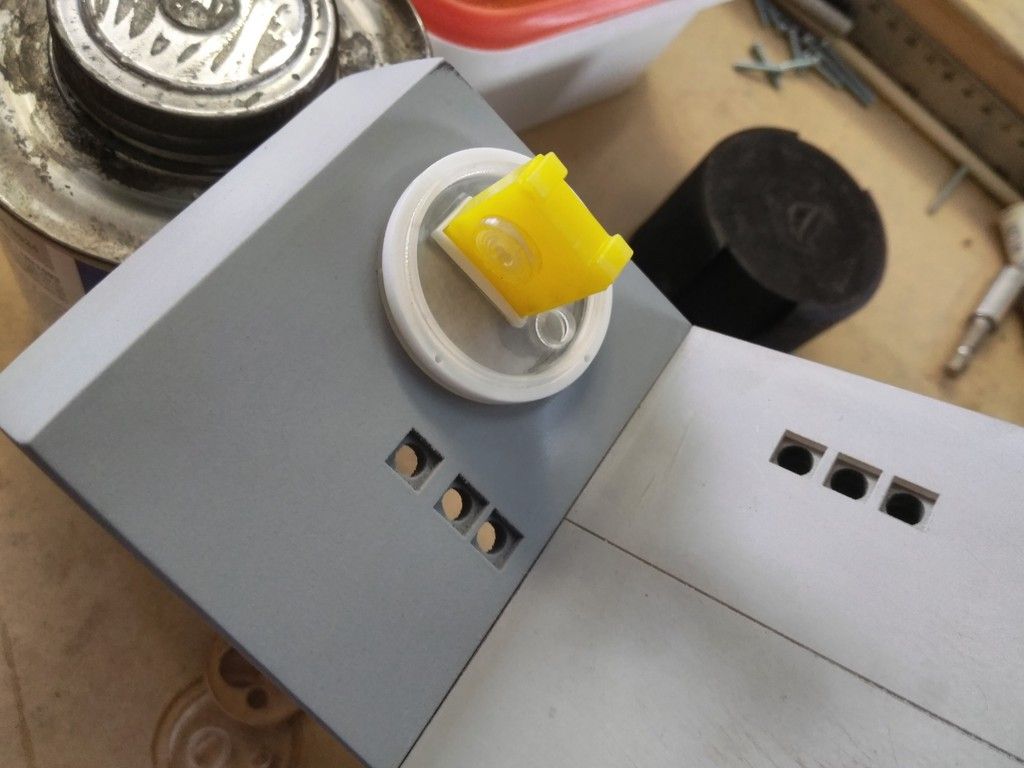
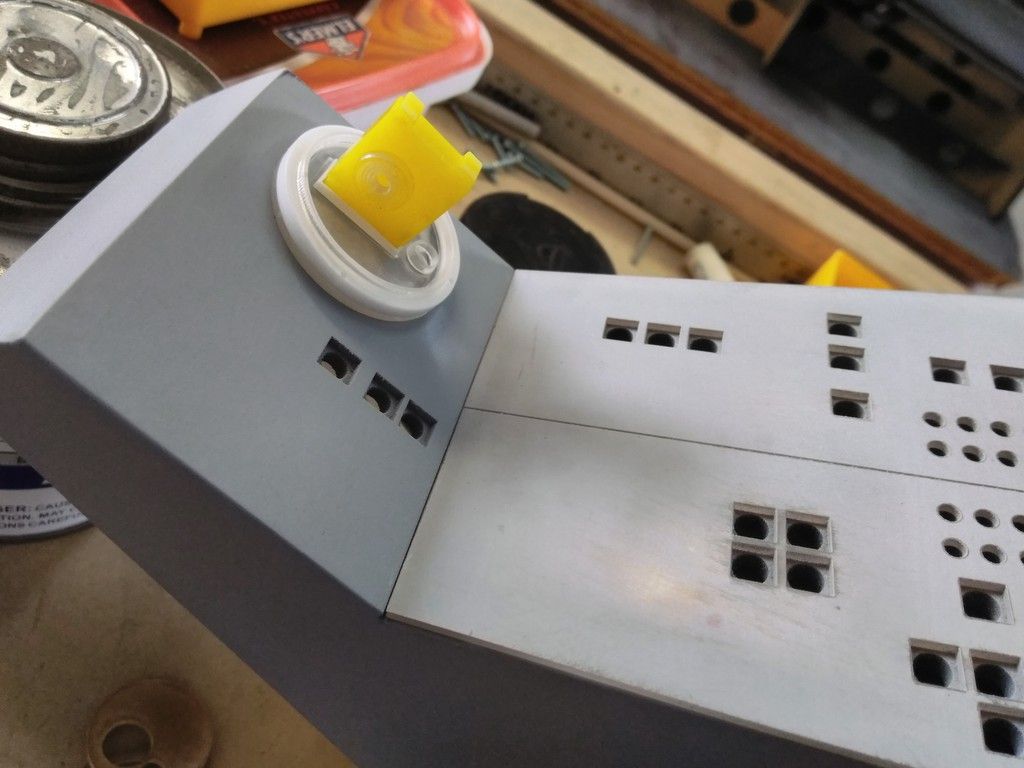
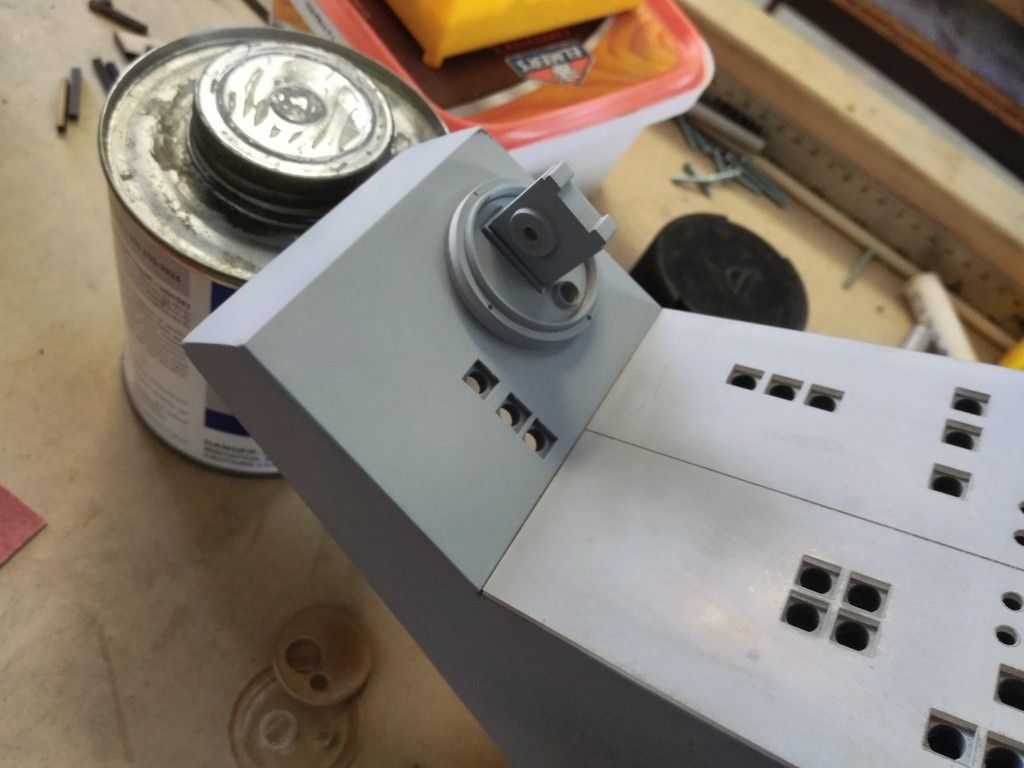
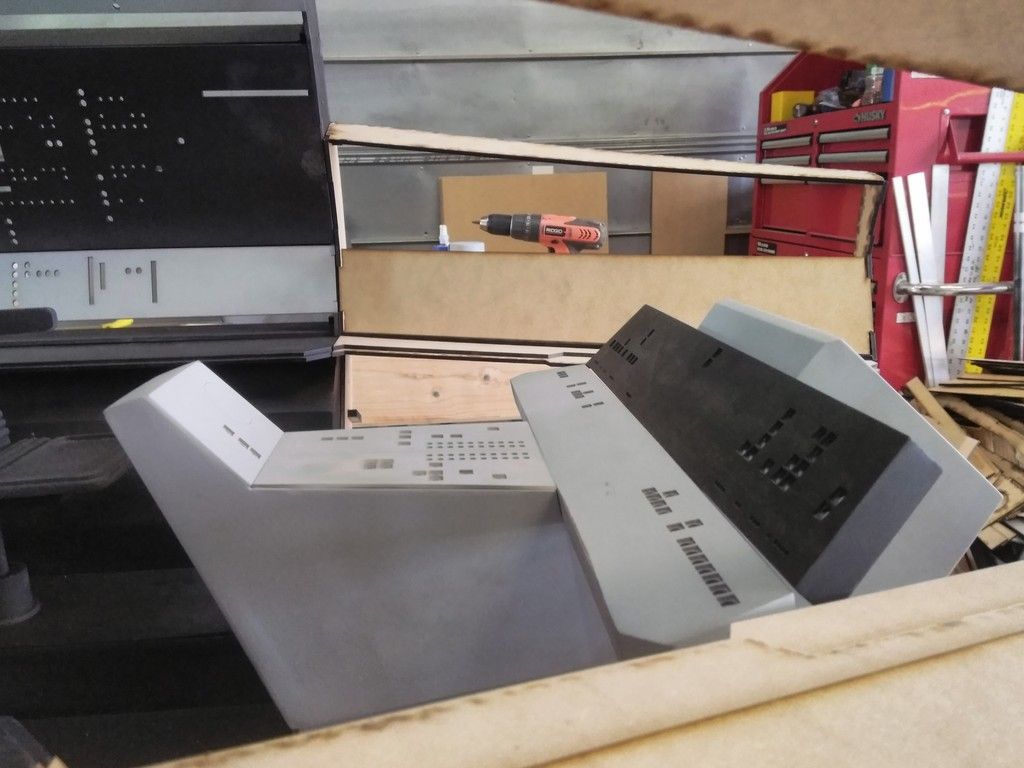
Izzy had printed this Matte Box a LONG while ago... Finally hit it with primer filler (although I'm suspecting this might be a 1/6th scale box?)
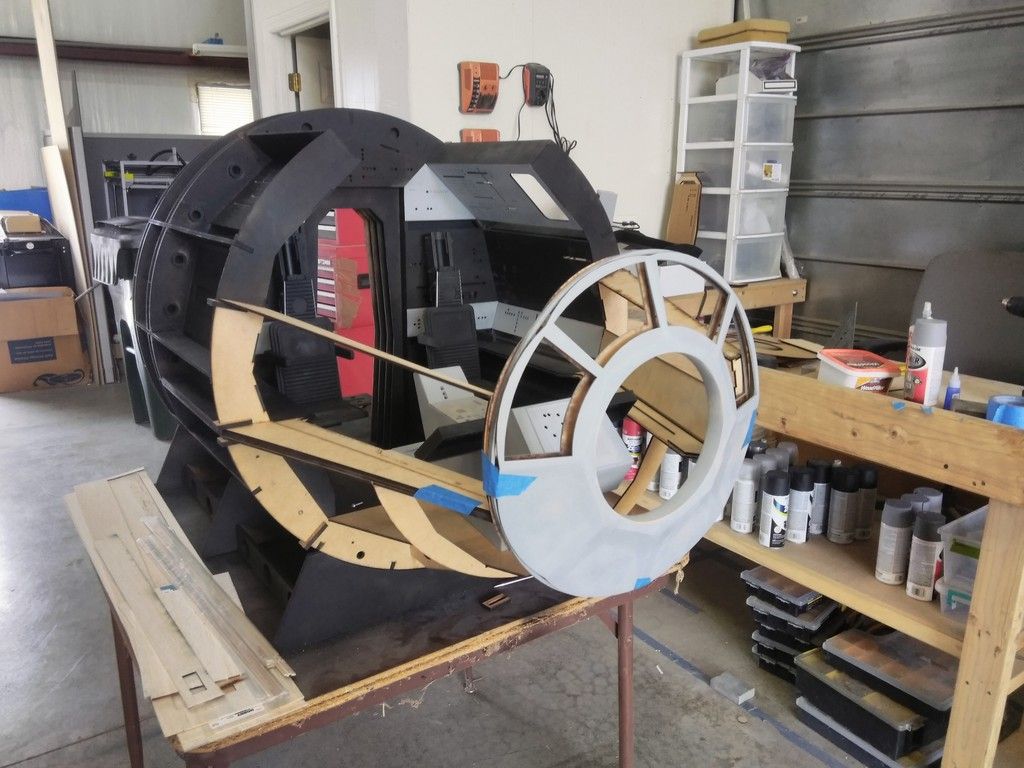
Got most of the nose and Volvo panels squared away! That went quick!
Wound up having to push the shelves back a little bit toward the outside to help make the console fit. It was either that or remove the body shelves - no idea what kind of damage that would have caused
Everything fits together so it should be ok

Chewie's side
Dang flys are everywhere!
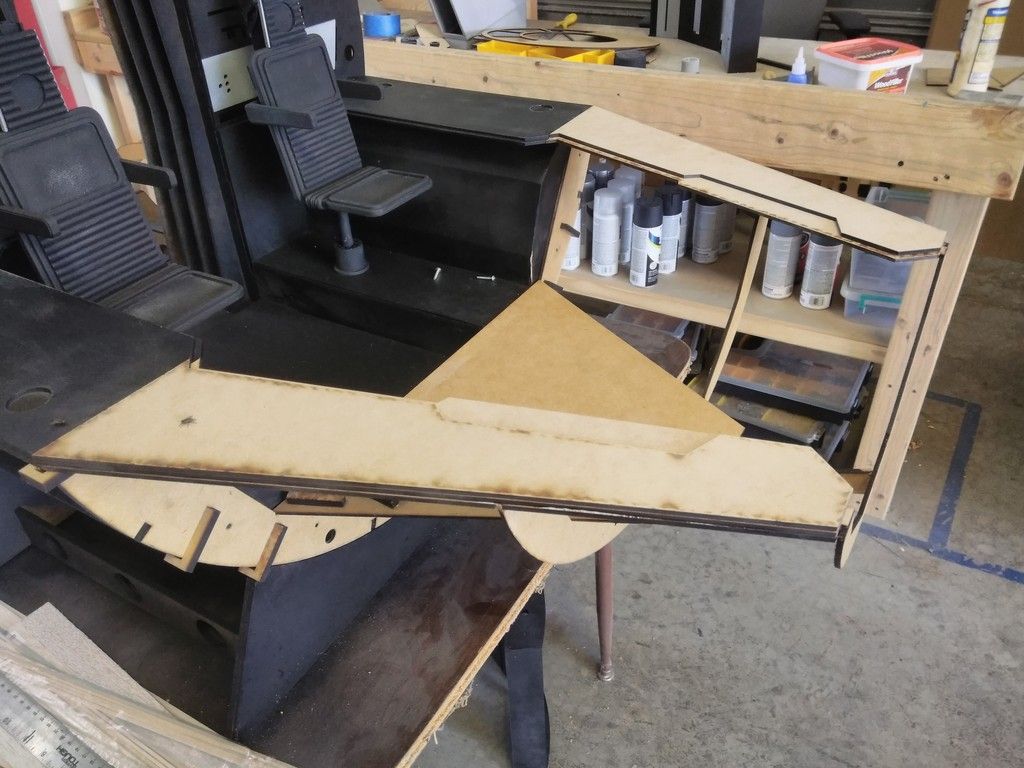
Volvo Panels! YEAH... I love these!
Even in this skeleton looking frame, the nose is already tilting downward and the shelves are no longer even with the main body - not sure how to fix?
Han's side

Adding some skin
The console will have to be raised approx .5 - .75" to clear the shelves
Volvo Panels skinned
These will be sanded then covered with a thin 1/16th acrylic panel to fill in the gaps and smooth out the edges
Primed
UGLY EDGES!
I'm not sure whether to permanently attach the Volvo panels to the nose? It might help with the tilt?
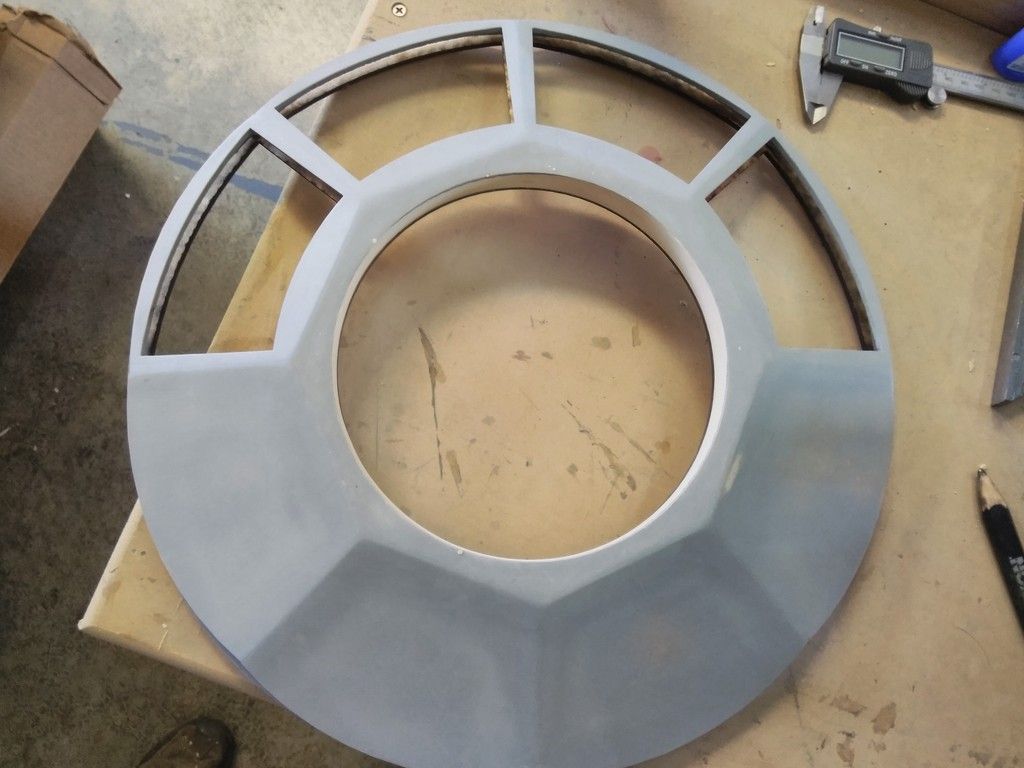
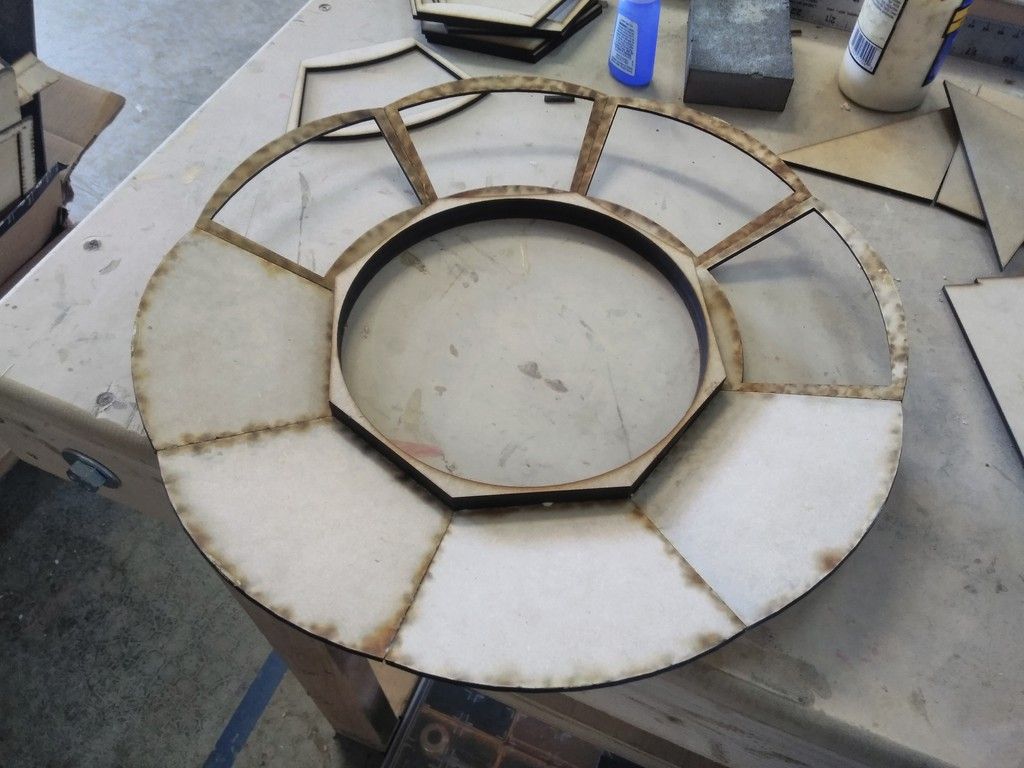
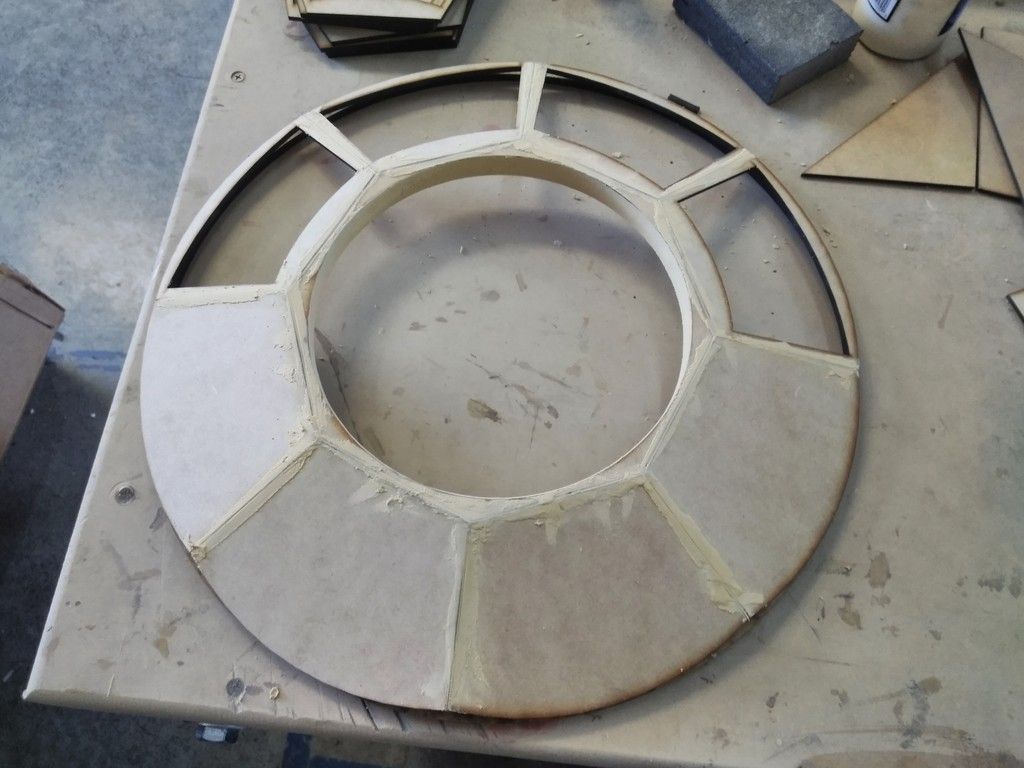
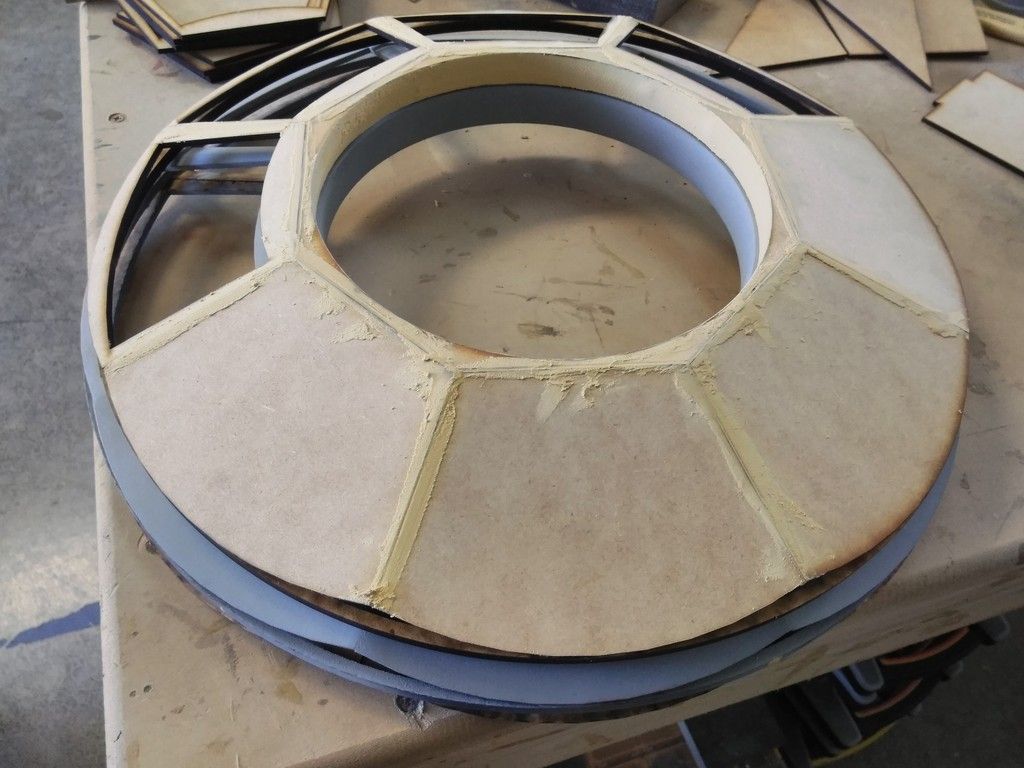
A new ring that will help guide the window
If you remember, I almost finished the window!

As you may be able to see... there is a fatal flaw with the window
Looks good from this direction
You can even see the Volvo panels popping out

See the flaw?
The window is too wide! I wont be able to align the window edges to the exterior skin.
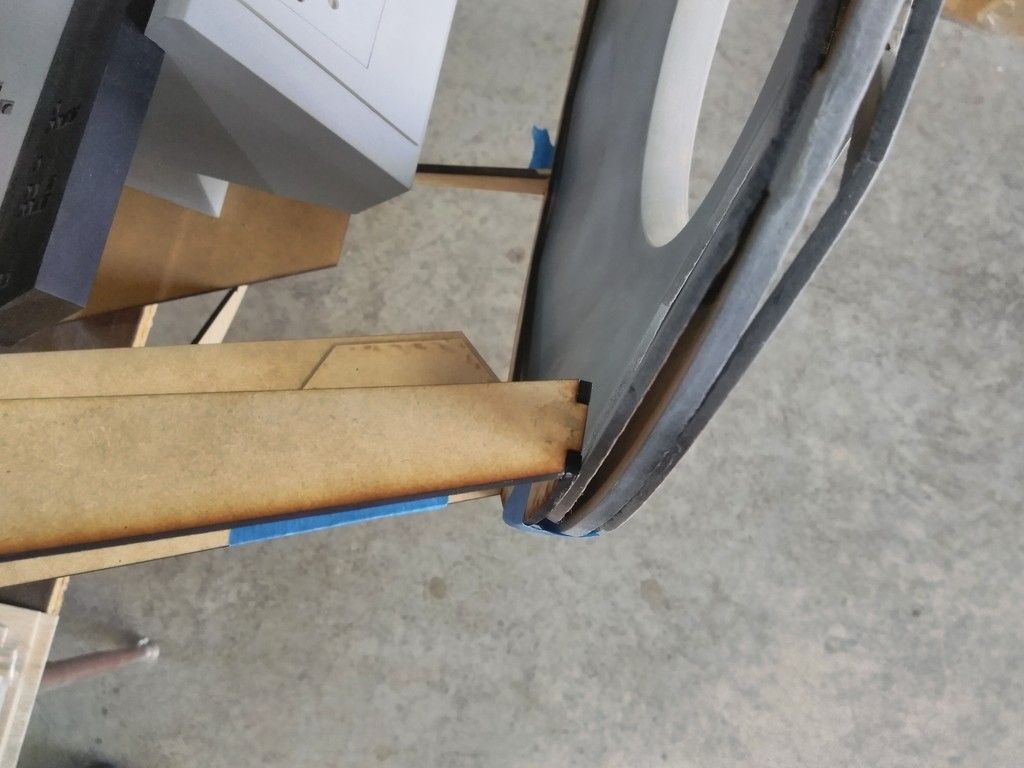
So... we have to rebuild!
Took the proper measurements, scaled the entire window down .8" to match the angle of the cone
Size comparo between the two
First layer of filler and primer done! Adding another layer of filler
I knocked the new window out in about 4 hours... and when it dried... it dried slightly off center! I think I can fix it... UGH
These areas will be covered with thin sheets of plastic
She is nice to look at!
And this...
Is where we are!
I think I'm going to stay with the 28" diam for now. Let's just see how it turns out.
More to Follow! Stay Tuned
Time for the "End of the Weekend Update"!
Got a little sidetracked with helping a friend work on his Alien EV Suit and had a few personal things to take care of. Also, the weather was a bit hot on Sunday so didn't want to stress the laser cutter too much.
Anywho... FINALLY got the upper panel on the Nav Computer smooth out. Just need to finish adhering all the other panels, adding and filler and then we can think about illumination!
Izzy had printed this Matte Box a LONG while ago... Finally hit it with primer filler (although I'm suspecting this might be a 1/6th scale box?)
Got most of the nose and Volvo panels squared away! That went quick!
Wound up having to push the shelves back a little bit toward the outside to help make the console fit. It was either that or remove the body shelves - no idea what kind of damage that would have caused
Everything fits together so it should be ok
Chewie's side
Dang flys are everywhere!
Volvo Panels! YEAH... I love these!
Even in this skeleton looking frame, the nose is already tilting downward and the shelves are no longer even with the main body - not sure how to fix?
Han's side
Adding some skin
The console will have to be raised approx .5 - .75" to clear the shelves
Volvo Panels skinned
These will be sanded then covered with a thin 1/16th acrylic panel to fill in the gaps and smooth out the edges
Primed
UGLY EDGES!
I'm not sure whether to permanently attach the Volvo panels to the nose? It might help with the tilt?
A new ring that will help guide the window
If you remember, I almost finished the window!
As you may be able to see... there is a fatal flaw with the window
Looks good from this direction
You can even see the Volvo panels popping out
See the flaw?
The window is too wide! I wont be able to align the window edges to the exterior skin.
So... we have to rebuild!
Took the proper measurements, scaled the entire window down .8" to match the angle of the cone
Size comparo between the two
First layer of filler and primer done! Adding another layer of filler
I knocked the new window out in about 4 hours... and when it dried... it dried slightly off center! I think I can fix it... UGH
These areas will be covered with thin sheets of plastic
She is nice to look at!
And this...
Is where we are!
I think I'm going to stay with the 28" diam for now. Let's just see how it turns out.
More to Follow! Stay Tuned
Last edited:
As always, a great update.
That droop is a killer -I'm assuming it occurs because the structure is nose-heavy. Maybe run an aluminum rod (or several) from under the cabin floor to under the floor in the nose to take some of the weight off the existing supports?
BTW, I know its's been said before, but it is really hard to remember this is not full scale. The pictures are gorgeous.
BigBigDave
Active Member
It's possible that adding the top part of the cockpit will solidify everything in the correct position, but if it doesn't:Even in this skeleton looking frame, the nose is already tilting downward and the shelves are no longer even with the main body - not sure how to fix?
Cables and turnbuckles!
Run a cable and turnbuckle inside each of the top two cockpit "overhead beams" connecting the main body of the cockpit to the window. Tighten as needed to pull up the window. Voila!
(Just like on a gate.)

Lt Washburn
Sr Member
I agree with the others that a compression bar at the bottom and/or a tension line at top will help. Also, making sure that the inner and outer skin have tight tolerances, will square everything up. It's like plywood over a framed wall, gives it strength against sheering. Prop it up with temporary supports so that all the parts go in with it aligned correctly.
As always, a great update.
That droop is a killer -I'm assuming it occurs because the structure is nose-heavy. Maybe run an aluminum rod (or several) from under the cabin floor to under the floor in the nose to take some of the weight off the existing supports?
BTW, I know its's been said before, but it is really hard to remember this is not full scale. The pictures are gorgeous.
Hey SB,
Thank you so much! I thought the exact same thing - running some sort of connector through the nose into the body to help pull the nose up. When the canopy is added I have to decide whether to simply rest the canopy on top of the nose (which will add more weight) or try to somehow connect the canopy beams to the nose and then same beams to the body helping pull everything together.
The other idea is to redo the nose using 1/4" MDF instead of the 1/8". I think adding that bulk will help keep everything in place.
It really is odd looking at the photos and realizing its only 1/4 scale.
- - - Updated - - -
NAV computer looks great!
What scale is this?
Thanks, S! Everything I'm working on right now is all 1/4 scale (minus the 1/6th scale nav chair)
- - - Updated - - -
It's possible that adding the top part of the cockpit will solidify everything in the correct position, but if it doesn't:
Cables and turnbuckles!
Run a cable and turnbuckle inside each of the top two cockpit "overhead beams" connecting the main body of the cockpit to the window. Tighten as needed to pull up the window. Voila!
(Just like on a gate.)View attachment 833842
Hey BBD,
That was my exact thought working through the beams! But we're dealing with such a small beam with very little but just enough weight to cause a slight droop. Its one of those things I really have to work through.
- - - Updated - - -
I agree with the others that a compression bar at the bottom and/or a tension line at top will help. Also, making sure that the inner and outer skin have tight tolerances, will square everything up. It's like plywood over a framed wall, gives it strength against sheering. Prop it up with temporary supports so that all the parts go in with it aligned correctly.
Hey LtW,
VERY GOOD POINT!!! When I skin the nose I have to make sure the shelves are aligned and flat and then HOPE I'm able to get a tight wrap around the frame. My first thought is using 1/16th or 1/8th inch balsa wood to wrap around the nose and body and then cover with sheet styrene. It will DEF be interesting.
JediMichael
Master Member
This looks like 2 cats would sit perfectly, or should I say purrrfectly in those 2 seats. haha
This looks like 2 cats would sit perfectly, or should I say purrrfectly in those 2 seats. haha
I see what you did there!
Similar threads
- Replies
- 2
- Views
- 853
- Replies
- 6
- Views
- 597
- Replies
- 8
- Views
- 548
- Replies
- 4
- Views
- 739
- Replies
- 4
- Views
- 2,301