You are using an out of date browser. It may not display this or other websites correctly.
You should upgrade or use an alternative browser.
You should upgrade or use an alternative browser.
A New Hope blast shield helmet .
- Thread starter CatfoodRob
- Start date
According to starwarshelmets.com, the blast shield is a custom made vacuum formed ABS piece. Go to http://starwarshelmets.com/original_rebel_pilot_helmets.htm and do a find on page for "blast shield". it's about half way down the page. It would be pretty easy to make. Make a MDF plug and vacuum form it.
To be honest I think that was just a guess by Jez , although he may be right , you see the U.K. Was several years behind the U.S.A in the bmx thing , bmx bikes didn't really take off in the U.K. Until 1979/80 ish .... so where did the props dept get bmx visors from ? But again , they got bmx chest protectors for the pauldrons, so maybe they had access to a more specialist motorcross shop ????
Unless someone identifies the blast shield exactly , we'll never know for sure .


BipeFlyer
Well-Known Member
To be honest I think that was just a guess by Jez , although he may be right , you see the U.K. Was several years behind the U.S.A in the bmx thing , bmx bikes didn't really take off in the U.K. Until 1979/80 ish .... so where did the props dept get bmx visors from ? But again , they got bmx chest protectors for the pauldrons, so maybe they had access to a more specialist motorcross shop ????
Unless someone identifies the blast shield exactly , we'll never know for sure .
You could find out. Here's a link to Andrew Ainsworth describing how the original vacuum forming was done. Apparently he made the helmet too. Send him an email or give him a call. It's probably not even long distance for you.
")
https://www.originalstormtrooper.com/our-story-19-w.asp
To me the letters on the side and the detail at near the nape of the neck on the helmet look to be drawn on with Blue sharpie. I wanted to do this helmet myself, but alas, time and money became an issue. I look forward to seeing your progress on this one!
Here's where I'm at , I've started blocking out the shapes in 12 mm mdf and filler ( bondo) a way off yet , but it's a start .

Sent from my iPad using Tapatalk
Sent from my iPad using Tapatalk
It needs a little re shaping around the sides.... my kingdom for more photos of it !!!!
Sent from my iPad using Tapatalk
BipeFlyer
Well-Known Member
It looks really good so far.https://uploads.tapatalk-cdn.com/20180123/6acb4b21a7be02c433d37b435fcfa378.jpg
It needs a little re shaping around the sides.... my kingdom for more photos of it !!!!
Sent from my iPad using Tapatalk
Sent from my Nexus 6P using Tapatalk
CAKComedyProps
Active Member
I have an Obi Wan figure with the helmet, I'll post pic if I find it.
spacebob
Sr Member
Hope this link works CatfoodRob
https://starwarsscreencaps.com/star-wars-episode-iv-a-new-hope-1977/39/
Pics start on this page as its hanging behind Ben
- - - Updated - - -
Yep it worked, fill your boots
https://starwarsscreencaps.com/star-wars-episode-iv-a-new-hope-1977/39/
Pics start on this page as its hanging behind Ben
- - - Updated - - -
Yep it worked, fill your boots
Last edited by a moderator:
but with the blast shield down, how is he going to see?
here is mine with my remote, I used velcro to attach it to the inside of the helmet. how do you think you'll attach yours?


here is mine with my remote, I used velcro to attach it to the inside of the helmet. how do you think you'll attach yours?
Last edited by a moderator:
Hope this link works @CatfoodRob
https://starwarsscreencaps.com/star-wars-episode-iv-a-new-hope-1977/39/
Pics start on this page as its hanging behind Ben
- - - Updated - - -
Yep it worked, fill your boots
Many many thanks..the hi res photos show so much more than I'd ever been able to identify previously . Many thanks.
Sent from my iPad using Tapatalk
Last edited by a moderator:
but with the blast shield down, how is he going to see?
here is mine with my remote, I used velcro to attach it to the inside of the helmet. how do you think you'll attach yours?
http://img.photobucket.com/albums/v...g remote/a2a2d76d00925c864d79a71b44af131c.jpg
Once I finalise my visor design , I'm guessing Velcro is the way to go , although I'm not intending to ever swop for goggles, mine will always be a blast shield display helmet .
Sent from my iPad using Tapatalk
Last edited by a moderator:
I used filler to shape my mdf mould after realising the outer edges were straight

Then on a visit to my friendly local vac former , I pulled a cast . Once offered up to the helmet I soon realised my dimensions were off a tad . The upper edges didn't fill the helmet opening enough, and the fold lines down the front weren't sharp enough . So I retired to my garage and attacked it with more filler .
A second visit allowed a young apprentice to pull a cast for me .

This final,cast looked ok , but I'm still not convinced I've got the shapes correct . The thing is. Tiny bit too wide , and I may re profile the centre section before pull number three .
Sent from my iPad using Tapatalk
Then on a visit to my friendly local vac former , I pulled a cast . Once offered up to the helmet I soon realised my dimensions were off a tad . The upper edges didn't fill the helmet opening enough, and the fold lines down the front weren't sharp enough . So I retired to my garage and attacked it with more filler .
A second visit allowed a young apprentice to pull a cast for me .
This final,cast looked ok , but I'm still not convinced I've got the shapes correct . The thing is. Tiny bit too wide , and I may re profile the centre section before pull number three .
Sent from my iPad using Tapatalk
I'm confident I can paint the patterns , but the weathering I'm not sure about . Any advice welcomed .Looks great cant wait to see it finished, Have you decided on how to do the finishes

A few modifications to my mould pencilled in , now I'm off back out to the garage for more filler and sanding dust .
This time I'm really hoping it will look perfect to the available screen shots .
Sent from my iPad using Tapatalk
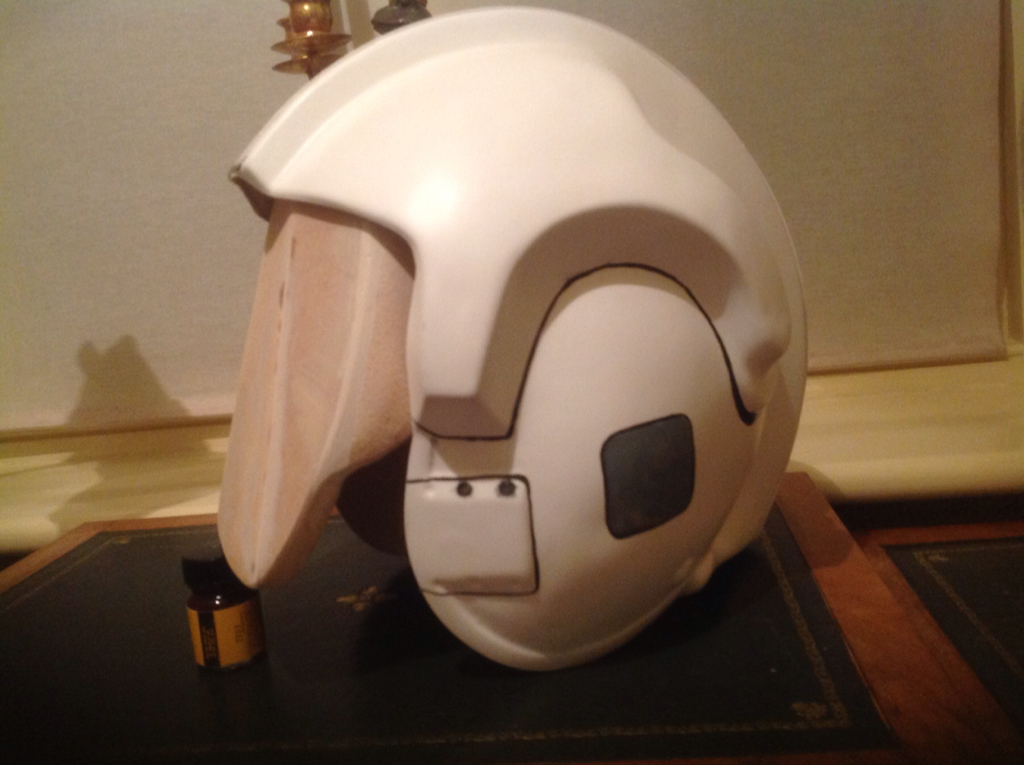
Version four of the blast shield mould is now in existence , a pull in pvc produced a nice shield

The very top edge inside the helmet needs adjustment yet , I've trimmed it off in the above pull .
Even though I need to modify the mould and produce a slightly different shield, I couldn't resist attempting some streaky black weathering as seen on the original .

I've also been hand painting the side markings .... hopefully the eventual weathering of the helmet will hide my shaky brushwork
.

Sent from my iPad using Tapatalk
The very top edge inside the helmet needs adjustment yet , I've trimmed it off in the above pull .
Even though I need to modify the mould and produce a slightly different shield, I couldn't resist attempting some streaky black weathering as seen on the original .
I've also been hand painting the side markings .... hopefully the eventual weathering of the helmet will hide my shaky brushwork
.
Sent from my iPad using Tapatalk
Similar threads
- Replies
- 37
- Views
- 2,282
- Replies
- 0
- Views
- 520
- Replies
- 3
- Views
- 314
- Replies
- 1
- Views
- 471