McQuarrie Vader WIP Scratch Build & Research (Studio 49)

amazing project, I really need one of those helmets
Thank you so much for the compliment, but unfortunately JRX has not been producing props for some time and I was bald to to pick it up on the cheap over on the Junkyard.
So keep an eye out, you never now.


What's your preferred filler these days, 2-part Bondo or something more exotic?
My filler really isn't all that fancy, but it is the best and most affordable stuff I have used thus far
$6 AUD for a quite a large tub and has lasted me daily 6-9 months over the course of multiple projects.
http://www.bunnings.com.au/uni-pro-500g-multi-purpose-filler_p1210281
Photo%2018-09-2015%207%2011%2014%20pm_zpsla68ivqg.jpg
 
My filler really isn't all that fancy, but it is the best and most affordable stuff I have used thus far
$6 AUD for a quite a large tub and has lasted me daily 6-9 months over the course of multiple projects.

So it's an air-curing putty rather than a two-part?
 
I'll be watching this thread with great interest.... [emoji6]

Thank you for the compliment!
I am looking forward to putting my skills to the test and hopefully learning some new skills as I try to catch build this awesome Vader!

I know that you probably are aware of these threads THXBOY but I figured I would post them for any members that may want to see some more in-depth info, progress and pictures I have a bunch of very detailed threads I have put together over on the Sith Lord Detachment:

McQuarrie Vader - WIP & Research

http://forum.501stsithlords.com/index.php?showtopic=9571

McQuarrie Vader - Reference Materials Thread (PIC HEAVY)

http://forum.501stsithlords.com/index.php?showtopic=9659

McQuarrie Vader - CRL Draft Thread

http://forum.501stsithlords.com/index.php?showtopic=9652
 
Last edited:
Re: McQuarrie Vader WIP Scratch Build & Research (Studio 49)

Update 9:
So I went down to the local Hardware store and picked a $7 hard hat with removable liner, figured I couldn't go wrong for that price.
I did a test dry fit and if fits perfectly in the dome. I will probably hot glue it in.

6A_zpslndsfau2.jpg


6B_zpsyknsmnxl.jpg
 
Update 10:
A minor update of sorts, I have purchased 2 fans to install in the RMQ Helmet of mine, which is coming along nicely. The dome is receiving the last few coats of nice black but the face is taking a tad longer since I had some issues painting in the recessed front grill area, but that is almost fixes and ready for and and black.

However, more importantly I was in the University workshop today doing model making for Industrial Design and went up to look in detail at the Vac-former. I knew they had one but didn't realise this guy is a beast of machine and could easily vac form shins (1 half at a time). Heck It could do stormtrooper armour!
So hopefully they will help me out when the time comes if I have my own material :D If not I may have to see if any local members can help me out.
​Anyway here is a pic of the beast:

1_zpslk9rb4no.jpg
 
So I have been doing some initial research into potential gloves I could use for the RMQ Vader and I figured I may as well post them here:

Custom Props - X-Wing Pilot /Tie Pilot / AT-ST Driver - Leather Gloves
http://www.ebay.com.au/itm/Star-War...oves-Custom-/171892837731?hash=item28059c8d63
2A_zpstcpdrk6g.png


2C_zpsvzrhwmzc.png


Custom Props - Shadow Guard Leather Gloves
http://www.ebay.com.au/itm/Star-War...35362280?hash=item2a1aa0a5e8&autorefresh=true
3B_zpsjalokifz.png


3B_zpsjalokifz.png


3A_zpsebv2jzzd.png


Tough Gloves Men's Ultra Enforcer Leather Gauntlets
http://www.amazon.com/gp/product/B004LYSEM2?redirect=true&ref_=s9_simh_gw_p193_d2_i1
1A_zps5lwzeliz.jpg
 
Last edited:
For refernce I am using the Koto Statue and from that it seems the gloves are relative;y simple in design and have a hand guard on top.
So at this stage I am leaning toward the Tough Gloves Men's Ultra Enforcer Leather Gauntlets from amazon. They are the simply design that I think might work at I could then somehow attach the hand guards (probably 3D printed) on top.

For reference here is the reference that support the simple design and they are the Kotobukiya Statue, Original Art and the Gentle Giant Bust.


Original Ralph McQuarrie Concept Art
R1_zpsglsscszl.jpg


Kotobukiya Statue
K3_zpsj6txtxs7.jpg


K4_zps5aqg0py9.jpg


K5_zpsiceubj0y.jpg


Gentle Giant Bust:
G2_zpsdk028rpr.jpg


On the contrary the Sideshow collectable suggests otherwise... At this moment In time will go with the references provided above as a sort of majority rules 3 vs 1 reference. Nonetheless I would love some feedback.
smile.png

Sideshow Collectables
S1_zpsxw9eqle9.png


R1_zpsglsscszl.jpg


K3_zpsj6txtxs7.jpg


K4_zps5aqg0py9.jpg


K5_zpsiceubj0y.jpg


G2_zpsdk028rpr.jpg


smile.png


S1_zpsxw9eqle9.png
 
Last edited by a moderator:
Super excited about this build. Congrats on your progress thus far.

If you wind up doing a run of the sabers, I'd be interested.
 
Super excited about this build. Congrats on your progress thus far.

If you wind up doing a run of the sabers, I'd be interested.


Than you so much for the compliment Panaflex!
As for the doing a run I don;t know what may happen there, "Always in motion the future is" ;-)
If anything, it will likely be available on my Shapeways Store. If and when I do make it available there I shall make a post to notify you and any others.
 
Update 11:

After a setback with a faulty can of Dulux, grrr... I was able to get a Brish Paint Sparay Can that is far better and final get some decent coats of black on!!!
For context it was either the nozzle that was fault or the paint since it was only spraying in a singular concentrated circle with overspray and drips being flung every where else.... Og well that is fixed now.


​I also received the fans in the mail today and I am having a look at where to install them, I was thinking the forehead but the helmet sits lower than I thought and then when wearing it with the Hard hat Liner the fans would be right up against my fore head and I figure thats not ideal... So I am thinking of either having a single fan i the grill or 1 installed on each cheek.


Any way here some pics of a freshly applied black coat, there is still a few more coats to go but it's looking good!


8A_zpsg4gglank.jpg


8B_zps9qinb7su.jpg


8C_zpsnivktu8o.jpg


8A_zpsg4gglank.jpg


8B_zps9qinb7su.jpg


8C_zpsnivktu8o.jpg
 
Last edited by a moderator:
So since there are no suppliers for any of these parts I will have to make everything from scratch. Some I can Laser cut, some I can 3D print but the shins are a different story. Since I am using this project to learn new skills I have decided that I am going to have a go at sculpting the shins then vac-forming them, much like the calves used for Clone armour.

So that leads me to my questions:

1
Has anybody here tried sculpting amour before? My thinking at this stage is to get some high density foam, insert it into a cardboard skeleton, sand it to the sahape of my leg then build on top of that, cut it in half and Vac-form each half. Does this seem like a sound way to go about this?

2
In terms of what to use for sculpting I am thinking of using my 'fine filler' and plaster of paris from Bunnings. Now I have no experience with the plate roof Paris so I was wonering if anybody could let me know what to expect.
 
Update 12:

Today I began working on building the Fan system. I have decided to mount the 2 side by side on an angle to each other and then I will hot glue it into the grill area with it slightly directed up.


So here's where it's at now:


Marking out angle to match that of the interior of the grill
9A_zpsqf66vcdq.jpg


9B_zpsu6zsagxd.jpg


Next I cut up a small angle of timber to sit in that angle and allow me to initially mount the fans
9C_zpsnzre3ws9.jpg


9D_zpskk3g1cpb.jpg


Painting the timber wedge

9E_zpsnmwzfcgh.jpg


The fans hot glued onto the wedge
9F_zpsi7dksi61.jpg


Next up is to buy a connector for the 9V battery, wire the switch and remaining electronics then finally glue it into place.
Any feedback would be great!

9A_zpsqf66vcdq.jpg


9B_zpsu6zsagxd.jpg


9C_zpsnzre3ws9.jpg


9D_zpskk3g1cpb.jpg


9E_zpsnmwzfcgh.jpg


9F_zpsi7dksi61.jpg
 
Last edited by a moderator:
Update 13:

So today I fitted the helmet liner with a hot glue gun and 5 Chicago screws.
It seems to be quite sturdy, however the quick test fit had it leaning forward to much and I think that the liner might not be strong enough... When the paint isn't so green I will post some pictures where it it but of now I have some photos of it as it stands now. Any suggestions on a much stronger liner that I can buy? Ideally one that is self supporting?
Maybe I could put some padding above the liner behind the forehead to stop the tilting, now I think about it, yeah that could also work. If I were to do padding what should I use?

Oh and just ignore the messy exposed hot glue, I promise it is much cleaner inside and that i will be cleaning it up soonish.
10A_zpsglpnwkmi.jpg


126231c5-2396-4848-adbb-f319c0c23366_zpshesqvjqc.jpg


93e4c0d1-9d41-4fa6-86ce-c390adcd69a3_zpsxvsonoq7.jpg


10D_zps8nvibrj2.jpg


10E_zpsirddr1t4.jpg


10F_zpseujnaqqp.jpg
 
I saw a JRX vader helmet and mask quite some time ago at a buddy's place. Sine Jesper had modelled it onto a casting of a DP Vader it seemed to be quite large, just as Darth stones armor did. The concept Vader is quite a lot sleeker in appearance than the movie Vader. May I recommend building a mannequin to your size for proportional reference?
 
Thanks for the advice Naboo. It does seem a little on the large side but I'm fine with that because I reckon once I get the bodysuit and cheats armour going it'll fill out the look.
I also just answered my own question, I was able to make some modifications after having a another person video what was happening when wearing the helmet, photos and details to come in a minute!
 
Update 14:

So as I said in the previous post i was able to enlist the help of a nerd by Imperial citizen who filmed me wearing the helmet which helped me workout what was flexing.

So after watching the video it turned out it was the unsecured rear parts that were flexing, so I was able to fix them into position by using some Chicago screws that wound up being to long for use on the belt to secure the loose parts to each other and tighten up the whole rig.


It does seem a little on the large side but I'm fine with that because I reckon once I get the bodysuit and chest armour going it'll fill out the look.


So the next thing on the list is to fix the height issue, at this stage I find it's riding a bit low (although an onlooker would never known and I can still see fine and you would never know if the lenses were fitted). So I thinking I'm going to use that foam/insulation tape that some use to pad their shins, can't remember the name at the moment but I'm sure you know. That should lift it a a tad and allow me to see easier.


Also 'warning' for weird disembodied eyes. I look pretty weird with the bucket on and with my eye line sitting that tad higher.
rolleyes.gif

One more thing, I will still be cleaning up the rear a bit so it's not so ugly, I know that no one will ever see it but that kind of thing matters to me!


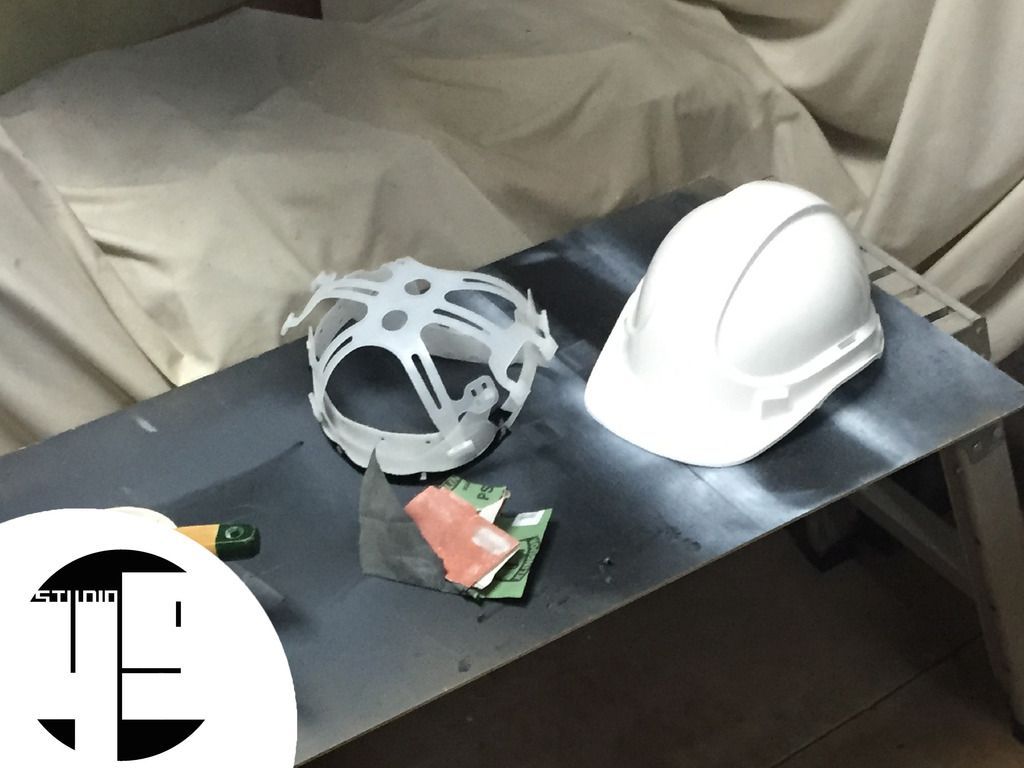
First some pictures of the new set up:

11A_zpssx12or9z.jpg


11B_zpswbwtxzho.jpg


11C_zpssmtexqsp.jpg


11D_zpsrhiq2k5k.jpg


And now some quick pics with the Bucket on. Beware the scary eyes!!! (mind you I could have posted a much scarier photo that had the flash going and I had my eyes closed, that was was an instant delete thats for sure!)


I'm also in the middle of redoing the front of the dome since with the combination of painting layers from me and the previous owner the lines in running across the centre axis of the front to the back had lost their detail. A bit more sanding an it'll be ready to go again.


11E_zpslo2fmygk.jpg


11F_zpsajbqgd6r.jpg


11H_zpsl1ikt4d2.jpg


rolleyes.gif


11A_zpssx12or9z.jpg


11B_zpswbwtxzho.jpg


11C_zpssmtexqsp.jpg


11D_zpsrhiq2k5k.jpg


11E_zpslo2fmygk.jpg


11F_zpsajbqgd6r.jpg


11H_zpsl1ikt4d2.jpg
 
Last edited by a moderator:

Your message may be considered spam for the following reasons:

If you wish to reply despite these issues, check the box below before replying.
Be aware that malicious compliance may result in more severe penalties.
Back
Top