1/4105 Re-Imagined Battlestar Galactica by Moebius Models

JMar

Well-Known Member
This Moebius Models Battlestar Galactica, 1/4105 scale kit was previous built out of the box. I was looking for a new challenge, so I decided to take it apart and do a complete rebuild.


This scale model build of the Re-Imagined Battlestar Galactica, from the 2004 mini-series will be built with a high degree of accuracy.


The 'step' where the 'gator head' meets the rest of the ship will be removed.


The hull will be highly detailed. This will be achieved through proper paint work as well as a decal set that will simulate the armour plating and the detail between the 'ribs'


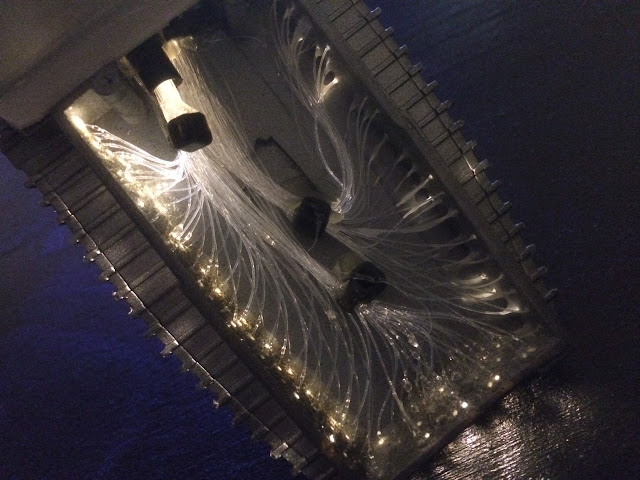
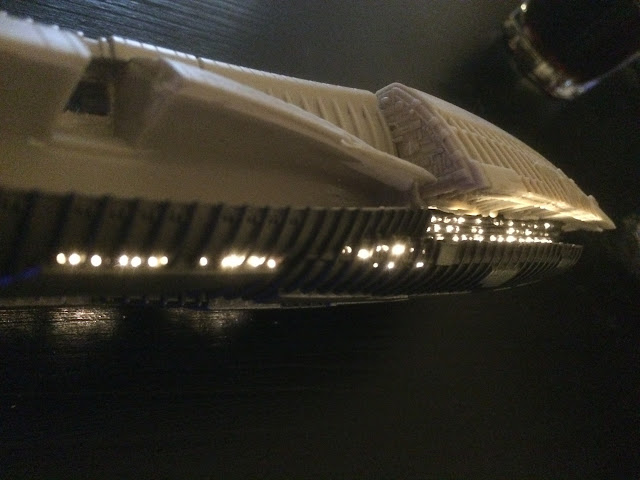
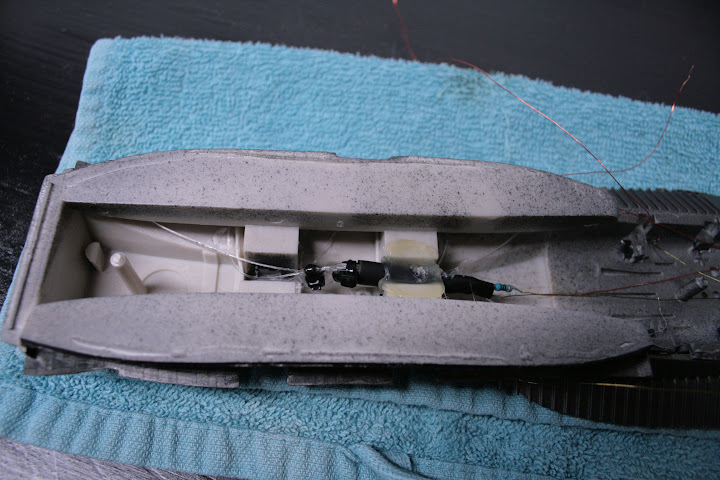
The ship will be fully lit using fiber optic strands for the windows, and LED light for the engines, flight pods, etc.


The addition of a brass photo-etch set, by Paragrafix Modeling Systems, will address the inaccurate gun turrets. This will also add the internal ribs of the flight pods, as well ass the window frames for the starboard flight pod/museum.


IMG_5770.JPG


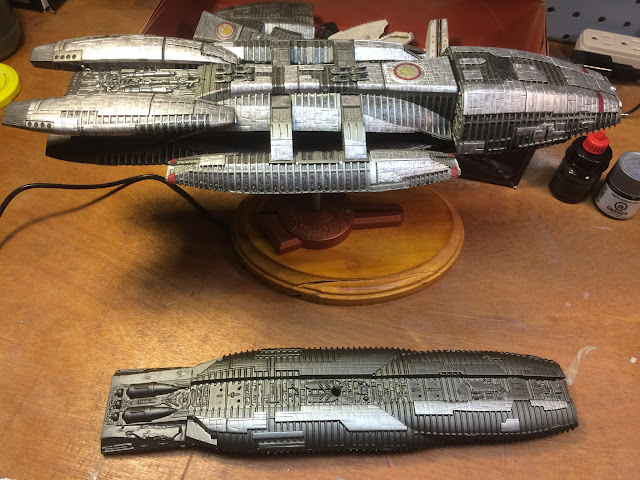
Old and New (New and Old?)


IMG_5771.JPG


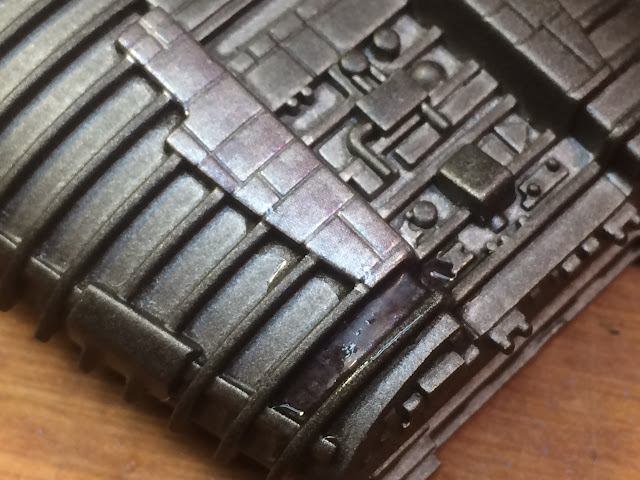
Acreation Decal test. Not great, but not the worst I've received.


IMG_0870.JPG


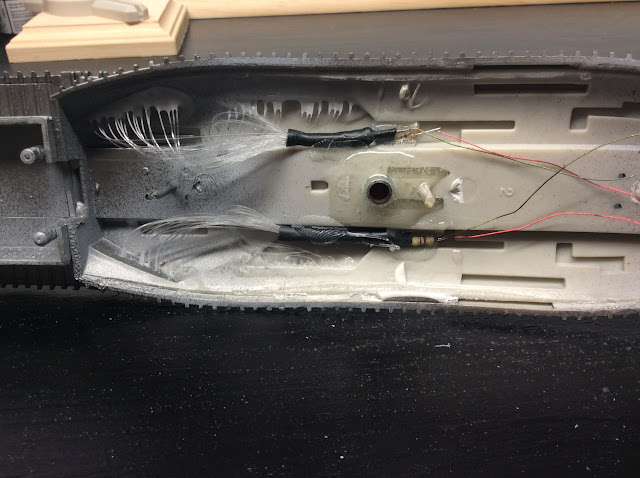
Lower Hull Window Fiber Optics.


IMG_0869.JPG


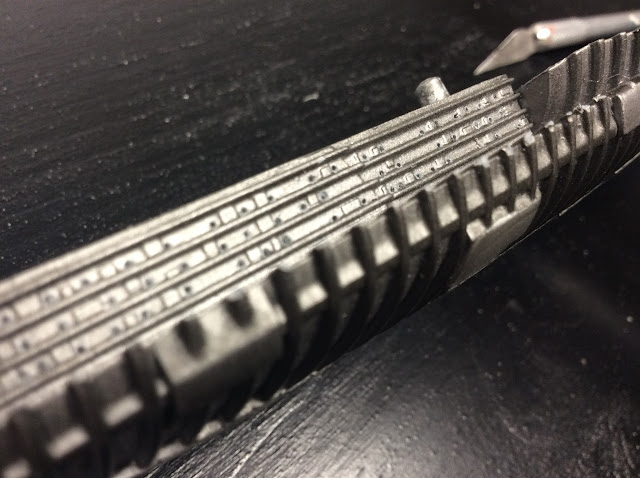
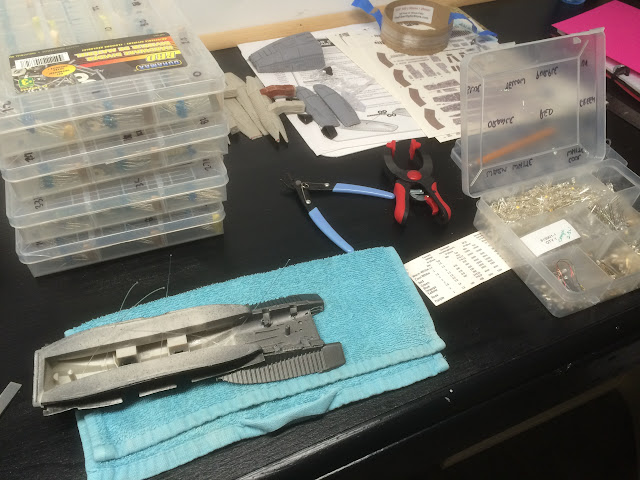
LOts of Window ports to be drilled out.


IMG_6008.JPG


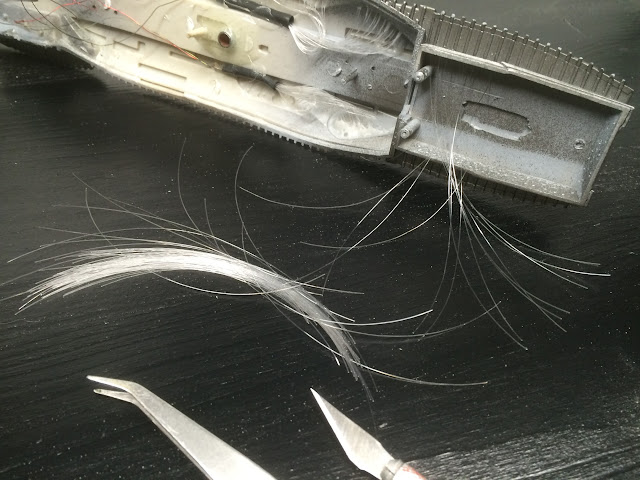
Laying down the first fibers.
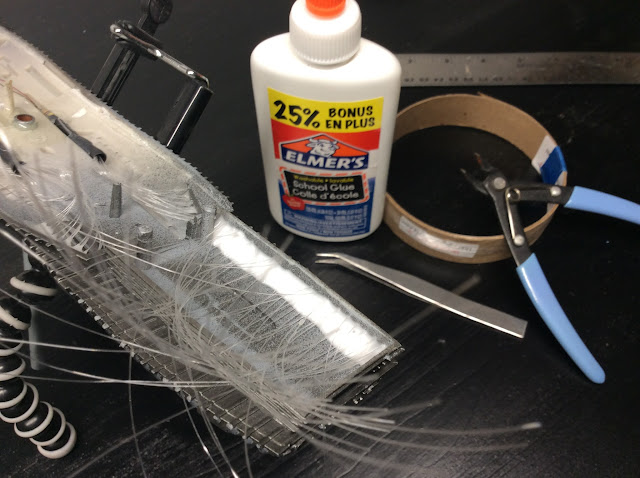

IMG_0872.JPG


...So many fibers.


IMG_6014.JPG


IMG_6015.JPG


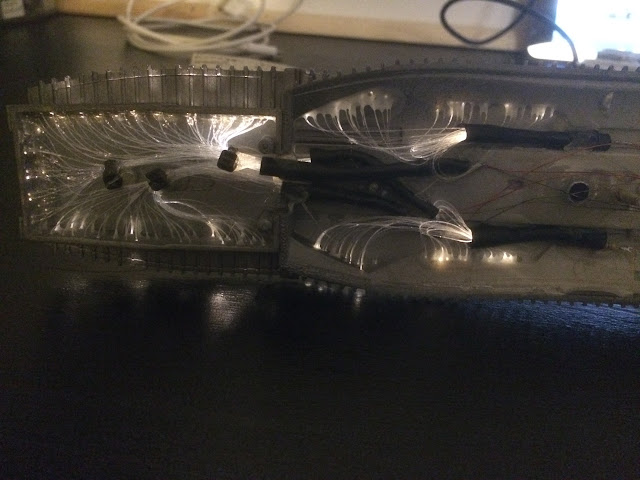
Keeping it as neat as possible.


IMG_6012.JPG


IMG_6013.JPG


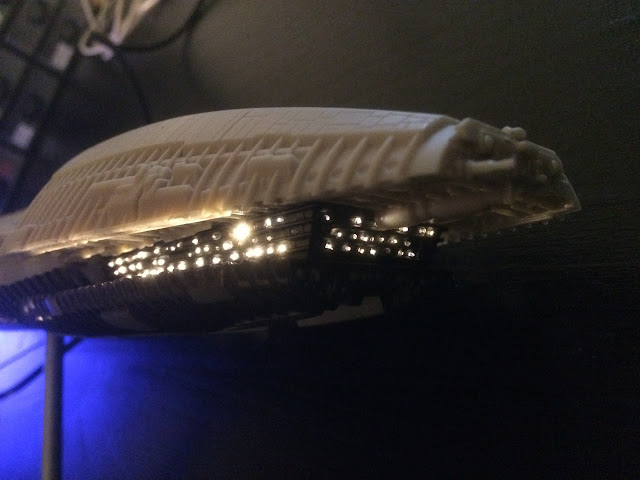
It was a ton of work...but totally worth it.
 
I finally got around to doing the rest of the fiber optic work...The flight pod 'garage' lights.


I used .50mm fiber optic to add the red lights. I chose the small fibers because I wanted light to cast downwards but not be blown out.


IMG_6057.JPG


IMG_6058.JPG


IMG_5259.JPG


IMG_5260.JPG


IMG_5267.JPG


IMG_5268.JPG


IMG_5269.JPG
 
Thanks blakeh1. I put a lot of effort into it.

There's nothing I hate more than out of scale lighting!
 
Last edited by a moderator:
Thanks @blakeh1. I put a lot of effort into it.

There's nothing I hate more than out of scale lighting!

Hey Jason,
looking good. I could not agree with you more, nothing ruins a good build like busting the scale with fiber optic that is too big. I am also a big fan of the 0.25mm.
 
opal1970. Not only is the .25mm excellent for, say, small windows...It's also very flexible and forgiving!
 
Last edited by a moderator:
I was SUPER careful.

Managed to use the same .30mm bit for the whole build...all 100+ holes!


:thumbsup Respect.

I also have a galactica build currently going, I have not got around to drilling for the fiber optics yet, but I used a 0.5 bit to drill out the undersides of the armor plates, if I remember correctly, I think I broke about a dozen of them before I was finished... and I was being insanely careful. :)

BTW, you mentioned that you will correct the offset gatorhead problem, if you are interested, I described the steps I took fairly well in my WIP
 
Last edited by a moderator:
I actually covered the modification to the head in my second video. Of course my mod would be different from yours because, in my case, the kit was assembled once in the past.

I threw it in the freezer and returned it to it's component pieces (or as much as possible).

As far as your build log, it's insane! You're doing an amazing job on making this kit accurate to the (virtual) miniature.

It's actually much farther than I'd go. In fact, I don't think I'd do this kit again. If I'm going to put that much effort in I'll do the resin Bad-Azz Galactica.

However, for those modellers who truly love modifying kits to be super accurate...well, this one is a dream!
 
As far as your build log, it's insane! You're doing an amazing job on making this kit accurate to the (virtual) miniature.

It's actually much farther than I'd go. In fact, I don't think I'd do this kit again. If I'm going to put that much effort in I'll do the resin Bad-Azz Galactica.

Thanks, I am glad you like it. Of course I will be happy when it is finished, but to be honest, I am not really doing it for a masterpiece as much as for the road to get there. I just enjoy coming up with some idea how to make it better and then wracking my brains how to get it to work.

Yes, I was looking at the Bad-Azz kit too, I was really tempted a time or two, but the one major drawback is I wanted to have the same detail but at a 1:4105 scale (I am speculating on buying the Bad-Azz Pegusus to join her). That and I have my doubts if the Galactica Bad-Azz kit is cast so that I can do all the other insane things that I still want to do. ;)

Give yourself more credit, your big G is coming along excellent, the lighting just makes it come alive. I will be most certainly tuning in to watch the progress.
 
Last edited:
Thanks, I am glad you like it. Of course I will be happy when it is finished, but to be honest, I am not really doing it for a masterpiece as much as for the road to get there. I just enjoy coming up with some idea how to make it better and then wracking my brains how to get it to work.

Yes, I was looking at the Bad-Azz kit too, I was really tempted a time or two, but the one major drawback is I wanted to have the same detail but at a 1:4105 scale (I am speculating on buying the Bad-Azz Pegusus to join her). That and I have my doubts if the Galactica Bad-Azz kit is cast so that I can do all the other insane things that I still want to do. ;)

Give yourself more credit, your big G is coming along excellent, the lighting just makes it come alive. I will be most certainly tuning in to watch the progress.

I hear ya. Part of the enjoyment of model making is the problem solving aspect!

Thanks. I'm nearing the end of the build and I've been flip flopping on the use of the rib detail decals. At this scale I'm pretty sure I'm just going to do the armour decals.
 
This is coming along wonderfully. Makes me really keen to start mine!
Could you explain why you mushroomed the fiber optics now rather than after painting the model? How do you prevent paint getting on the ends?
I have seem other lighting done by leaving the strands sticking out and trimming back later (which must also be tough to do without scratching the paint!)

Thanks in advance.

The paint scheme on the Galactica is simple enough that it was easier to paint the base coat, then drill the holes for the windows, install and bloom the fibers, etc. Because there was no more paint work to do in the areas where the fibers/windows I opted to do the blooming prior to installation.

In truth I try to do that on all my models. With enough pre-planning it's possible and then I don't have to trim, or scrape, or bloom afterwards. I'd rather not try to work to closely to the finished surface with tools or heat if I can possibly avoid it!
 
Thanks JMar. Makes total sense! I can imagine trying to trim those suckers afterwards would be near on impossible!
 
This thread is more than 8 years old.

Your message may be considered spam for the following reasons:

  1. This thread hasn't been active in some time. A new post in this thread might not contribute constructively to this discussion after so long.
If you wish to reply despite these issues, check the box below before replying.
Be aware that malicious compliance may result in more severe penalties.
Back
Top