Zvezda Avenger-Class ISD-II - WIP

i sold this kit to you. I’m gonna need it back....,


Yes you did... and THANK YOU - and ... DAMN YOU TO HOTH at the same time!

(Just kidding - unless you really like your Winter Ski vacations)

Well, with the Tedium, time invested, LEDs and literal blood and tears poured into this kit - it's gonna cost a major fortune to ship it back to you.
 
At the time they weren’t easy to come by, so I am glad it went to a good home and has been turned into such an amazing piece! Mine is still on the sprue. Can’t wait to see her all done up!
 
Well considering that Galactica was accused by Lucasfilm of ripping off Star Wars back in '78, I see nothing wrong with Star Wars culturally appropriating "Lords of Kobol" with the slight deviation in a vowel and consonant ... giving the denizens of Cloud City a religion germane to the Star Wars universe. Most of us OT fans who saw IV in theaters are '78 BSG fans also. Because you know.... without the Lords of Kobol, there would be no mankind from whom all Colonies evolved. Even if we're supposed to be the thirteenth.

Pegasus-Galactica.jpg
 
Last edited:
yeah man - that looks freaking awesome! So does the sound samples start when you turn on the lights or is that just something you added to the video?
Can't wait to see this under paint. I have no doubts you do to :)
 
It's something I added to the video. It was a sound file I edited together a year or so ago after reading some threads here about arduino boards and contemplating possibly doing that to this kit and adding a small speaker with the programmable lighting board into it.

I abandoned that idea when I got a closer look at what was involved to do it. Notwithstanding having to download new software to my Mac just to be able to program the board, and the learning curve for this was deemed by myself as 'over the top' considering I never soldered a wire before in my life, and here I was having ostentatious delusions of grandeur.

Given the near-disaster events that occurred while soldering the 50-plus LEDs and seemingly miles of wire - I can say that my waving off the idea as a pipe dream was a wise decision on my part.

Otherwise this project will probably take another 2 years for me to complete. If at all.

But in my fever-dream, I did edit a sound file together with the idea I would put a small speaker system in the kit, which is what you hear in the video above.
 
After 3 years and 3 months (and 6 other builds in-between) - FINALLY - Priming has begun on this beast! The topside cake layer and the bottom hull I will attempt to do over the weekend. Primed the engine bells, the hyperdrive nodules, the bridge tower, the bridge lid, the trench top and bottom and the backside engine area. Airbrushed the inside of the hull areas to coat the fiber near the top and bottom hull joins so in case any Tamiya liquid cement gets on them, we won't have any cracked fibers due to the cement on the fiber when the hulls are glued together.

Stynlrez - stuff is AMAZING! Love the leveling properties as it dries. Very cool. Second time using acrylic primer and not a rattle can. First time was on the Bandai 1/5000 Star Destroyer, and that was the white primer. Using the grey this time, and I wondered if the black would have been better - but considering how dark this dried, the grey is going to work just fine. Pics do not accurately convey the rich deep grey in-person.

Finally - some light at the end of the longest and most tedious build tunnel I ever attempted.

Primimg-Begins.jpgPrimer Bridge 1.jpgPrimer-Bridge-2.jpgPrimimg Porttrench.jpgPrimer-Enginebay.jpg
 
Awesome! Question about the Stynlrez...I've tried priming with it and learned that the stuff dries QUICK. Online homework reveals that other users have discovered the same. Do you have some airbrush cleaner ready to go as soon as your session is over? I also read that it sprays best with larger needle/nozzle combos and higher pressure than what you'd normally use for the color coats. What have you found?
 
Awesome! Question about the Stynlrez...I've tried priming with it and learned that the stuff dries QUICK. Online homework reveals that other users have discovered the same. Do you have some airbrush cleaner ready to go as soon as your session is over? I also read that it sprays best with larger needle/nozzle combos and higher pressure than what you'd normally use for the color coats. What have you found?

YES! And YES! And yes again. Dries fast. Very fast. But, has great leveling properties despite how fast it dries. I have a big bottle of Airbrush reducer and extender base that I used before to thin the White Stynlrez for the Bandai Kit. I chose to use the primer right out of the bottle this time without the reducer to cut down on possible hair and lint getting stuck in the paint over such a large surface area ( I have 2 German Shepherds and their hair floats everywhere). That plan paid off as the top of the hull has just been sprayed with 2 coats and no hair or lint that I can see on quick inspection.

I am using a larger needle and nozzle (0.5") and have upped the pressure to 25psi. It does still tend to spit once in awhile, but the higher pressure is necessary or the thicker viscosity of this primer will not atomize properly. Stynlrez dries to the touch in about 2-5 minutes depending on the amount and seems ready to be worked with and sanded after an hour. I will likely wait 24 before doing any major sanding or repair work. The finish is hard and flat, VERY flat. PERFECT to receive the Tamiya XF-2 with some sky gray for the base coat that I am going to put some reducer into with some Pledge Floor care for leveling. Should result in a semi-gloss to matte finish.

I also have Spectra airbrush cleaner that I used during the session. After each cupful of Stynlrez I go through, I have to stop, fill the paint cup with water and spray through, then take off the nozzle and using a Q-tip with water, scrape out the drying viscous of the primer in the nozzle. Then wipe out the inside of the cup with wet paper towel, dump a few drops of Spectra in there and spray through onto paper towel until clear. Then I can refill the cup again and resume priming. Somewhat tedious - but - the trade off of using a water-soluble primer and less harsher thinners and cleaning agents is worth it. The high humidity this time of year here makes the use of rattle cans a non-starter in this case - and - I did not want to risk using a rattle can, even though Robert Cass suggested I do. I do prefer the control of airbrushing this primer directly into areas difficult for a wider spray to reach and coat thin enough not to obscure tiny detail such as brass PE in many spots.

At the end of the session, I have a bottle of Tamiya X-20A Acrylic thinner I put in the paint cup after clearing the brush with water and I spray that through, letting some sit in the cup and covering the nozzle with finger to get some back flow into the mechanism, then spray out the rest.

I then disassemble the brush and pull out the needle to clean with cloth and thinner and the nozzle assembly.

I finish with another few drops of Spectra sprayed through to dry. So far, not bad.

I will say that due to odor and having water as the primary cleaning agent - using Stynlrez and acrylics has been much easier and also better in the noise department. The wife does not complain when I use those.
 
That looks seriously amazing under paint. Ties everything together beautifully! Can't wait to see the final construction as I'm sure you are too.
Your patience and dedication has paid off big time so far
 
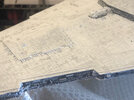
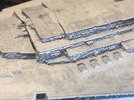
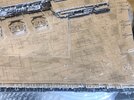
I know it has been a long while since I updated this Build log - as it happens, gt350pony66 had mentioned it on the TIE Advanced build thread I started and I realized I had not taken any pics in awhile. I set this build aside to get to several kits that had been sitting above the bench getting dusty over the last couple years, and I honestly needed a break from the sloth and snail's pace of this build because I am so determined to get it right that I will literally spend a week doing one small section.

Currently I am hand-drawing the panel lines in a No. 2 pencil. In some cases and sections I am trying to be exact in terms of markings that ILM had on their 8 footer - and in others - I just have to wing it because there are no close up reference pics that showcase some areas. I have the entire bottom hull finished in terms of panel lines drawn - and I have the Port side finished. I have the Starboard side to line and the conning tower to panel line and then.....

... and then it's some touch-ups with the airbrush in spots. An overall coat of Pledge Floor care to seal all the paint and pencil work in followed by a generous application of dullcoat.

Then it will be to glue the bridge into place - solder the final lighting connections, place the remote sensor, install the internal batteries and seal the top and bottom hulls together.

After that - a bit more touch ups with the airbrush if needed and the final lid atop the conning tower glued down - and I may be able to call her finished by Christmas.

Maybe.

Anyway - here's a bit of a preview of the panel line tedium I have been immersed in for several months. A little at a time, here and there.

Panel lines 1.jpgPanel lines 2.jpgPanel lines 3.jpgPanel lines 4.jpg

 
Great to see some progress on your build!
Its looking amazing. Like you, mines stalled whilst other projects are completed as a way of keeping myself interested
All of your hard work, time and patience is showing
 

Your message may be considered spam for the following reasons:

If you wish to reply despite these issues, check the box below before replying.
Be aware that malicious compliance may result in more severe penalties.
Back
Top