Y-Wing (Gold Leader) Build - Nice-N Model Designs

That looks epic and awesome -- if you want to make more, I'd pay good cash money for one of them, esp. if you could make it twice as long and 1.5x as wide so I could recreate the most famous Y-Wing shot from the whole movie:

1683389117588.png


But as soon as I say that out loud, I realize I'd want a screen-matched rear vertical wall as well, which wouldn't be 'too hard' would it?
 
Hi , has Nice-N models shut down ? There is a message saying "Models not for sale ." on their website .

I wanted to but one of their models . Regards Oggy4u
 
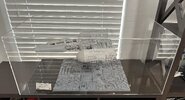
In an attempt to avoid getting dust all over my model and Death Star base, I took the time to create a drawing and order a custom-made acrylic display case. The display case is made in the same style as the Icons display cases. After two weeks of waiting, I was able to pick it up today. These are the same guys who made my blaster display cases and SS TIE Fighter display cases:
IMG_4854.JPG
 
That looks epic and awesome -- if you want to make more, I'd pay good cash money for one of them, esp. if you could make it twice as long and 1.5x as wide so I could recreate the most famous Y-Wing shot from the whole movie:

View attachment 1698636

But as soon as I say that out loud, I realize I'd want a screen-matched rear vertical wall as well, which wouldn't be 'too hard' would it?
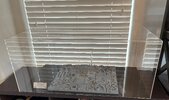
Unfortunately, the larger the base, the heavier it gets, so it becomes impractical. :)
 
Here's a photo of the main part of the model inside the display case:

IMG_6626.JPG

Last year I realized that the Death Star base could actually be expanded by simply adding more pieces, just like ILM did back in the day. However, the eBay guy that sold me these pieces had long since retired so these were no longer available.

It's been a while since my last post, so here's what has been happening since 2023: I spent the remaining months of that year painting the steering assemblies and engine details. I also spent a good deal of time testing different paint colors and collecting paint cans. Due to the weather, I put the Y-Wing on hold (Putting the main section of the model on display - see above) and worked on other projects. I had underestimated the amount of time involved in painting those items last summer and unfortunately, I spent the entire summer of 2024 finishing up those projects, having to put the Y-Wing on hold. Back in May I had some time so I went back through my Y-Wing references, paints and parts, trying to figure out where and how to resume the painting. After thoroughly studying the reference photos and doing some testing in June I was ready to pick up where I left off.

Up next, painting the steering assemblies, engine details and Tee Struts.
 
Last edited:
On to the steering assemblies:


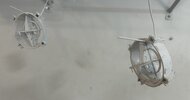
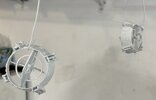
IMG_6627.JPG IMG_6629.JPG

While studying the reference photos, I realized that it appears as if ILM used flat white as a base and then weathered on top of that. I also noticed that in at least one reference photo, the entire Y-Wing is made up of white, plastic components (and a few off white or light yellow parts), so I'm using Tamiya White Surface Primer to avoid "clumping" on these parts since they are made up of tiny details. The only draw back is that white paint has a tendency to show off all of the "problems", so I'm coming across all kinds of crevasses, joint lines, etc. so it has taken some time to apply putty to these areas (Tamiya White Putty) to help make them presentable. I'm trying to keep in mind that when it's time to weather some of these areas, it will help cover up some of these "problems".

While painting these, I've also used the same technique to the engine details:

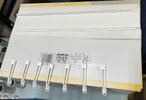
IMG_6628.JPG

Only two of the Tee Struts are seen in the photo above because the rest of them are done. Because these parts have flat surfaces, I've simply used some Testor's and Tamiya white primer. They seem to work just fine together. I don't remember when or why I purchased the Testor's version, but I wanted to use it up before continuing with the Tamiya primer.

Today I sprayed what I hope is a final coat of white primer on all of the parts. Once these are done, I will move on to the largest part of the model, which is where the real work lies. :)
 
Back
Top