Rawktrooper

Well-Known Member
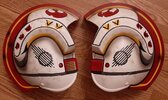
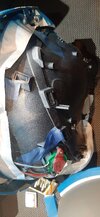
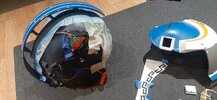
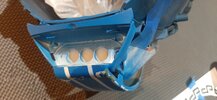
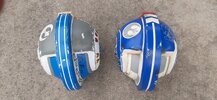
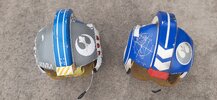
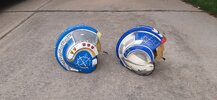
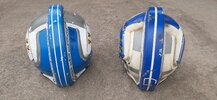
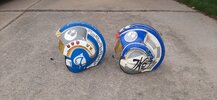
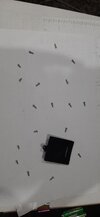
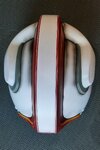
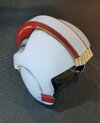
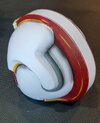
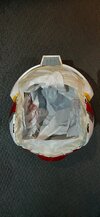
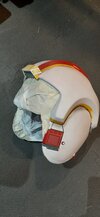
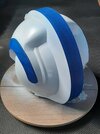
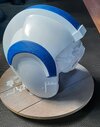
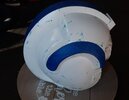
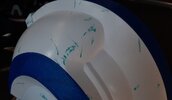
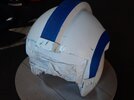
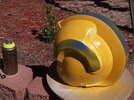
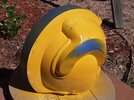
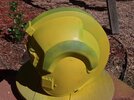
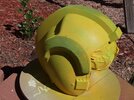
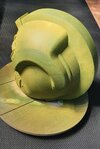
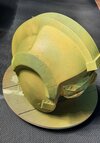
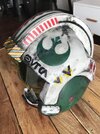
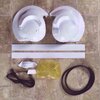
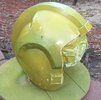
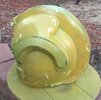
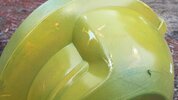
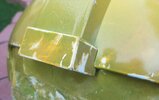
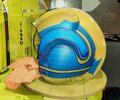
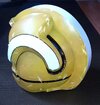
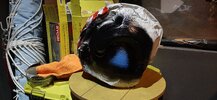
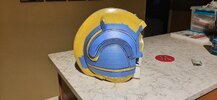
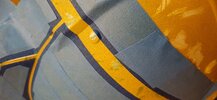
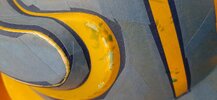
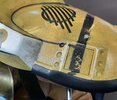
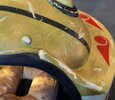
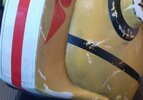
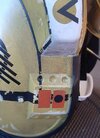
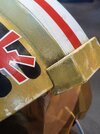
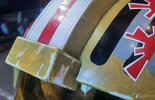
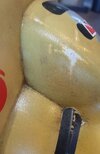
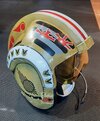
I did a disassemble and repaint of the Black Series Luke helmet and I'll show some photos here.
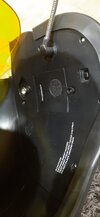
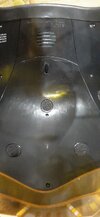
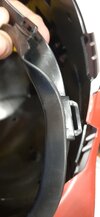
Any questions please ask. I'll do my best to explain how it works. you will have to forgive the mess this was. and I didn't take photos in the first part of disassembly of the interior of the shell and electronics. I'll be doing another repaint of another helmet here soon and will post a more detailed step by step.
 

Attachments

  • 20210711_205114.jpg
    20210711_205114.jpg
    1.4 MB · Views: 279
  • 20210719_102425.jpg
    20210719_102425.jpg
    2.3 MB · Views: 234
  • 20210720_204623.jpg
    20210720_204623.jpg
    1.2 MB · Views: 197
  • 20210720_204634.jpg
    20210720_204634.jpg
    2.7 MB · Views: 219
  • 20210720_204652.jpg
    20210720_204652.jpg
    1.9 MB · Views: 200
  • 20210720_204753.jpg
    20210720_204753.jpg
    1.1 MB · Views: 215
  • 20210724_195031.jpg
    20210724_195031.jpg
    3 MB · Views: 276
here's the comparison of size and shape from the Black Series repainted Luke Skywalker helmet and an original Rogue One xwing helmet with my own paint. BS on the left and RO on the right.
enjoy!
 

Attachments

  • 20210814_181511.jpg
    20210814_181511.jpg
    3.3 MB · Views: 251
  • 20210814_181447.jpg
    20210814_181447.jpg
    3.2 MB · Views: 231
  • 20210814_181424.jpg
    20210814_181424.jpg
    2.9 MB · Views: 219
  • 20210814_181407.jpg
    20210814_181407.jpg
    2.9 MB · Views: 221
  • 20210814_181346.jpg
    20210814_181346.jpg
    3 MB · Views: 259
i began to partially diassemble the Galaxys Edge helmet for sanding and taping before paint.

I removed all the padding and the chin strap, then looked for all the screws, removing one at a time and making a screw map on a piece of paper until all the screws were removed. This is for re-assembly so i know where the longer screws go etc.
I removed the rubber edge roll, which has little loops attached so you cannot just pull it out.. I peeled back the side panel enough to pull out the edge roll and realized this interior is attached pretty well even without the screws, so i detached the microphone boom by pinching the clips and pulling the mic out of the side panel. I then left the interior attached for sanding, since i decided removal of the interior is not that important on this one.
I am leaving the interior panels alone at this time. I dont want to ruin whatever they have going on in there holding it in place. I will just tape off the edge of the interior so it doesnt get a bunch of overspray and work it with everything as-is.

I was going to remove the visor and paint the underside of the visor cover, but at this point i will just be bagging and taping the visor off so i dont get spray on it since removing that is not working well with the interior being possibly tack glued or have some clips holding the majority of it in place.

I wetsanded the markings off the helmet, since you can feel a bit of roughness when you touch the logos and emblems and fake chipping. This would probably show up if i were to leave them on an just prime the helmet.
I left the sides of the ridge largely alone, but did wear down the yellow stripe a bit.
I am leaving the heavy shading and grey pieces and the red sides, also i am taking a little off the front cap just to get the lines less noticeable.

I will be using a modeling technique with this one, where i am going to pre-shade the helmet before adding color. In order to do this, i will be adding chipping agent after a solid white coat is applied and wet sanded smooth to a semigloss finish. I will explain more as i go along.

enjoy!
 

Attachments

  • 20220830_205403.jpg
    20220830_205403.jpg
    690.4 KB · Views: 98
  • 20220830_205434.jpg
    20220830_205434.jpg
    912.9 KB · Views: 96
  • 20220830_211248.jpg
    20220830_211248.jpg
    689.7 KB · Views: 89
  • 20220830_212107.jpg
    20220830_212107.jpg
    646.4 KB · Views: 98
  • 20220830_211029.jpg
    20220830_211029.jpg
    825.7 KB · Views: 101
  • 20220831_173801.jpg
    20220831_173801.jpg
    1.1 MB · Views: 105
  • 20220831_173814.jpg
    20220831_173814.jpg
    994.3 KB · Views: 120
  • 20220831_173820.jpg
    20220831_173820.jpg
    851.2 KB · Views: 119
Last edited:
i have done a lot of work on this Galaxys Edge Luke... you cant tell it yet but i did a bit of priming, sanding, paint, more sanding, more paint, some gloss, more sanding, more paint... and now taping off the areas i want to remain white. next is the chipping agent and then color!
 

Attachments

  • 20220915_133941.jpg
    20220915_133941.jpg
    1,011.3 KB · Views: 83
  • 20220915_133952.jpg
    20220915_133952.jpg
    951.1 KB · Views: 91
  • 20220915_134000.jpg
    20220915_134000.jpg
    900 KB · Views: 84
Last edited:
Looking good, so far! I wonder if the retractable visor could be fit onto the bs helmet?

I have the bs Wedge helmet now and want to repaint it to be Luke’s, but also need to find some thinner padding, I had to remove it for the helmet to fit. I don’t mind pulling the electronics if necessary, to get the retractable visor to fit. Also might allow me to refit the padding (which seems very nice, IMHO).
thanks for sharing the information.
the molded plastic in the top of the BS helmet would prevent you from swapping visors or even modding the visor unless you did a serious rework of the interior. You would have to cut out some plastic and add in a partial dome to replace the old plastic that the electronics sit in so your visor could move.. Once you take it apart you will see what i mean. The visor would need to have room to raise about 5 inches, and you have to accomodate for the facets in the visor into the helmet.
I had similar thoughts when i found the first BS helmet a while ago to use for my daughters own helmet. We just ended up repainting it and leaving the interior alone.
It could be a fun project... albeit time consuming and needing a slight redesign.
Let us know what you do! it would be interesting to follow on here.
 
Yeah, I might give it a try. I see the GE helmets on eBay, anyone know what they cost in the park? Maybe I can get a friend to pick one up for me.
 
Yeah, I might give it a try. I see the GE helmets on eBay, anyone know what they cost in the park? Maybe I can get a friend to pick one up for me.
I picked up a couple GE helmets for about 80 each (shipped) less than a year ago. You can see my comparison earlier in this thread, if you havent.
 
Last edited:
i made some progress on the Red Leader helmet.. i started by laying on some masking liquid to try to come close to the major scratches and paint chips. i left the finer ones to be done later when the helmet is closer to complete.
i layed down a light coat of krylon marigold which was covered in light coats of various Montana colors to try to get to a close, but darker yellow-greenish hue. this will lighten up and yellow up as i wet sand the color and remove the chipping mask and some of the montana color mix.
i have started to wet sand now with 800 grit as i dont want to remove too much color at once.. so far its still a bit too green for my taste but its getting closer. it will also ungreen itself as i add some washes and weathering passes later on in the build.
 

Attachments

  • 20220924_104025.jpg
    20220924_104025.jpg
    719 KB · Views: 72
  • 20220924_104034.jpg
    20220924_104034.jpg
    996.5 KB · Views: 56
  • 20220924_104030.jpg
    20220924_104030.jpg
    791.6 KB · Views: 57
  • 20220924_104038.jpg
    20220924_104038.jpg
    789.8 KB · Views: 68
  • 20220924_113105.jpg
    20220924_113105.jpg
    1.2 MB · Views: 78
  • 20220924_113115.jpg
    20220924_113115.jpg
    694 KB · Views: 60
  • 20220924_113351.jpg
    20220924_113351.jpg
    979.8 KB · Views: 65
  • 20220924_113401.jpg
    20220924_113401.jpg
    915.9 KB · Views: 52
  • 20220926_130756.jpg
    20220926_130756.jpg
    1.3 MB · Views: 64
  • 20220926_130803.jpg
    20220926_130803.jpg
    1.3 MB · Views: 68
I built a Hephaestus Forge kit a few years ago. He's a local Albertan, but it was a nice kit with a good result. Some pics of my friend's build, plus the instructions and yours truly in the mustache I grew for the occasion. My wife and I did the foam earmuffs ourselves, some mattress foam covered over with pleather.
 

Attachments

  • ben's helmet 4.jpg
    ben's helmet 4.jpg
    414.9 KB · Views: 104
  • X-Wing-Pilot-Helmet-Guide.pdf
    1.1 MB · Views: 122
  • test 1.jpg
    test 1.jpg
    128.6 KB · Views: 106
  • test 2.jpg
    test 2.jpg
    2.9 MB · Views: 107
  • test 4.jpg
    test 4.jpg
    734.7 KB · Views: 102
  • Test 6.jpg
    Test 6.jpg
    1.1 MB · Views: 111
I built a Hephaestus Forge kit a few years ago. He's a local Albertan, but it was a nice kit with a good result. Some pics of my friend's build, plus the instructions and yours truly in the mustache I grew for the occasion. My wife and I did the foam earmuffs ourselves, some mattress foam covered over with pleather.
never heard of that one. looks pretty good. no visor?
 
never heard of that one. looks pretty good. no visor?
It came with a visor...I guess they don't show it in the instructional pdf, but it was there. I replace the chin strap material, made the liner/muffs myself with my wife's help, and made my own mic.
 

Attachments

  • helmet kit.jpg
    helmet kit.jpg
    87.8 KB · Views: 67
heres my current status on my Red Leader repaint.
i have done several coats of different paint colors and finished up with 2 thin coats of semi-gloss before the removal of tape and the retaping for black lines..
I will say these photos are a touch too green.. the actual color is a little more yellow than this, and slightly darker.

will keep you updated
 

Attachments

  • 20221005_162343.jpg
    20221005_162343.jpg
    821.5 KB · Views: 66
  • 20221005_162351.jpg
    20221005_162351.jpg
    928.2 KB · Views: 57
  • 20221005_162417.jpg
    20221005_162417.jpg
    1.4 MB · Views: 64
  • 20221005_162437.jpg
    20221005_162437.jpg
    1.2 MB · Views: 69
added some gloss coats, removed tape, and light wet sanding... before adding tape again for black accents.. still need to bag it and prep for chipping before the black passes.
Yes i did decide to mask off the black areas and not hand paint all the lines.. i just dont like the look of most of the hand painted Red Leaders that i see.. i think the lines are too thick and not straight at all for my preference.
more to come!
 

Attachments

  • 20221008_231147.jpg
    20221008_231147.jpg
    1.2 MB · Views: 85
Last edited:
i bagged and painted the black lines and areas and removed tape and the chipping. now on to decals

I decided to use 2 different sets of decals. I could not find one single set that had what i thought needed to be on the helmet, so i had to order 2 different sets to mix and match between them. Unfortunately, now that i have gotten both sets, they are not even the same materials...
One set is vinyl and an assembly-type decal set.. the other is paper printed... so i will have to come up with a good way to seal these paper decals after application before weathering.
On my helmets in the past, i have painted the markings, but masking off for these particular ones would take much more time than i think i want to do... at least with decals i can always go back and replace these with paint if i decide it doesn't look or feel right later.
Any suggestions or ideas feel free to add.. i would appreciate it.

Also! the color of this helmet is not consistent with the lighting i am having to use, and ranges from green to yellow depending on my phones personal preferences at the time i take the photo.. even using manual mode doesnt give me an accurate representation 75% of the time.

enjoy!
 

Attachments

  • 20221010_135701.jpg
    20221010_135701.jpg
    926.9 KB · Views: 86
  • 20221014_191757.jpg
    20221014_191757.jpg
    2.2 MB · Views: 63
  • 20221013_231935.jpg
    20221013_231935.jpg
    1.7 MB · Views: 74
  • 20221013_231750.jpg
    20221013_231750.jpg
    2 MB · Views: 66
  • 20221013_231757.jpg
    20221013_231757.jpg
    2 MB · Views: 90
Last edited:
decals added.. again, from two different dealers.. then light gloss coat applied and the helmet was weathered with several passes of water soluble oil paint in a few colors.
i didn't want to get this one terribly dirty so i left it somewhat cleaner than other props. It is a bit dirtier than the photos show..
i haven't had a chance to do a final scratch pass yet but the weathering is completed.
Closeups are included in attachments below.


enjoy my new Disney Galaxys Edge Luke repaint to Red Leader!
20221024_130834.jpg
20221024_130845.jpg
20221024_130859.jpg
20221024_130908.jpg
 

Attachments

  • 20221024_130720.jpg
    20221024_130720.jpg
    1 MB · Views: 59
  • 20221024_130710.jpg
    20221024_130710.jpg
    899.2 KB · Views: 62
  • 20221024_130652.jpg
    20221024_130652.jpg
    1.1 MB · Views: 59
  • 20221024_130613.jpg
    20221024_130613.jpg
    1.1 MB · Views: 55
  • 20221024_130603.jpg
    20221024_130603.jpg
    1.2 MB · Views: 55
  • 20221024_130551.jpg
    20221024_130551.jpg
    1.2 MB · Views: 52
  • 20221024_130537.jpg
    20221024_130537.jpg
    1.1 MB · Views: 50
  • 20221024_130520.jpg
    20221024_130520.jpg
    1.3 MB · Views: 59
  • 20221024_130510.jpg
    20221024_130510.jpg
    1.1 MB · Views: 61
I was asked for a place to move some posts from other threads and decided to create this thread for these types of painting and repainting projects.
I have done many X-Wing pilot helmet designs and repainting projects, and i have a couple more in the works, and need a place to post the process and differences.

This thread is for all types of helmets available, from MC/FAC, RS, Galaxy's Edge, Hasbro Black Series, etc.
This seems to be a fairly popular topic of late, and i think it would be a great place to gather and share our projects and tutorials.

If you have a paint design project or a repainting project and need a place to post, feel free to post here!
We are a community and it would be nice to keep all our work visible for others and find it easily.

Let the show begin!

Note: Apparently the original post (this one) was moved when the other posts from other threads were moved here.. i guess they supercede this post because of the dates they were originally posted... Sorry for the mixup.. the moderators were not able to keep this post as number 1.
 
Last edited:

Your message may be considered spam for the following reasons:

If you wish to reply despite these issues, check the box below before replying.
Be aware that malicious compliance may result in more severe penalties.
Back
Top