Wonder Woman Movie 2017 Costume Build (WIP)

megabethbob

New Member
Hi! I started building my movie wonder woman costume back in december 2017, and just realised I never made a thread for the build! So I'll make a few posts now documenting everything i've done so far, and then continue to update when i do more work.

So this is the costume I am making! The version from her solo movie (so with brighter colours and not all dark and grungy haha)

d814fc741061113.jpeg

I started off by making the Tiara!

I'm lucky enough that my Mum's boyfriend is an extremely talented Blacksmith ( http://www.verdigrismetals.co.uk/ ) and he agreed to help me make a brass version of the tiara!

I did make a youtube video showing how I did it briefly, but I'll post a walkthrough here anyway! https://www.youtube.com/watch?v=_xSuagdGU7U&t=2s

To start with, I cut out all of the pieces needed out of a 20 gauge brass sheet using a bandsaw, and then filed all the edges so they were nice and smooth.

IMG_20171223_123949197.jpg

We then began silver soldering the layers together. It took a long time to do the first layer on the base piece as we had to make sure it was completely secure! If it wasn't, when it came to shaping the curve into the tiara later, the layer could pop off.

IMG_20171223_150012113.jpgIMG_20171223_171945443_BURST000_COVER_TOP.jpg

Once those layers were done, I made the centre star! I had to cut this by hand because it was too small for the bandsaw and i value my fingers. I ended up having to recut it 3 times as it kept being slightly the wrong shape after the filing down!

IMG_20171223_192633100.jpgIMG_20171223_210827414_HDR_2.jpg

Once every piece was strongly soldered on, the tiara was acid bathed to get rid of all the flux, and then gently hammered into shape (no pictures of this but it's in the video)

Then the tiara was polished till super shiny!
IMG_20171223_212626940_BURST000_COVER_TOP.jpgIMG_20171223_214103866.jpg

Finally, we gave it a Patina so it has the lovely dark shadows to show off the detail.

25659864_1523228857798230_1769024104247536218_n.jpg
PicsArt_01-05-08.42.51.jpg

And that's the tiara completed! It comfortably sits on my head with no straps around the back as it was shaped perfectly to my forehead! Will continue my costume progress in a minute...
 
Right! Next I made the sword and shield (partially - shield back design and straps have not been done yet because i'm lazy)

I bought a gorgeous godkiller 3d printed kit from Tip Top Workshop on etsy https://www.etsy.com/uk/listing/548566351/ The print quality is gorgeous and it was easy to put together, however my only qualm is that there isn't any way to put a metal rod etc inside it, so it snapped in two when i dropped it onto carpeted floor! The team who make it though are super kind and helpful.

Standard 3d print finishing - sanding, priming, painting etc. Feat homemade spray painting rig of string and a fence post..

IMG_20171005_174427134.jpgIMG_20171004_085023716_3.jpgIMG_20171005_180643846.jpg

And the finished sword! I think I'm going to repaint it as my lovely chrome paint was ruined by clear coat because i didn't know any better at that point :')

IMG_20171005_210653631.jpgIMG_20171005_210813581.jpg

On to the shield!

I used my old Queen Hippolyta shield as a size guide, and cut a base circle out of 10mm eva foam, then curved it into shape using a heat gun and a plastic snow sledge :')

IMG_20171003_180753421.jpgIMG_20171003_183143881.jpg

I then carved in the recessed lines with a craft knife before opening them up with a heat gun.
IMG_20171003_210749183.jpg

I then glued on all the raised details on the shield, using 3mm foam, and string for the line details. The whole thing was then covered in black worbla as I have a load spare.

IMG_20171023_075822440.jpgIMG_20171228_202334285.jpg

I then primed with wood glue, and then painted the whole shebang using a pale gold and a gunmetal colour metallic acrylic paint. and then shaded and weathered!

IMG_20171229_161658416.jpg

And the finished (ish) shield!

IMG_20180101_192613361.jpg

Still need to do the back of course but i just... cant be bothered right now as it's not an interesting part of the costume....

Bracers coming next!
 
Bracers!

0362b30467e9456e8063ae1ece0a218b_th.jpg

As I am planning to make the bodice armour from cast urethane rubber, like the real movie one, I wanted to practice with these materials first, so decided to make the bracers in the same way! (albeit flat moulded) I used to be a prosthetic makeup artist, so I'm familiar with sculpting and casting, but not so with urethane rubber.

I bought PS Flex 60 from PS Composites, and T-30 silicone to mould with (both are platinum cure)

I sculpted the first bracer flat with chavant clay, completely flat first, then adding the 3d muscle detail, then battle scratches.
IMG_20180131_003925019.jpgIMG_20180130_202147957.jpgIMG_20180131_200224914.jpg
I then made the most hobo mould i have ever made before as I had nothing else to make mould walls with :lol

IMG_20180131_202329369.jpgIMG_20180131_204603939.jpg

I then mixed up the rubber, adding in black pigment, and hoped for the best! This is a fast curing rubber, so after a few minutes i secured the mould into a curve shape so it would cure in an arm shape!

IMG_20180201_202221987.jpg

And here's what came out! I actually scrapped the one pictured as it was too thick to fit around my wrist. I ended up being happy with my 4th attempt, and glued felt inside for comfort (and so the rubber doesnt rip)

IMG_20180201_223111026_BURST000_COVER_TOP.jpgIMG_20180201_223105098_BURST000_COVER_TOP.jpgIMG_20180201_223120934_BURST000_COVER_TOP.jpg

I painted the bracer using my airbrush and Model Air paints, before weathering and shading by hand with regular acrylics.

IMG_20180222_210134337.jpg

And here is the finished bracer!

IMG_20180225_134331296.jpgIMG_20180225_134323902.jpgIMG_20180225_134345385_2.jpg

Its a lot shinier and more metallic in person than I can capture on camera haha! And I'm happy with how comfortable it is compared to worbla and foam. I'll hopefully film the progress of making the second one, and be able to make a video 'tutorial' like I did with the tiara!

Next up is the leg armour, which was the last thing I finished!
 
Leg armour/boots!

WWomen_suit-3.jpg

To start with, I ordered 3mm tooling leather off the internetz, as well as a basic pair of leather wedge boots for me to frankenstein.

The boots I cut to shape with a craft knife, before painting gold!

IMG_20180314_192144640.jpgIMG_20180314_184551336.jpgIMG_20180314_183644007.jpg

Onto the legs. I bought a pattern from Epoch Echo Cosworx on etsy https://www.etsy.com/uk/listing/531900495/ , and it was a great base! I ended up having to redraw a couple of pieces, mainly the back calf piece, and the top of the front shin piece, and adjusting the strip details to work for my leather, as the pattern was designed for EVA foam.

I spent a good couple of hours cutting out all the pieces and layers to the pattern, as I have weak arms and limited leather tools XD

IMG_20180319_145801_2.jpg

I then carved all the detail in. The thick and deep lines on the lower leg pieces, and a small recessed line on all the middle strip top pieces, and then used a pointy sculpting tool to emboss the line details on some of the gold pieces when the leather was wet.

IMG_20180319_153124013.jpgIMG_20180319_174808355.jpg

I then wet moulded! Feat my leg.

IMG_20180319_193235501.jpg

Once it was all bone dry and in shape, I glued the layers together using contact cement, and made the strap holes - either a circular hole for a ball headed rivet to go through, or a horizontal slot for a strap to go through.

IMG_20180320_212834778.jpgIMG_20180320_204041124.jpgIMG_20180320_212839033.jpg

I had a quick test of the fit, which is very difficult when you live on your own and masking tape isnt strong enough to hold the leather!

IMG_20180321_204845428.jpg

I then painted and battle damaged! I was stupid and forgot I needed to add battle damage until after I had done the red paint, but it all turned out ok anyway! I just carved all the scratches with a small craft knife.

For the paint, I followed the manufacturers instructions - painting with a very metallic silver paint first, and then spraying the candy colour over the top. It turned out great!!

IMG_20180321_211259467.jpg
IMG_20180322_194656085_2.jpgIMG_20180322_205227845.jpg < left is before i remembered I needed battle damage, right is after... but look at that colour!!

I then masked off the red and painted the gold, then weathered and did any detail painting by hand with acrylics - the middle strips, the two smooth outer lines are a darker more brown gold colour. I painted the carved lines on the shins with a dark gunmetal almost black, the scratches with a dark metallic brown, and then weathered and shaded with the same brown.
And then it was done!!! I'm so damn happy with these legs, in my opinion they're the most accurate costume piece I've made in my 7 years of cosplay haha! Even though theyre not 100% of course, I'm damn proud :D Im at the mercy of Mr Postman before I can completely finish and do the straps, but they'll be done soon!

IMG_20180322_223235874.jpgIMG_20180322_223129946.jpgIMG_20180322_223121990.jpg First photo and last with flash, middle without.

Don't know what I'm going to make next. Probably will make a start on the bodice sculpt once I have the time!
 
This is fantastic! You really have done an outstanding job making your own suit from scratch. And it's awesome to find these threads into the project so I can see them come to fruition.
 
This is stunning! I love the mixed media use and your little scarring details and paint job are spot on. That tiara is a work of art - the metal work is amazing. Looking forward to watching this progress. :)
 
Right! I finally had the time to do more work, and the convention this is due for is looming :(

So next I jumped in with the harness/bulger thing and her armband.

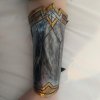
The armband was made from black worbla, with no foam as a base as I wanted to get the sharp bends, so each layer is 2 layers of worbla stuck together
IMG_20180424_140205761.jpg
I carved in the line details with a craft knife in the warm worbla, then sprayed the whole thing gold.
IMG_20180424_144429070.jpg
I then hand painted in the colour variation
IMG_20180424_150027011.jpg
Then weathered! Definitely the easiest piece of the costume so far.
IMG_20180424_150946058.jpgIMG_20180424_151019792.jpgIMG_20180424_151106450.jpg

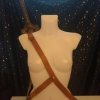
The harness is made from some 2mm brown leather I had lying around. I cut it into 3cm wide strips, before cutting into all the pieces!
Screenshot_20180423-233957.png
The sword frog and lasso holder (the bits that sit on her hips) and the belt end for the shoulder were made the same way I made the armband - layers of worbla with the details carved into hot worbla.
Screenshot_20180423-234001.pngreceived_1964061143606807.jpeg

I then used contact cement to glue them to the belts! I attached the leather to each other in the same way.
Then just a couple of sam browne studs were added and it was done! When I have the time, I'll dye the leather darker brown to be more accurate, but thats not my priority right now!!
PicsArt_04-23-06.28.33.jpgreceived_1964061360273452.jpeg

I've just ordered the last of the supplies I need to make the bodice, so I'll definitely have updates on that soon! :)
 
Amazing work! I made my own outfit for Fan Expo Dallas, but it was my absolute first time making anything so the whole costume is due for upgrades now that I have some experience. I had purchased a skirt and harness that were made of vinyl, I want to remake both with actual leather! I'm going to attempt having 3D prints of those buckle things that go on the harness.
 
Right! The costume is now finished!! I've done a hell of a lot over the past few weeks so lets get to it.

IMG_20180504_193923800.jpg
Firstly, the small bits. I made wonder woman's lasso using some gold tubing and bright yellow el wire! It glows super well in low lighting, so hopefully should look great on stage! I'm going to make a leather lasso too for when i dont need glowing, but those materials only just arrived tonight so bear with XD

I also finally made the back of the shield. Googly eyes for the win! I didnt go for super accuracy with this as, well, its the back and will only ever be partially visible!
IMG_20180509_202550582.jpgIMG_20180509_214719812.jpg

Then I have also made the cloak. Its wool, and has a fur trim (which i havent taken a picture of finished, just before the trim!) I did decorative machine stitching on all the seams and the.. unnecessary decorative seams.

IMG_20180513_163723662.jpgIMG_20180513_135840006.jpg

I also made the skirt! Super easy, patterned on newspaper then cut out of this lovely metallic blue leather i bought for the costume a year ago! This will be glued inside the bodice (with one side velcroing shut where the bodice attaches together). I masked off and painted the gold detailing with angelus leather paint.

IMG_20180508_202112370.jpgIMG_20180508_211010628.jpgIMG_20180508_212604658.jpg
 
And onto the big bad bodice! This will be pic heavy...

SO originally I was planning on sculpting the bodice, moulding in silicone and then casting in urethane rubber - like the real costume! However I didn't feel confident enough in my skills to spend all that money on supplies (and possibly waste all that money!) so after enjoying making the leg armour, I decided to use leather (which is still accurate! Some of her armour is leather)

I started by making a base from Kobracast. Its a bit like worbla, but lighter weight and more flexible, but much less prone to tearing - perfect! Well it was super wrinkly and hard to control, but I got there! I shaped it over a mannequin in my size, with tin foil sculpted on the mannequin for the rib detail.
Once that was done, I covered the whole thing in masking tape and got to patterning!

IMG_20180505_172941907.jpgIMG_20180505_212834874.jpg
this took a bloody age. I think I redid it about 5 times before I was happy! Once I was, I cut all the pieces out of leather, and began the long and arduous task of wet moulding every piece!

IMG_20180508_153817821.jpg

For the gold pieces, before doing any shaping i glued down the multiple layers, and wet carved in the texturing!

IMG_20180515_095006843.jpg

I then spray painted a base gold on these pieces (because I couldn't be bothered with masking the red parts later) and glued them to the base bodice with contact cement :)

IMG_20180515_165258861.jpgIMG_20180515_174943710_BURST000_COVER_TOP.jpg

I then glued down all the red pieces (which were untextured and smooth)
IMG_20180518_144059626.jpgIMG_20180518_161007762.jpg

Then painting! I started with a metallic red paint, before airbrushing in the shadows, and dry brushing copper lightly on the highlights (boobs and ribs lol)
IMG_20180518_212711291.jpgIMG_20180519_224200031.jpg

And then this morning I finished the costume!! I carved in battle damage with a craft knife, then painted the scratches with a gunmetal silver so they catch the light a little. Here's a look at the finished bodice! I'm so super proud! It fastens at the side with an overlap of velcro.

20180522_121013.JPG20180522_121143.JPG20180522_121135.JPG20180522_121126.JPG20180522_121211.JPG20180522_121156.JPG
First photo with flash, rest in sunlight!

- - - Updated - - -

So once that was all finished, I couldn't wait to throw the whole costume on, wig and makeup and all haha!

IMG_20180522_141122404_HDR.jpgIMG_20180522_140935253_HDR_2.jpgIMG_20180522_140308968.jpgIMG_20180522_141106262_HDR.jpg

I'm wearing the costume this sunday, and entering a big competition so wish me luck!! I'll definitely post back here when I have proper pictures of the costume that aren't just mirror selfies, and I'm happy to answer any questions anyone has! Thank you for coming on this build with me!!
 
Wow, that looks awesome. The suit looks really professional. You make a great Wonder Woman, good luck with the contest.
 
You're lucky you had blue metallic leather laying around for that skirt lol. I'm planning on making another one with leather but I have just tan lightweight leather from Hobby Lobby!
 
This thread is more than 3 years old.

Your message may be considered spam for the following reasons:

  1. This thread hasn't been active in some time. A new post in this thread might not contribute constructively to this discussion after so long.
If you wish to reply despite these issues, check the box below before replying.
Be aware that malicious compliance may result in more severe penalties.
Back
Top