WIP - Rocketeer Helmet Sculpt and Cast

This looks fantastic! One of the coolest helmet designs and you captured it beautifully. Great job!

Thanks! I finished the fin and applied the fake welds, and molded and casted the helmet (not the fin, yet), and the mold was faulty. I didn't take the same amount of care as last time and ended up with a few bubbles trapped between layers of rubber (not immediately obvious looking at the mold, but my suspicion is that when the first coat of resin heated up as it cured, it made the bubbles expand, leaving dents in the surface), and worse, the mother mold wasn't stable enough, so I have a flat spot on the top of his head.

So, more materials coming, and this time I'll make a proper mold.

Pictures coming, even of the failed attempt...
 
OK, we now resume where we left off, with pictures...

With the plywood fin held in place with three small screws, and wax paper stuck to its sides, I attempted to use red spot putty to make the simulated welds. I put it in a disposable glue syringe (purchased 5 to a pack at the local Woodcraft store). The results were less than impressive. Mostly it was too fragile and shrunk too much. So I scraped it off and tried again with ordinary latex caulk, also in the glue syringe. It came out pretty well, but I didn't think it was tough enough to use for the weld around the fin.
helmet64.jpg
helmet65.jpg


Speaking of the fin, I put a few coats of primer on it, and hit the defects with spot putty, to get rid of the woodgrain and some small splinters on the edges.
helmet66.jpg


I installed the nearly complete fin and painted vaseline along the lower edge of it, to keep the weld from sticking. Then I loaded up the glue syringe with Bondo. I didn't attempt to do this for all the welds simply because it sets up so fast. It took two syringes just to do the fin. I was pretty pleased with how it came out.
helmet67.jpg


After it cured, I removed the fin, and it left a perfect socket! I cleaned off the vaseline with rubbing alcohol.
helmet68.jpg


I gave the helmet a final coat of primer, and it was about ready to be cast for the final helmet(s).
helmet69.jpg
helmet70.jpg
 
I closed up all the holes with Monster Clay, and also build up a "collar" around the bottom so it would be easy to get a good bottom edge to the helmet. Up on the stand, I went ahead and made another mold with silicone and plaster bandages, just as before.
helmet71.jpg


I readied the mold for casting, and already noticed something wrong - there was a soft spot at the back where I hadn't gotten enough layers of plaster bandage, and the whole thing didn't fit together as securely as I'd have liked. I couldn't use a mold strap (although this time I had one) for fear it would crush the back, so I ended up gorilla-taping it together on the sides.
helmet72.jpg


I got a good uniform smooth thickness this time (a little too thick, actually), but the helmet came out with some serious defects. Most seriously, the top was flattened, and there was a small warp on the chin. In a few places, there were strange depressions, which I later matched up to large bubbles where I'd allowed air to be caught between the first coat of silicone and the next thicker coat. I didn't take proper care, and I paid for it. I can't bear to toss this one away, but it's a little too messed up to use.
helmet73.jpg


So, back to the drawing board. Yet another mold. This time I was very careful to get the silicone into every nook and cranny, and carefully smoothed down at least three thickness of plaster bandage to follow every contour. In this picture, I've finished the back half, and painted paste wax along its front edge. Then, I started applying the first layer of bandage to the front. To try and make a more solid fit between the two, I set a folded layer right against the edge of the rear half. The subsequent layers would provide the overlap.
helmet74.jpg


So here's the final mother mold, waiting to completely cure and dry so I can try another casting in the morning.
helmet75.jpg
 
The mold came out very well. I'm especially happy with the way the edges of the mother mold came out - they fit together very solidly.
helmet76.jpg


This mother mold is solid enough that I can actually use a mold strap to hold it together.
helmet77.jpg


A few imperfections in the silicone mold - this one is similar to what happened catastrophically in the last mold: a void between the first two layers of rubber, right near the central "weld". It's not very large, so I'll be able to clean it up on the final casting.
helmet78.jpg


Epic fail! The first cast from the new mold is perfect except it's all sticky on top! My first thought is that it looks like the pigment is settling out, and I guess that maybe I'm using too much pigment.
helmet79.jpg


The next cast is successful, using less pigment, except it's a little bit thick/heavy, and the last layer inside came out all swirly looking. Starting to wonder what I'm doing wrong.
helmet80.jpg


Here's the result of that mold imperfection, a bump near the fin.
helmet81.jpg


And another fail! Now I'm thinking I must not be always mixing the resin well enough.
helmet82.jpg


Success! One more time with no pigment, and I can see the swirls in the nearly-clear resin as I mix it - and I can see I really do need to mix it a lot more thoroughly than I've been doing. It came out great, but it really is harder to trim the plastic when it's white - the detail is harder to see.
helmet83.jpg


Once more with pigment and mixing very throughly, and another success! This one is nice and light, but a little too thin around the bottom - it'll need a bit of bondo to make the bottom edge nice and solid (with no sharp edges!)
helmet84.jpg


And now I have my trio of helmet shells - one for me, my girlfriend, and my daughter. The master helmet sits in the back, looking over its children proudly. Time to cast the fin, finish trimming all the holes, and patch all the defects with bondo.
helmet85.jpg
 
These are continuing to look awesome! It's amazing what we learn when we fail... Heaven knows I've torn out a lot of seams this week (most of them zipper-related -- ugh).

Can't wait to see these guys all painted up and ready to go. =)
 
I forgot to mention one detail - on the tan and white helmets, there's a slight dent in the face on one side of the mouth. You'll notice it's not present on the last gray one, and it's not because I made a new mold.

Right behind that area is a sharp bump on the outside of the silicone, and a corresponding dent in the mother mold - but unless they're perfectly lined up, the bump rides up the side of the dent, and it ends up pushing the rubber in a bit right there. I noticed it before I cast the last one, and just a slight adjustment, and they fall into place properly. I'll have to fill in that slight depression on those two helmets.
 
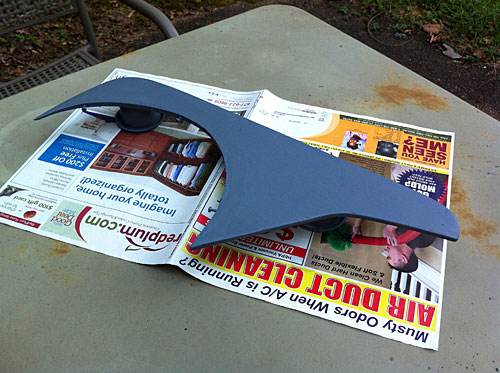
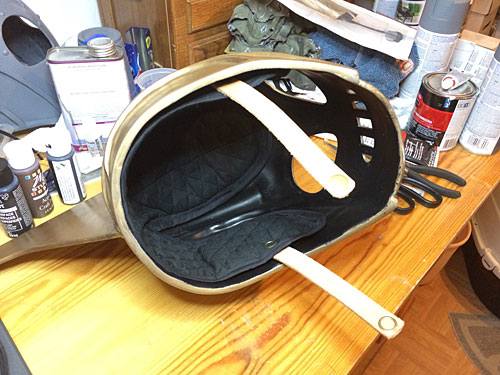
Now to cast the fin.

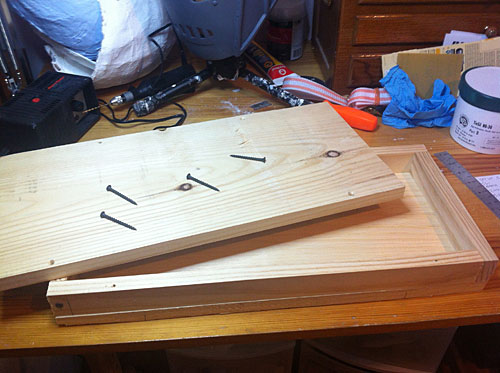
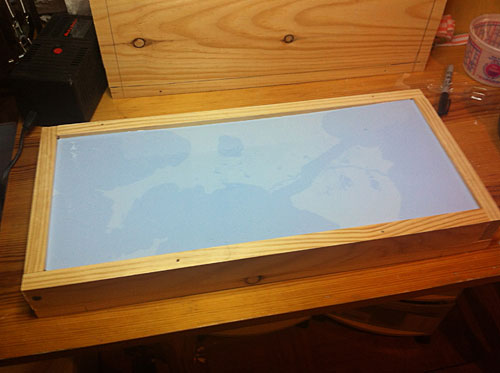
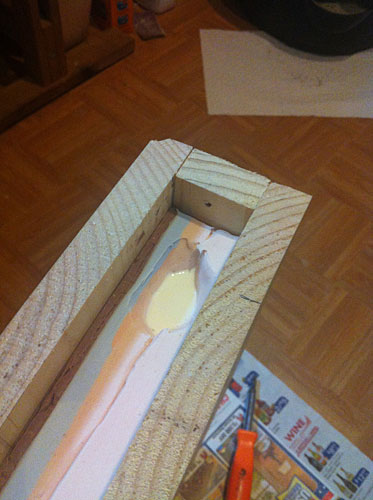
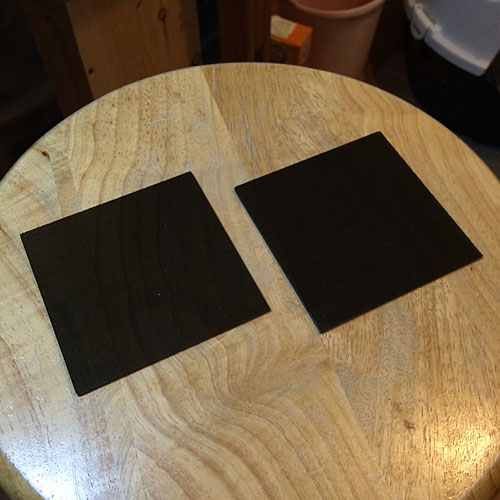
First, I built a wooden box that could be completely disassembled, with an inside depth of 1 1/2" and big enough to leave a half inch or so all around the edges of the fin.
fin1.jpg


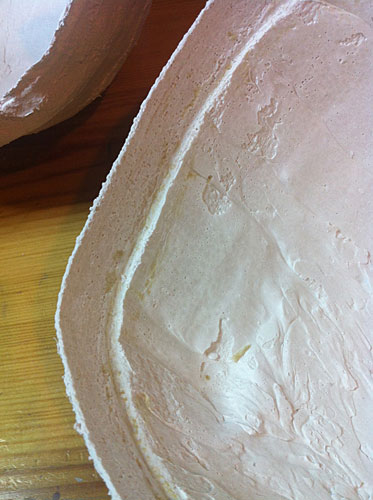
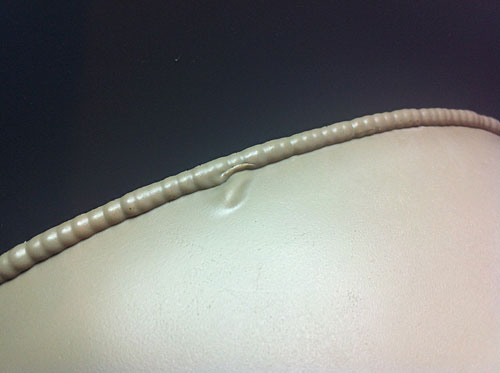
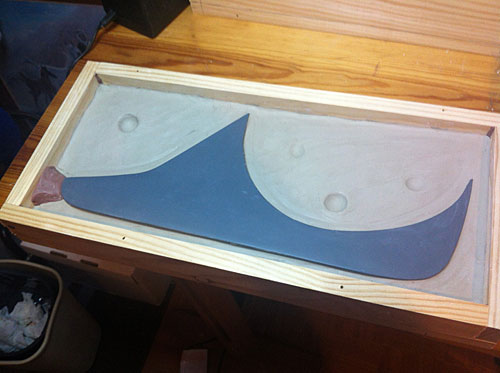
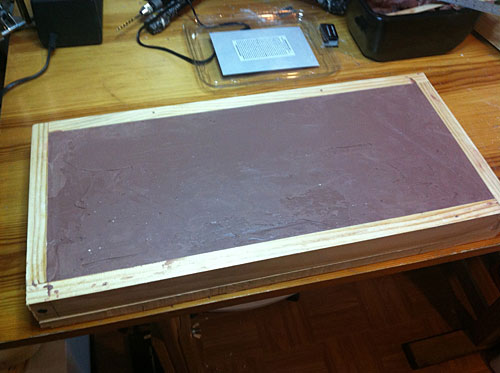
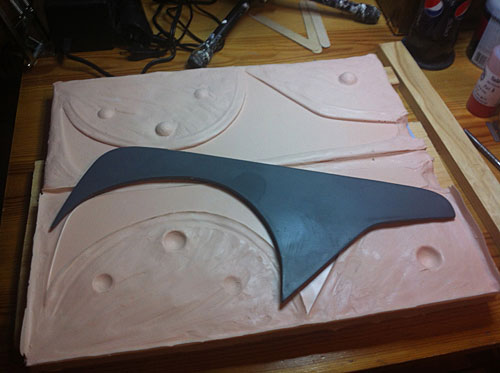
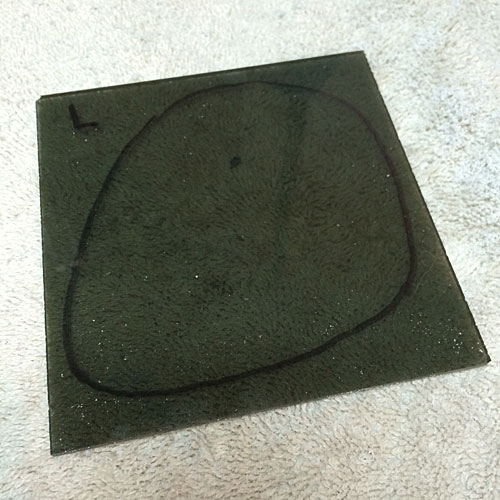
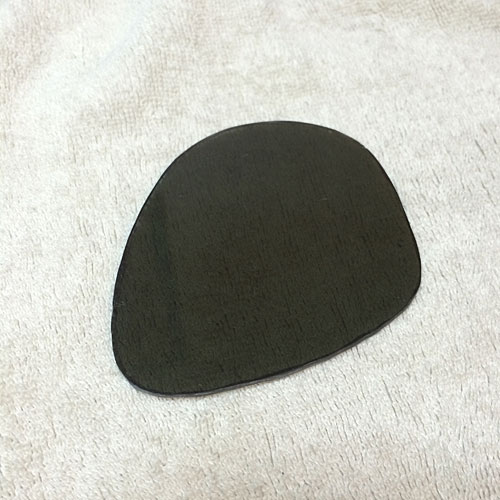
Next, I sealed up the corners with Monster Clay, and filled it up halfway with air-dry clay. Then I embedded the fin in it up to its mid-point. I added a "spout" to the end of the fin, made out of Monster Clay, to leave a place to pour in the plastic and let air escape. I used various items (including a small rubber ball) to add dents to the clay so I'd have some "keys" to help make sure the two halves of the rubber mold line up perfectly later.
fin2.jpg


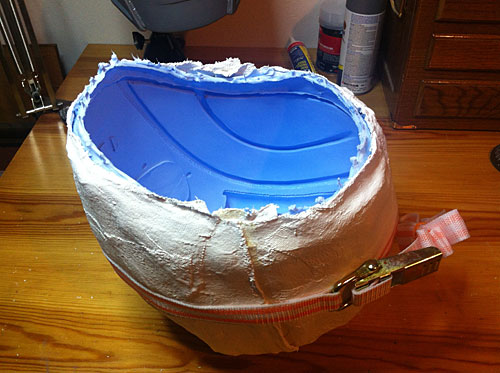
Next, I poured silicone into the mold. It took a LOT of silicone. I used up the two pound I'd got from BITY Mold Supply, and added about a pound I had left over from the helmets, and it still didn't get quite all the way to the top.
fin3.jpg


Not wanting to wait a week until more silicone arrived to finish this half of the mold, I filled the rest of this side (after the silicone cured) with melted Monster Clay. I put it in the oven in a pan at 200 degrees and waited for it to get liquified. Then I poured it in, and used the side of a metal ruler to make sure it was good and flat.
fin4.jpg


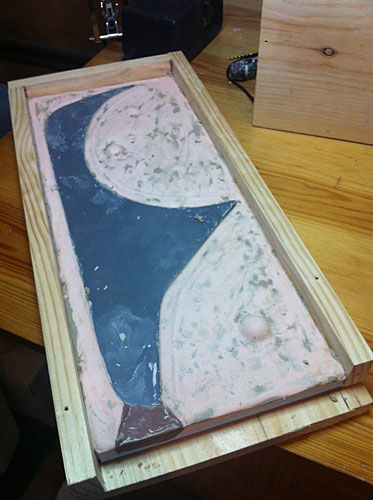
Now I could flip it over and remove the air-dry clay, which stuck to the silicone a bit more than I would have liked. I hadn't used any mold release, but that might have helped. I washed the rubber to get all the clay off it, and set it aside, waiting for more silicone to arrive.
fin5.jpg


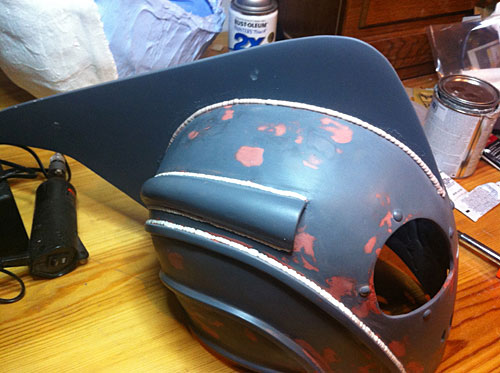
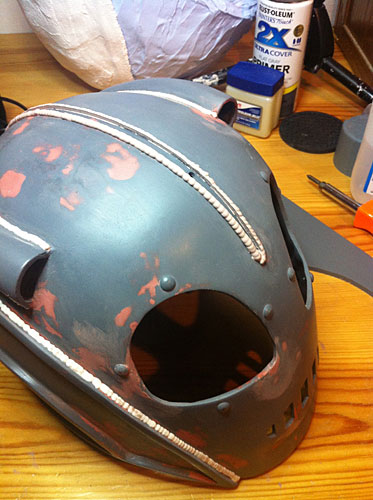
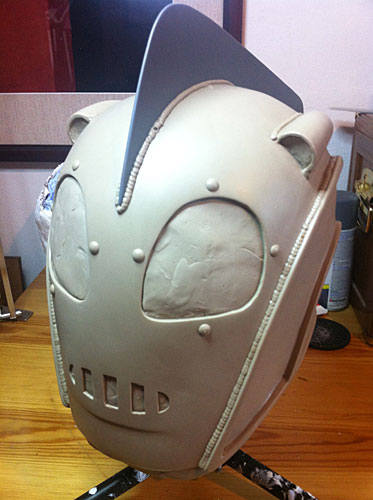
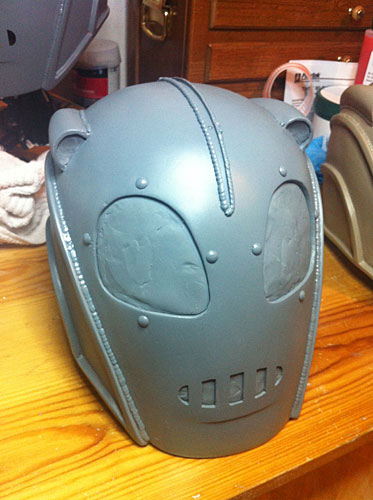
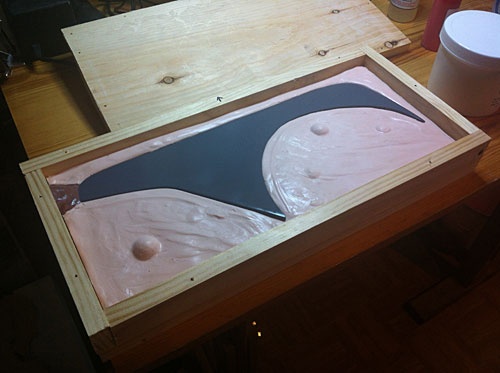
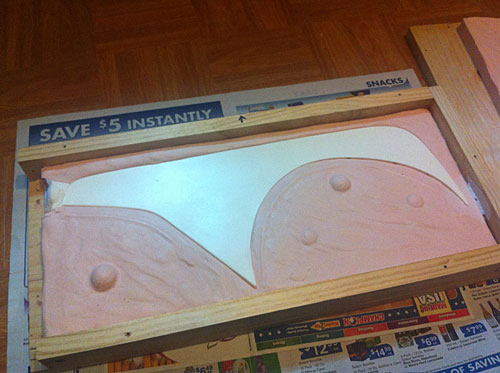
The mold is cleaned up and ready to have the second side poured. I carefully put the master fin back in, but it didn't fit down perfectly. As a result, the final fins will be slightly thicker at the bottom edge, and will need to be sanded a bit to make sure they fit well into the slots on the helmets. I sprayed it thoroughly with mold release (make sure it says it'll work to keep silicone from sticking to silicone!)
fin6.jpg


The second side was poured (which used every drop of the new 2 pounds of silicone), and after it cured, I carefully disassembled the mold (the silicone really stuck to the wood), and now I have the two rubber mold halves. There's the master part on top. Its job is done. I had to trim some rubber off all around, and also inside the mold in the places where it flowed slightly under the fin. As I said, that'll make those parts slightly thicker in the final castings.
fin7.jpg


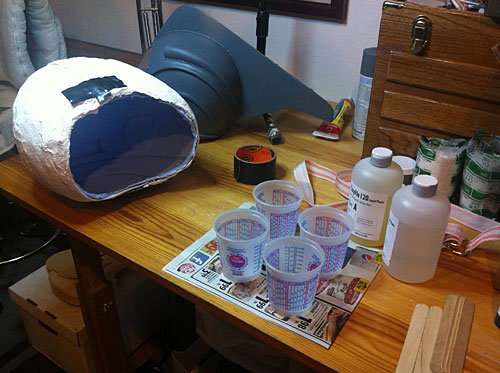
Mold all assembled and ready to pour the first one. This is the first time I've ever done this, so I'm a little paranoid. I've places a lot of newspaper underneath in case it leaks out the bottom at all.
fin8.jpg


Poured and curing. It used about 7 1/2" ounces of resin, less than I expected (for a change). It also didn't leak out onto the floor. I waited for it to cure with great anticipation...
fin9.jpg


Separated the mold halves, and the casting came out perfectly, just a little bit of extra plastic to trim off, plus the plug at the tail end where I poured it in.
fin10.jpg


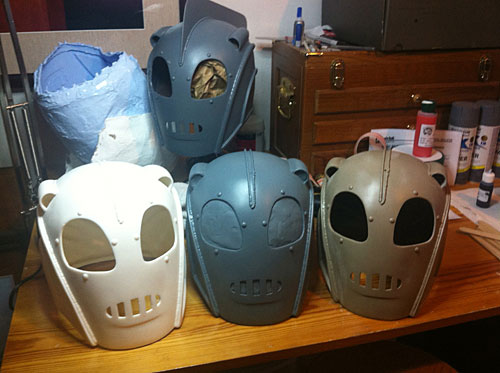
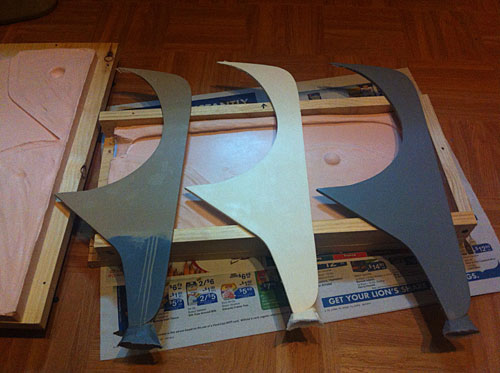
I cast three fins for the three helmets. I didn't really need to match the colors (since they're all going to be sprayed with gray primer), but I did it anyway. I messed up, though. For the second one, I tried using a little less resin, and miscalculated and had to mix up another batch. In my haste, I grabbed the gray pigment instead of the brown. So that one ended up two-tone. :)
fin11.jpg


Here's a close up of the plug that'll have to be trimmed off.
fin12.jpg


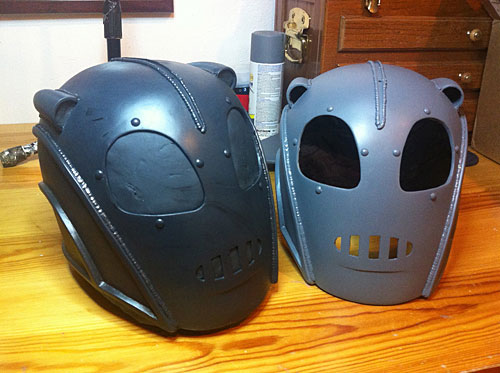
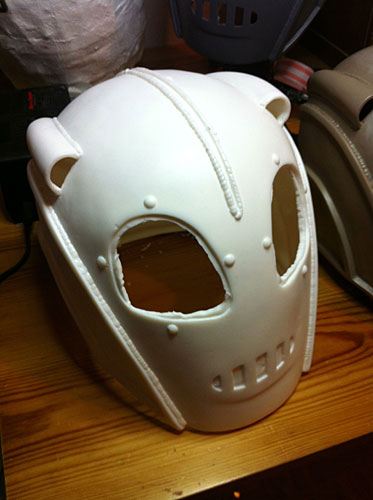
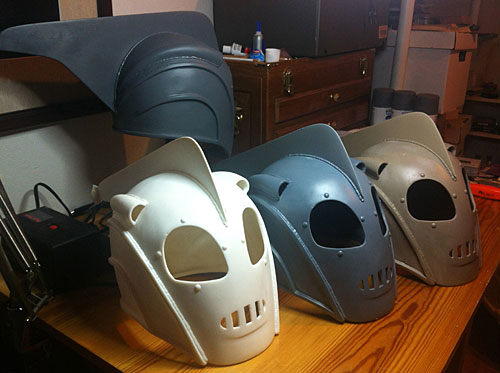
And there they are, all parts cast and ready for final filling, sanding, and priming.
fin13.jpg
 
I love your molding method for the fin. I noticed that around your mothermold for the helmet you used a tightening strap to keep it together. How did you keep the fin mold together when you stood it up? Did you do something similar. Great pull and incredible work.


Sent from my iPad using Tapatalk HD

Thanks! The wooden box I built for the fin mold screws together on all sides, so that's what was keeping it together. It can be completely taken apart and put together securely. Having said that, as I disassembled it for the third time, I thought maybe I should have just used a bungie cord. :)
 
Sorry about the long delay. I had a bunch of other stuff going on, and also had a small setback. One of the three "final" helmets wasn't so final after all - It was one I hadn't done such a great job mixing the resin, but only for one of the layers. So as I worked to try and thin out the area around the mouth, it started de-laminating. I stripped off the last layers, and what was left was a bit too thin. I decided it wasn't worth trying to repair, so I made one last cast with white resin.

Here's the final white cast, with most of the holes cut out, in the process of having the thin bottom edge filled with bondo.
helmet86.jpg


I spent quite a bit of time very carefully filling and sanding imperfections, and shaved off four of the molded-in rivets, replacing them with the actual metal upholstery nails I used in the original master, because they had serious air bubbles in them. I eventually got to the point where I felt like I could continue finessing the thing forever, and decided it was time to finish it up.

Here it is ready for its last coats of primer. You can see a couple of the real metal rivets.
helmet87.jpg


At last, I painted it gold. Two coats, lightly sanding in between. I used Design Master Colortool "Brilliant Gold", which I think was actually just a bit too yellow.
helmet88.jpg


That was ok, though, since I then went over it with Antique Gold Rub n' Buff, which gave it a more brassy color and a nice smooth metallic look.
helmet89.jpg


But that's too new and shiny, have to dirty it down, so here's a thin coat of a mixture of My Studio acrylic craft paint, "Bittersweet Chocolate" and black. This coat was too thin and runny, so subsequent costs were thicker. I sponged off the paint with a soft rag, leaving it in the crevices, and leaving a subtle "rubbed metal" look to the surface.
helmet90.jpg


The result was better than I expected. It looks even more like it's made of actual brass in person. It's kind of uncanny.
helmet91.jpg


I brush-painted the inside with Folk Art Multi-Surface satin acrylic paint.
helmet92.jpg


Next up: making the liner...
 
Now for the liner!

I made a card stock and blue tape pattern to fit the inside of the helmet. I wanted to keep the air scoops open for ventilation, and make something relatively easy to construct.
helmet93.jpg


Here's the thing unfolded flat. Time to trace half of this onto a pattern...
helmet94.jpg


And here we go, ready to cut some fabric.
helmet95.jpg


I've cut of two pieces of some black quilted material, and two pieces of plain black material, and sewed the halves of each side together. On the plain side, I used some velcro with heat-activated adhesive. You stick it on and iron it from the back to set it.
helmet96.jpg


I cut out some pieces of foam to pad the top and sides. For the helmets for my girlfriend and my daughter, we'll need to use more padding (because their heads are smaller than mine!), and will likely have to alter the pattern.
helmet97.jpg


All sewed together, including some black fabric tape along the edges.
helmet98.jpg


Stuck some self-adhesive velcro (from another set of velcro - the heat-set stuff won't work for this) on the velcro on the liner, and stuck it all in its proper place inside the helmet.
helmet99.jpg


Now, what to use for a chin strap? Luckily, I found these leather wristbands at the craft store. I cut off the ends with their existing small straps (fortunately, they were exactly the length I needed) and I set in some larger brass-colored snaps I got at the fabric store (along with the snap setter, the sort you pound on with a hammer).
helmet100.jpg


After some experimenting to work out the exact length and position needed, I attached the straps to the sides of the liner with snaps (which allows them to pivot).
helmet101.jpg


Replaced the liner in the helmet and walked around the house with the helmet on, feeling a little triumphant. :)
helmet102.jpg


One last task to go: The tinted plastic lenses. I've just ordered a couple of 4" sample squares of 1/8" gray tinted acrylic, I'll see if I can bend them slightly with some heat. They don't need to curve much, but they do need to curve in two directions. I might lay the square over a hard rounded surface and heat it and see if I can make it droop enough to get the curve I need. If that fails, I'll have to try vacuum forming, which I've never done.

Once I've got the lenses formed and cut to size/shape, I'll fix them in place with Sugru silicone putty.
 
I just wanted to add that I took inspiration for the liner from Valor's (http://www.therpf.com/f9/rocketeer-helmet-custom-liner-82366/). It hadn't occurred to me to make the liner in three lobes until I saw his version. I didn't refer back to his when I was designing mine, so the details are entirely different, but I'd like to thank him for the general concept, it really helped me in the design process.
 
Also, thank you to Valor and Mr. Spider for their suggestion in other builders' threads to use Antique Gold Rub n' Buff. It's the perfect solution.

Just wanted to give credit where credit is due, shoulders of giants and all that. :)
 
Coming down the home stretch!

Got a couple of 4" squares of tinted acrylic from Tap Plastics.
helmet103.jpg


Here's a square with the rough shape of the lens marked on it.
helmet104.jpg


Then I cut it out to that shape.
helmet105.jpg


Then the fun begins. I held the edge of the piece in a pair of smooth-jawed pliers, and wearing heavy work gloves, heated the plastic with a heat gun set at what it claims is 1000 degrees, sweeping it over the plastic constantly for a few minutes, until it got slightly droopy. Then I held it by the edges and formed it around the curved side of a glass bowl. I did this several times, until I got a bit of a domed center, and refined the curves of the edges to match up with the inside curve of the helmet.
helmet106.jpg


Then I attached the lenses to the inside of the helmet with black Sugru silicone putty.
It wasn't perfect, partly because the plastic is only very thin right at the edges of the eyeholes, and I didn't want to thin out the plastic past that point, so there's a slight gap between the lenses and the edge of the hole (through which you can see the Sugru acting as a gasket), which doesn't look bad.
helmet107.jpg


And voila! The helmet is complete at last.
helmet108.jpg


Here I am modeling the finished helmet. I was pleased to find I can (just barely) get it on over my glasses. I've already ordered my Rocketeer jacket - but the rest of this will be in other threads.
helmet109.jpg


Thanks for following along on this adventure!
 
This has been an amazingly awesome thread to follow! Thanks again for sharing all of your info and posting pictures of everything (including the speed bumps). Congrats on a great Rocketeer helemet build.
 
This thread is more than 10 years old.

Your message may be considered spam for the following reasons:

  1. This thread hasn't been active in some time. A new post in this thread might not contribute constructively to this discussion after so long.
If you wish to reply despite these issues, check the box below before replying.
Be aware that malicious compliance may result in more severe penalties.
Back
Top