I suggest that you start with the pleated ribs. These will take most of your time. When you have finished these, making the rest of the jacket will feel much easier.
")
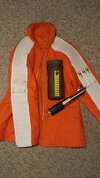
Unlike Luke's ceremonial jacket, which has quilted ribs, the ribs on the Snowspeeder Pilot jacket are box-pleated -- each rib consists of two opposite folds. No batting is necessary - the folding and the stiffness of the fabric will keep the pleats puffy by themselves.

I have scaled pics and measured that each pleated strip is 3 inches (7½ cm) wide (plus seam allowance) and that there is one pleat for about each ½ inch (13 mm).
Each strip is pleated from the middle of the forearm, over the shoulder, to the collar -- they do not go around the back. The strips are not pleated all the way down to the wrist: The last eight inches (20 cm) are flat. Not only does this save work and fabric, but it is also easier to fit unpleated sleeves into the cuffs of your gauntlets. The gauntlet cuffs will cover up most of these lengths anyway.
In this tutorial, we make a single pleated strip at twice the width (+ 2× seam allowance), and then cut it apart into two -- this way, we save a lot of work.
1. Take the long strip that you have cut out. Turn it over so that the bottom (non-coated) side is facing up.
2. Measure the center and draw a line, or mark the center at points along the strip.
3. Lay down your measuring tape right along the line that you have just drawn. Make a mark at each half inch (13 mm).
4. Take your right-angle ruler, and draw a line across the strip at each mark, so that there is a space of ½ inch between each line. Each tree spaces will form a single box-pleat.

Each box-pleat consists of two simple pleats: One in one direction, and another in the other direction.
There may be other ways of doing it, but I made the pleats on my jacket in two steps: First the downward-facing pleats and then the upward-facing pleats.
For each three spaces: pinch the first space in and over itself and pin, so that two lines meet. There should be no line inside the pleat (that would make it too large). Do this at the left side, at the right side and in the center. Then jump over two spaces and repeat for the next pleat.
Once you have pinned the whole strip, stitch near the left edge, near the right edge, and right beside the center line. Work your sewing machine in the direction down over the pleats, not in the direction against them.
Then do the same thing over again, but in the other direction: Each new pleat should meet with another in the other direction. When you are done folding and pinning the pleats, each box pleat should be ½" wide. This time you should also sew three seams, over your previous seams: at the left side, at the right side and right next to the center line, but in the other direction.
Once you have sewn it all together, you are not quite done yet:
There is only one seam down the middle, just a little bit off the center-line. Now make a new seam alongside the center-line, but on the opposite side of it from the previous seam. After you have done this, then you can cut the two pleated strips apart.
.jpg")