VIKINGS: Lagertha Costume w/ leather and chainmaille

SaraParker

New Member
A friend of mine said "Hey, why don't you do Lagertha's armor from Season 3".
I looked ad it and was thinking: "Hey, yeah, I can do that in 2 weeks" :facepalm

Then the research began and I realized really quickly that this will take me more than 2 weeks.
I will post my progress pics below. Check my Instagram for more if you like.

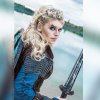
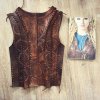
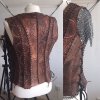
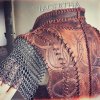
This is the end result:

lagertha-1.jpg
lagertha-2.jpg
lagertha-3.jpg lagertha-4.jpg
lagertha-vikings-cosplay-saraparker.jpg
 
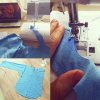
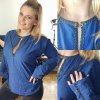
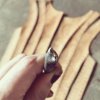
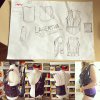
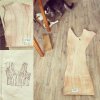
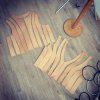
The SHIRT

I made my own pattern, but after I was done with it I found a pattern from McCalls, I can post it later if anyone is interested
12417535_1004177796333628_2794536548134717751_n.jpg

Since I couldn't find the right color, I had to dye my shirt, just FYI, DO THAT BEFORE! And wash your fabrics, linen and cotton shrinks! :lol
12933005_1005798366171571_7635876281771317410_n.jpg

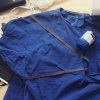
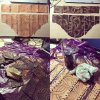
I had no idea how to find the trims, but I got lucky on found it on Ebay! The texture is almost velvet-y
12523821_1006805936070814_7616943747309441322_n.jpg

The claps can be found at Jo-Anns, really was happy finding them there, they come in different colors.
12932547_1006280476123360_5604459653831866576_n.jpg

Some hand stitching of the trim and attaching the claps and almost done... there is a lot of details still in this. See hem stitching.
12923229_1007512189333522_4960925776619825119_n.jpg

12417535_1004177796333628_2794536548134717751_n.jpg


12523821_1006805936070814_7616943747309441322_n.jpg


12923229_1007512189333522_4960925776619825119_n.jpg


12932547_1006280476123360_5604459653831866576_n.jpg


12933005_1005798366171571_7635876281771317410_n.jpg
 
Last edited by a moderator:
THINGS YOU NEED :D

I didn't cut my rings, I did some research and ended up buying NON galvanized (less shiny but can rust) rings on Amazon
it's a 4 in 1 pattern, best is to close a lot of rings and then make 4 in 1 bits and then attache them into patches.
Don't worry about the correct length and shape yet, you will have to adjust that later when gravity is doing it's bit aka you need to attache it.
12369037_945563245528417_1760440284856515743_n.jpg

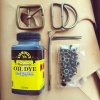
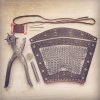
For the bodice you need undyed leather (I got it from ebay, check saddler or similar), leather dye, tools for the tooling, swivel knife, braiding needles, belt buckle and D-rings for the sword belt, grommets, hole punch (1 round, 1 wave/s-shape), hammer, rivets, leather bands (round and flat), Oil, ...
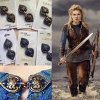
12790904_989601537791254_5954545562386898908_n.jpg

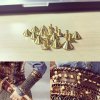
It took me ages to decide on those rivets, but I'm happy with them. Compare to original.
1934895_989601387791269_6809354514514918555_n.jpg

I only found this hole punch from a cheap chinese ebay store, takes several weeks, costs only a buck and doesn't last for the whole armor, I would suggest getting 3, just in case. 3 well spend Euros/Dollars ;)
13062547_1020652134686194_7873676645174437763_n.jpg

1934895_989601387791269_6809354514514918555_n.jpg


12369037_945563245528417_1760440284856515743_n.jpg


12790904_989601537791254_5954545562386898908_n.jpg


13062547_1020652134686194_7873676645174437763_n.jpg
 
Last edited by a moderator:
Leather Bodice

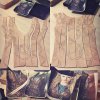
First up: Pattern making, we used the "Oh, let's just wrap you into duct-tape" (Pro Tip: Put on a padded bra you will be wearing and don't wrap to tight and use clingfilm underneath)
12321531_1009873602430714_8889291565146807780_n.jpg12670525_1010136792404395_956807426630388710_n.jpg

Transfer the pattern to leather, I didn't have much, so I had to play TETRIS, I normally have a checklist to make sure I have all parts.
941331_1014719061946168_4516222240685583642_n.jpg12993404_1015229971895077_7199514063233921090_n.jpg

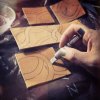
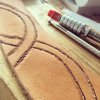
Draw the pattern (I couldn't find any screenshots of the back of her bodice, so I adapted it to the rest). Leather needs to be wet when you start using the swivel knife and do tooling!
13051784_1017389318345809_1121895029547914237_n.jpg13413032_1053232894761451_6712049421281655618_n.jpg

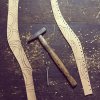
Finish all tooling first!!! THEN do the hole punches. The panels get the "s" aka "wave" punches, only the edges are round, but you need to check closeup shots, there are some waves.
13043794_1017672181650856_3005250014164197710_n.jpg13256181_1038619282889479_3194623634048969282_n.jpg

941331_1014719061946168_4516222240685583642_n.jpg


12321531_1009873602430714_8889291565146807780_n.jpg


12670525_1010136792404395_956807426630388710_n.jpg


12993404_1015229971895077_7199514063233921090_n.jpg


13043794_1017672181650856_3005250014164197710_n.jpg


13051784_1017389318345809_1121895029547914237_n.jpg


13256181_1038619282889479_3194623634048969282_n.jpg


13413032_1053232894761451_6712049421281655618_n.jpg
 
Last edited by a moderator:
Leather DYE

I did wear gloves, yeah, double up if you are wearing cheap gloves ;)
I used different methods to apply the dye and also removed and added some acrylic color to enhance the snakes.

13267744_1040099202741487_4254225165580682505_n.jpg 13226712_1039302822821125_1436670053399928173_n.jpg 13043697_1021462691271805_7442621886818226923_n.jpg 13040954_1021982784553129_134768918314698761_o.jpg

Time to attach the panels (round leather strings), and braid (flat leather bands)
13055352_1022605761157498_8275148419150012160_n.jpg 13082664_1022980804453327_6849359619307643613_n.jpg

13040954_1021982784553129_134768918314698761_o.jpg


13043697_1021462691271805_7442621886818226923_n.jpg


13226712_1039302822821125_1436670053399928173_n.jpg


13267744_1040099202741487_4254225165580682505_n.jpg


13055352_1022605761157498_8275148419150012160_n.jpg


13082664_1022980804453327_6849359619307643613_n.jpg
 
Last edited by a moderator:
Wrapping up

I wanted to finish the top of the bodice first, to figure out the size of the lower part,.. same procedure as above ;)
13417477_1053901361361271_1956280854208935725_n.jpg 13419286_1054482911303116_5825236464558041400_n.jpg
Now it's time to attache all parts with flat leather bands. Also add the rivets and make the bracer (pattern it after your arm ;)).
13331059_1048246361926771_5940132333710500548_n.jpg 13418938_1049995705085170_8012065532064565883_n.jpg 13494845_1057346527683421_1147145709727414504_n.jpg

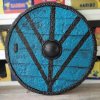
The shield is made from EVA foam, wood and leather. The sword is made from wood with aluminium tape, the scabbard was covered with leather and fur.
13310550_1045616922189715_5341431286080816130_n.jpg 13339718_1047063245378416_2345616906501497412_n.jpg 13391996_1046668218751252_8870478240952303194_o.jpg 13450059_1050779945006746_2174977674134312929_n.jpg

Almost done! Some weathering, add the leather pants (they ripped before I went to ComicCon, so I improvised and used fabric ones and added leather braid stiches on the side)
13475147_1057688040982603_5590673451340957966_o.jpg


- - - Updated - - -

Any questions? Leave them below :D

More pics on instagram.com/DeliriumReal


13417477_1053901361361271_1956280854208935725_n.jpg


13419286_1054482911303116_5825236464558041400_n.jpg


13331059_1048246361926771_5940132333710500548_n.jpg


13418938_1049995705085170_8012065532064565883_n.jpg


13494845_1057346527683421_1147145709727414504_n.jpg


13310550_1045616922189715_5341431286080816130_n.jpg


13339718_1047063245378416_2345616906501497412_n.jpg


13391996_1046668218751252_8870478240952303194_o.jpg


13450059_1050779945006746_2174977674134312929_n.jpg


13475147_1057688040982603_5590673451340957966_o.jpg
 
Last edited by a moderator:
What a great project and SO MUCH WORK! You did a splendid job on all of this, plus you make a perfect Lagertha! You look just like her!
:thumbsup
 
Wow, that costume is incredible!! The location pictures really sell it. I don't know the character but the costume is awesome!
 
I really love this! Fantastic work, I was curious what you used For pants? I'm trying to sew some lagertha style pants but patterns seem to be impossible to find any help would be amazing!
 
FANTASTIC work! This looks amazing. The attention to detail is stunning, even more so with the chainmail. Keep up the good work!
 
The SHIRT

I made my own pattern, but after I was done with it I found a pattern from McCalls, I can post it later if anyone is interested
View attachment 669986

Since I couldn't find the right color, I had to dye my shirt, just FYI, DO THAT BEFORE! And wash your fabrics, linen and cotton shrinks! :lol
View attachment 669990

I had no idea how to find the trims, but I got lucky on found it on Ebay! The texture is almost velvet-y
View attachment 669987

The claps can be found at Jo-Anns, really was happy finding them there, they come in different colors.
View attachment 669989

Some hand stitching of the trim and attaching the claps and almost done... there is a lot of details still in this. See hem stitching.
View attachment 669988

View attachment 669986

View attachment 669987

View attachment 669988

View attachment 669989

View attachment 669990
what mcalls pattern did you locate?
 
Sorry guys, there was something wrong with the display of the pictures.
It should work now.
Leather DYE

I did wear gloves, yeah, double up if you are wearing cheap gloves ;)
I used different methods to apply the dye and also removed and added some acrylic color to enhance the snakes.

View attachment 670495 View attachment 670494 View attachment 670493 View attachment 670492

Time to attach the panels (round leather strings), and braid (flat leather bands)
View attachment 670496 View attachment 670497

View attachment 670492

View attachment 670493

View attachment 670494

View attachment 670495

View attachment 670496

View attachment 670497
 
Leather Bodice

First up: Pattern making, we used the "Oh, let's just wrap you into duct-tape" (Pro Tip: Put on a padded bra you will be wearing and don't wrap to tight and use clingfilm underneath)
View attachment 669996View attachment 669997

Transfer the pattern to leather, I didn't have much, so I had to play TETRIS, I normally have a checklist to make sure I have all parts.
View attachment 669995View attachment 669998

Draw the pattern (I couldn't find any screenshots of the back of her bodice, so I adapted it to the rest). Leather needs to be wet when you start using the swivel knife and do tooling!
View attachment 670000View attachment 670002

Finish all tooling first!!! THEN do the hole punches. The panels get the "s" aka "wave" punches, only the edges are round, but you need to check closeup shots, there are some waves.
View attachment 669999View attachment 670001

View attachment 669995

View attachment 669996

View attachment 669997

View attachment 669998

View attachment 669999

View attachment 670000

View attachment 670001

View attachment 670002
Love this! Do you have a template for the vest?
 

Your message may be considered spam for the following reasons:

If you wish to reply despite these issues, check the box below before replying.
Be aware that malicious compliance may result in more severe penalties.
Back
Top