UPDATE: Completed photos post #21
Decided to build a Tusken Raider helmet for display. I have not decided if it will only be a helmet, or a bust with the bandoliers. I was inspired by the half bust made by starwarshelmets. I'll decide that later. I figured I will build the helmet fist, but I did order the neck respirator from Godzilla too.
So, received a package from Godzilla (Adam), and I must say Adam has taken great pains to produce this kit.
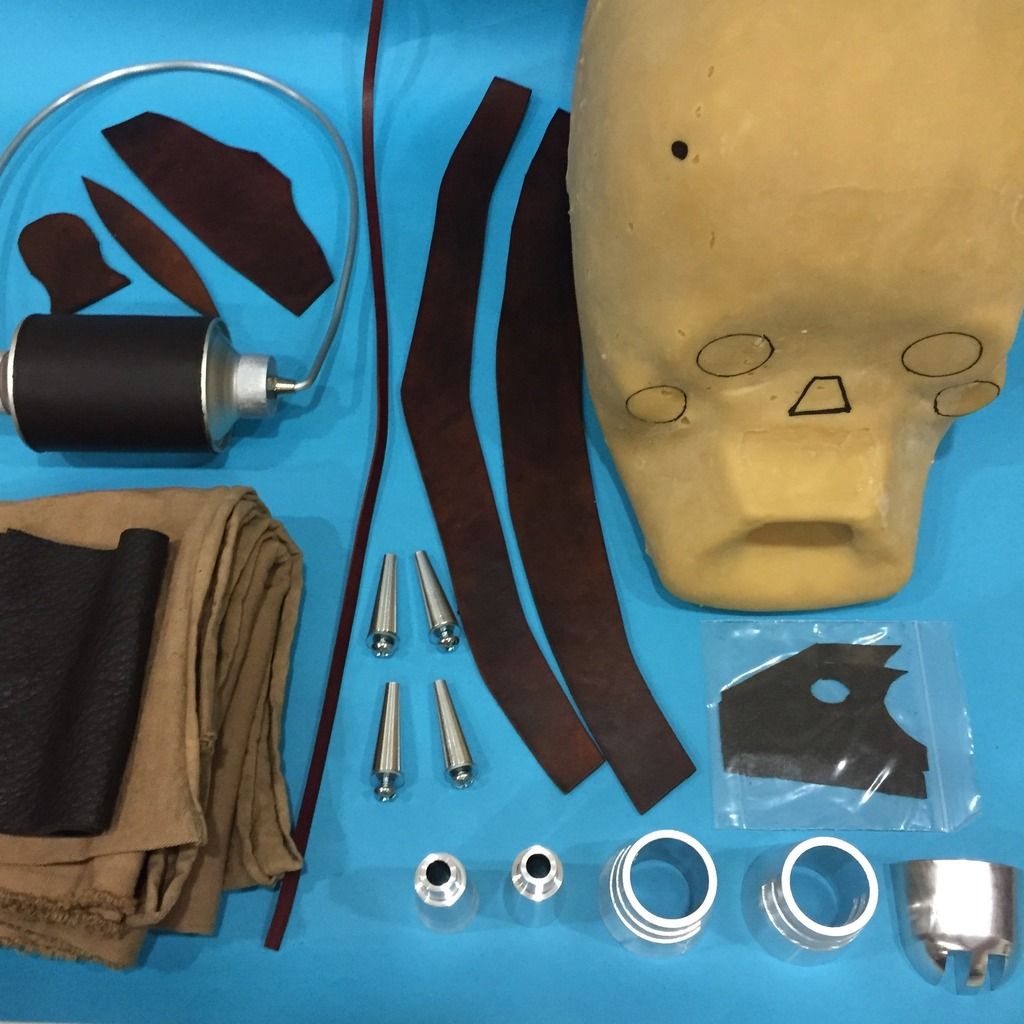
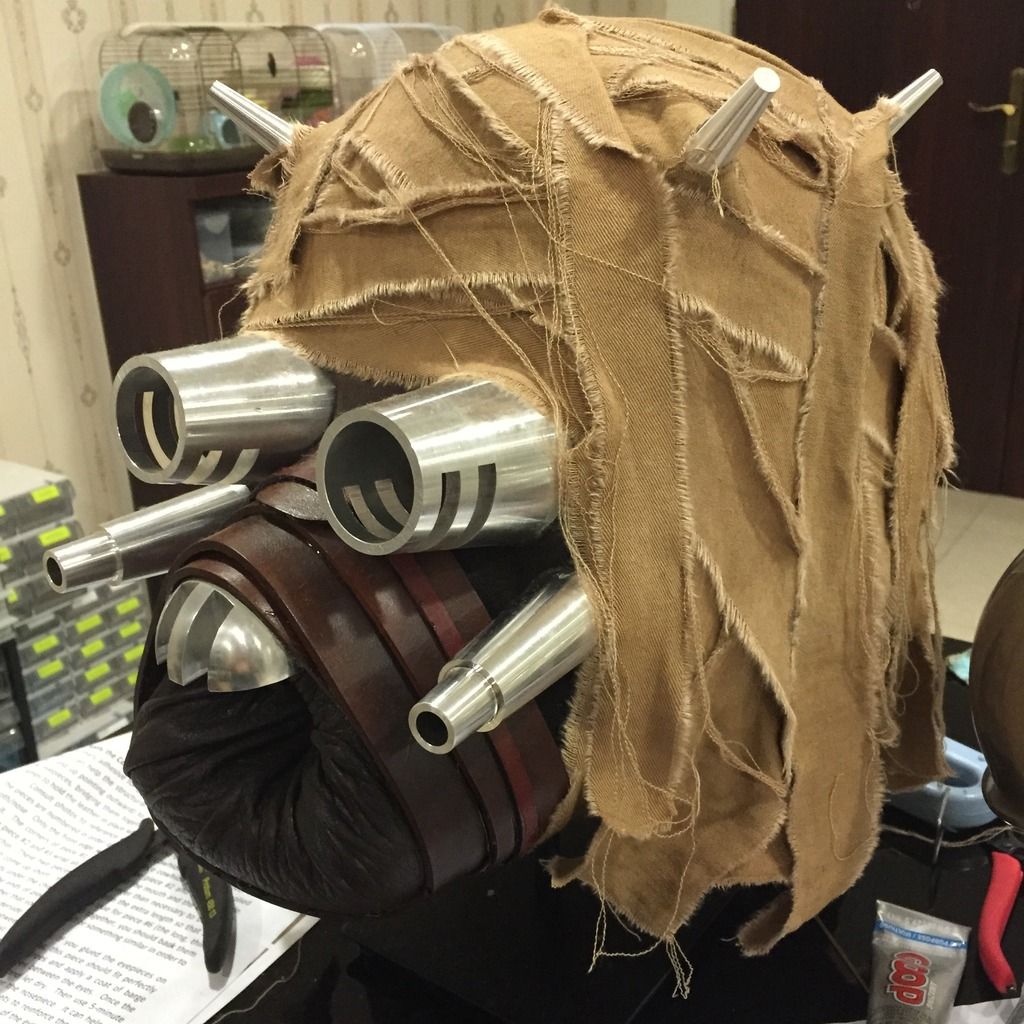
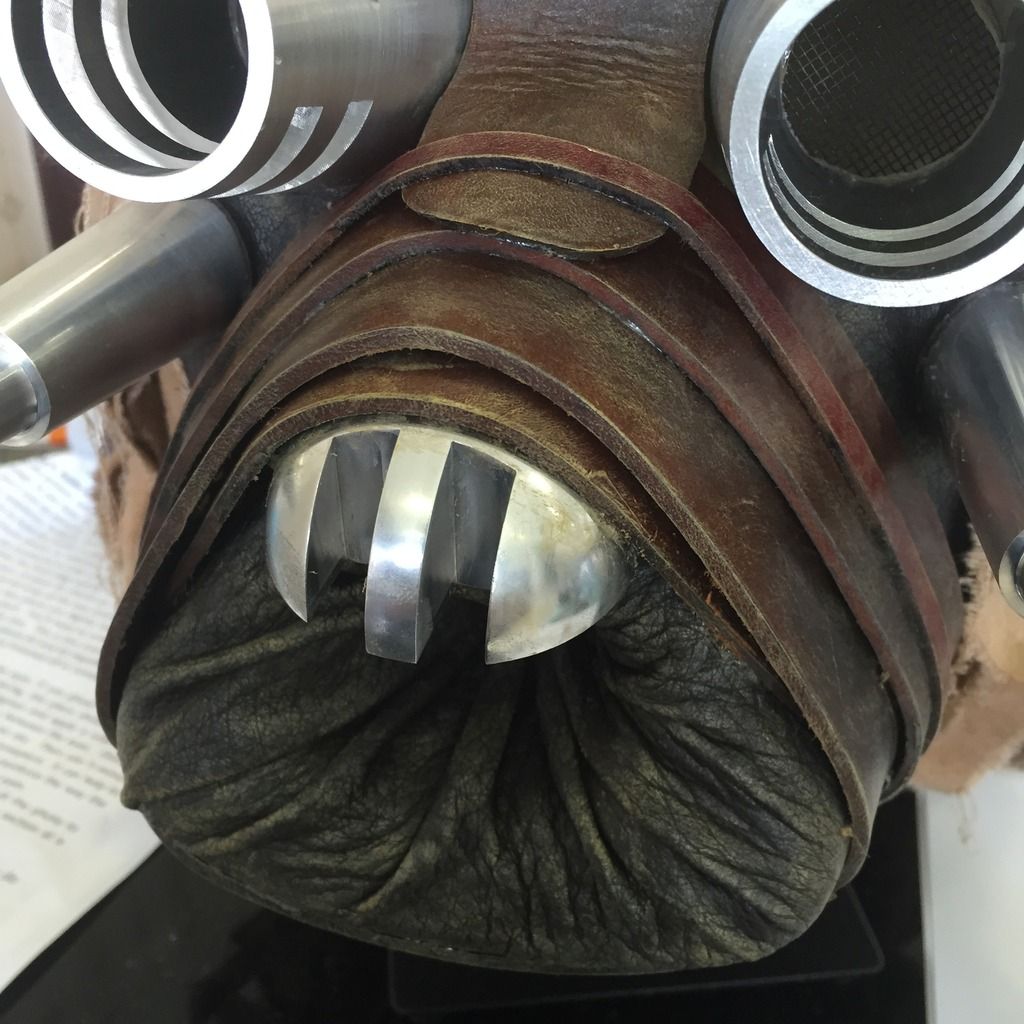
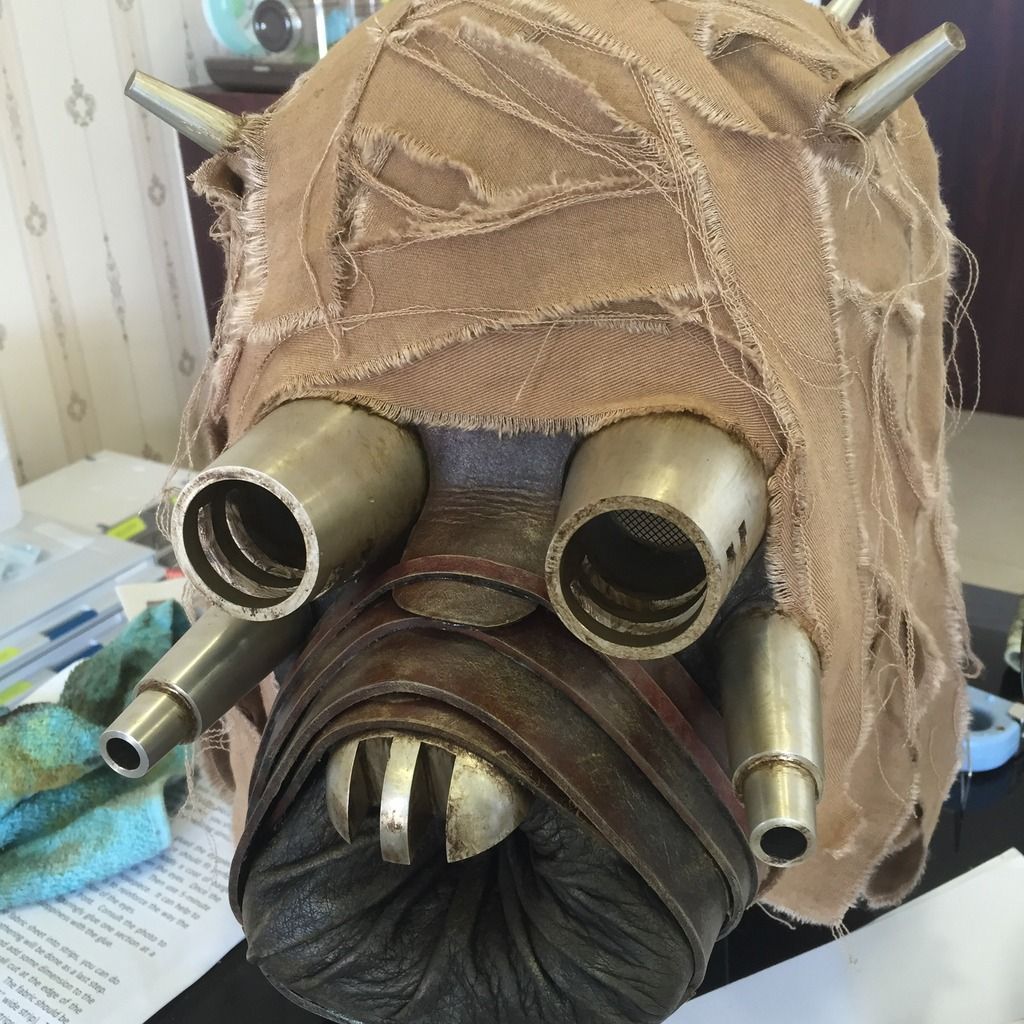
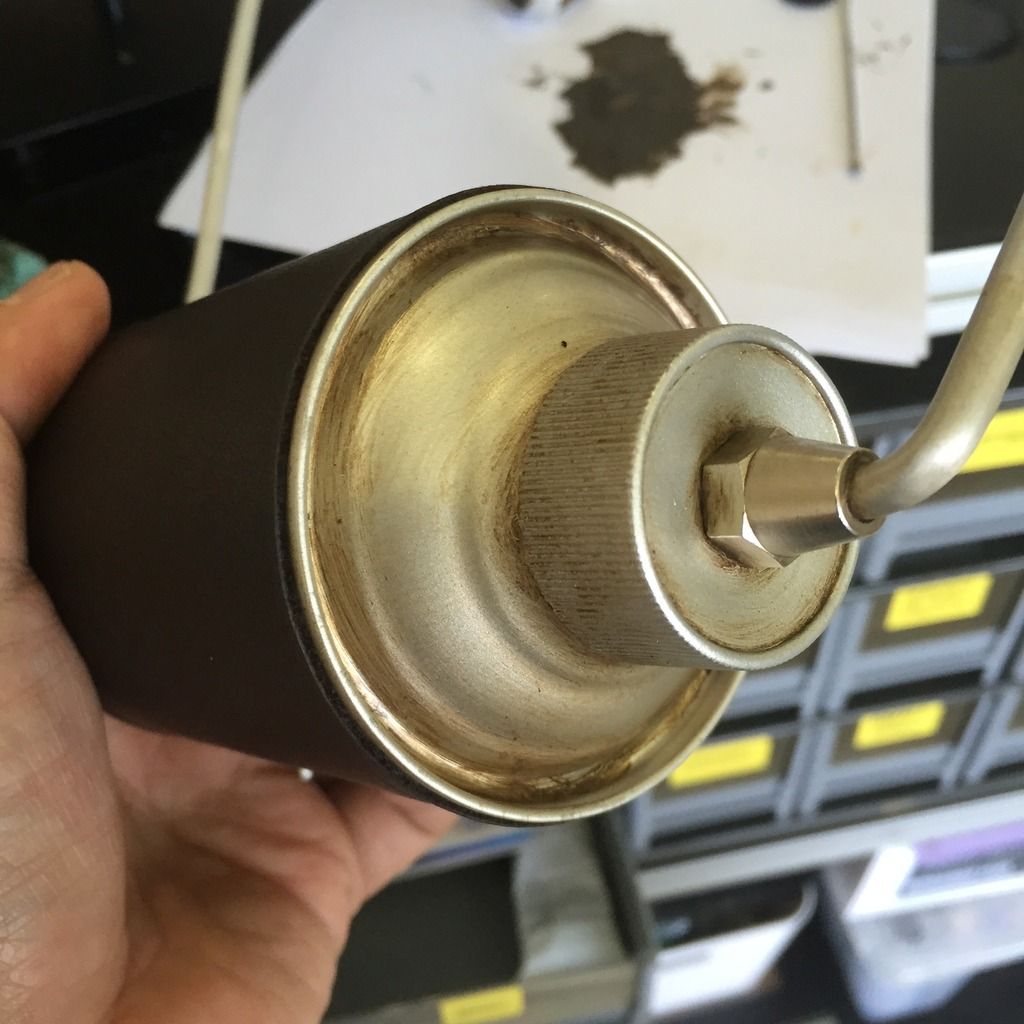
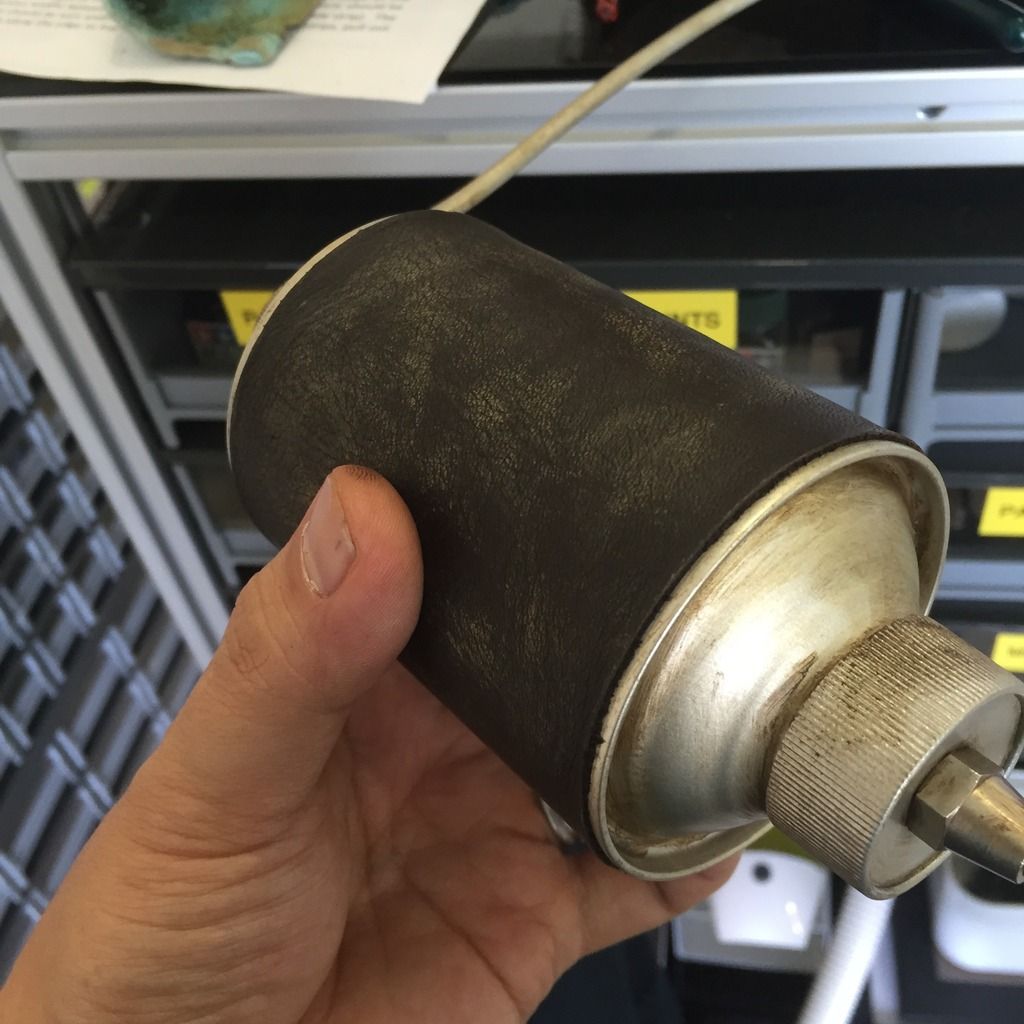
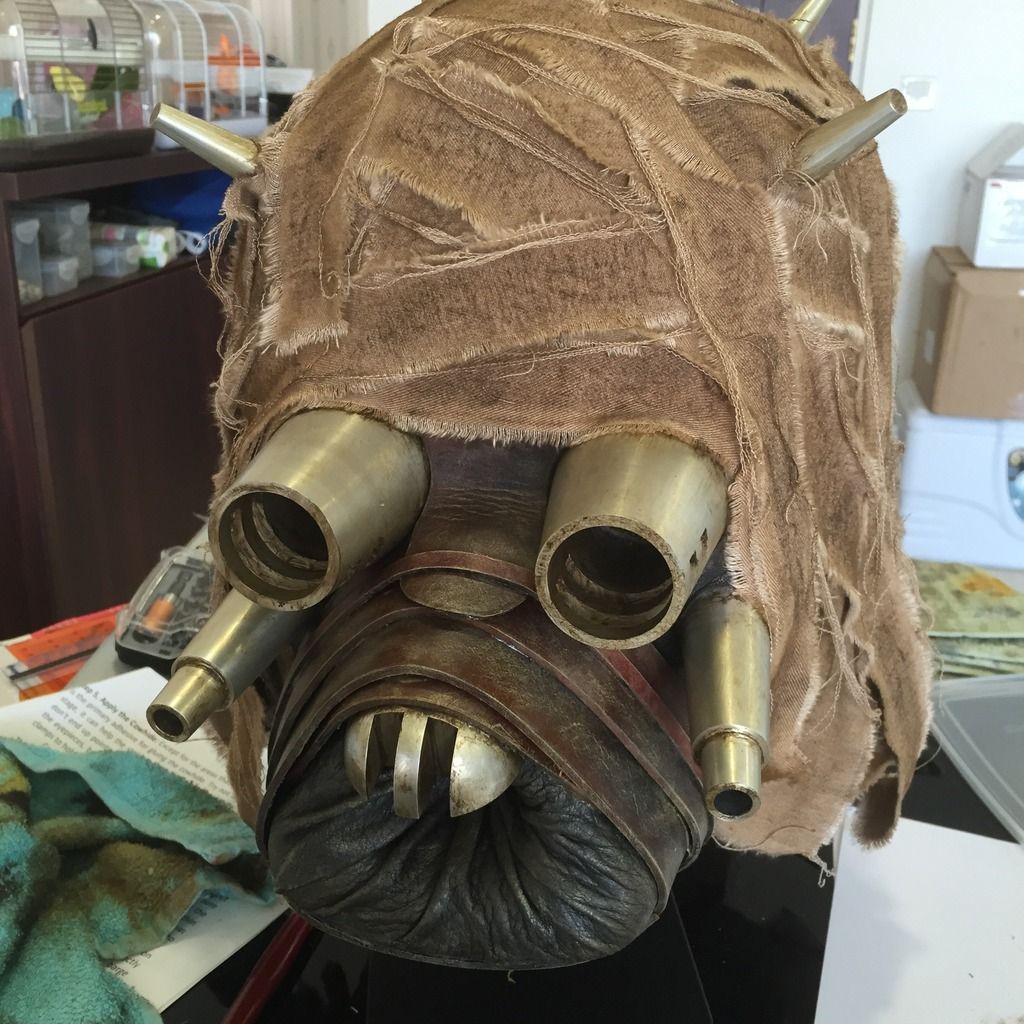
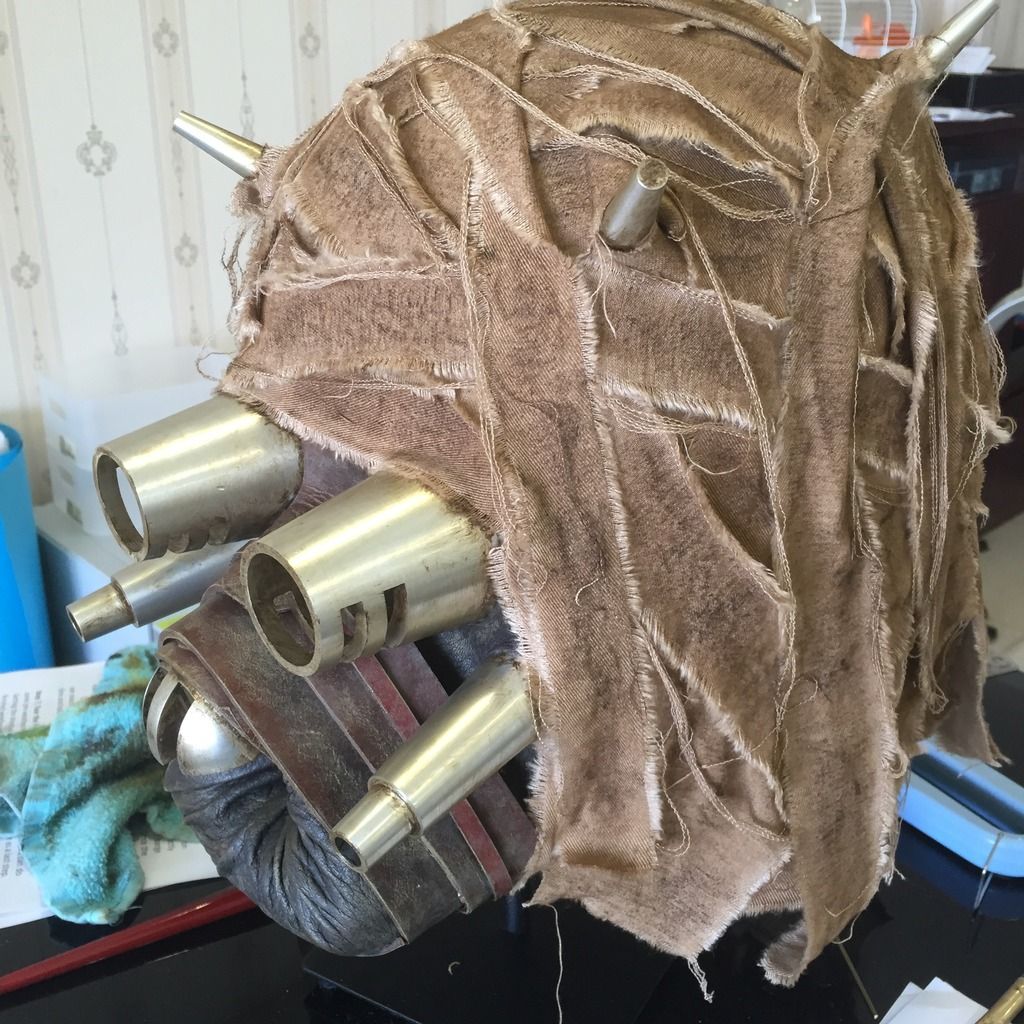
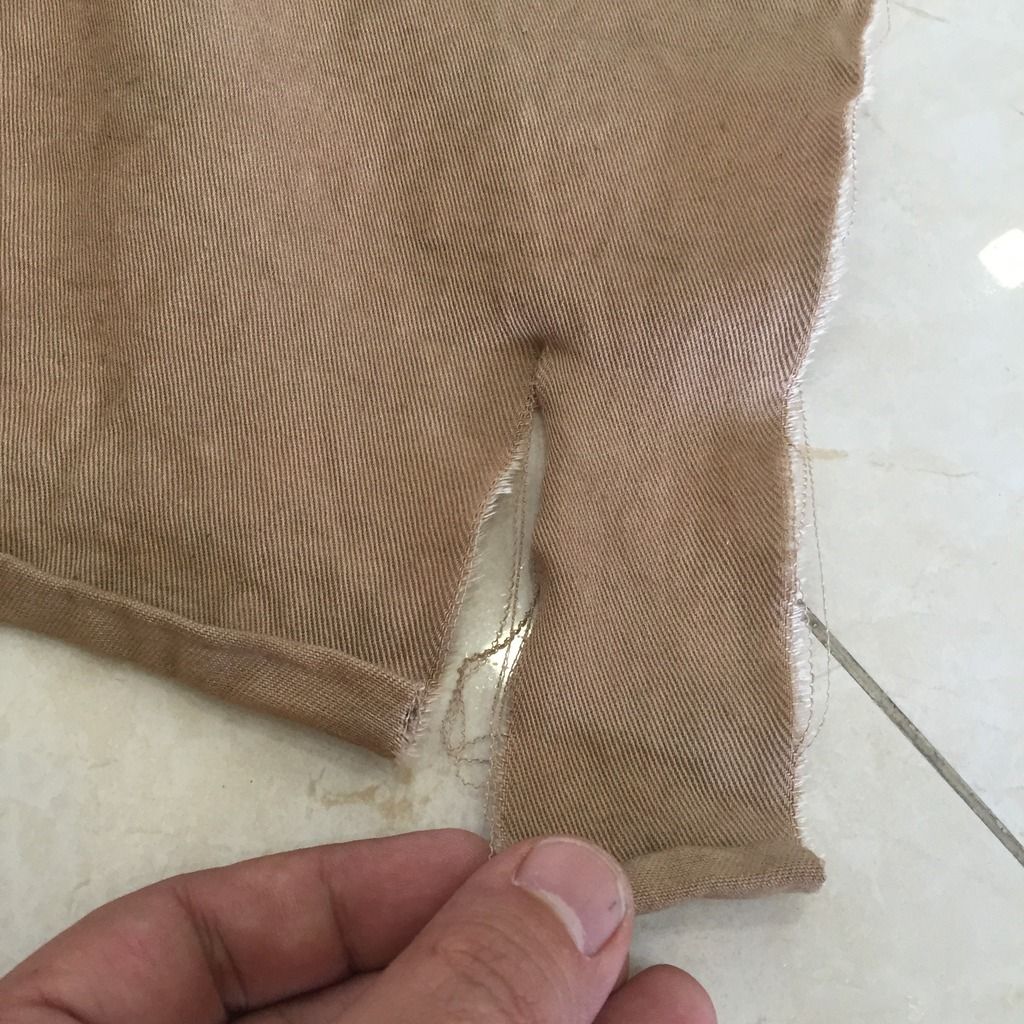
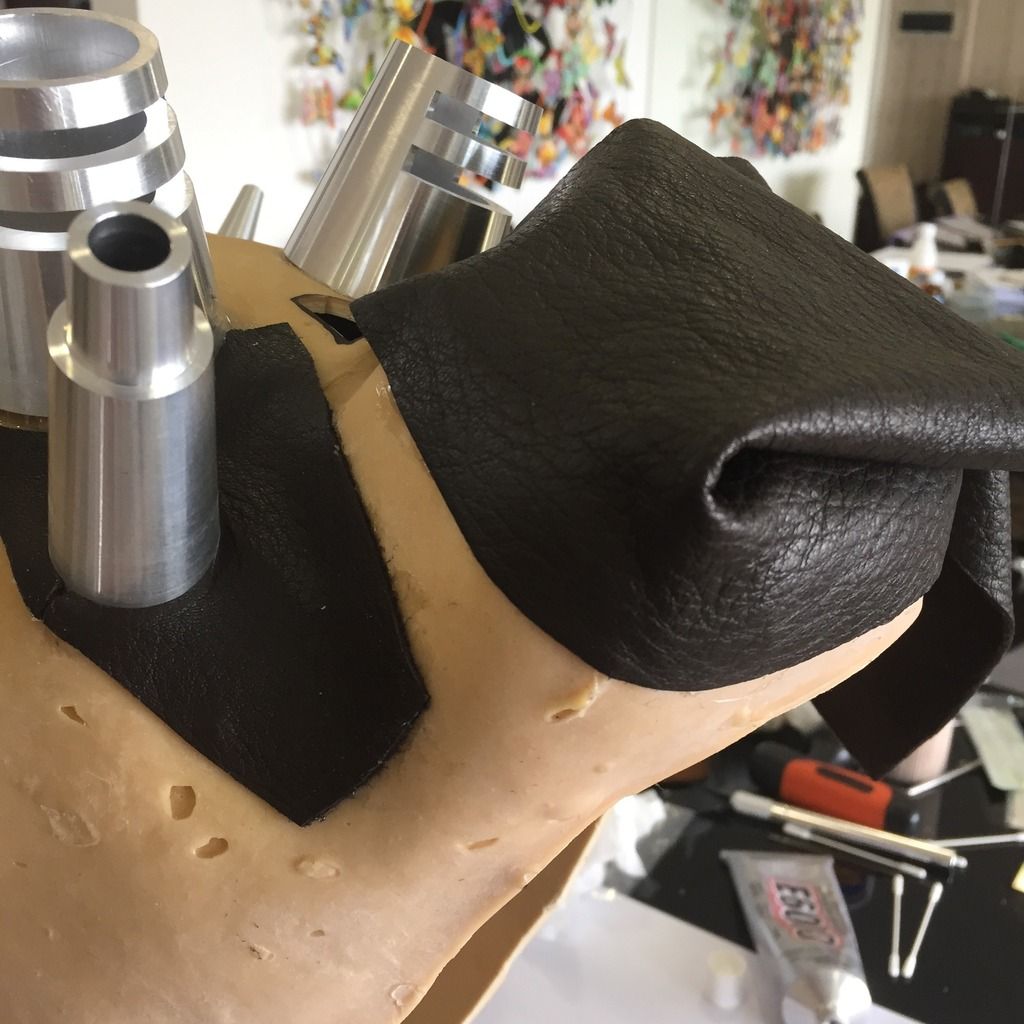
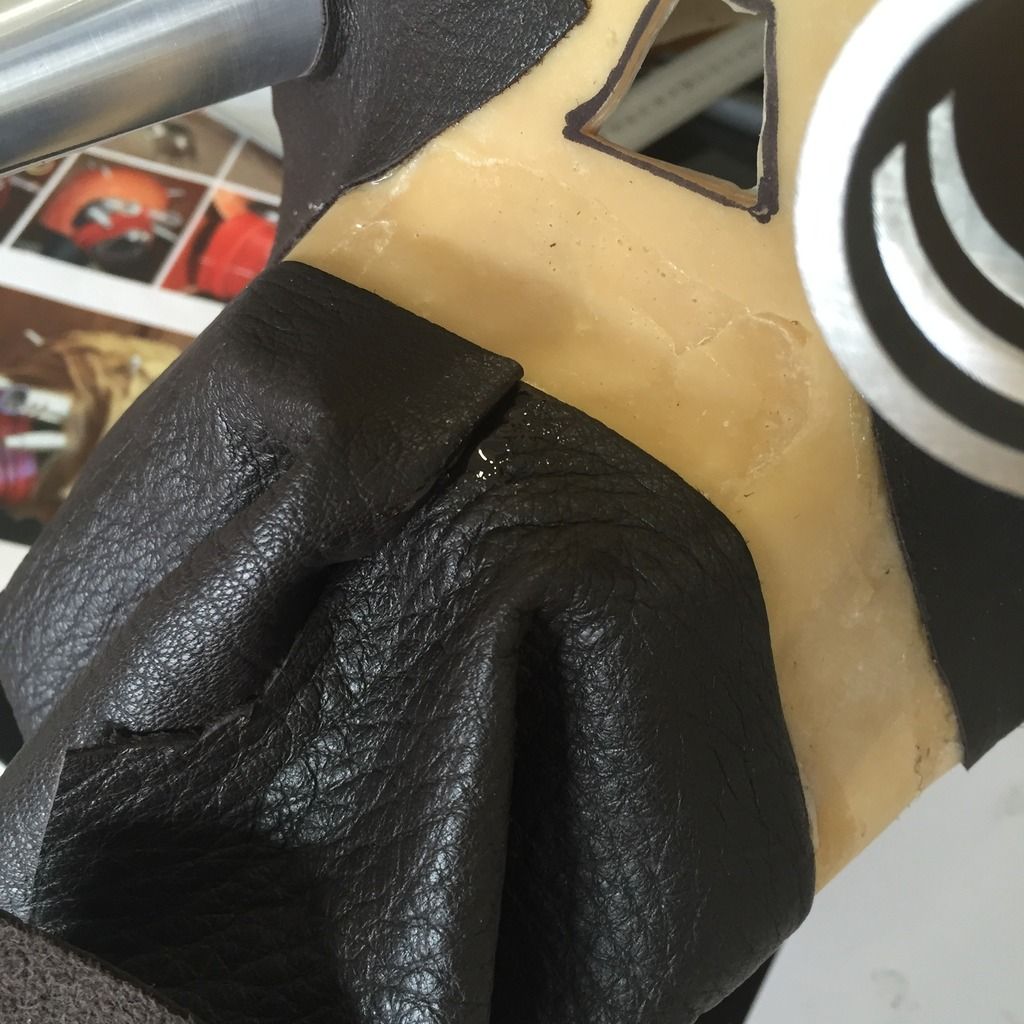
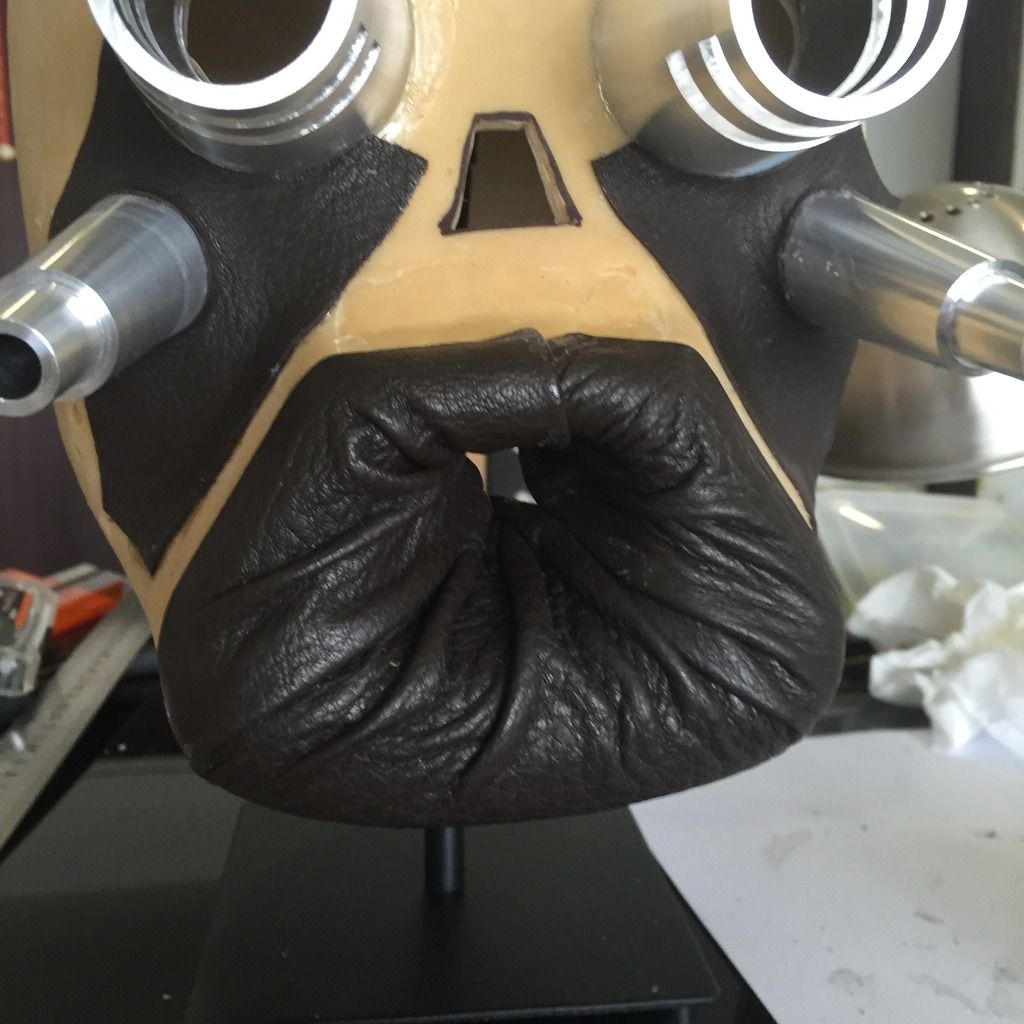
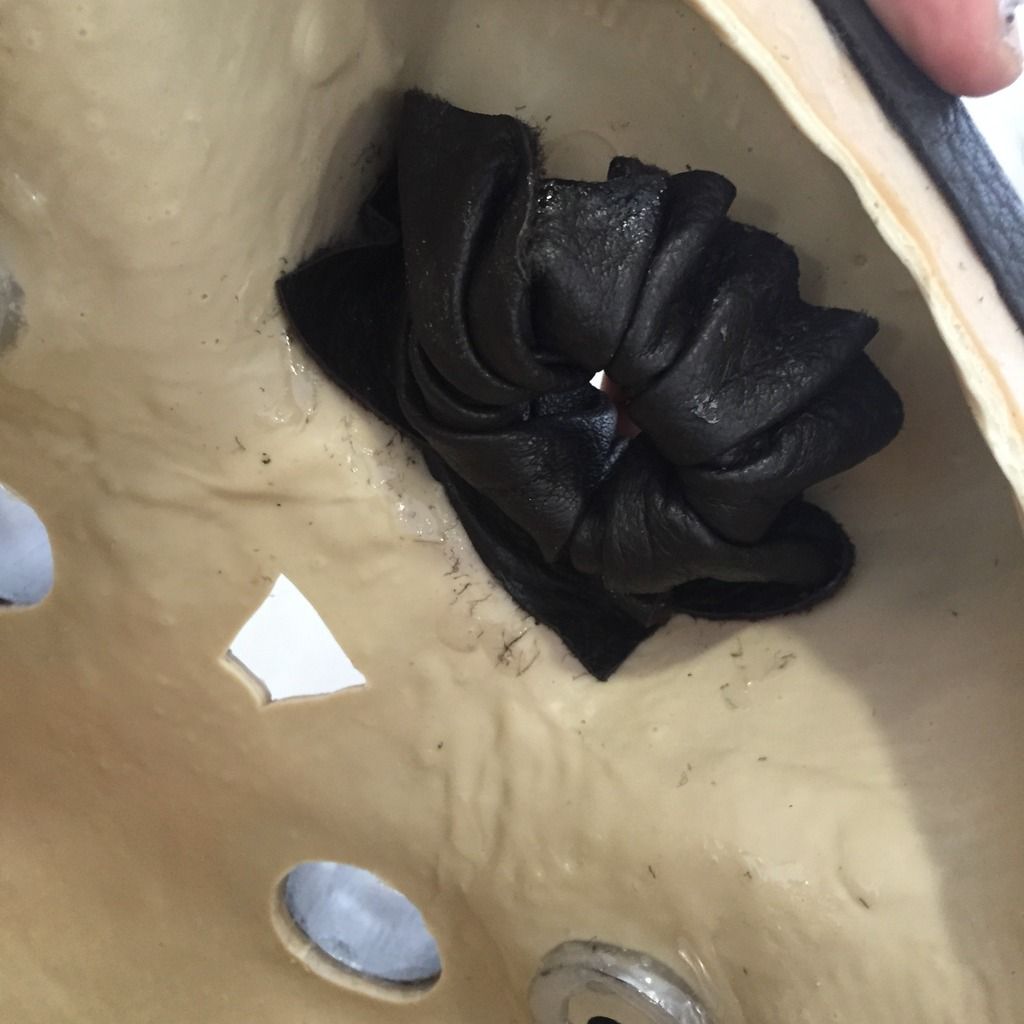
The helmet is made of strong latex, with the positions of all the machined parts marked out for easy cutting. The machined parts are perfect, and the leather bits are of high quality. I was worried that the mouth leather was going to be difficult to crease into shape around the mouth, but the material is soft and I foresee it is not going to be a problem. The fabric for the head covering comes in a big piece, leaving me to decide on the width of each piece for randomness, and I will see later how this works out.
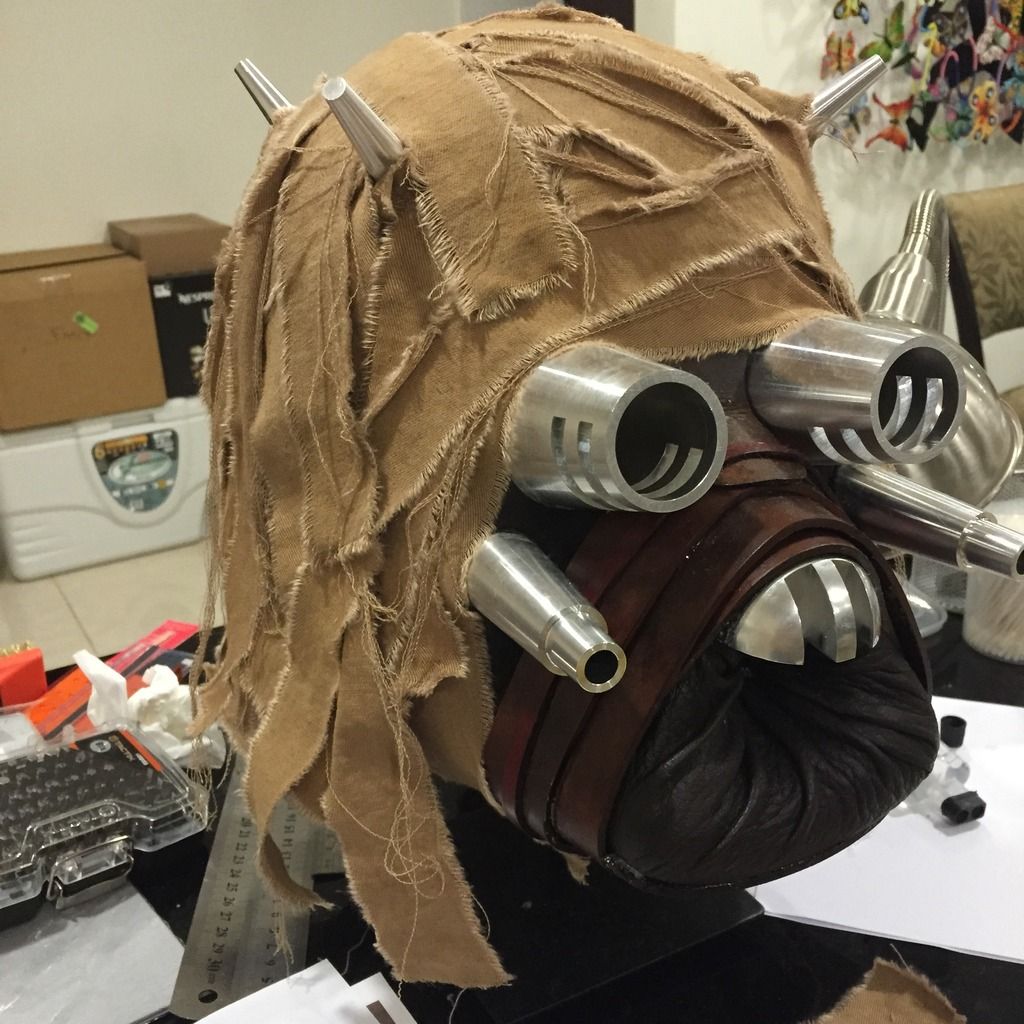
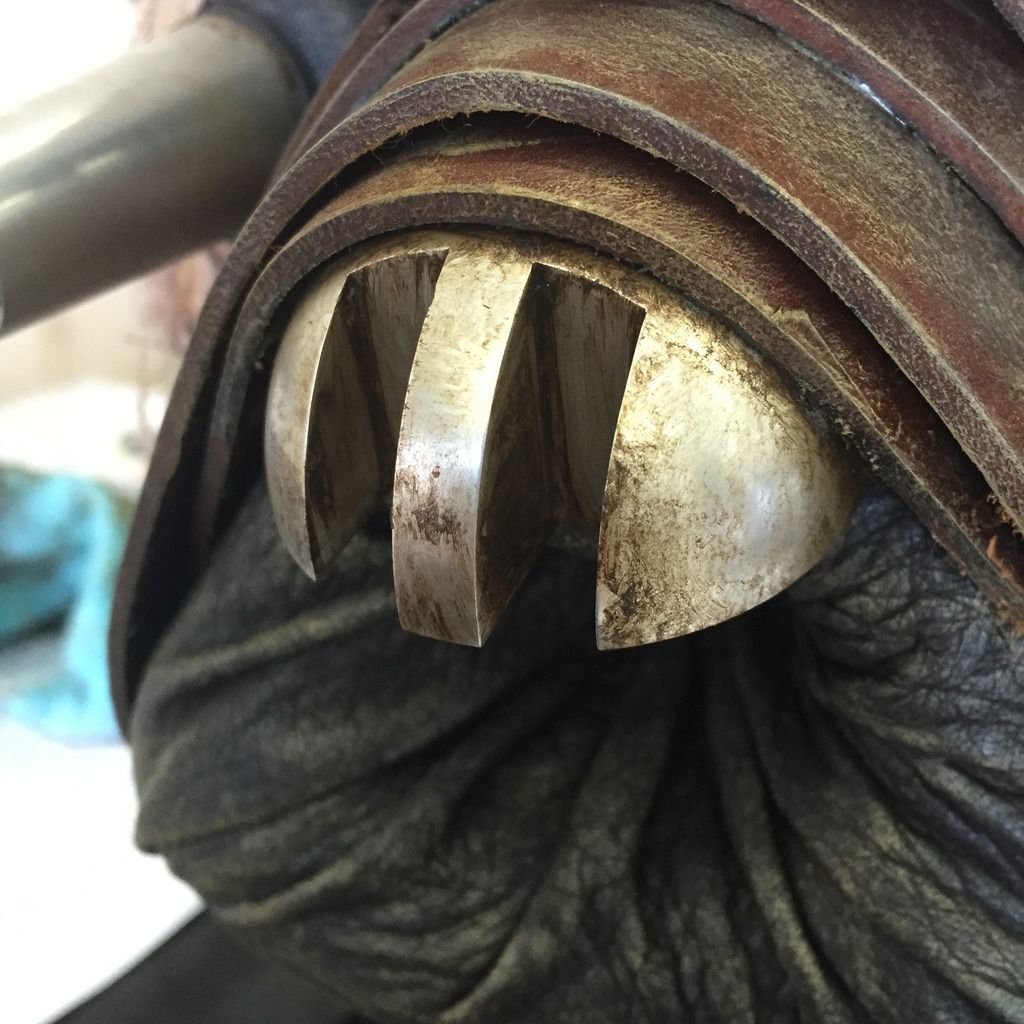
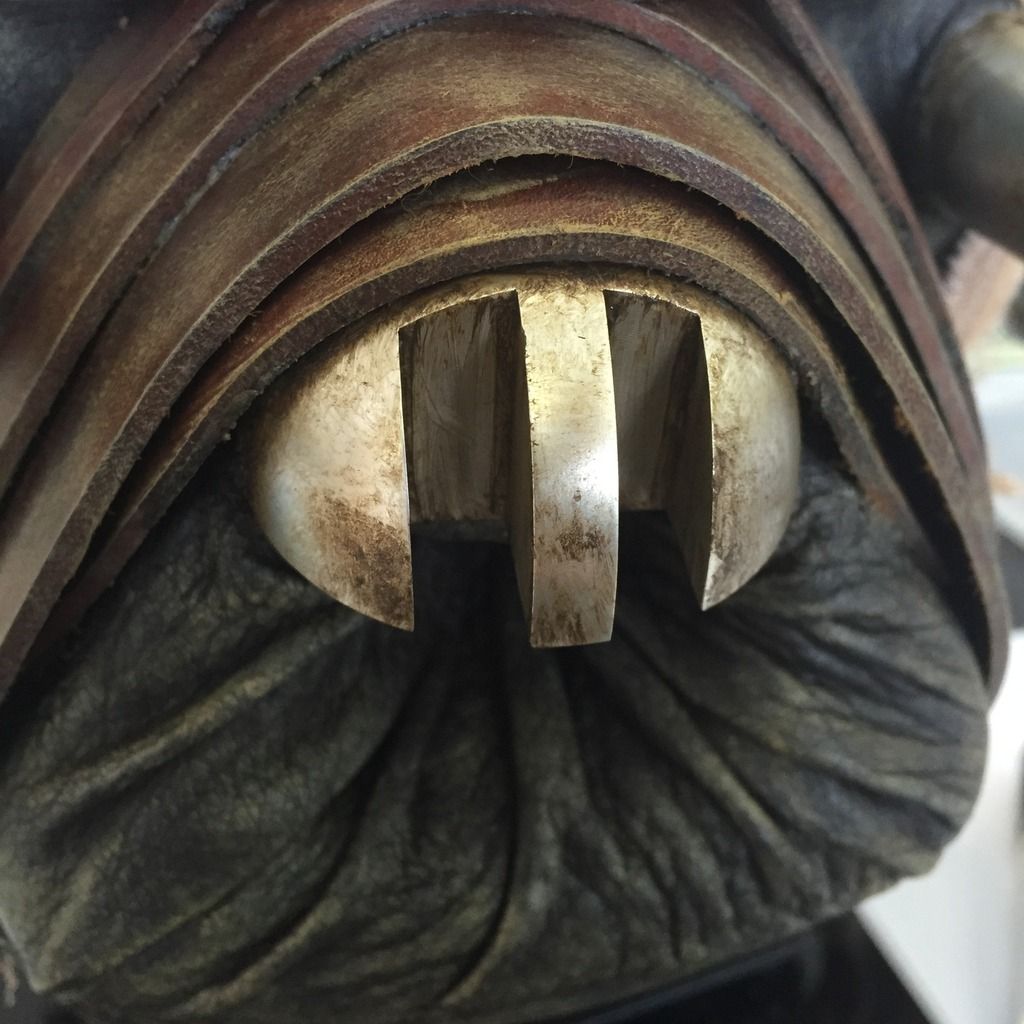
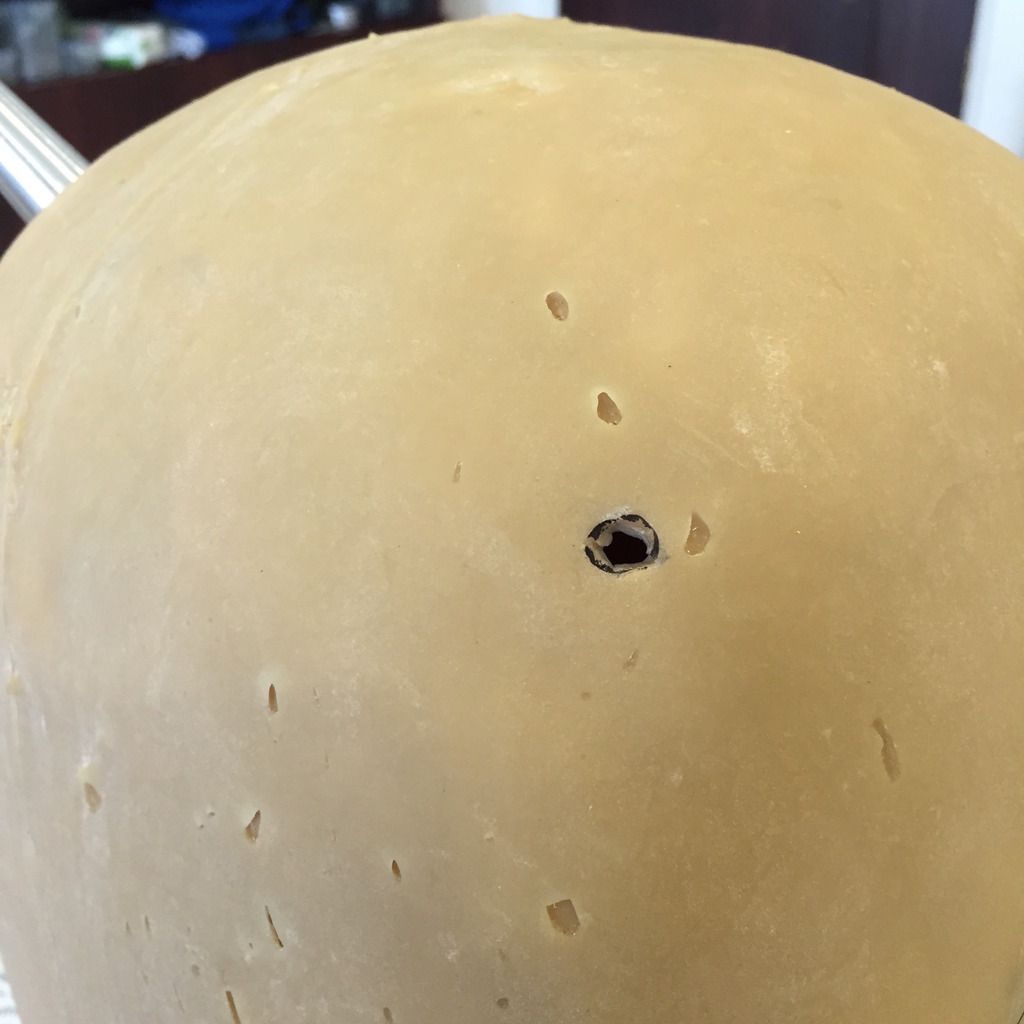
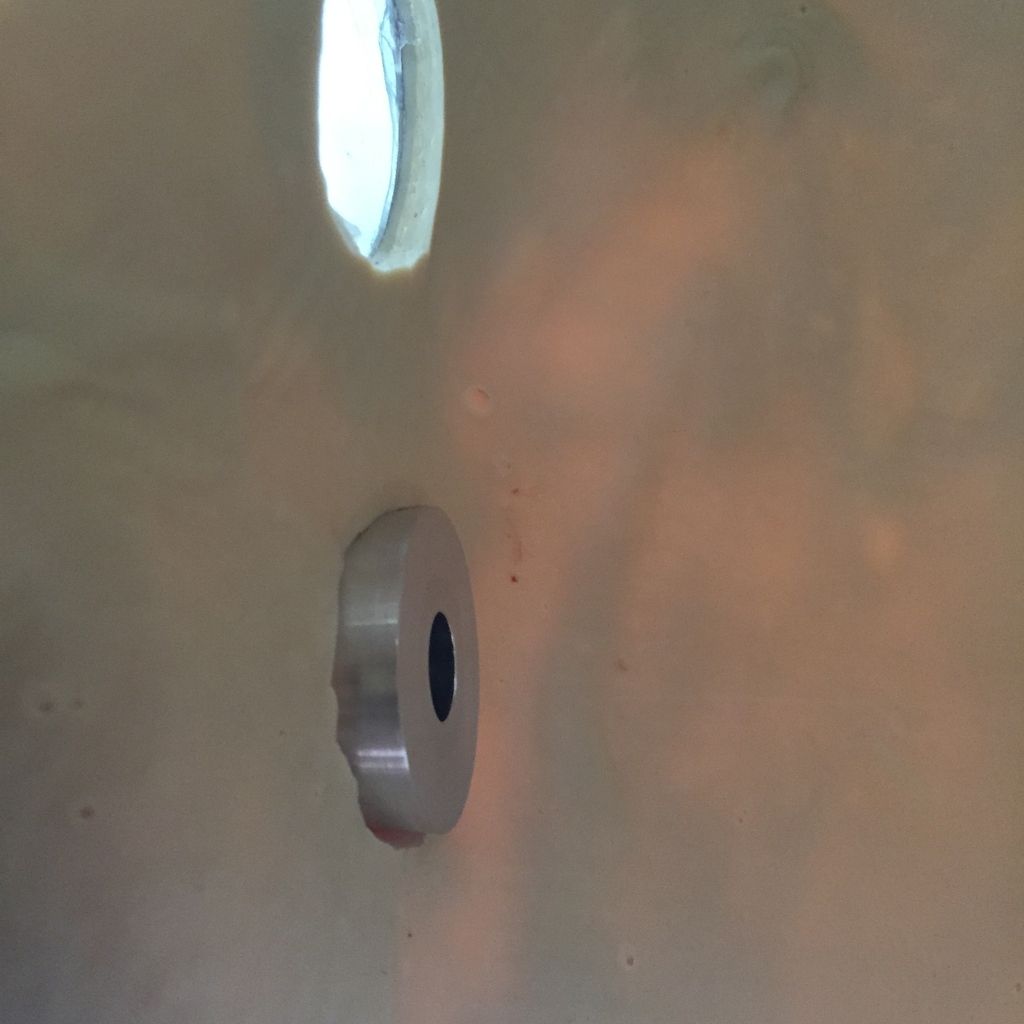
So first, I used an X-acto (new blade) to cut the 4 holes on the top of the helmet where the horns will be positioned. It doesn't have to be a perfect circle, just enough for the screw to go through.
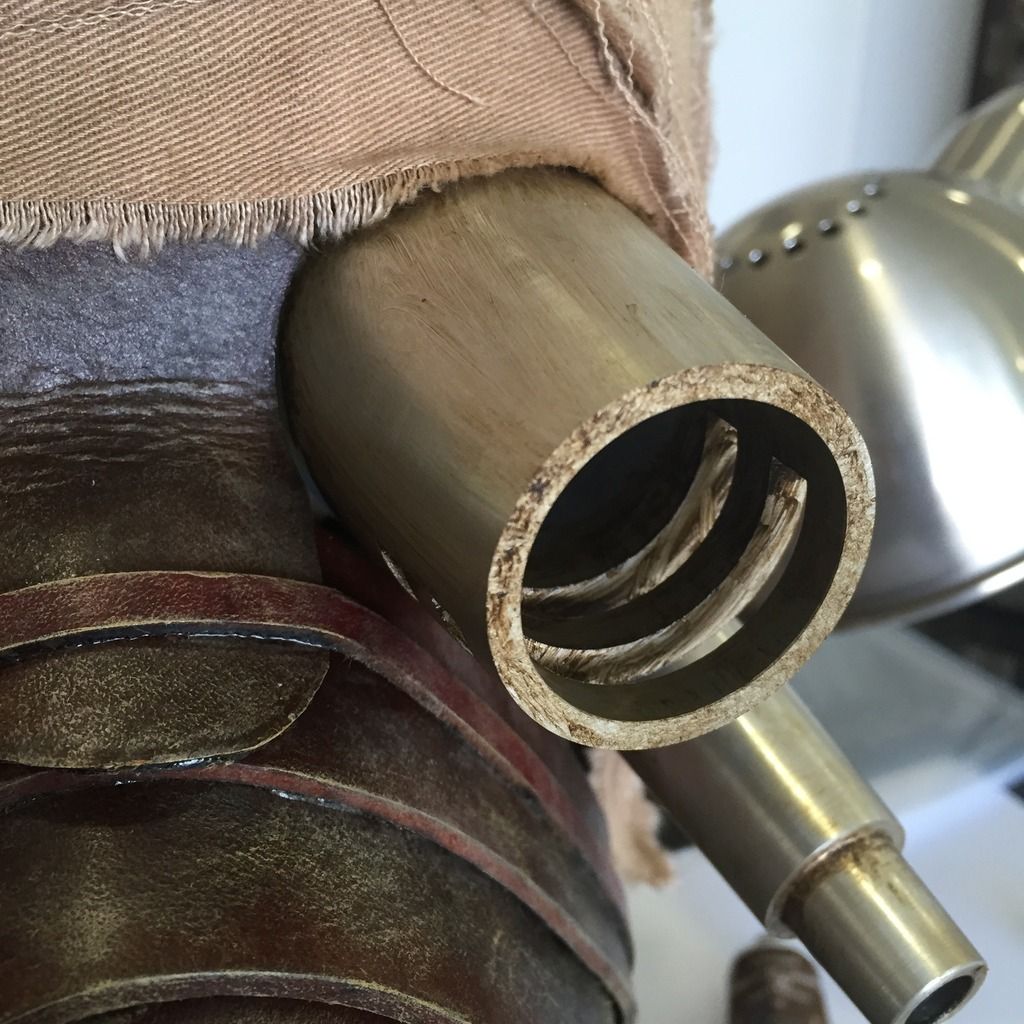
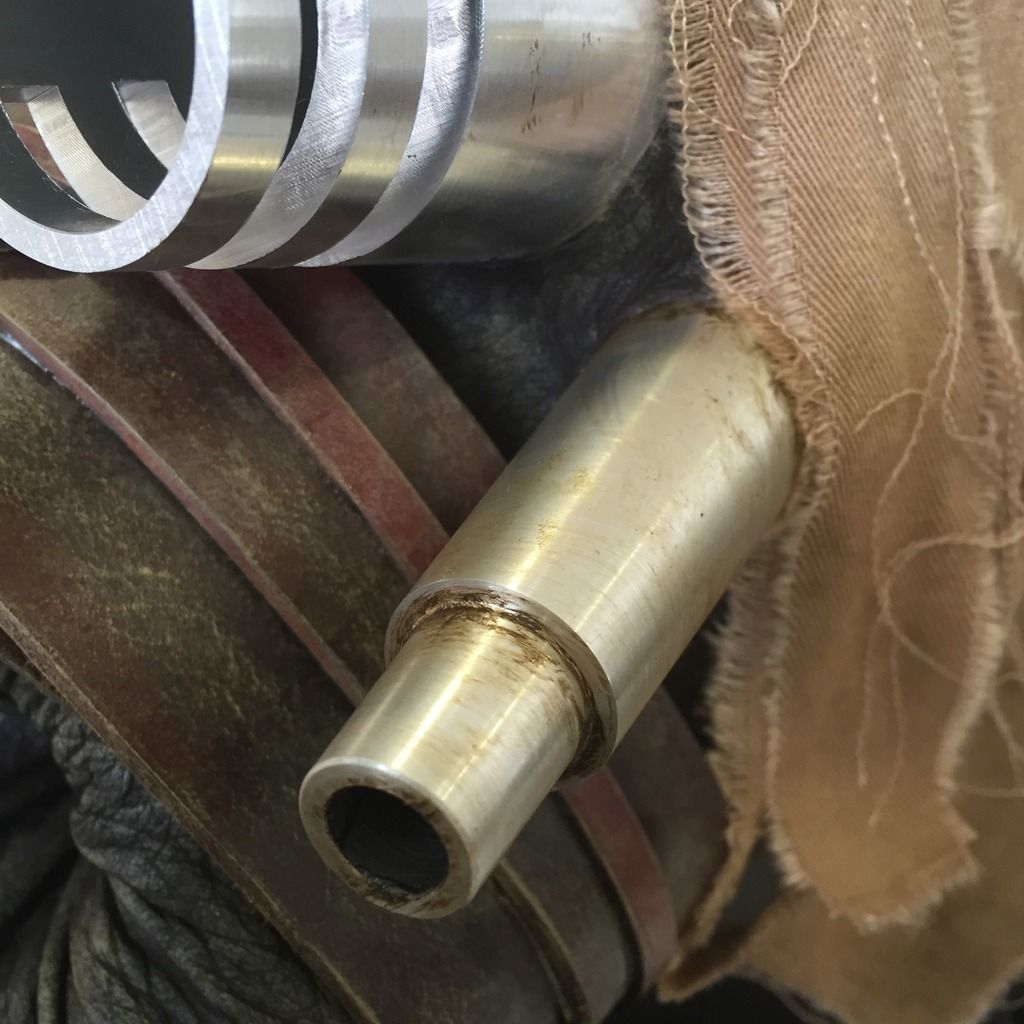
Next, it was a simple procedure of screwing on the horns with a screwdriver from the inside. No glue needed.
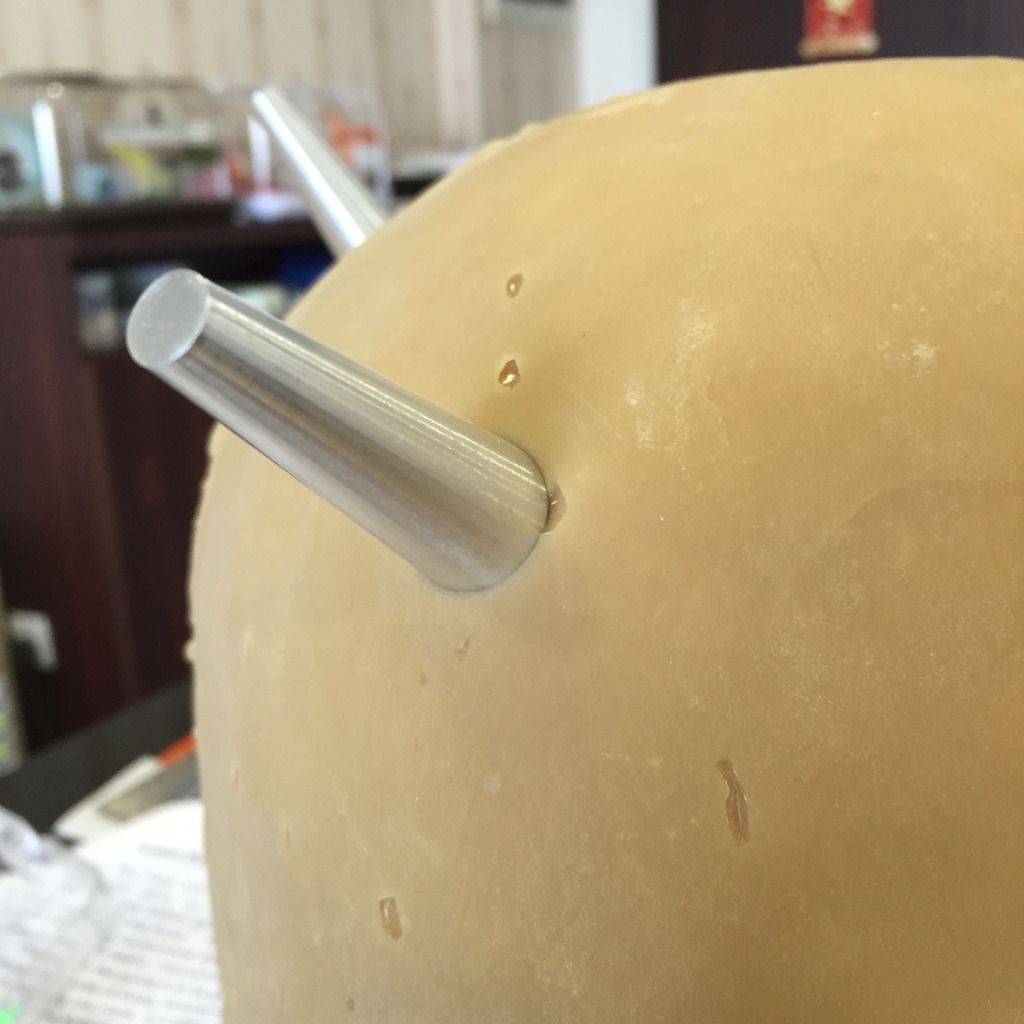
In 5 minutes, all 4 horns completed.
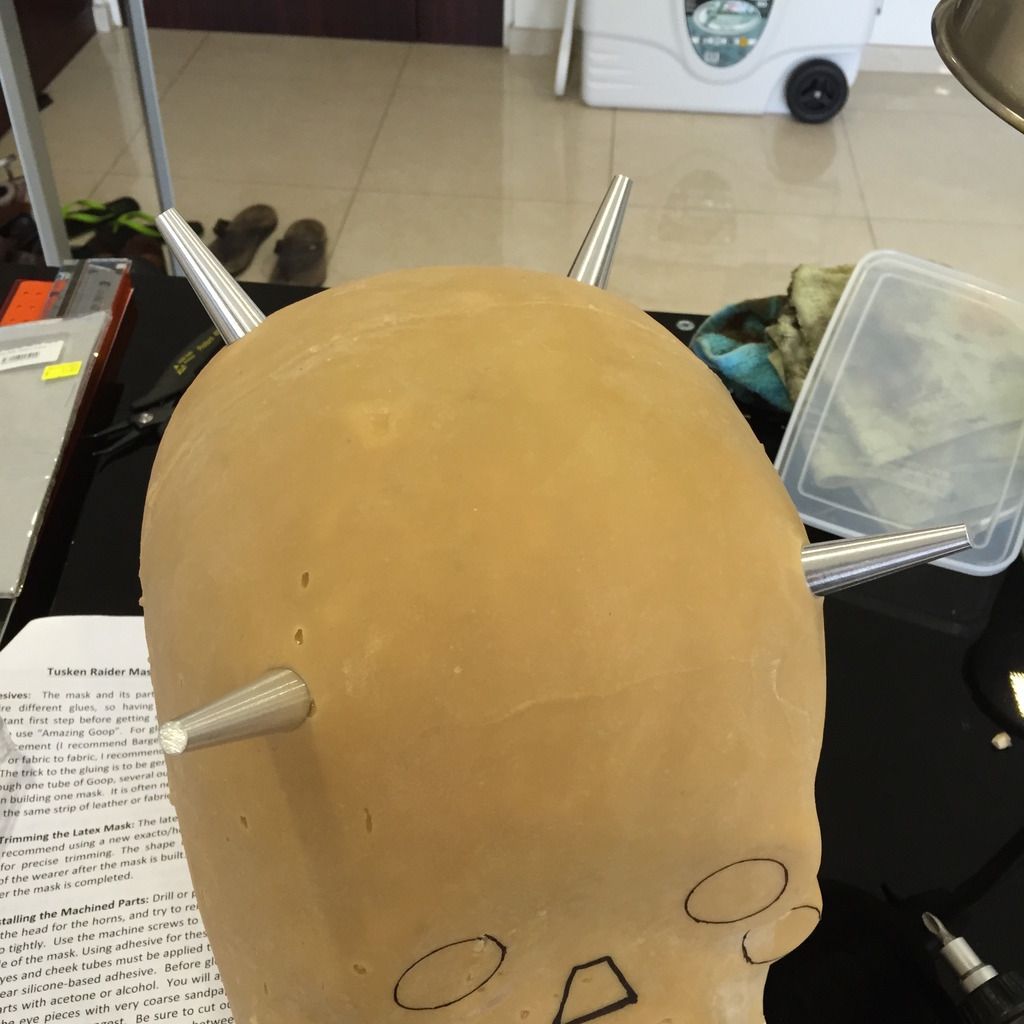
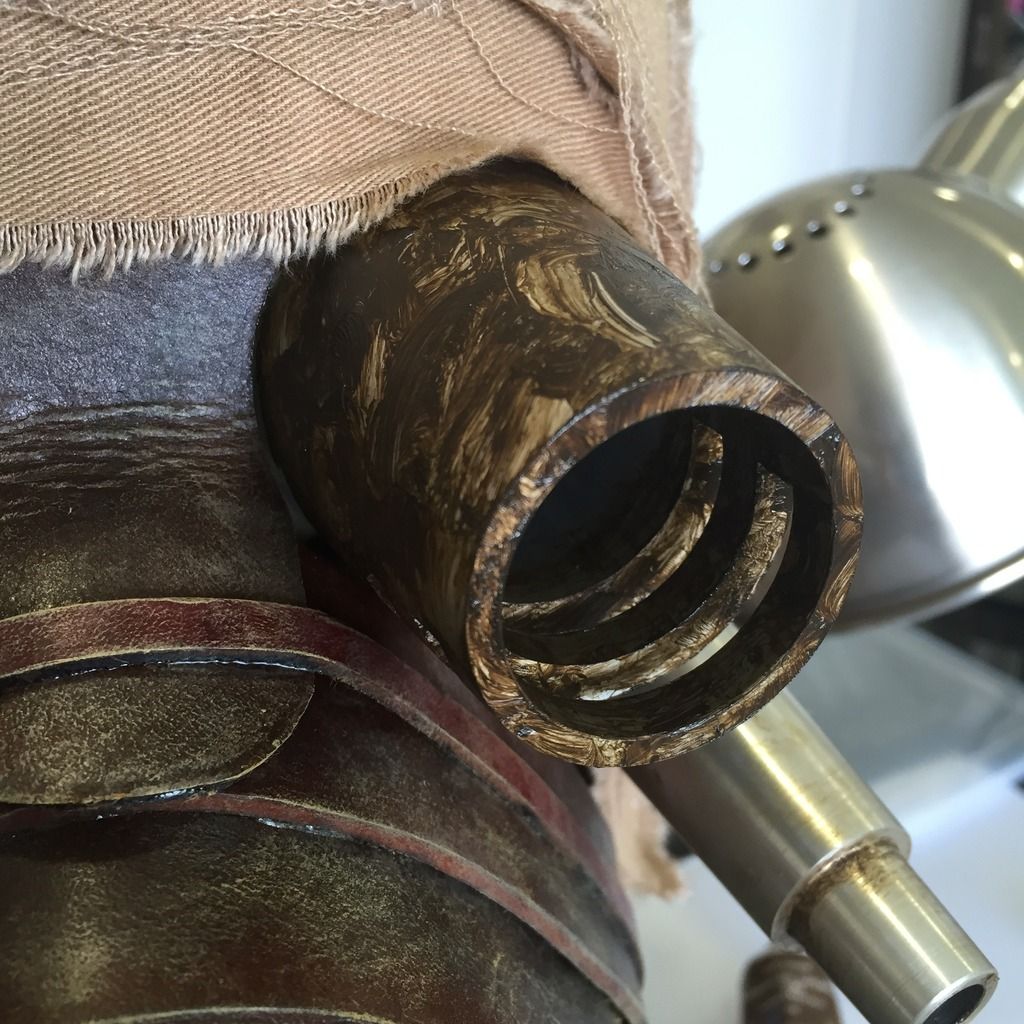
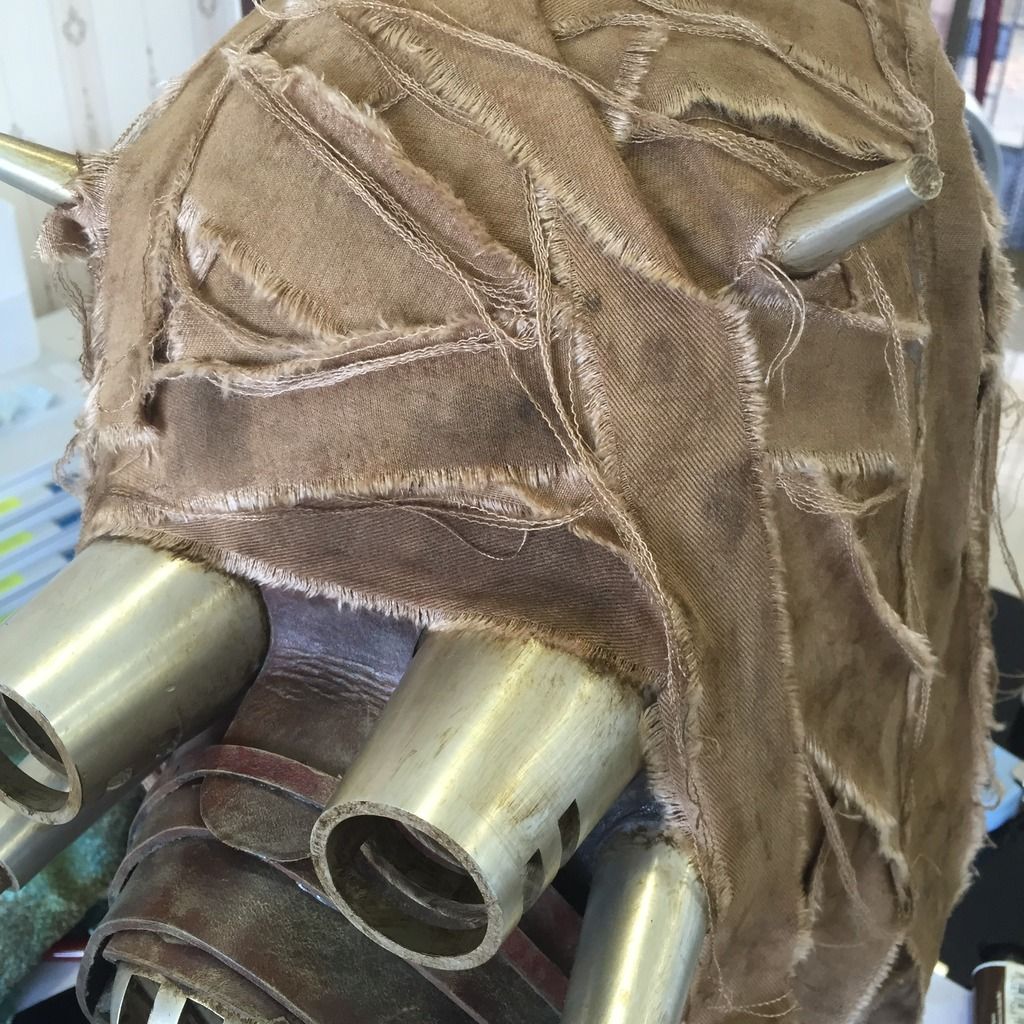
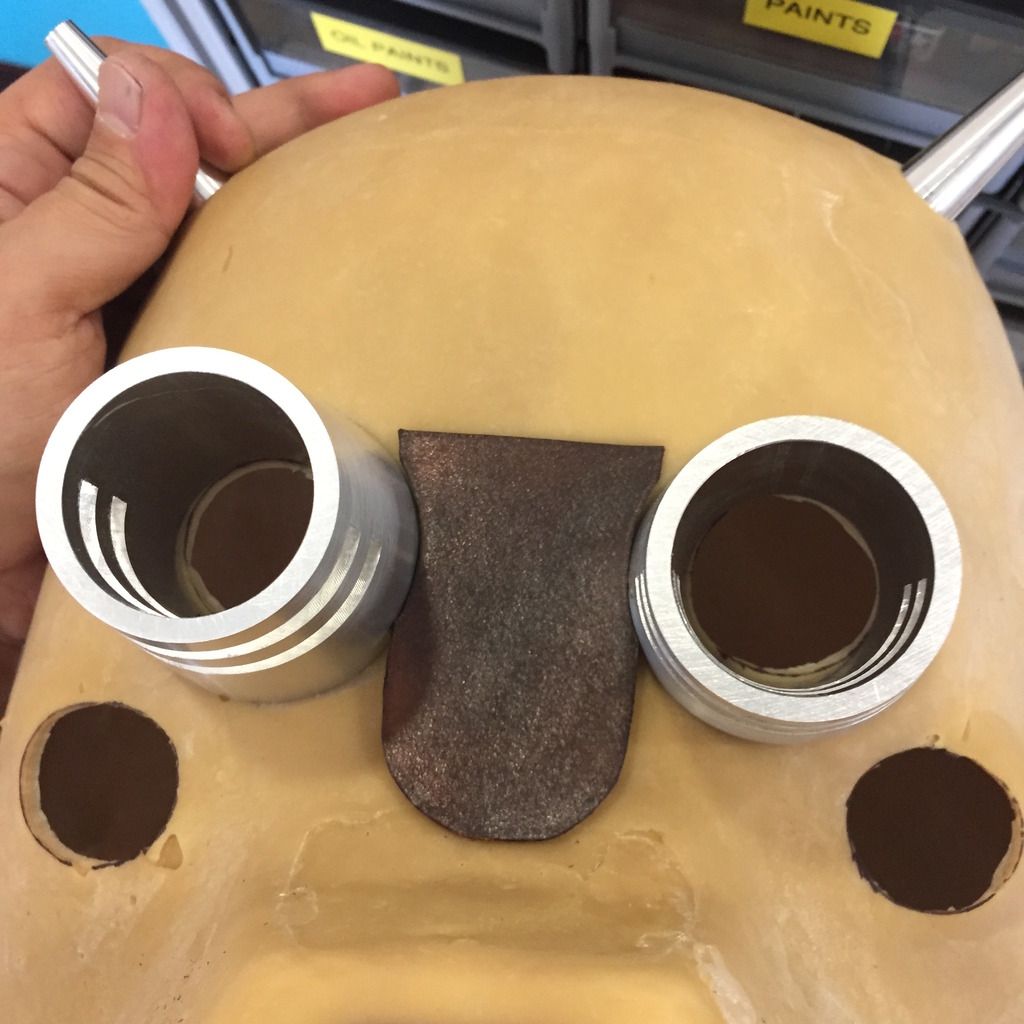
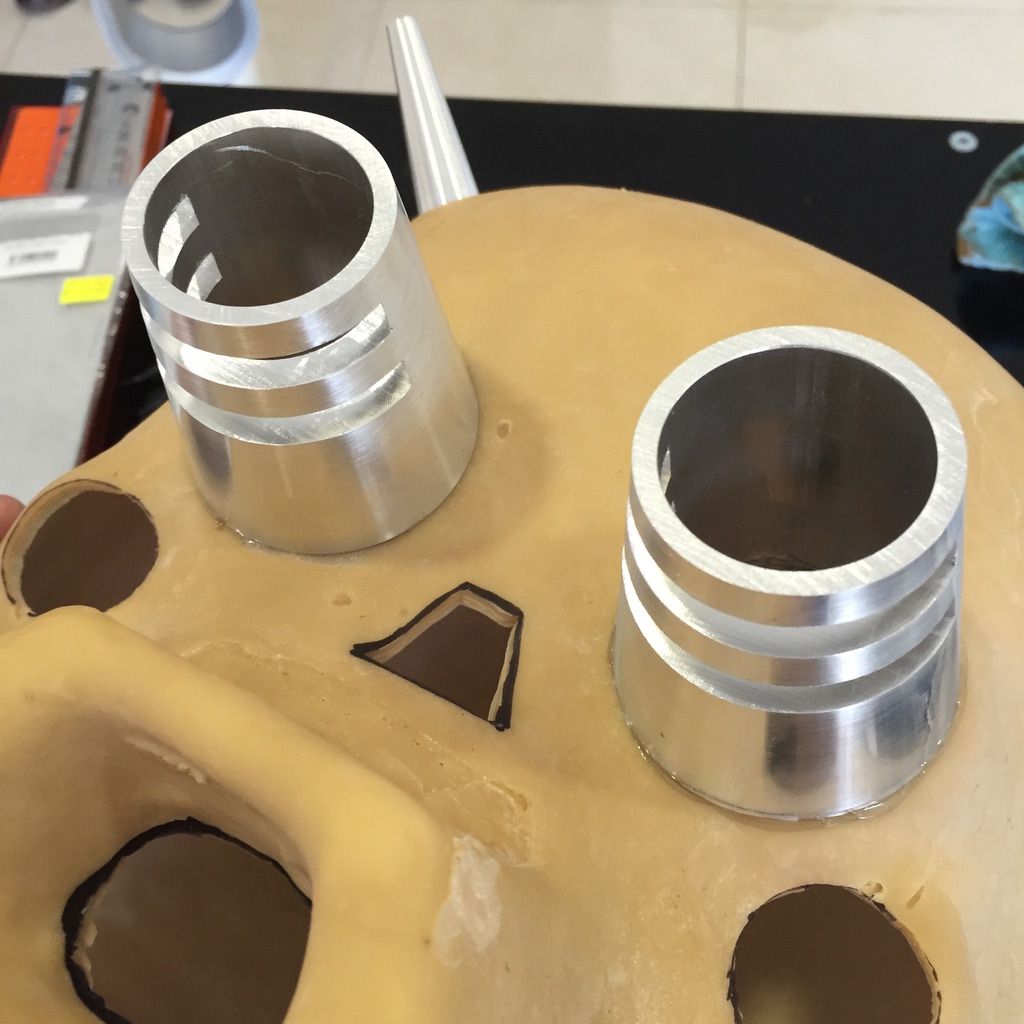
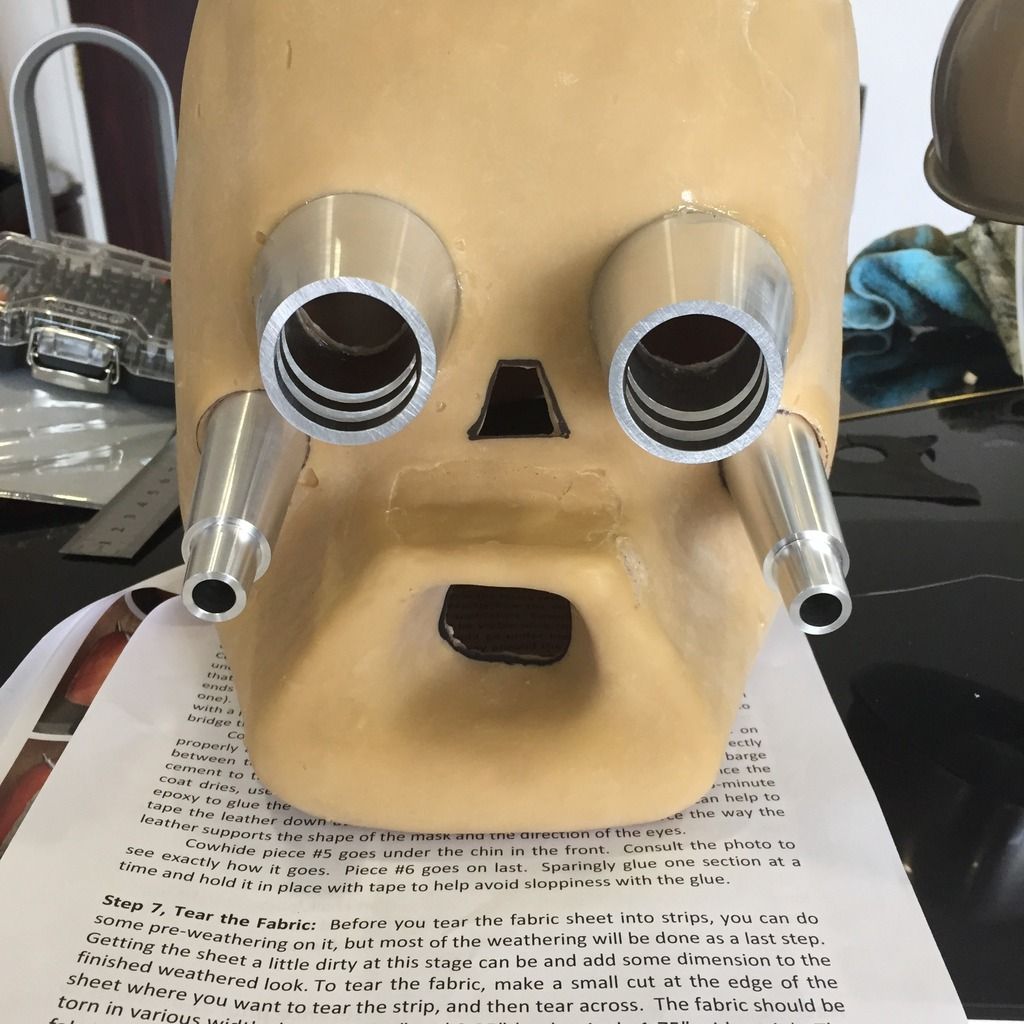
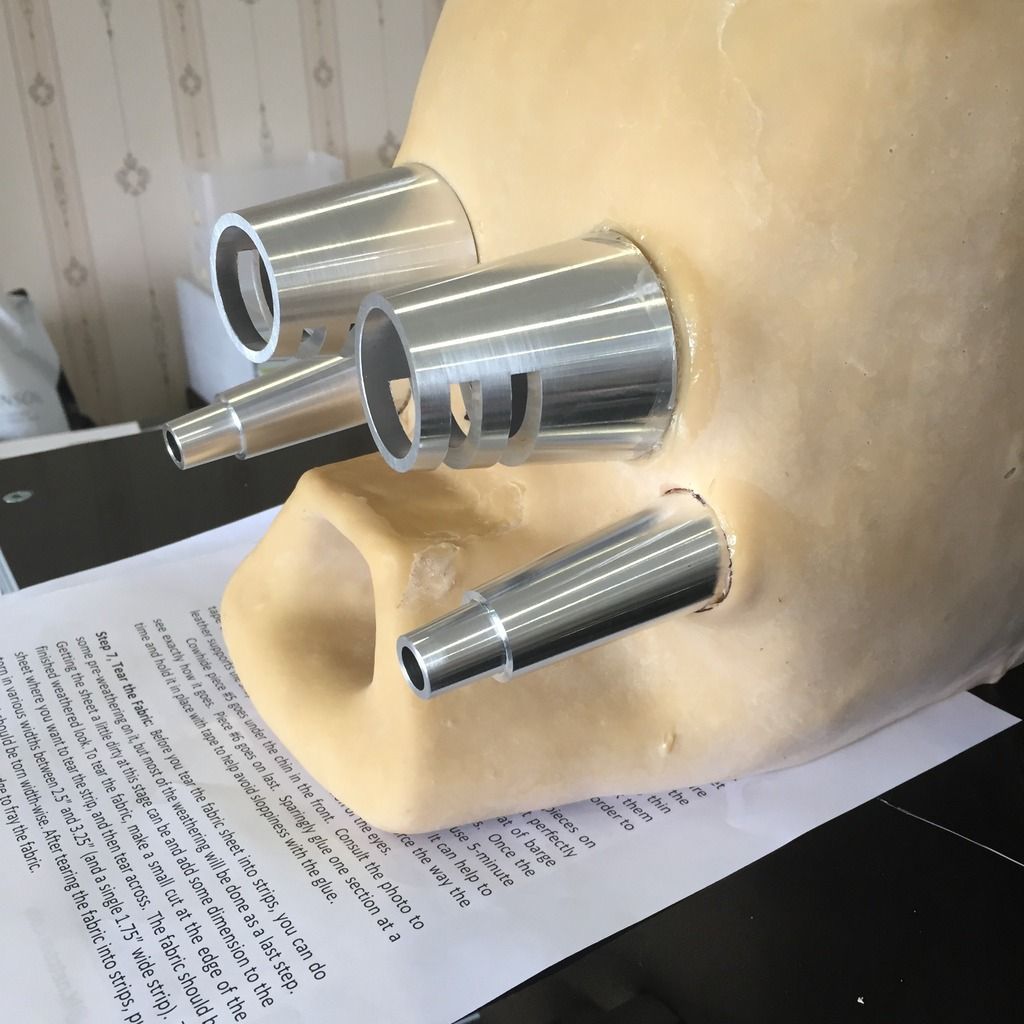
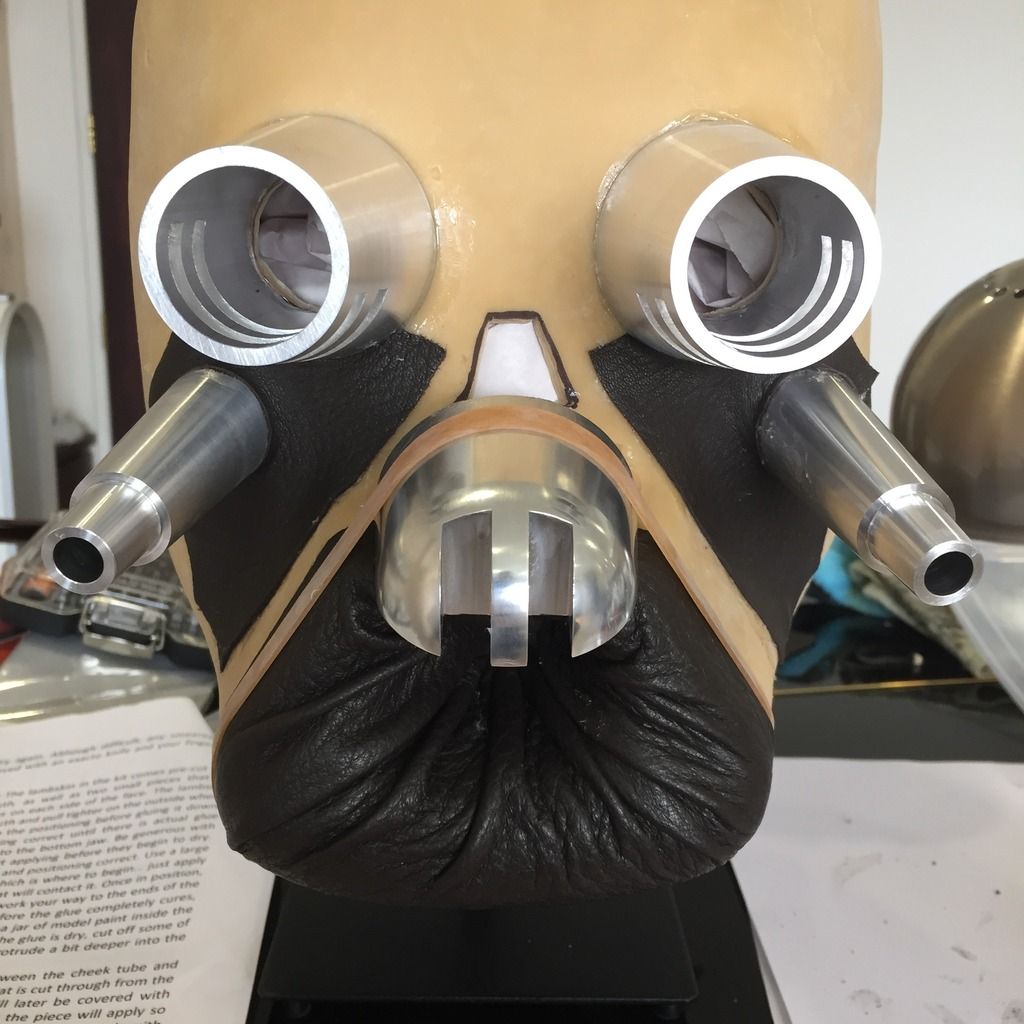
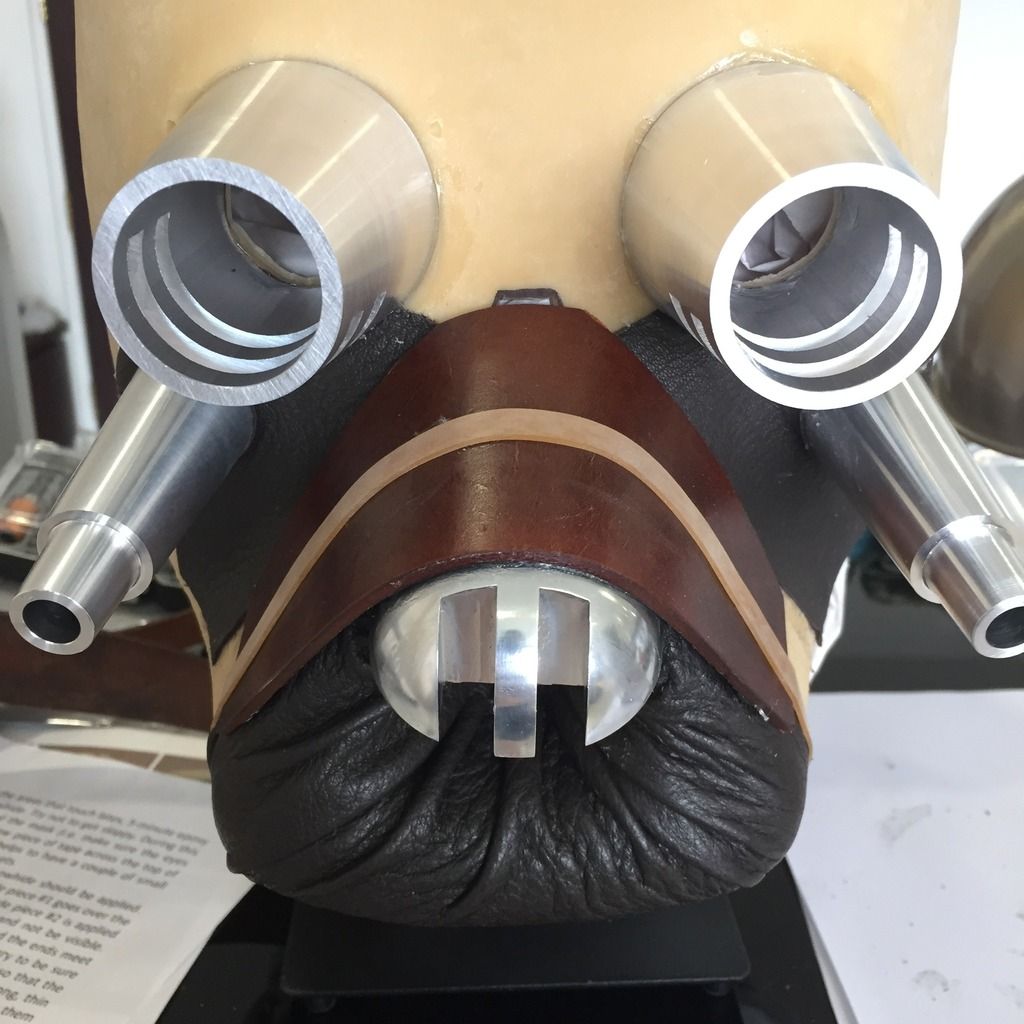
Next up, I started on the holes on the front of the helmet. Remember to position both machined eyes over the marked eyeholes together with the leather piece #4 in between the eyes BEFORE you cut the holes. This is to ensure that the leather piece fits snugly between the 2 machined eye pieces with no gaps, and that the marked circles are exactly in the middle of the eye pieces so you can cut them out with peace of mind. When cutting the cheek holes, I cut in an angle to better accommodate the conical shape of the machined parts. According to the instructions, they are meant to be fixed by sliding from the inside, with a bit left on the inside of the helmet, and not glued on the surface of the helmet.
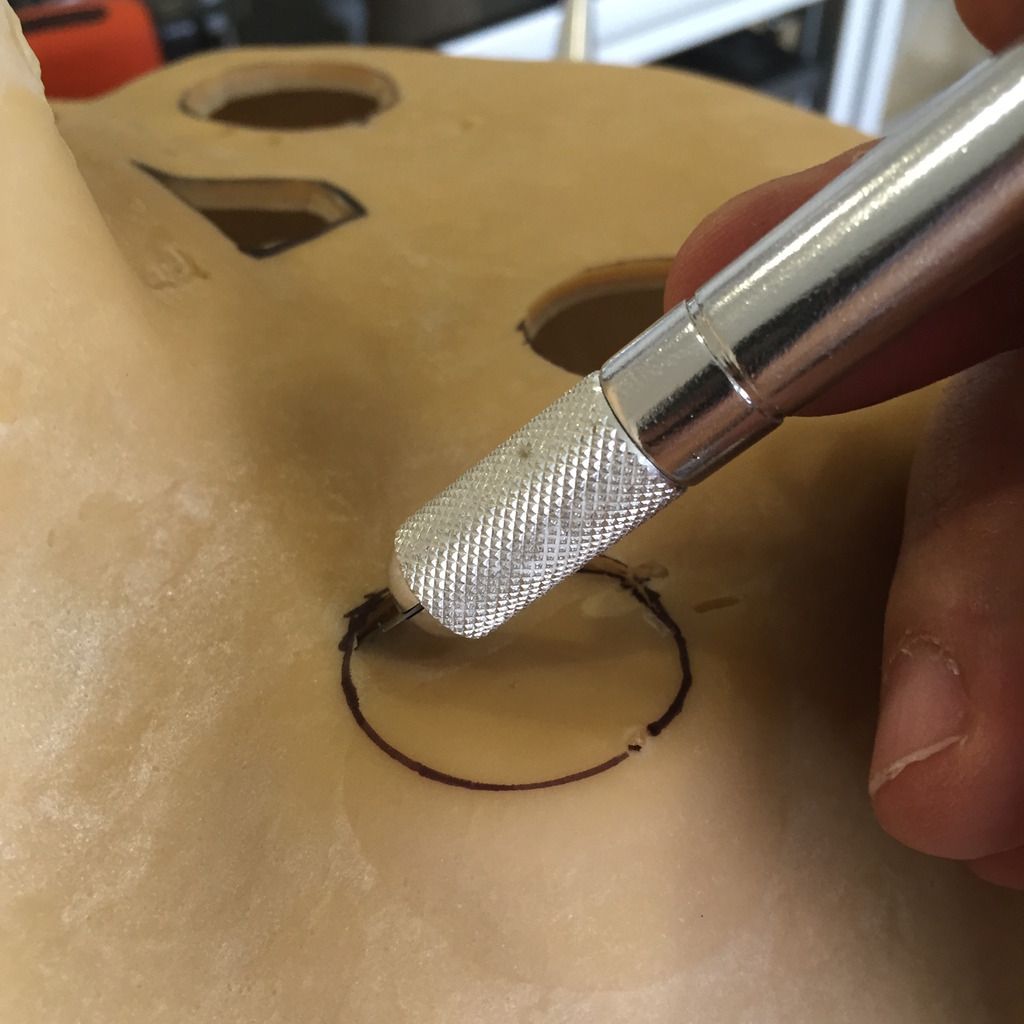
All the holes cut, and the machined eye pieces with the leather piece placed to confirm their positioning.
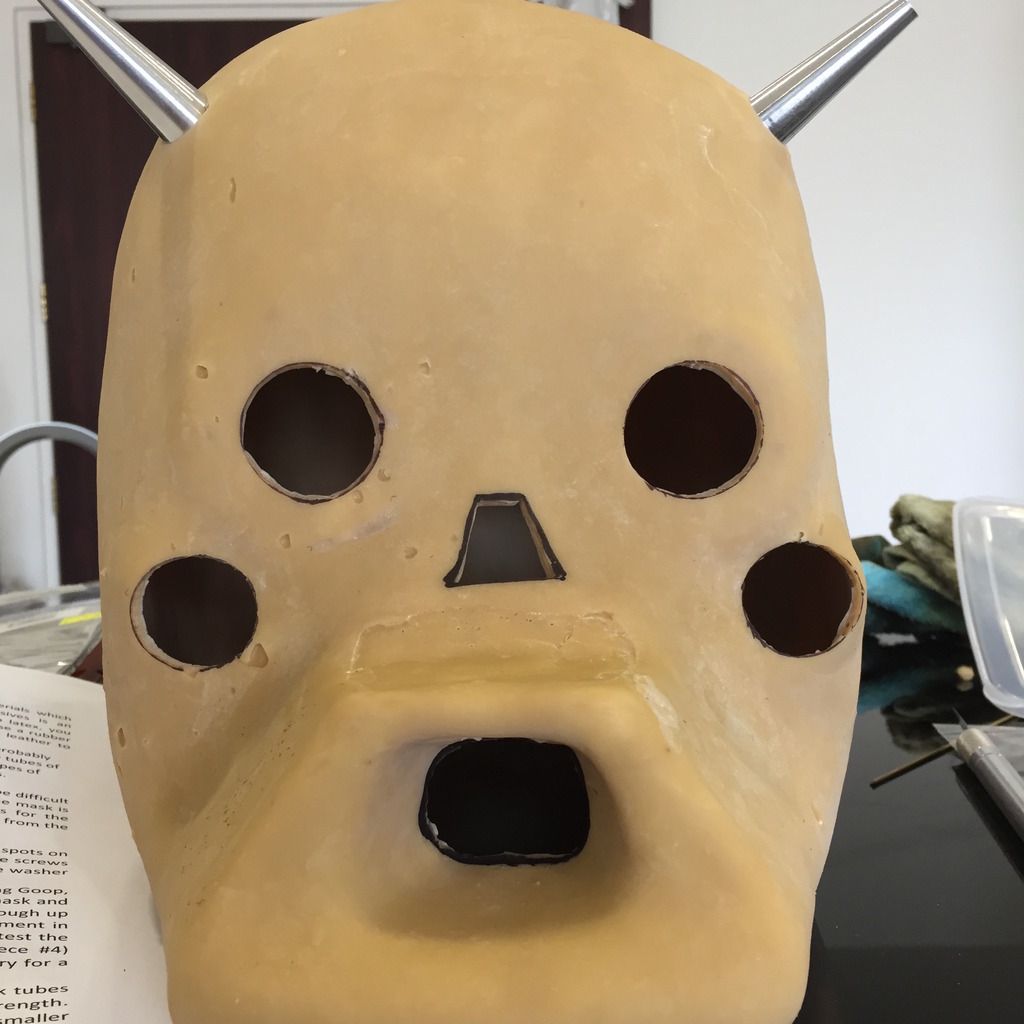
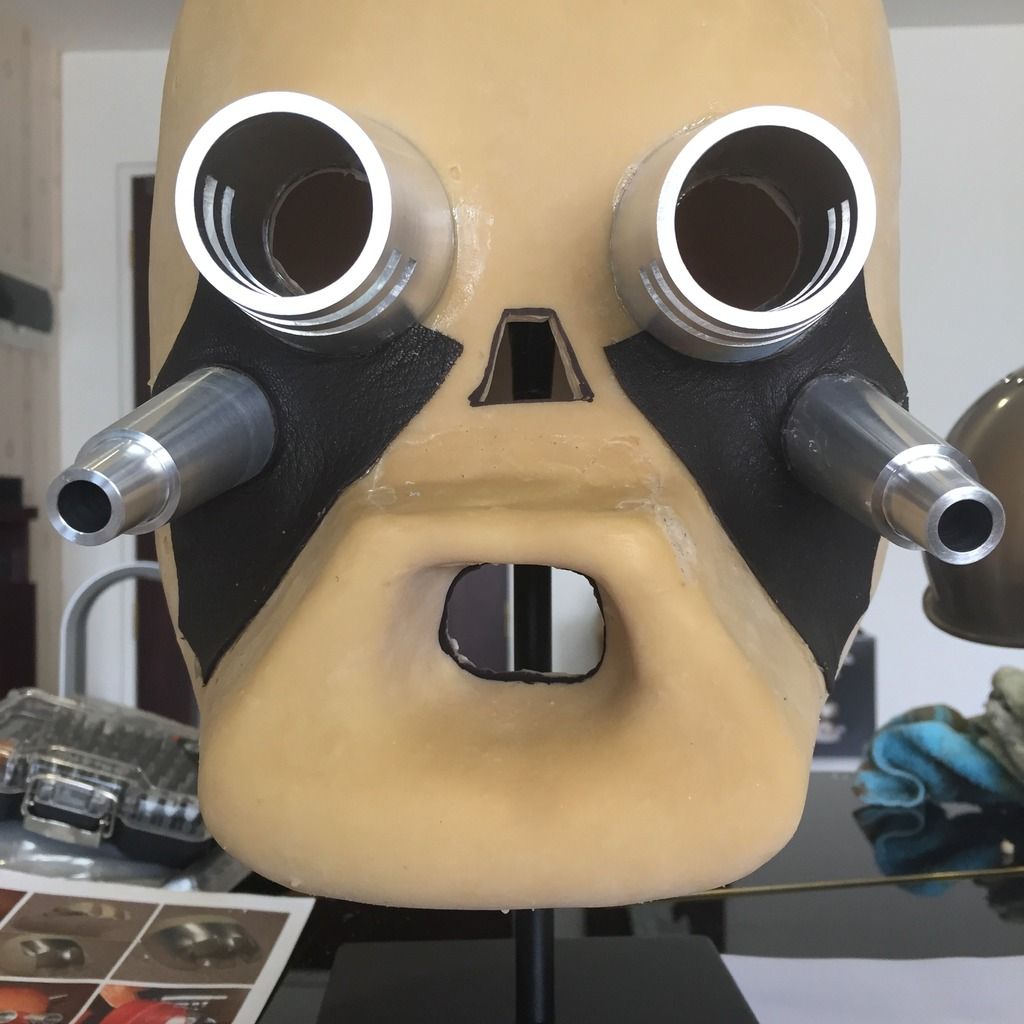
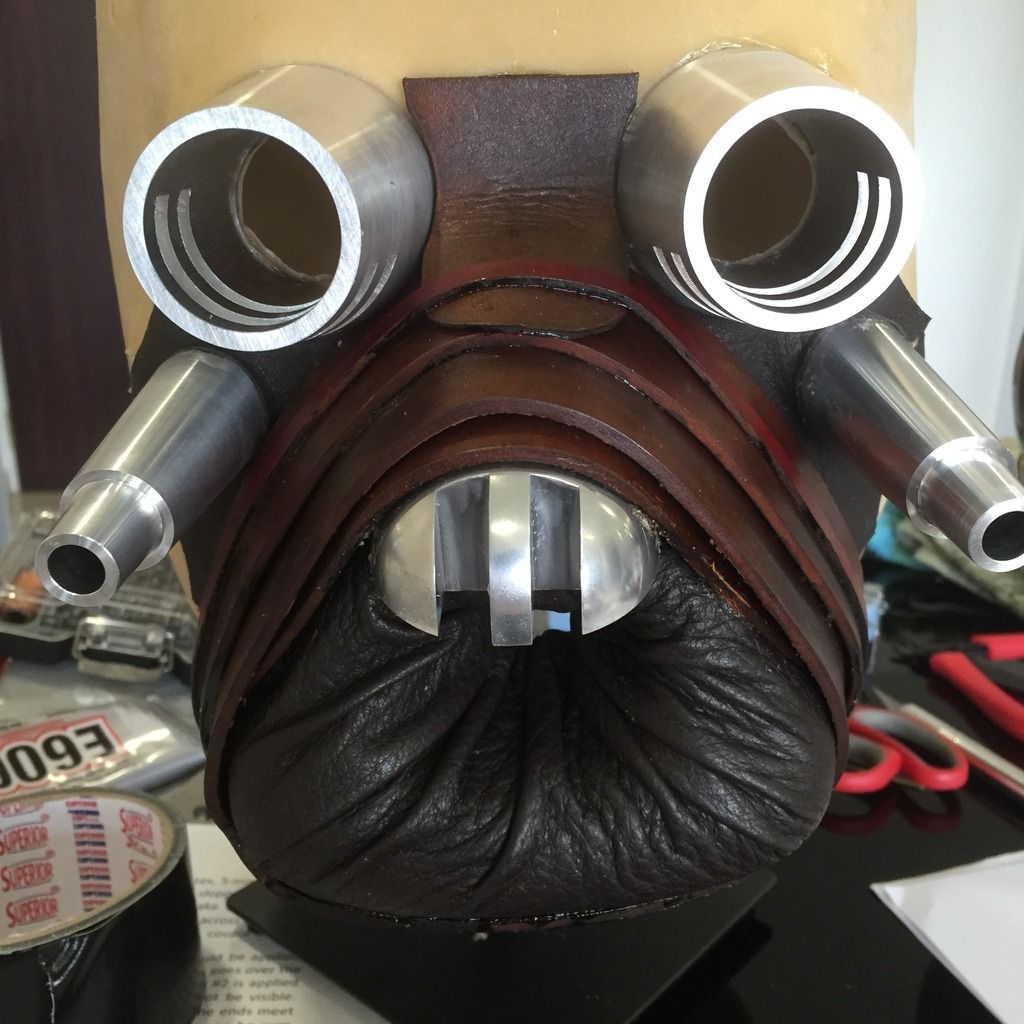
Next, I used E6000 to glue the eye pieces on the helmet. and let cure. As this helmet is for display and not trooping, I did not bother to drill holes into the eye pieces and helmet to further secure with screws like the top 4 horns. Your call if you are not confident of the glue keeping everything together during trooping. I'll see after the glue cures if I need to do that step.
Till the next update...
Decided to build a Tusken Raider helmet for display. I have not decided if it will only be a helmet, or a bust with the bandoliers. I was inspired by the half bust made by starwarshelmets. I'll decide that later. I figured I will build the helmet fist, but I did order the neck respirator from Godzilla too.
So, received a package from Godzilla (Adam), and I must say Adam has taken great pains to produce this kit.
The helmet is made of strong latex, with the positions of all the machined parts marked out for easy cutting. The machined parts are perfect, and the leather bits are of high quality. I was worried that the mouth leather was going to be difficult to crease into shape around the mouth, but the material is soft and I foresee it is not going to be a problem. The fabric for the head covering comes in a big piece, leaving me to decide on the width of each piece for randomness, and I will see later how this works out.
So first, I used an X-acto (new blade) to cut the 4 holes on the top of the helmet where the horns will be positioned. It doesn't have to be a perfect circle, just enough for the screw to go through.
Next, it was a simple procedure of screwing on the horns with a screwdriver from the inside. No glue needed.
In 5 minutes, all 4 horns completed.
Next up, I started on the holes on the front of the helmet. Remember to position both machined eyes over the marked eyeholes together with the leather piece #4 in between the eyes BEFORE you cut the holes. This is to ensure that the leather piece fits snugly between the 2 machined eye pieces with no gaps, and that the marked circles are exactly in the middle of the eye pieces so you can cut them out with peace of mind. When cutting the cheek holes, I cut in an angle to better accommodate the conical shape of the machined parts. According to the instructions, they are meant to be fixed by sliding from the inside, with a bit left on the inside of the helmet, and not glued on the surface of the helmet.
All the holes cut, and the machined eye pieces with the leather piece placed to confirm their positioning.
Next, I used E6000 to glue the eye pieces on the helmet. and let cure. As this helmet is for display and not trooping, I did not bother to drill holes into the eye pieces and helmet to further secure with screws like the top 4 horns. Your call if you are not confident of the glue keeping everything together during trooping. I'll see after the glue cures if I need to do that step.
Till the next update...
Last edited:


")