trekriffic
Sr Member
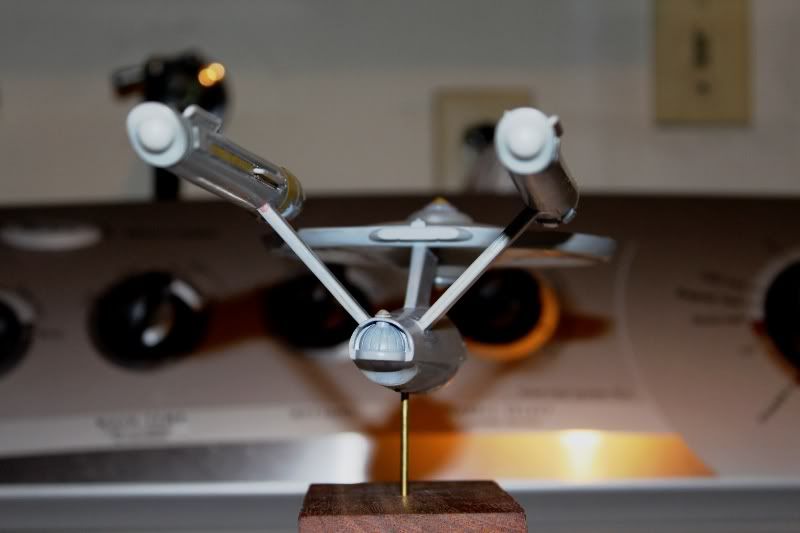
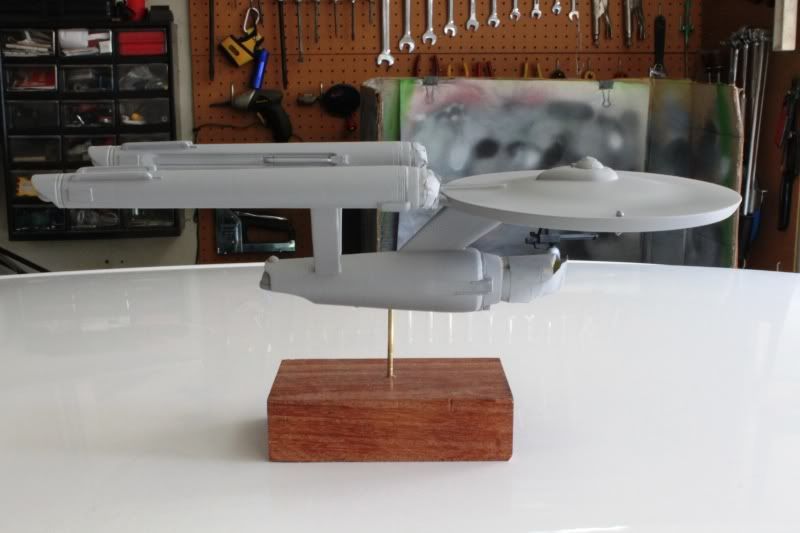
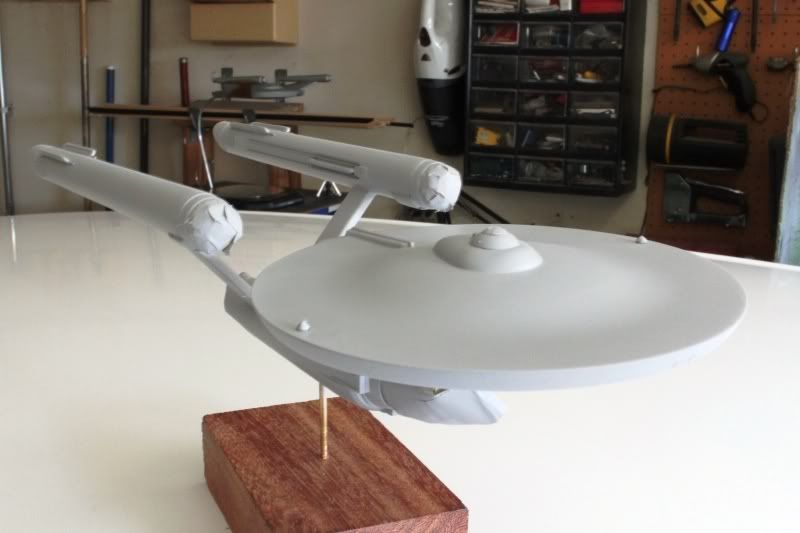
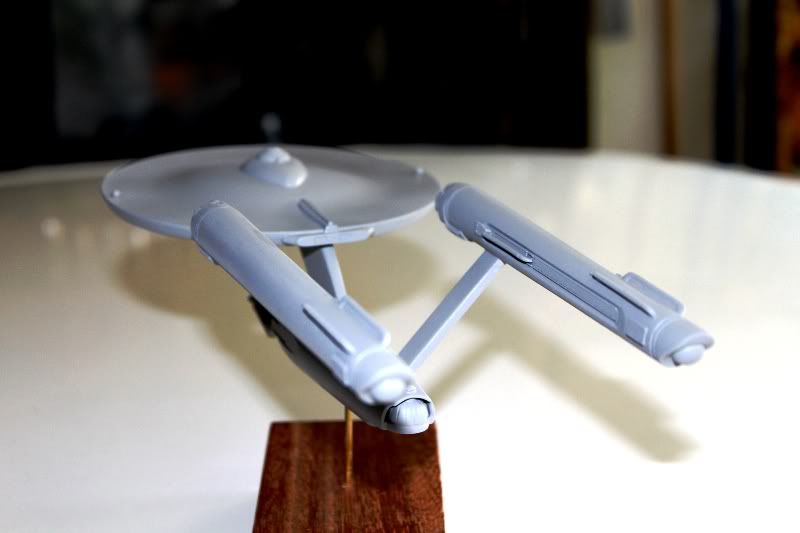
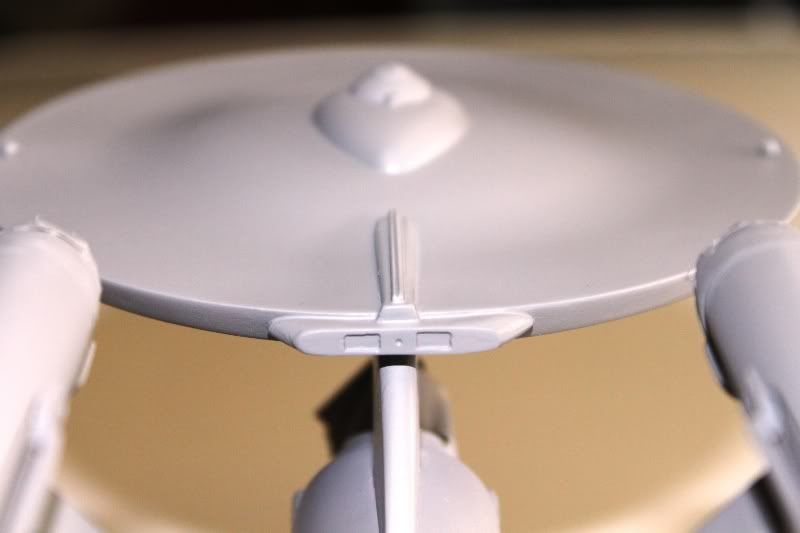
Hi everyone! These are some in-progress shots on my 1/1000 scale build of the Polar Lights kit.
This will be the production series version of this kit and is being constructed as part of the Group Build over on The Tholian Web forum.
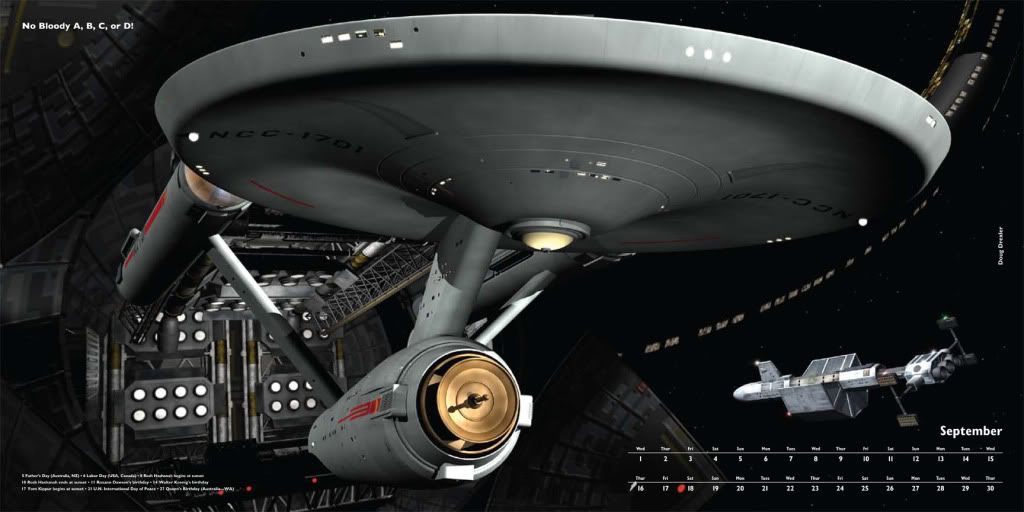
Just so you all know, this image taken from the 2010 SOTL calendar is kind of what I'm shooting for.
As much as possible anyway given the limitations of this kit.
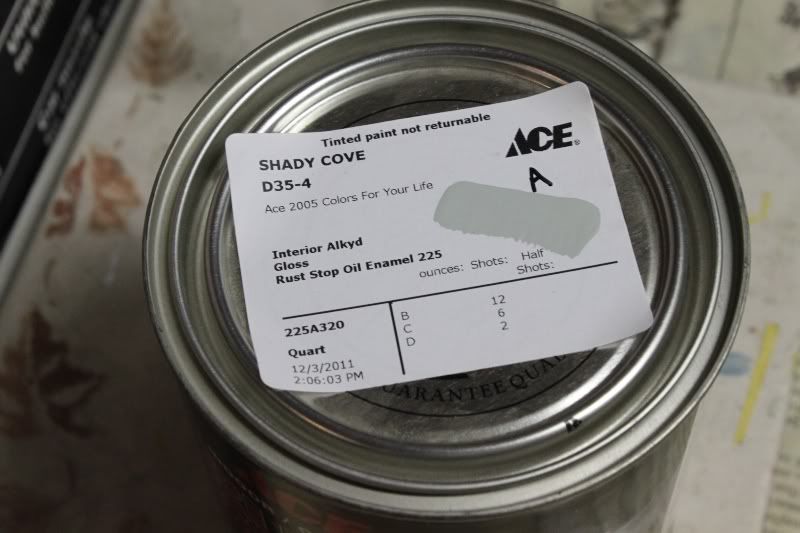
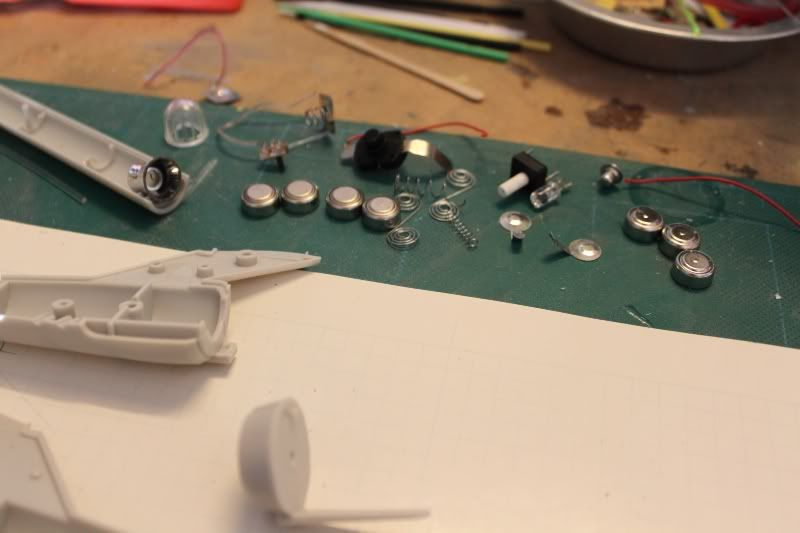
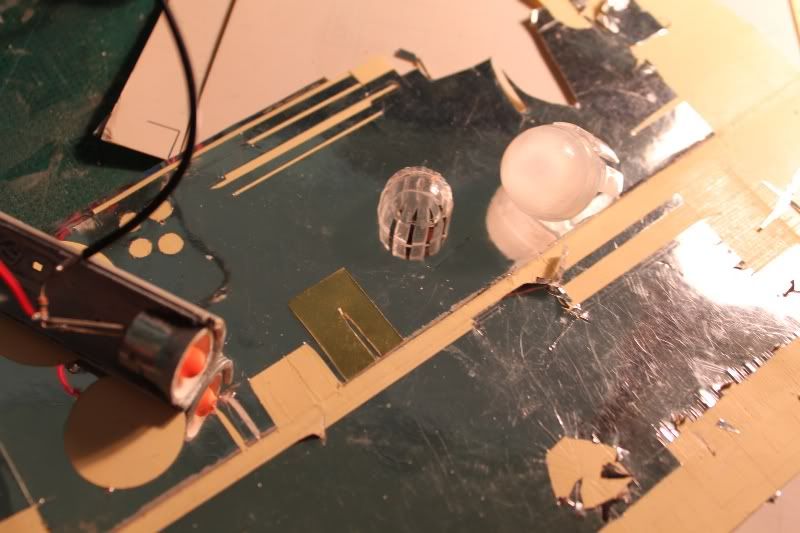
Shown here are various parts scavenged from booklights I found at the local Dollar Tree store.
Four of the 1.5V batteries, wiring, metal contacts (one with and one without a spring), and slide switch will be used to construct an internal battery pack so the finished model will not need an external power source. Each nacelle will have a reflector behind the LED in each bussard.
The lights will be static which should look nice for photographing.
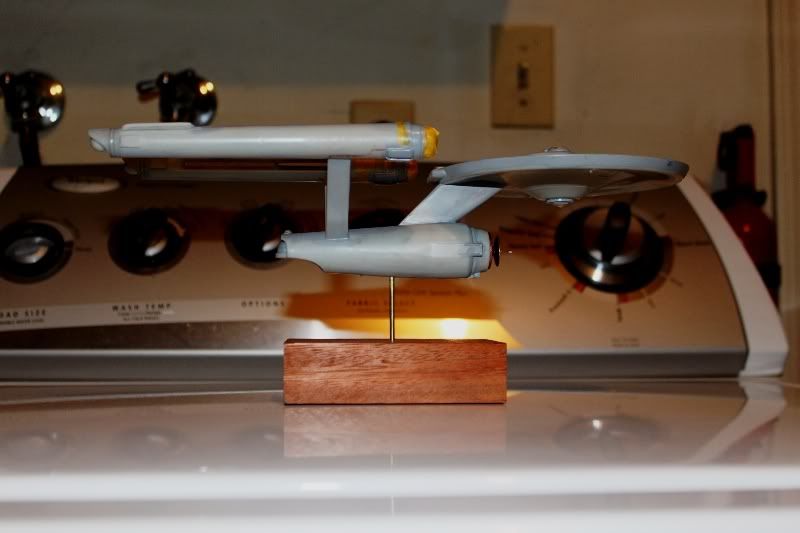
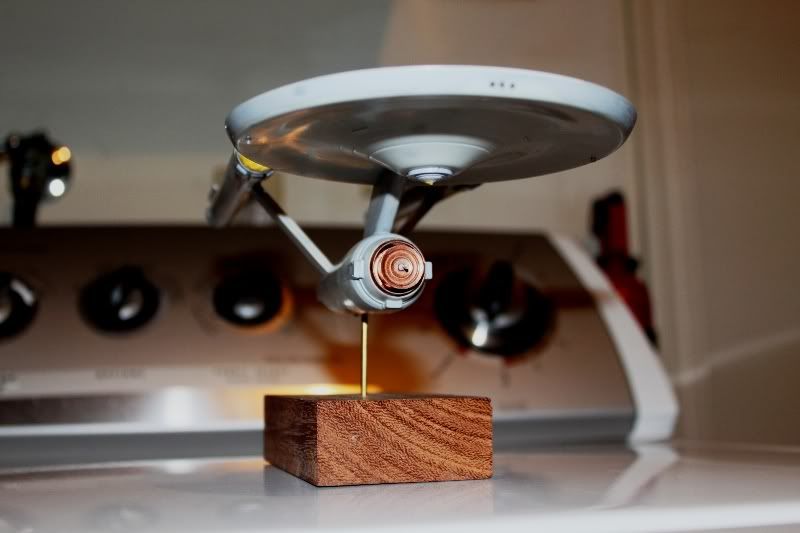
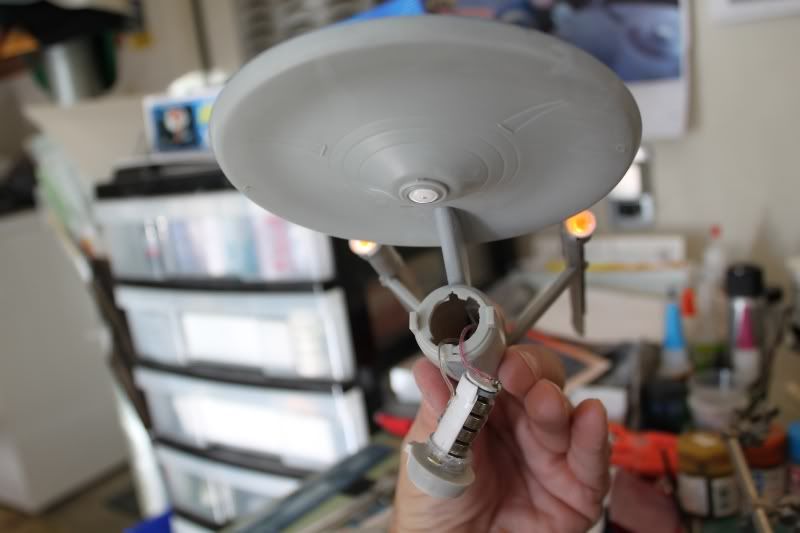
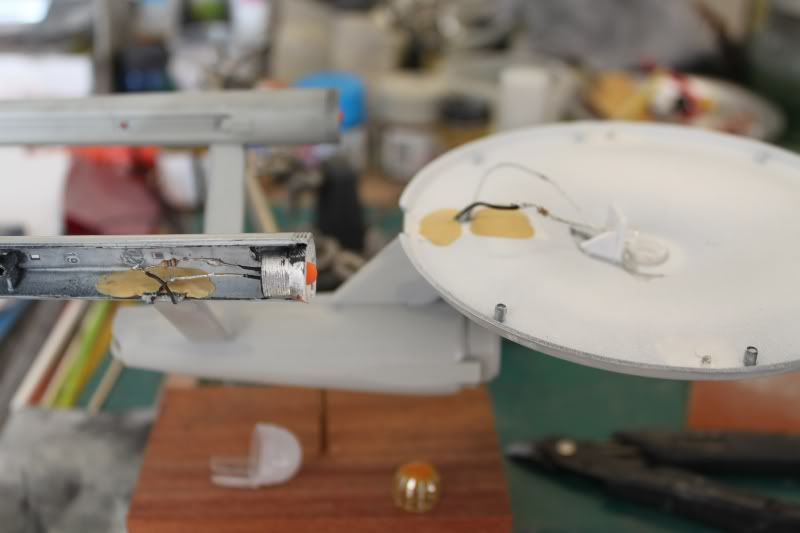
The finished battery pack made from the booklight parts and Evergreen and clear acrylic tubing is wired up and attached with CA to the back of the deflector housing.
I won't go into details about all the material I had to remove from the inside of the secondary hull to accomodate all the battery parts and wiring but, believe me, it was a lot!
Brass tabs at the front of the battery pack mate to slots cut into the secondary hull and the housing turns to lock into place.
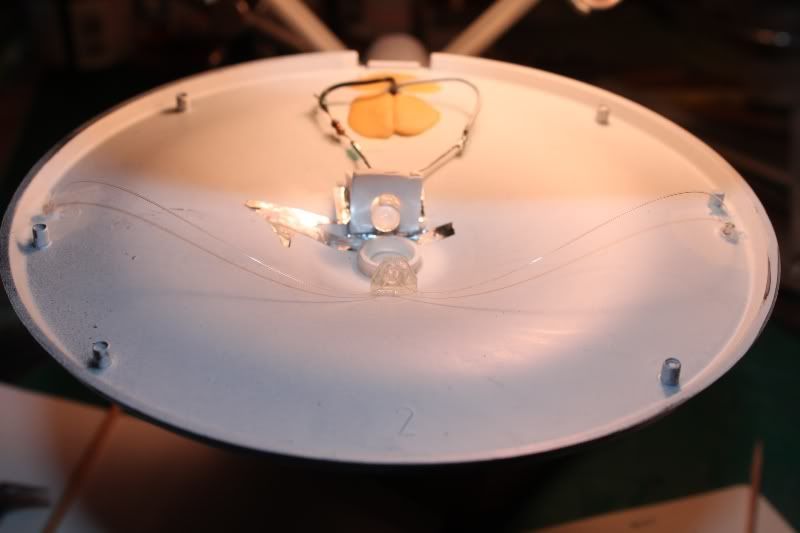
A high brightness white LED is wired between the upper and lower sensor domes in the primary hull.
This LED will later be painted with fluoresent white acrylic paint so it spreads it's glow evenly around the interior much like an incandescent light bulb would.
Wires are soldered to the LEDs in each nacelle.
The LEDs are painted with white fluoresent and orange acrylic paint.
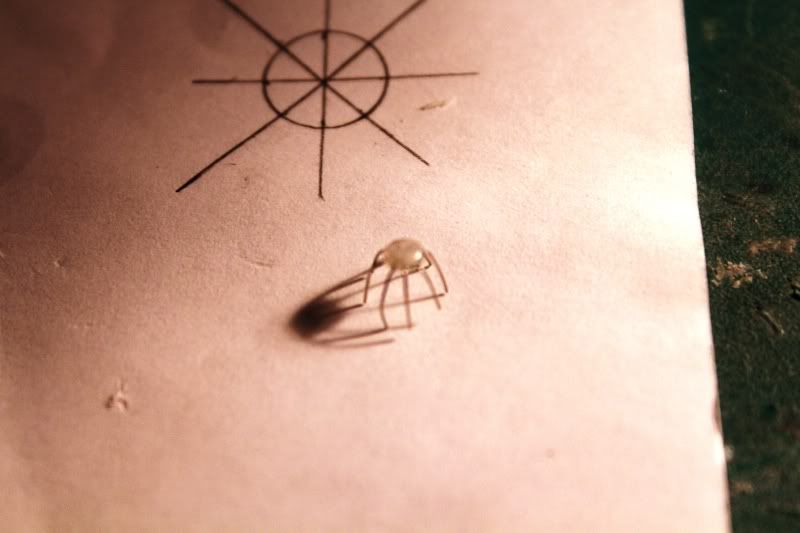
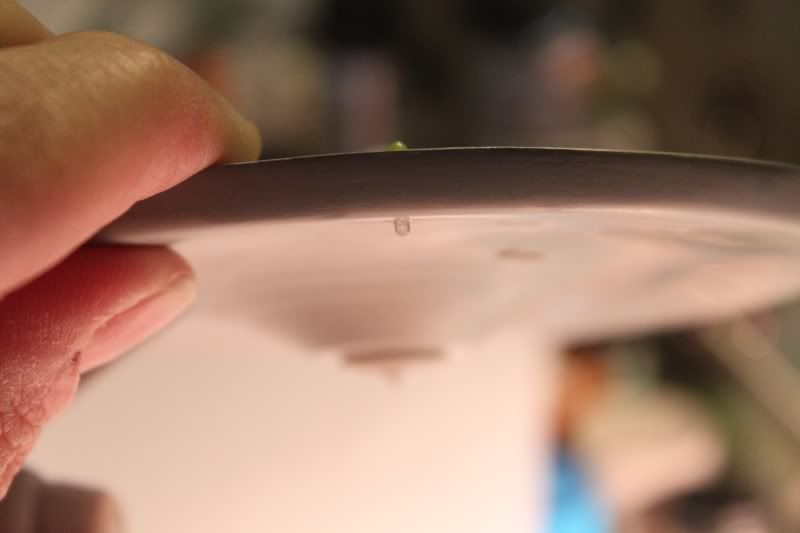
A wire cage or "spider" is constructed using 30 gauge solid wire and a clear styrene disk.
This will be inserted into the lower saucer sensor dome to give it the "pie slice" look seen in several fan made images which I have come to admire.
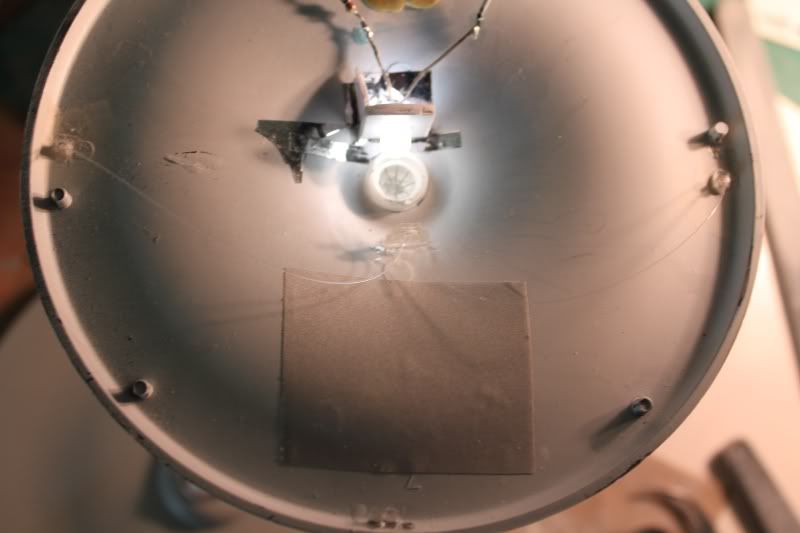
The cage after insertion into the lower dome. The insides of the sensor domes are painted with white fluorescent acrylic so they will have a nice even glow with the light on. Fiber strands are run to the lower running lights.
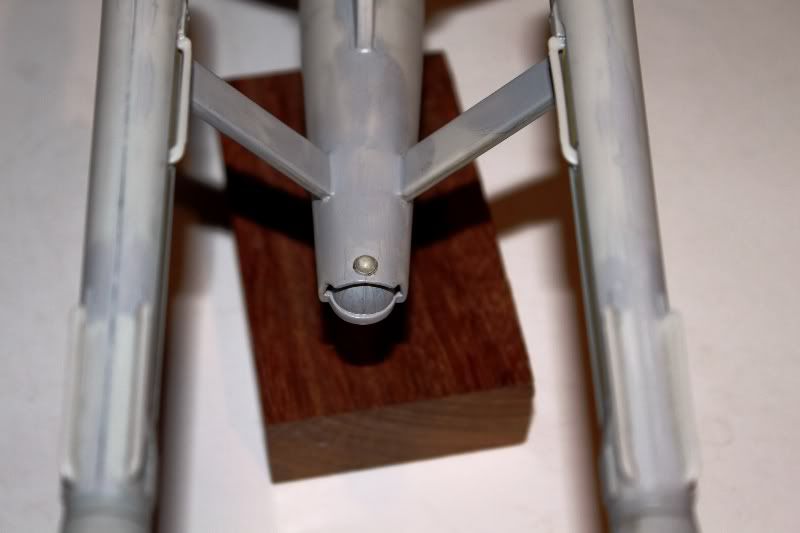
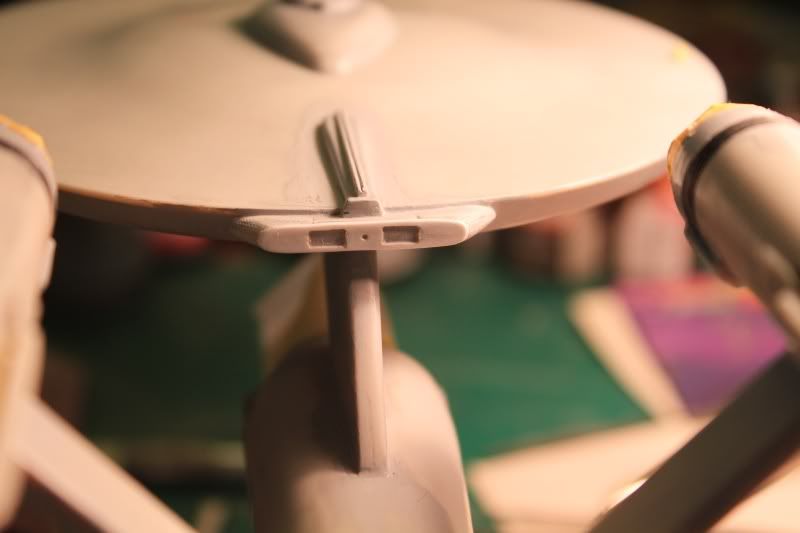
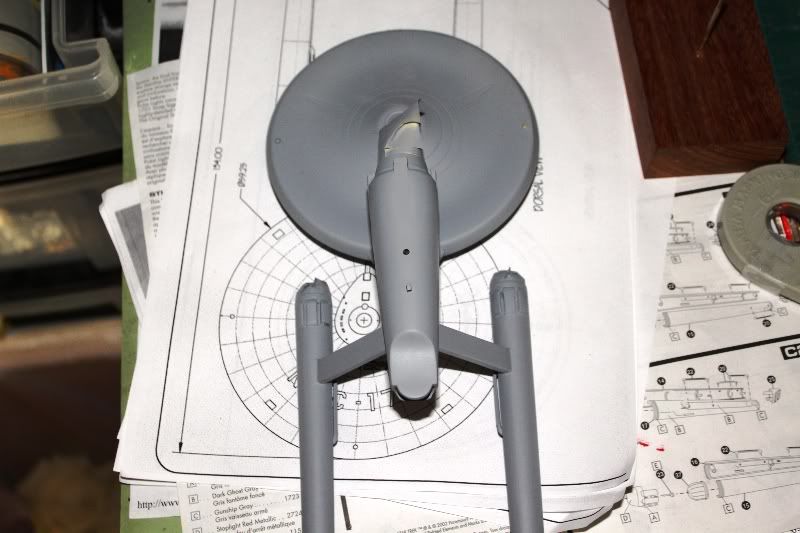
I didn't care for the look of the kit molded "nipple" on the lower saucer dome so I used the other dome in the kit (the one provided for use in building the pilot versions) and drilled out a small hole in the center. Then I turned some aluminum bar stock at high speed on my dremel and made a tiny round bead with a tiny shaft using my scribing tool. Then I glued it into the hole in the center of the lower sensor dome. This is the location of the ion pod in my opinion. Some may disagree but, for the sake of this build, it's the ion pod!
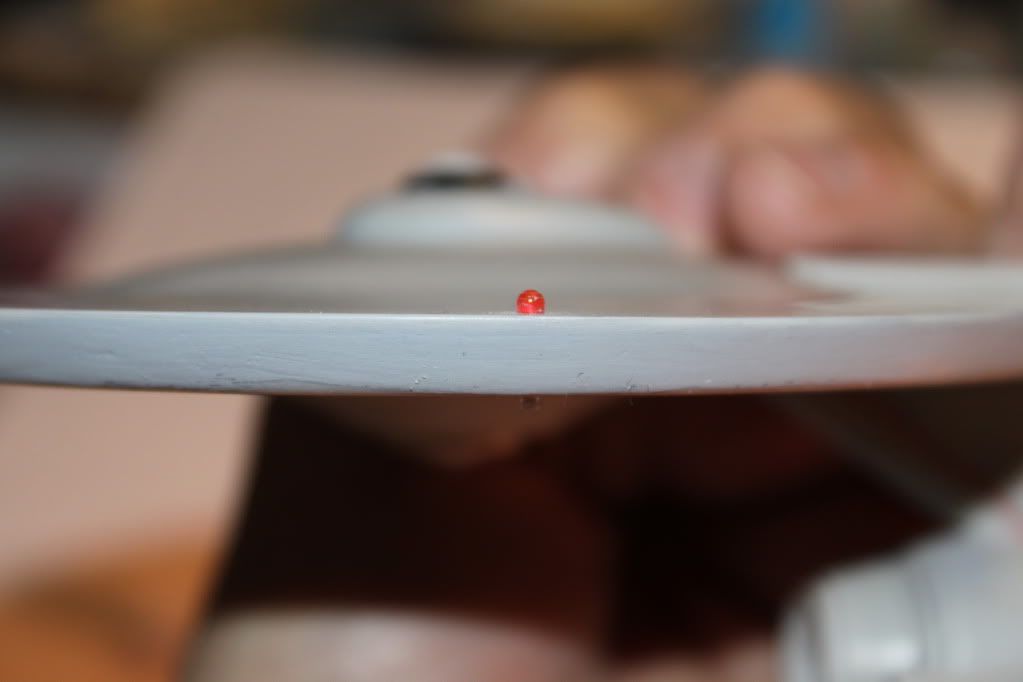
Upper port and lower starboard running lights were turned on my dremel using red and clear acrylic rod. Looking at some great still shots of the studio model I left them as globes rather than hemisphers sitting up slightly above the surface of the model.
Work on the bussards involved making a brass template for use in cutting strips of adhesive-backed aluminum foil to make the fan blades to stick to the dome inserts. The template will allow me to make each fan blade identical to the other. The inserts have had about 1/8" removed from the backside to accomodate the LED reflector. The ridges for the fan blades were also sanded flat as the fit was too tight otherwise; I have cracked a few bussard domes in the past so I knew this going in.
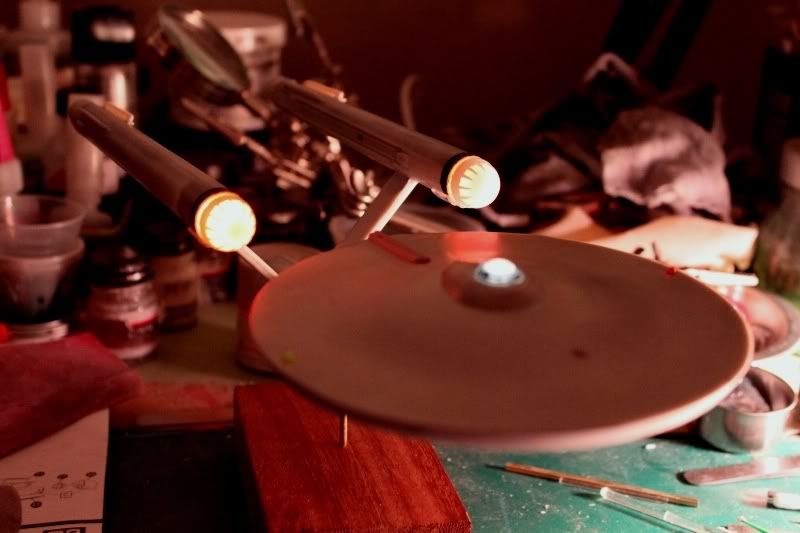
Light test after painting the interior of the bussard insert with transparent turn-signal amber enamel followed by red acrylic paint thinned with alcohol and allowed to pool in the center. The outer bussard domes were previously frosted on the inside with Floquil clear flat.

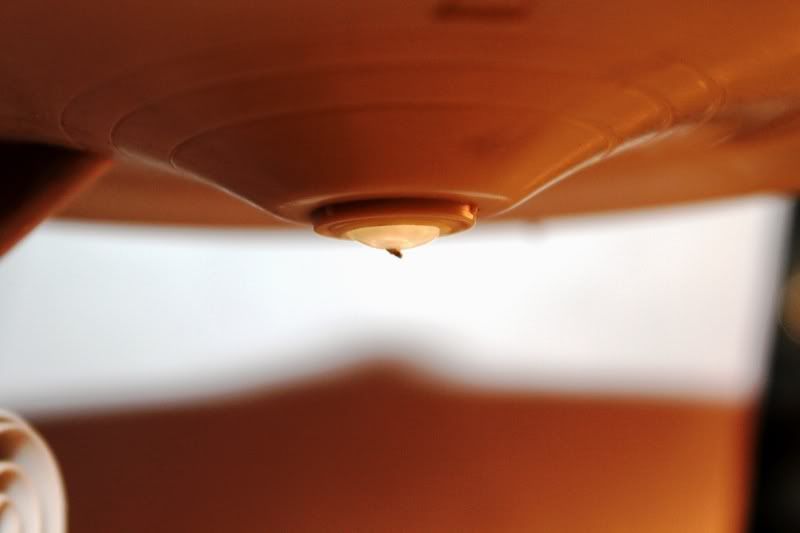
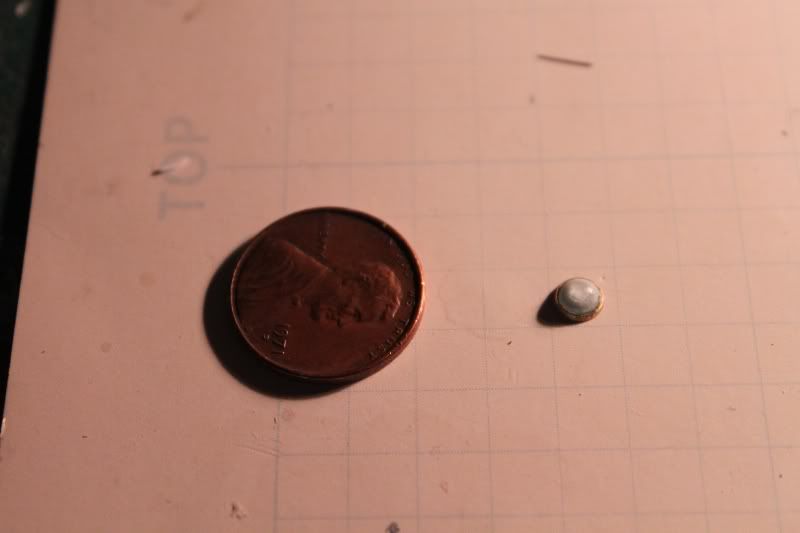
The stern beacon over the shuttle bay doors was the wrong shape and you could see the square slot in the kit part for mounting to the tab on the hull so I made a new one from scratch. Then I took brass tubing and ground a bevelled edge with the dremel before slicing it on my mini-cutoff saw. Much better in my opinion.
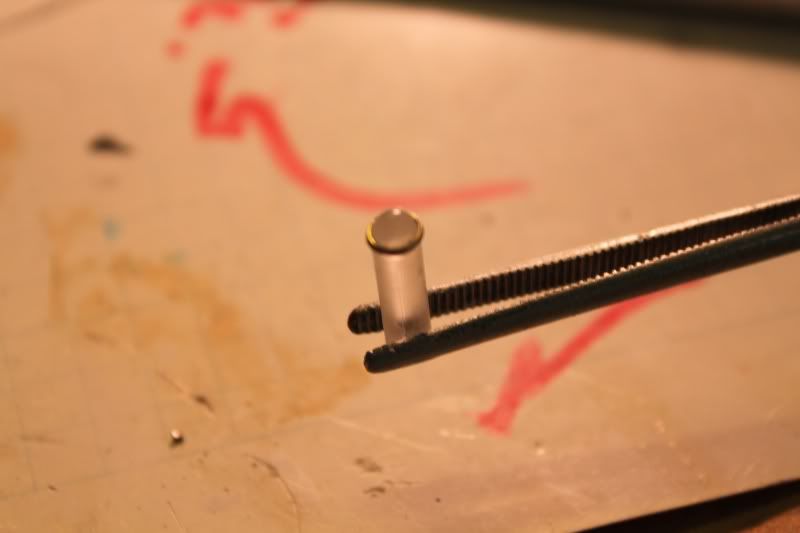
Then I sliced the acrylic rod off below the metal collar using a miter saw, hollowed out the inside with a round router bit, and painted it with white fluorescent paint tinted with just a hint of blue. My fingers almost cramped up from holding this tiny piece as I worked on it.
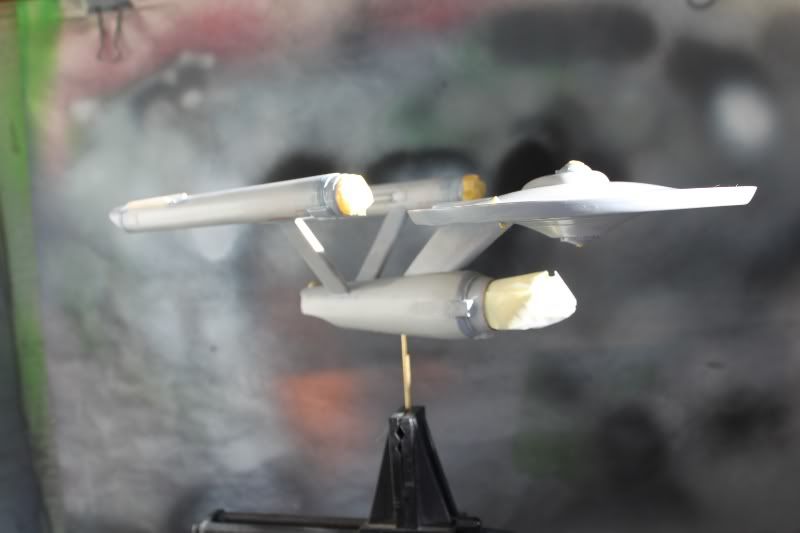
So, as of this writing, all hull seams have been filled and scraped and puttied and the majority of the sanding is complete. I did fill in the kit scribed lines in the front of the dorsal and on the front undersides of the nacelles with red putty. These areas will eventually be masked off and painted a slightly darker, greener shade of the hull color. Left to attach are the bussard domes, hangar bay beacon, intercoolers and reactor loops, and end caps on the nacelles. The deflector dish will be attached last and may be left removeable after the rest of the ship is finished.
It should be ready for priming with gray rattle can Tamiya primer tomorrow.
With any luck I should be finished by New Years.:confused
Thanks for reading ! Comments welcome!")
This will be the production series version of this kit and is being constructed as part of the Group Build over on The Tholian Web forum.
Just so you all know, this image taken from the 2010 SOTL calendar is kind of what I'm shooting for.
As much as possible anyway given the limitations of this kit.
Shown here are various parts scavenged from booklights I found at the local Dollar Tree store.
Four of the 1.5V batteries, wiring, metal contacts (one with and one without a spring), and slide switch will be used to construct an internal battery pack so the finished model will not need an external power source. Each nacelle will have a reflector behind the LED in each bussard.
The lights will be static which should look nice for photographing.
The finished battery pack made from the booklight parts and Evergreen and clear acrylic tubing is wired up and attached with CA to the back of the deflector housing.
I won't go into details about all the material I had to remove from the inside of the secondary hull to accomodate all the battery parts and wiring but, believe me, it was a lot!
Brass tabs at the front of the battery pack mate to slots cut into the secondary hull and the housing turns to lock into place.
A high brightness white LED is wired between the upper and lower sensor domes in the primary hull.
This LED will later be painted with fluoresent white acrylic paint so it spreads it's glow evenly around the interior much like an incandescent light bulb would.
Wires are soldered to the LEDs in each nacelle.
The LEDs are painted with white fluoresent and orange acrylic paint.
A wire cage or "spider" is constructed using 30 gauge solid wire and a clear styrene disk.
This will be inserted into the lower saucer sensor dome to give it the "pie slice" look seen in several fan made images which I have come to admire.
The cage after insertion into the lower dome. The insides of the sensor domes are painted with white fluorescent acrylic so they will have a nice even glow with the light on. Fiber strands are run to the lower running lights.
I didn't care for the look of the kit molded "nipple" on the lower saucer dome so I used the other dome in the kit (the one provided for use in building the pilot versions) and drilled out a small hole in the center. Then I turned some aluminum bar stock at high speed on my dremel and made a tiny round bead with a tiny shaft using my scribing tool. Then I glued it into the hole in the center of the lower sensor dome. This is the location of the ion pod in my opinion. Some may disagree but, for the sake of this build, it's the ion pod!
Upper port and lower starboard running lights were turned on my dremel using red and clear acrylic rod. Looking at some great still shots of the studio model I left them as globes rather than hemisphers sitting up slightly above the surface of the model.
Work on the bussards involved making a brass template for use in cutting strips of adhesive-backed aluminum foil to make the fan blades to stick to the dome inserts. The template will allow me to make each fan blade identical to the other. The inserts have had about 1/8" removed from the backside to accomodate the LED reflector. The ridges for the fan blades were also sanded flat as the fit was too tight otherwise; I have cracked a few bussard domes in the past so I knew this going in.
Light test after painting the interior of the bussard insert with transparent turn-signal amber enamel followed by red acrylic paint thinned with alcohol and allowed to pool in the center. The outer bussard domes were previously frosted on the inside with Floquil clear flat.
The stern beacon over the shuttle bay doors was the wrong shape and you could see the square slot in the kit part for mounting to the tab on the hull so I made a new one from scratch. Then I took brass tubing and ground a bevelled edge with the dremel before slicing it on my mini-cutoff saw. Much better in my opinion.
Then I sliced the acrylic rod off below the metal collar using a miter saw, hollowed out the inside with a round router bit, and painted it with white fluorescent paint tinted with just a hint of blue. My fingers almost cramped up from holding this tiny piece as I worked on it.
So, as of this writing, all hull seams have been filled and scraped and puttied and the majority of the sanding is complete. I did fill in the kit scribed lines in the front of the dorsal and on the front undersides of the nacelles with red putty. These areas will eventually be masked off and painted a slightly darker, greener shade of the hull color. Left to attach are the bussard domes, hangar bay beacon, intercoolers and reactor loops, and end caps on the nacelles. The deflector dish will be attached last and may be left removeable after the rest of the ship is finished.
It should be ready for priming with gray rattle can Tamiya primer tomorrow.
With any luck I should be finished by New Years.:confused
Thanks for reading ! Comments welcome!