Tom's PCubed saber projects

thd9791

Master Member
RPF PREMIUM MEMBER
Hello - im signed up for 2 spots on PoopaPapaPalps forged saber run. The first is his design of the infamous V2 and the next will be a bladed stunt saber.. later on.

My girlfriend and I keep calling him P Cubed for short, because the screen name is so long.

Anyway, i hope folks know he generally solved or whittled down lots of debate over the V2 based on whats actually possible to machine. These casts are very wonky and my guess is that the V2 is so skinny because its the most true round they could get out of it. And you can get the V2 from the V3 profile, that was a blow to my logic.
20210112_093901.jpg20210112_093646.jpg
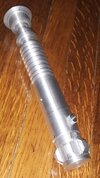
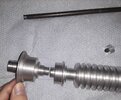
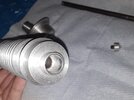
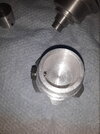
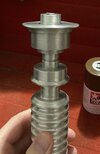
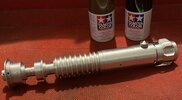
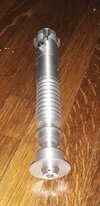
Everything from the mated emitter/body and the nipple groove/motor driveshaft debate.. i really like the solutions he has come up with. A lot of these decisions fit what I see in the pictures we have.. AND its a real cast piece. It looks pristine and smooth in the pictures but there are pockmarks and dark spots everywhere. And machining marks on the rings, emitter, windvane and pommel. Its heavy. It rattles. I think this is a perfect start.
20210106_132244.jpg20210112_092640.jpg20210112_092752.jpg
Without a torch, i just used 2 cloth masks and a metal file to trim the washer around the mystery chunk I saved for this. It left the sides shiny and the top still dark. I quite like it. Then I squished the legs of the mystery chunk to fit... but the legs are too damaged and short, so I just left them straight and E6000 held it in perfectly.
20210112_092558.jpg20210106_142932.jpg
I also replaced the included cone knob with a replacement made by Transcriptors around 2015. His is more accurate to the vintage knobs though, add that to my want list. The threading matches!

I have multiple paint cans on the way, and Im going off the beaten path here.

20210112_093431.jpg
20210112_093519.jpg
 
Last edited:
So, left to right
20210112_100556.jpg

1) Transcriptors replacement - larger knurling
2) poopapapapalps hand made knobs
3) Anakin Starkiller custom made with the kits
4) cant remember.. corellian exports?
5) pastorjedi cone knob

I think the old correct michell knobs have small knurling like most of these. Well done everyone - we freaking nailed this part!
 
So, left to right
View attachment 1411135
1) Transcriptors replacement - larger knurling
2) poopapapapalps hand made knobs
3) Anakin Starkiller custom made with the kits
4) cant remember.. corellian exports?
5) pastorjedi cone knob

I think the old correct michell knobs have small knurling like most of these. Well done everyone - we freaking nailed this part!
4) looks most accurate
 
I didn't know he made them. I may as well stop if it's got the same separate grub screw feature and it's a lot more accurate than what I can produce.
CE are larger than yours. Yours matches the diameter of my Transcriptors replacement. Really, he nailed the angles and he got his knurling deeper somehow, but thought I'd clarify!
 
I didn't know he made them. I may as well stop if it's got the same separate grub screw feature and it's a lot more accurate than what I can produce.
If I didn't happen to have already the real piece (or a nice collection of replicas to choose form like Tom's) - I'll be happy to just use yours when I receive mine v2 rather than chase another replica knob.
 
If I could get my knurling tool's jaws lined up every time, I can produce pretty clean deep knurls. However, most of the time they come out looking like the old PastorJedi ones or worse.
 
word to the wise - I did put dents in my emitter, ever so slightly. I didn't bother heating it since the original wasnt done this way and used a rubber mallet and a block of wood.

3 hits and cracks opened up. Hairline ones, nothing big, so I smushed JB Weld onto the emitter and threw it in a drill press and sanded the emitter smooth. I think it should be fine, and should have maybe heated it!

anyway, I'll post pics later today, it looks great

This is why I always use heat

I repaired a members here a few years back, he cracked it wide open. I wanted to film it to show others how to fix it, but he was so embarrassed he wanted me to stay quiet about it

But with that job I used alumaloy rods. Very inexpensive and easy to use


So that’s always another option down the road
 
I didn't know he made them. I may as well stop if it's got the same separate grub screw feature and it's a lot more accurate than what I can produce.

He doesn’t make them anymore, he did a small run. I actually asked for some custom work on mine so they are more accurate

I would love for him to do a huge run
 
Im not sure these are as bad as I thought. Like, not worth brazing, but please let me know if they are! I did rub some JB Quick weld paste in there and I think it worked but the cracks are so miniscule I have doubts that the paste was small enough to go in haha
20210113_185251.jpg
20210113_185216.jpg

Leaving this the way it is. Next... LACQUER
 
This is why I always use heat

I repaired a members here a few years back, he cracked it wide open. I wanted to film it to show others how to fix it, but he was so embarrassed he wanted me to stay quiet about it

But with that job I used alumaloy rods. Very inexpensive and easy to use


So that’s always another option down the road

I mentioned it before but brazing with cast alu works up to a point and that point is reached when it needs to be cleaned. The stuff I use is tougher than the cast and any area around the fix will often get taken more off than the brazing.

I recently had to fix one on the first 2 runs and luckily it wasn't all that terrible an issue. The problem comes later when it patinas, if it's not covered in paint they will patina in two different finishes.

And if it's all the same, I have the very same hairline fractures on the one I keep for myself. I'll be experimenting continuously on solving them with cast metal (especially as thin as these need to be), if I can reduce them in any way, but it might just be another inevitability to accept.
 
Im not sure these are as bad as I thought. Like, not worth brazing, but please let me know if they are! I did rub some JB Quick weld paste in there and I think it worked but the cracks are so miniscule I have doubts that the paste was small enough to go in haha
View attachment 1411590View attachment 1411591
Leaving this the way it is. Next... LACQUER

I think it looks fine tom
 
Thank you, both of you.

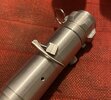
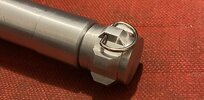
Today I dug up an old Wannawanga D ring clip from that period we thought the ANH Graflex had a single rivet.. those D rings are the exact round cornered kind I was looking for! The v2 I think has a longer/larger one but it seems the D ring is just a hair longer than the pommel, and so is this one. I didnt remove any material from the center, just used heavy duty Husky Snip pliers to split the center that was already cut.
20210114_101045.jpg

I wrapped the D ring in gaff tape and took the pommel off the saber so there was no extra weight to manage. I
used the Vice method to close it properly. I really love how this worked out!
20210114_101222.jpg20210114_101130.jpg20210114_100546.jpg
 
better pics.

I have a wannawanga lever with an original Graflex block. redbutton had a clamp with mismatched sidebars: they both were square holed ones and this block was JB Welded into the bar as a "fix".. it's the inside one, the outside one is the wannawanga block
fullsizeoutput_2409.jpeg

and the D ring

fullsizeoutput_2406.jpeg

some paint to come! still deciding how to mask off or weather the lacquer

fullsizeoutput_2408.jpegfullsizeoutput_2405.jpeg
 
I have a weathering pattern I plan on using for the booster and some of the other parts of the saber...


I tested it with random black rattle can on an old air tank from a scuba gun.. because star wars geeks have those in their houses

20210121_154516.jpg
20210121_154508.jpg


Folks... ROCK SALT

I got a tip from CHIZZbot1973 on using it for weathering and then learned all about rust weathering on model cars and tanks. Watched a lot of adults play with toy cars with really low voices.. it was odd. However, as someone that worked in a museum with some of the first diorama complex displays.. and loving Lord of the Rings, the ability to make miniatures with the same detail as large items is incredible.

There are a few key steps they taught me and ill go over them when I do my V2.. it will be tricky because I have to paint the whole saber at once
 

Your message may be considered spam for the following reasons:

If you wish to reply despite these issues, check the box below before replying.
Be aware that malicious compliance may result in more severe penalties.
Back
Top