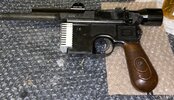
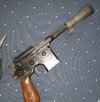
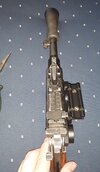
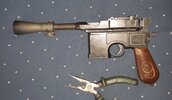
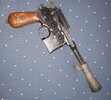
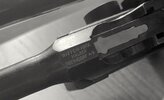
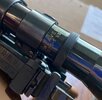
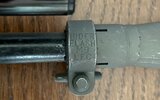
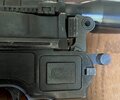
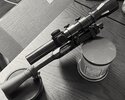
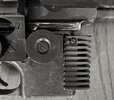
Tom's Greedo Killer

thd9791

Master Member
RPF PREMIUM MEMBER
So, yes this is happening

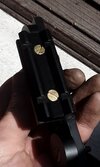
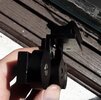
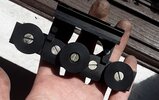
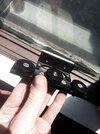
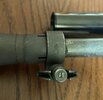
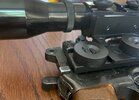
Before I do a full intro - my weird eyes noticed something. The immaculately CNCed scope mount I have.. I think its a Field Marshall looked too compact. Literally the countersinks are a little small but they all look the right ratio to the screws

Funnily enough I dug through my bin of screws (ignore my dirty fingers please) and found some the same threading but vintage. Yep. Theyre bigger. The old size sits completely flush with these knobs.

im going to bore out the countersinks a bit more, to match what I see in the photos and on screen. I see a countersink about half the diameter. Gotta cut some of these shorter too.

The center screw? Part of me thinks its the same size as the others with a larger countersink. Part of me thinks its smaller and the countersinks are all the same. I need to get out my calipers and photoshop for that one
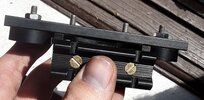
20210423_142240.jpg20210423_142223.jpg20210423_142200.jpg20210423_142142.jpg20210423_142048.jpg
 
Last edited:
Nice! Happy that you wish to go further than what the amrket replicas are reproducing :)
for my build, I went with an old vintage EE8 phone screws (used for blade runner blaster bits). I used the same size of screws but a larger center countersink.
this is what I could make out from the reference photo, here with all screws next to each other:
37218303995_376e10f98c_k.jpg

looking forward to see what you come up with :)
 
Yes, thank you! I'm glad others share in this itch for researching

This is the picture from War Machine Paintball's website, and I heartily agree
GKEdited.jpg


So
1) the bottom left corner of the plate is rounded off
2) the taper on the right half - there is more of a bevel on the top than the bottom, in fact there's even a bump before it reduces
3) all mounting bar screws are the same size, looks like they got a little enthusiastic when countersinking the center knob. In fact, the right knob looks less countersunk than the right one!
4) a good comparison for the upper screws is in pink

It looks like I'm going to drill out the center screw mount and re-tap it to match the others, as well as some fun sculpting details
 
great stuff :)

I think you might be reading into the weathering of the paint for the "bump" before it reduces on the cross bar. It might just be paint missing on the thickness of the bar, if that makes sense.

I'm sure you'll have fun with that, but it's also pretty easy to try to match the screw head orientation, here is my rendition:
DSC01769.jpg


Obviously, stuff can always be improved. I had a good look at the images when i did mine but it's all handmade as always and I notice now that my right contersink is deeper than the left and it could be reverted seing your observations :)

also, the most annoying part of that blaster is the fact that there is the one during filming and the reasembled one or different one for the book and you'll notice that the screw orientation is completely different in the film. and the center screw is not fully threaded inside the round thing... fun stuff!
 
You know, now that you mention it - I remember noticing that the on-screen version had a heavy layer of paint, and the rear vertical screw point is bent back towards the gun. I see the central screw now too!
This was the pic you posted, that may be from Scott J

star-wars4-movie-screencaps.com-5832_2.jpg


weird that the screws aren't in the same orientation. I wonder if they were loose in the chronicles photos or something, you'd think they clock in tight in one orientation.. like whatever they were tapped when it was made wouldn't change?
 
it could be that one or two screws are loose in the movie and they tightened them back up. as we see, the middle screw is clearly completely loose, maybe the front screw is a bit loose too, it seem a bit higher in the countersunk. that would explain that those two screws are not oriented the same.
the rest of the screws look pretty much in the same orientation :)
 
Humor me here ...

If the prop guys were trying to replicate the ANH hero, is it possible that the spacer disks are actually threaded? If so, It's possible that they left the middle screw a bit too long, threaded it through the spacer, then into the crossbar. The disk could then be tightened to the mount even with a protruding center screw (intended to mimic the way the Hero's center knob protrudes).

Maybe the blaster was disassembled/screws lost between shooting and promo pics so they found new screws (hence the different orientation) and just picked a shorter center screw (as one would do if they didn't have great reference). They got the scope rings wrong for those photos, so it was obviously disassembled then reassembled by someone who wasn't too thorough.

Just a theory.

Looking forward to following your build!
 
SO..... today....

1) I bored out the little hole in the grill to accept a neat little vintage screw I dug up

2) i used Rapid Tap and zero-flute bits to bore out the discs to a size larger than the vintage screw heads
(This was TOO easy and I bored larger than I meant to. Oops. Oh well, this will be my signature on the blaster..)

3) Trimmed screws with a dremel. I cut the left one too short, and put it in the center. So, in order to replace the smaller center screw with one of the larger ones, I drilled out the bar and plate, and nicely re-tapped it .. with Rapid Tap! Then I dropped a different vintage screw in the empty left disc. Needed to be 4mm longer, measured from the back of the bar. 4mm is the thickness of the MGC wall at the back.
fullsizeoutput_2708.jpeg

4) Drilled and tapped the gun itself. I was able to get multiple 8-32 threads in both the front and back holes! Still using a nut inside the magazine area.
fullsizeoutput_2702.jpeg

5) using a dremel and mostly my trusty metal file collection, I altered the bar to what I see on the prop. rounded left edge, and football shaped right ends
fullsizeoutput_2706.jpeg
 

Attachments

  • fullsizeoutput_2704.jpeg
    fullsizeoutput_2704.jpeg
    1.5 MB · Views: 42
Hey Tom, oh I think you went a bit far on the countersunk holes. Nice alignment on the screws though :)
yesss I did :/ I am so used to using some force with my drill press, when I dribbled rapid tap and used these special bits... it just melted through the disc. underestimated how quickly it was removing material!
 
Nice GK!

I did the same thing with one of my disks but just flipped it over and got it right on the back side. Just make sure yours aren't already drilled too deep to where the center would blow out if you tried this.

Also, why the sight removal? Are you hoping to leave the barrel intact, visible inside of the flash hider cone? If so, sounds kinda cool!!
 
Thank you! I'll take some more pictures when I disassemble it to paint it, I was surprised about how I was able to tap the MGC wall. and the bar is like right against the gun, unlike the Hero. Weird.

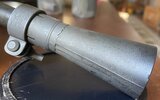
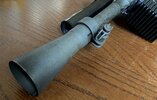
Yea, the M9 flash hider cone is so large and so... EMPTY, artistically I've always wanted something in there. They did it with one of the Muppet blasters that Propstore had for a bit, you can see a fake piece of "barrel" in the flash cone. The hero gun at least had the holes and a small barrel hole at the bottom.

I also just realized I don't know how long to make the barrel and a lot of times I start with a clean barrel so I can slide things back and forth to my liking. If it was pointless.. I guess thats more practice for me!
 
Makes total sense! Try to snap a pic of it with the barrel intact/FH mounted up if you think about it. Would love to see how that looks.
 
Hey so... i sat on it and decided Id keep the countersunk holes the way they are. It gives the blaster some more character and is kind of like my signature!

Anyway, i did this as an efficient propmaker would, assembled and then painted the parts. Same thing happened on the Hoth gun so why not.
20210609_144935.jpg20210609_144953.jpg
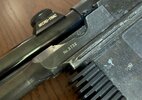
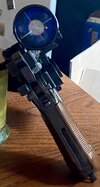
The GK photos look to me to have retained the oroginal MGC finish with black painted parts. So I ised rustoleuk satin black and taped off the entire mauser to paint the bracket. Redbutton helped me hunt down a flash hider and so we sliced some aluminum tube and wrapped it in gaff tape for a spacer on the barrel... works pretty well!
20210609_144918.jpg
I guesstimated the barrel length to the tip of the scope, is that right?

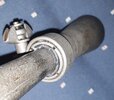
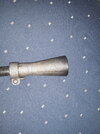
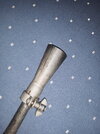
Oh i forgot. These flash hiders were covered in cosmoline still, so after a soapy bath I dried them over fire like all my steel parts.. and accidentally tarnished one spot. So I did an overspray pattern of black at the tip to hide my mistake!
20210609_145011.jpg20210609_145030.jpg20210609_144821.jpg20210609_144835.jpg
 
Hey so... i sat on it and decided Id keep the countersunk holes the way they are. It gives the blaster some more character and is kind of like my signature!

Anyway, i did this as an efficient propmaker would, assembled and then painted the parts. Same thing happened on the Hoth gun so why not.
View attachment 1465833View attachment 1465834
The GK photos look to me to have retained the oroginal MGC finish with black painted parts. So I ised rustoleuk satin black and taped off the entire mauser to paint the bracket. Redbutton helped me hunt down a flash hider and so we sliced some aluminum tube and wrapped it in gaff tape for a spacer on the barrel... works pretty well!
View attachment 1465832
I guesstimated the barrel length to the tip of the scope, is that right?

Oh i forgot. These flash hiders were covered in cosmoline still, so after a soapy bath I dried them over fire like all my steel parts.. and accidentally tarnished one spot. So I did an overspray pattern of black at the tip to hide my mistake!
View attachment 1465835View attachment 1465836View attachment 1465837View attachment 1465838
Good Job on the dusting near the end of the flash hider!!
 
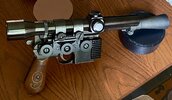
SO here is where I stand today! The grill won't move, the E6000 seemed to work. I decided to do the original finish & black painted parts like I imagined they did other props for ANH

Here is a comparison of the real prop. I think this is the version I got off Google. Please let me know if it's not.

I can't help stare at my over done countersinks, but I do (personally) like the look
ANH_GK_real_right.jpg

fullsizeoutput_27d3.jpeg

And some shots of the stamping now on my Greedo Killer
fullsizeoutput_27c5.jpegfullsizeoutput_27c2.jpegfullsizeoutput_27bc.jpegfullsizeoutput_27bb.jpegfullsizeoutput_27ba.jpegfullsizeoutput_27b9.jpeg

The blaster itself.. the design is growing on me
fullsizeoutput_27b1.jpeg

fullsizeoutput_27d2.jpeg

fullsizeoutput_27c9.jpeg
fullsizeoutput_27bf.jpegfullsizeoutput_27c0.jpeg

fullsizeoutput_27c1.jpeg

The alterations to the cross bar
fullsizeoutput_27be.jpegfullsizeoutput_27bd.jpeg

and the flash hider that I touched with black overspray

fullsizeoutput_27c7.jpegfullsizeoutput_27b5.jpeg
 
Last edited:
Your message may be considered spam for the following reasons:

If you wish to reply despite these issues, check the box below before replying.
Be aware that malicious compliance may result in more severe penalties.
Back
Top