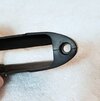
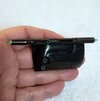
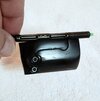
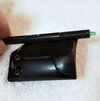
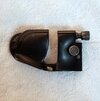
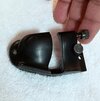
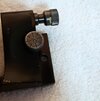
Tomenosuke Blade Runner Blaster OG Edition

superjedi

Sr Member
Hi all!
I'm very excited to have gotten my first Tomenosuke Blade Runner blaster today! :D
I know they've been around for a while now, but I've never owned one.
This is the OG Edition, which is currently available from HCG. That's where I ordered it from. It's advertised as a hand weathered replica, and my overall impression is that it's an absolutely amazing piece!
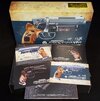
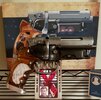
Here are a couple of pics of the box art and the paper goodies, including an assembly booklet that also has several pages of photos of the real deal from Worldcon, and a set of four postcards. Very cute!
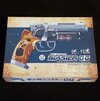
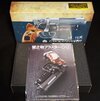
20210223_142318.jpg 20210223_145229.jpg 20210223_145247.jpg

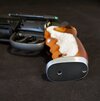
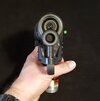
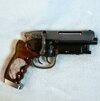
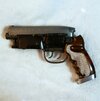
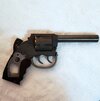
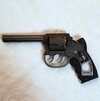
As for the blaster itself... holy cow! The first thing I noticed was the weight. It's quite hefty. The finish looks terrific. Note that the color on the Steyr upper and barrel appear a bit lighter in these pics than they appear by eye. But still a nice medium worn blued finish.
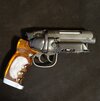
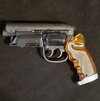
20210223_145025.jpg 20210223_145000.jpg 20210223_144932.jpg 20210223_144802.jpg

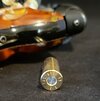
Even the simulated rounds are fantastic.
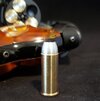
20210223_144601.jpg 20210223_144546.jpg

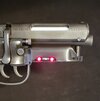
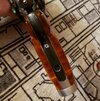
What would a BR blaster be without lights?? There are five red LEDs that have a slow "power up" to full brightness when you turn the slide switch on. The green LEDs in the sight rod do not light up.
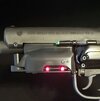
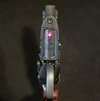
20210223_144649.jpg 20210223_144709.jpg 20210223_144737.jpg

Those of you who own one of the Tomenosuke blasters know that they include a slotted screw to swap out with the Weaver knob, and that's just what I did.
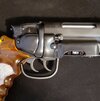
20210223_144521.jpg

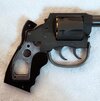
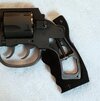
Overall, I'm thrilled to finally have one of these in my collection! My *only* criticism is that I think they went a bit heavy with the white residue in the grip checkering. I may pick up a set of replacement grips at some point.

Finally, a question for other owners: there's some oil residue on the Steyr upper, which I've read is common to all of the pre-assembled blasters. What's the best way to remove it, or even it out?
Thanks for looking! I'm off to retire some replicants. ;)
 
I assembled the kit version, so I’m not familiar with the oil issue. Does this OG version have a cold blued steyr upper - ie aluminum black? If so, then the oil might have been applied to keep the cold bluing shiny. However if the oil is on the version which has a painted steyr, then I’m not sure why the oil is there. Either way, I’d probably just wipe down the excess oil with a clean soft cloth.

Thanks for the suggestions, guys!

Any advice on taking care of those residual oil spots?
 
Just made the final payment on mine today and got the confirmation e-mail that it shipped. I've actually bought one of each of the Tomenosuke models that have been releasing over the last few years and this will be the 5th variant model.

I'll definitely be cleaning up the grips if they're that cloudy.
 
My OG no longer looks like it did when I took it out of the box. :lol: I have begun making some mods to bring its appearance closer to the "restored" Worldcon gun.
I have everything disassembled and so far I have added some scuffs and scratches to the cylinder covers, the Steyr mag, and the butt plate.
I have stripped the factory finish from the Steyr upper and I am waiting on a bottle of Novacan blackening solution to arrive. I'm also waiting on a blued steel barrel.
I'm having a lot of fun with it, and I'll definitely post new pics when it's all done!
 
I have everything disassembled and so far I have added some scuffs and scratches to the cylinder covers, the Steyr mag, and the butt plate.
Having spent quite a lot to buy the OG in the first place, that first scratch must have needed a deep breath before hand!
 
It's not textured, it's pretty smooth to the touch. I don't know the process they used to coat those parts but it seems almost like a cross between chemical darkening and super fine powder coat.
 
My parts and supplies got here earlier, and since I had previously begun my weathering process, I was able to get everything finished up!
Here's a quick teaser pic. I'll post some more once I have more time, along with a description of what I did. I'm really happy with the way it turned out!

20210303_143657.jpg
 
So... you're leaving the residue as is on the grips? Your call obviously but can't help thinking it would look better if it was toned down.
 
Last edited:
As I mentioned yesterday, the conversion on my OG is finished! (Except for the grips, which should be here by the middle of next week.)
Here are a couple of overall shots to start things off.

20210304_085250.jpg 20210304_085205.jpg

Next, I'll show the work I did on each component. I didn't do a 100% teardown. I left the trigger and hammer assemblies intact on the Bulldog portion. As far as that goes, the biggest mod was to replace the existing barrel. I got a beautiful blued steel barrel from a vendor on ebay, and swapped it out by carefully cutting the Tomenosuke barrel off. This was the most nerve wracking step for me! I did it by hand with a fine hacksaw, and then sanded the nub smooth. It went really well though, and the real steel barrel looks amazing.

20210304_082801.jpg 20210304_082856.jpg

I also used a red Scotchbrite pad to polish the exposed parts of the Bulldog body, including the cylinder. This lightened those areas and gave them more of a metallic look.

I also removed the grip frame and polished it with 0000 steel wool. This exposed the underlying silver metal so that it can be seen much better through the amber grips.

20210304_082724.jpg 20210304_082832.jpg

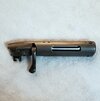
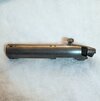
On the Steyr upper and the trigger guard, I soaked the parts in white vinegar and then used steel wool to remove the factory finish. I probably soaked them for a total of around 4 1/2 hours, doing 2 or 3 rounds of scrubbing. I disassembled the parts before soaking.

I bought a bottle of Novacan liquid, which I had read about in another Tomenosuke thread, and applied it to all the parts, after I had cleaned them with acetone. After applying the Novacan and rinsing the parts, I lightly went over them with steel wool to even out the finish.

20210304_082608.jpg 20210304_082529.jpg

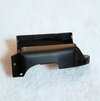
I did some light overall scuffing on the plastic Steyr magazine, then used an X-acto blade to add some scratches. All scratches throughout the process were referenced from Karl Tate's incredible Worldcon photos.
I even carefully carved out the small missing chunk above the on/off switch.

20210304_082141.jpg 20210304_082109.jpg 20210304_082052.jpg

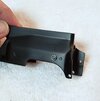
On the side plates, I used an X-acto blade again to add some surface scrapes and a minimal amount of chips.

20210304_082328.jpg 20210304_082305.jpg 20210304_082230.jpg

20210304_082457.jpg 20210304_082438.jpg

The right side plate was also the only place I used any paint at all: the little nick on the binding post. I used a tiny amount of brass metalizer on it.

20210304_082421.jpg

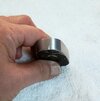
I did some chipping on the butt plate, and also added the small gouges on the rear area.

20210304_082700.jpg 20210304_082634.jpg

I slightly reworked the weathering on the backstrap, as the stock weathering pattern was basically a smooth curve.

20210303_175020.jpg

So that's pretty much it! A very satisfying process to improve, in my opinion, an already outstanding replica.

Thanks to everyone who previously posted their tips and techniques on their own Tomenosuke conversions! They were immensely helpful.

"Have a better one!" ;)
 
Thanks!

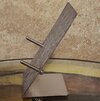
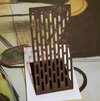
The stand i got for the blaster is one of those metal pistol stands for airsoft guns that I found on eBay. It's sturdy and stable, and the two rods unscrew so you can place them pretty much anywhere in the slots.

20210301_154054.jpg

It's raw metal, but I wanted to give it a more "dystopian" look. I had an old rusting kit from another project a few years ago that contains a base coat of water-based paint with iron filings, and a rusting solution.
I applied the base coat and the rust solution, and added a few heavier spots with some Vallejo pigment powder mixed with a drop or two of water.

20210304_182336.jpg

I'll let it dry overnight, then I'll hit it with Humbrol matte acrylic varnish. I think it looks better beat up like this. :)
 

Your message may be considered spam for the following reasons:

If you wish to reply despite these issues, check the box below before replying.
Be aware that malicious compliance may result in more severe penalties.
Back
Top