You are using an out of date browser. It may not display this or other websites correctly.
You should upgrade or use an alternative browser.
You should upgrade or use an alternative browser.
Thorin Oakenshield ,The Hobbit
- Thread starter Contec
- Start date
Contec
Master Member
Drilled a hole for the attachment system.
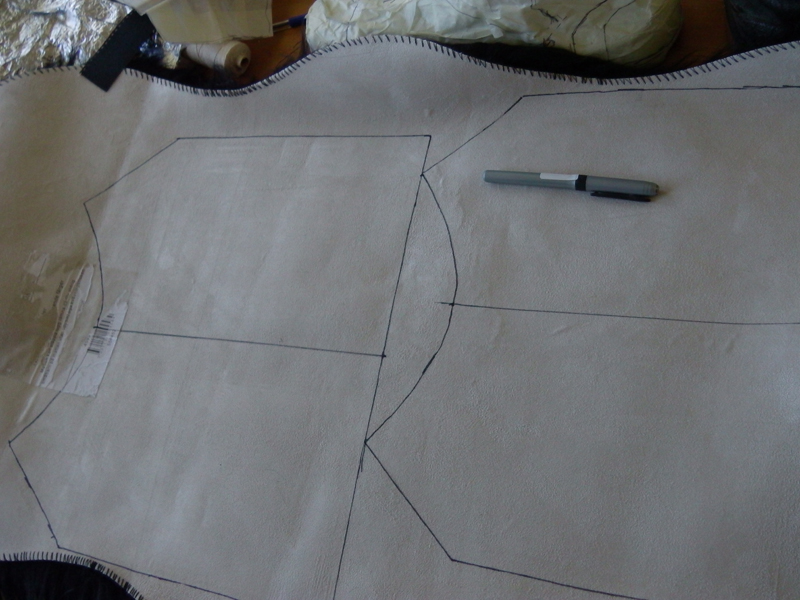
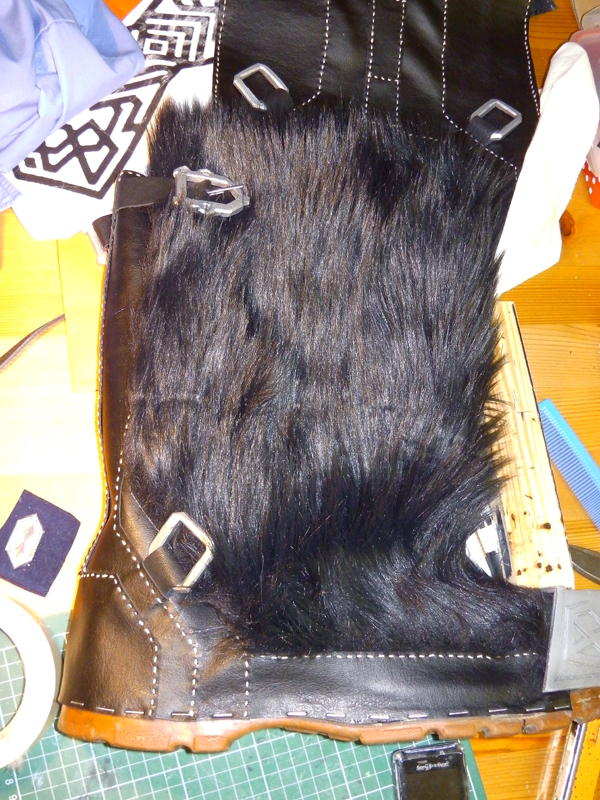
It was time to start attaching everything on the boots. I cut a piece of denim fabric and hot glued that to the boot.

Then i measured and cut out the fur parts, cutting it from behind with a scalpel so that i don't cut the fur.
Then i sewed the two part together,

I have been battling on how to attach the leather parts on the boot and becasue the original boot was a pair of work boots their sole is made of a rubber that resists glues. But the leather parts around the sole is made from leather so after testing a few diffrent glues i just took some superglue and spot glued the leather to the boot and too be extra sure that it will not get lose as easy, i used my Staple gun on the edge.
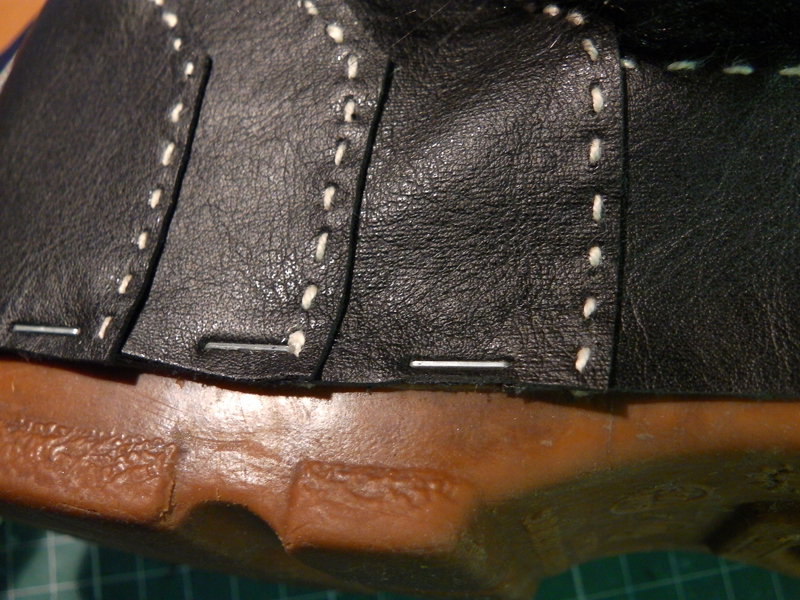
Might have gone a little overboard with the stapleing, but i am gonna hide them by painting them black later on.
Just awaiting the boot caps and leather straps and one of the boots are ready. The other one i need to start over with.
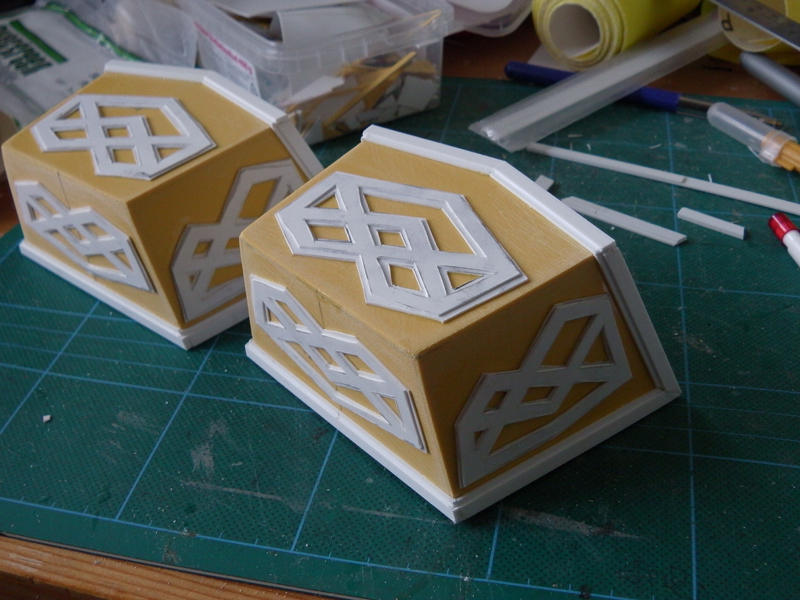
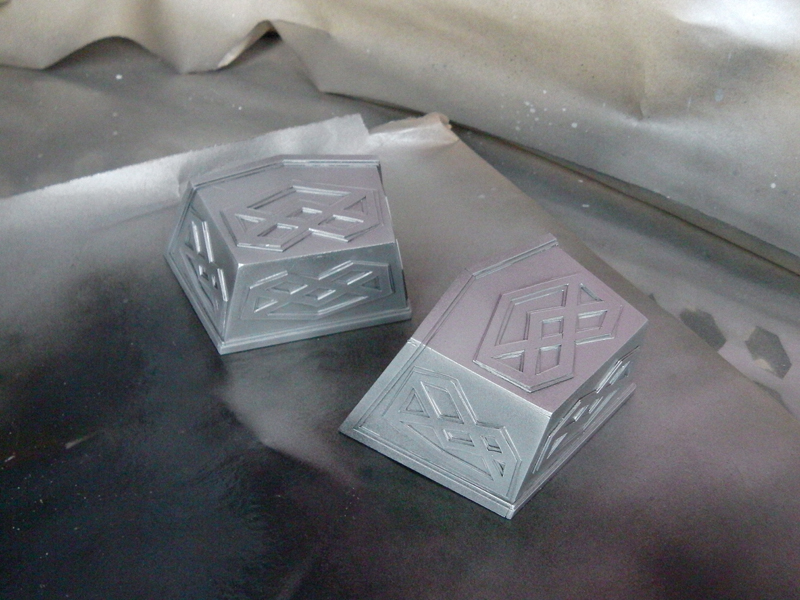
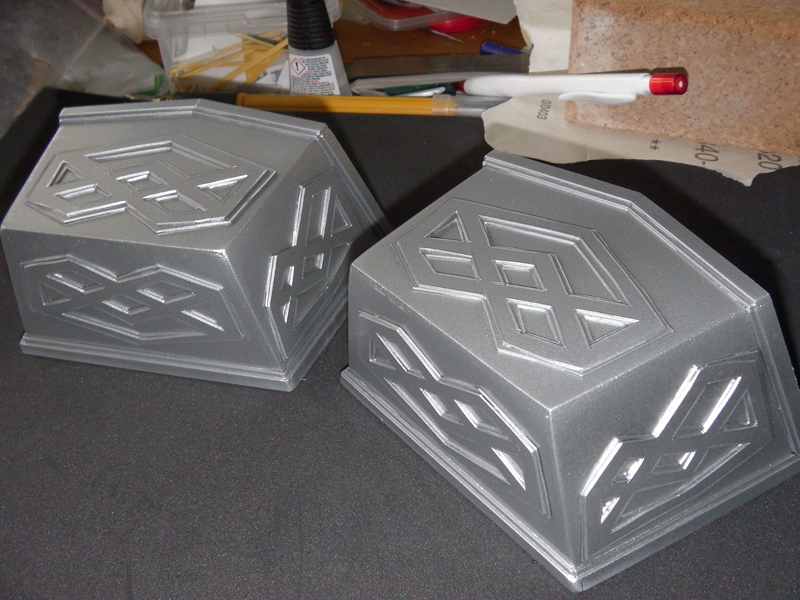
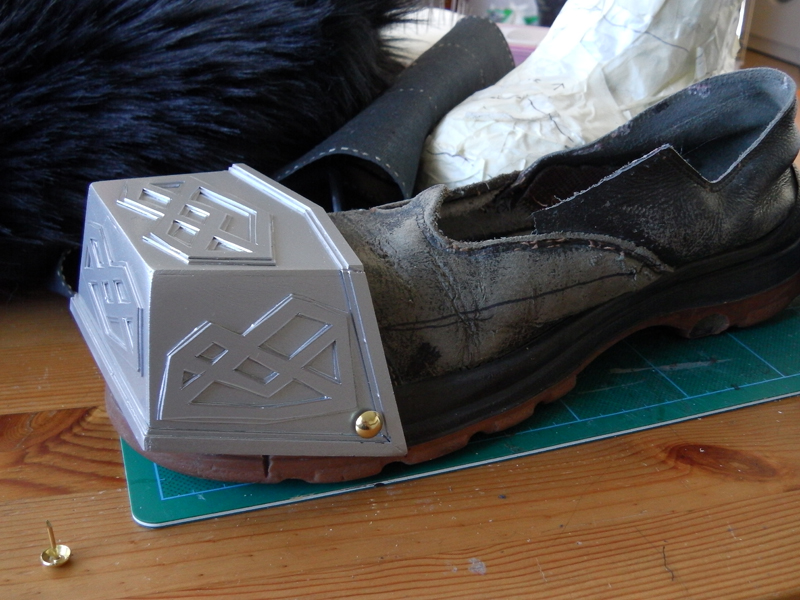
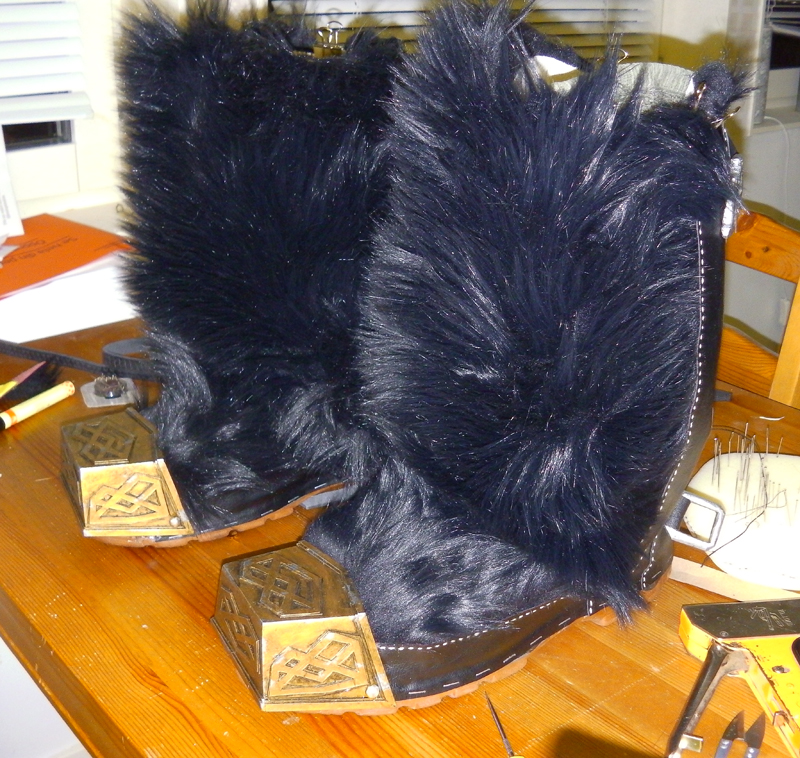
The boot caps was painted silver and then i used some latex on the edges and repainted them gold. After they had dried i removed the latex and the silver shines thru.
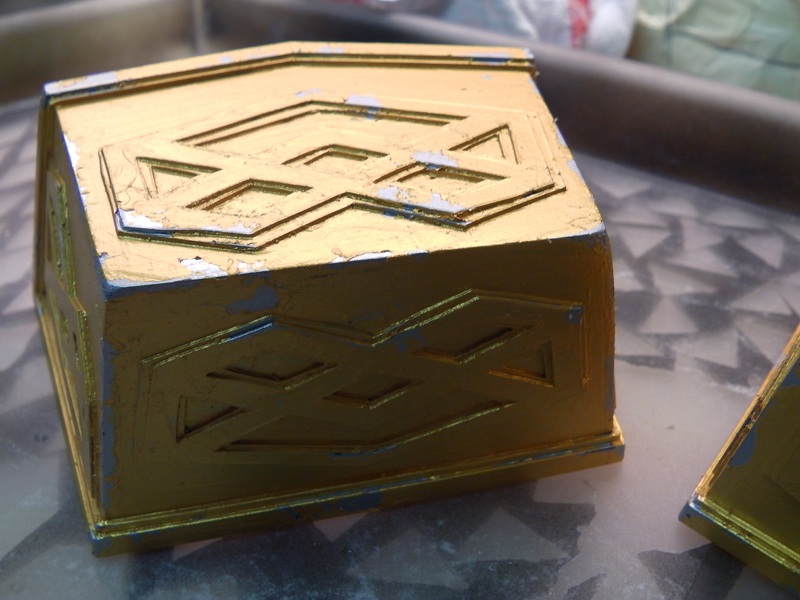
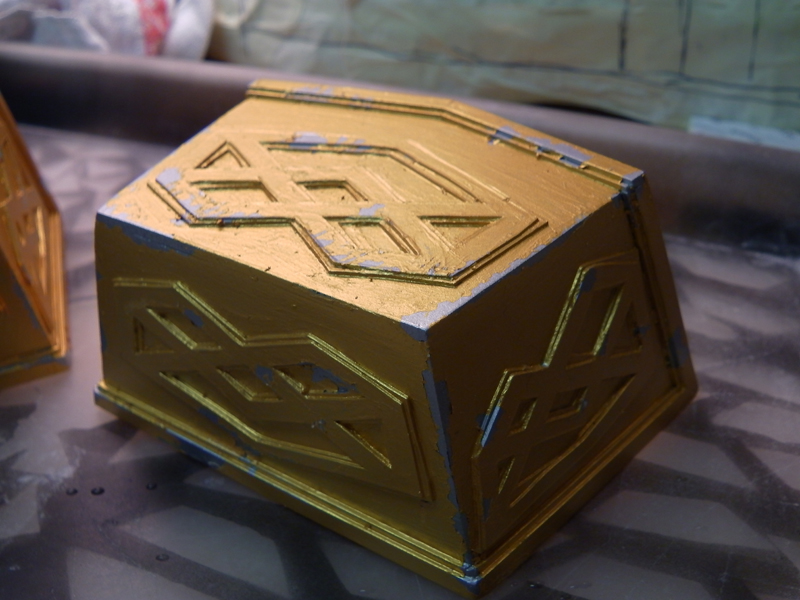
For weathering i covered the bootcaps with black acrylic mixed with water and cleaned them up as good as i could with a cloth. I think they need a little more dirt on them before i am happy with them.

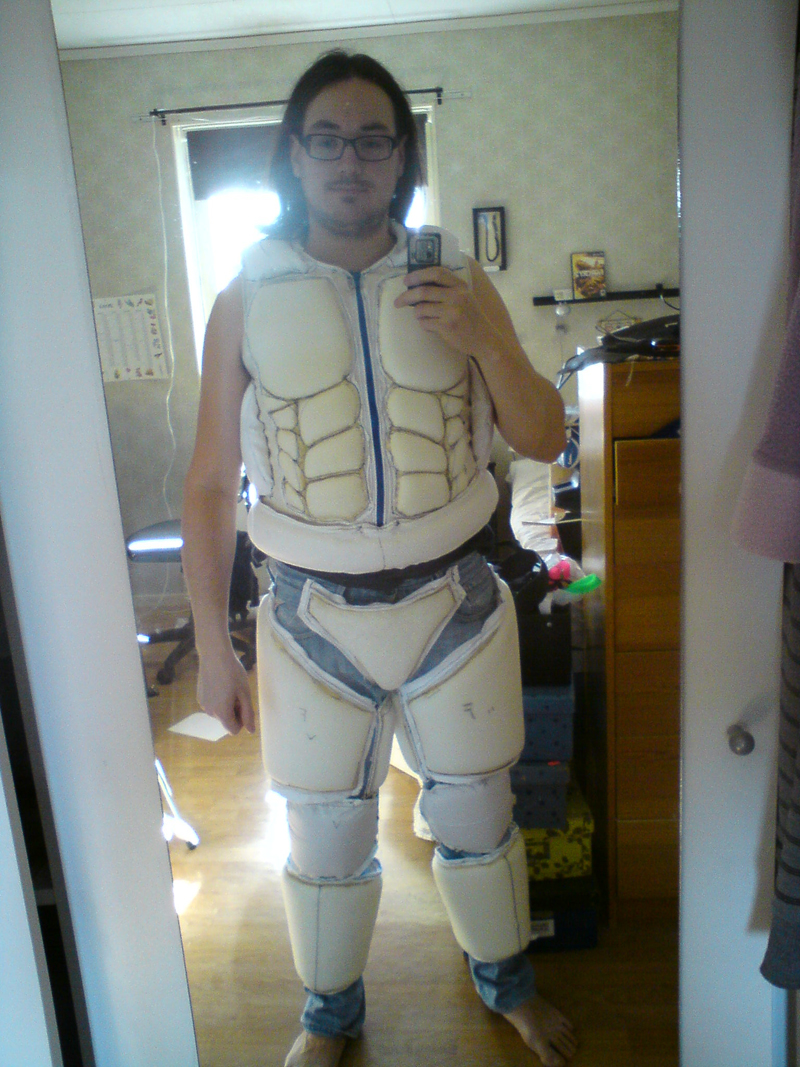
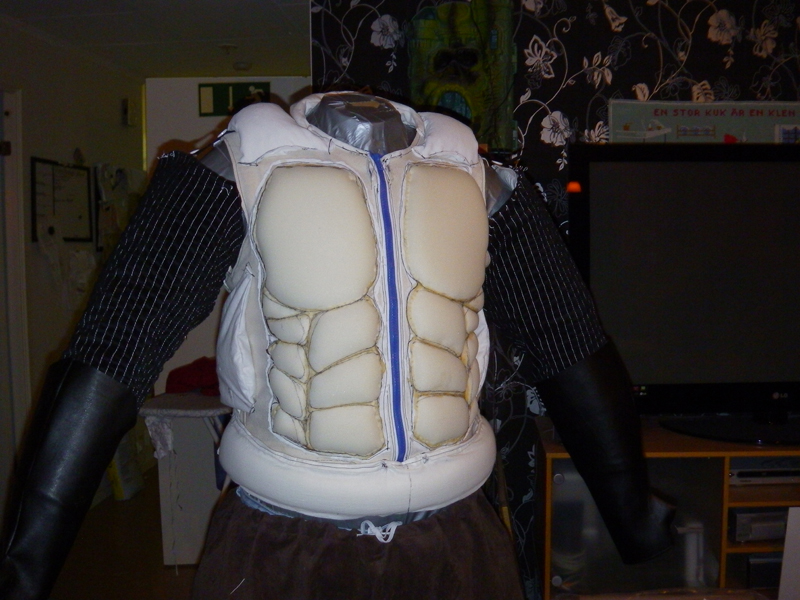
I have also worked on the muscle suit some more.
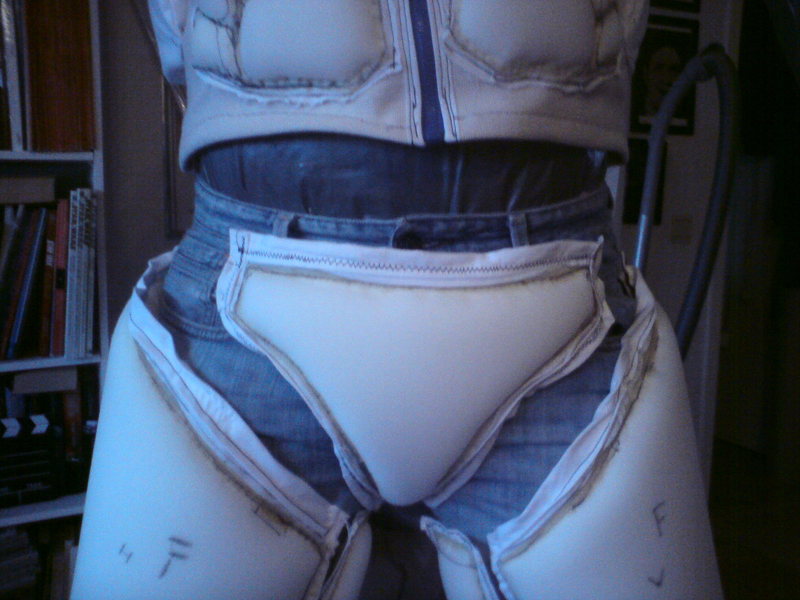
Made the Crotch part, and buttcheeks

Kneecaps
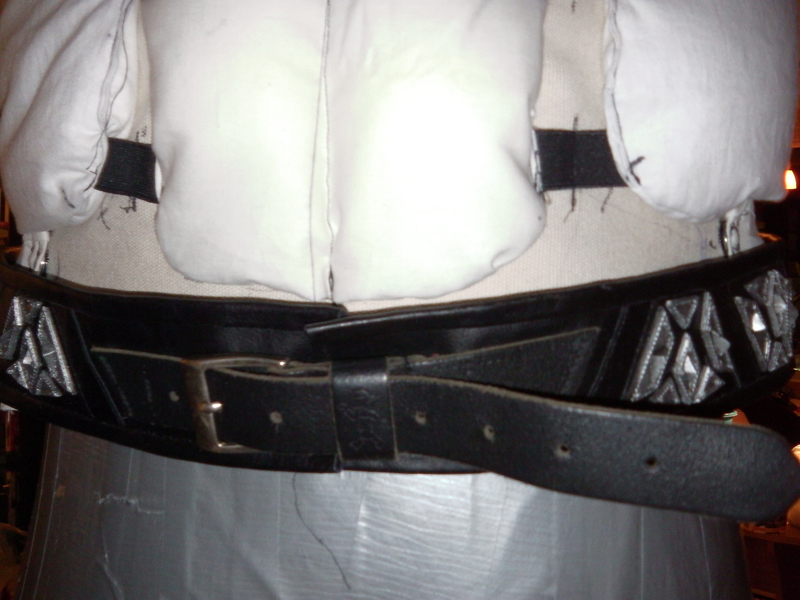
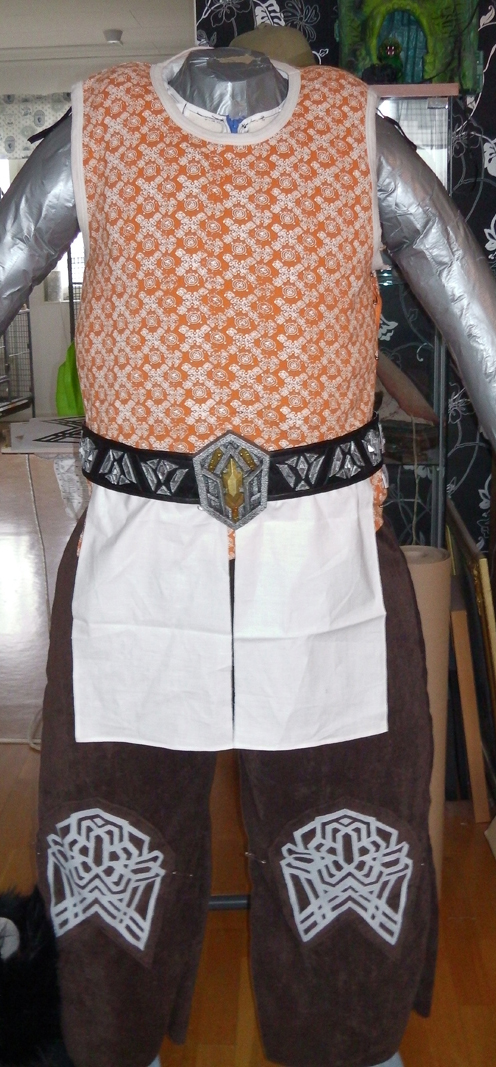
I also noticed that i needed something extra around the waist, so i made a "belt" to go around.

Buttcheeks getting attached..

Crotch part
Need to attached the arms next.
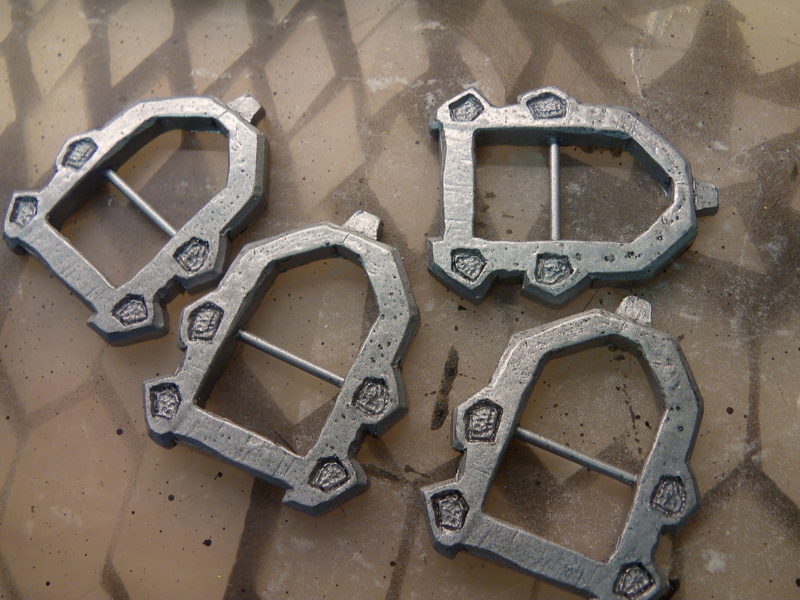
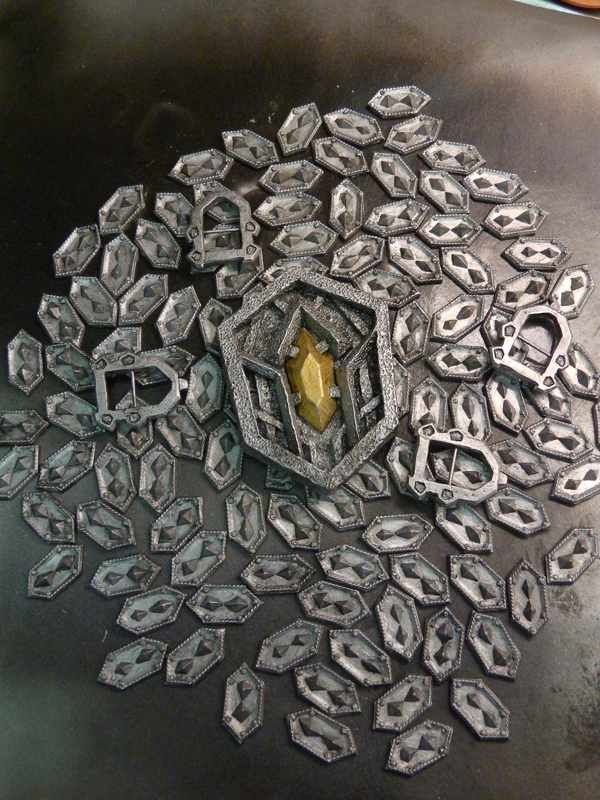
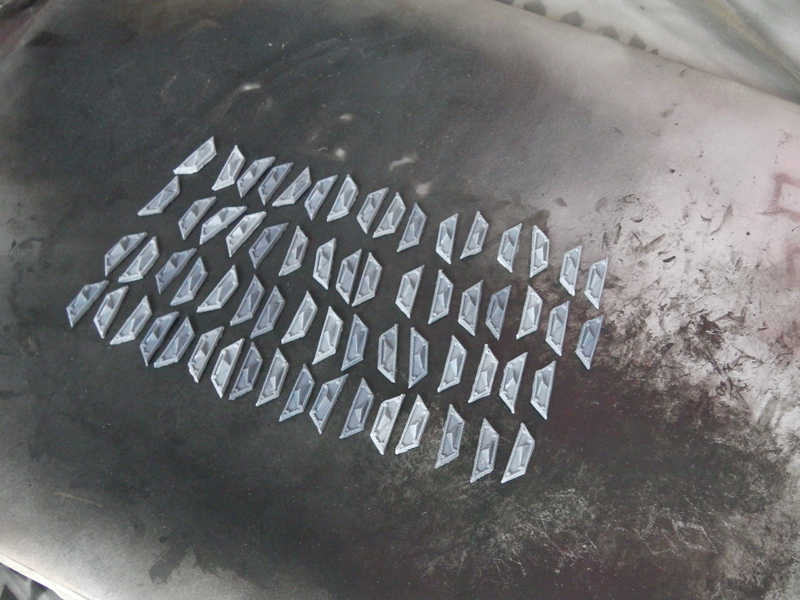
Started weathering the 300+ "metal" plates /buckles i made.
Its a simple job that take a long time thanks to the large quantity i have. The weathering is just black acrylic and a little water that i paint the part with and then clean away with a rag.
[url=https://flic.kr/p/rmsije]
Clean parts on top and weathered parts at the bottom.


Just a few parts ready....Still got huge bags with loads more of these to make...
This is a stencil i have cut out for the pants knee part. Soon starting sewing on the pants.

It was time to start attaching everything on the boots. I cut a piece of denim fabric and hot glued that to the boot.
Then i measured and cut out the fur parts, cutting it from behind with a scalpel so that i don't cut the fur.
Then i sewed the two part together,
I have been battling on how to attach the leather parts on the boot and becasue the original boot was a pair of work boots their sole is made of a rubber that resists glues. But the leather parts around the sole is made from leather so after testing a few diffrent glues i just took some superglue and spot glued the leather to the boot and too be extra sure that it will not get lose as easy, i used my Staple gun on the edge.
Might have gone a little overboard with the stapleing, but i am gonna hide them by painting them black later on.
Just awaiting the boot caps and leather straps and one of the boots are ready. The other one i need to start over with.
The boot caps was painted silver and then i used some latex on the edges and repainted them gold. After they had dried i removed the latex and the silver shines thru.
For weathering i covered the bootcaps with black acrylic mixed with water and cleaned them up as good as i could with a cloth. I think they need a little more dirt on them before i am happy with them.
I have also worked on the muscle suit some more.
Made the Crotch part, and buttcheeks
Kneecaps
I also noticed that i needed something extra around the waist, so i made a "belt" to go around.
Buttcheeks getting attached..
Crotch part
Need to attached the arms next.
Started weathering the 300+ "metal" plates /buckles i made.
Its a simple job that take a long time thanks to the large quantity i have. The weathering is just black acrylic and a little water that i paint the part with and then clean away with a rag.
[url=https://flic.kr/p/rmsije]
Clean parts on top and weathered parts at the bottom.
Just a few parts ready....Still got huge bags with loads more of these to make...
This is a stencil i have cut out for the pants knee part. Soon starting sewing on the pants.
Contec
Master Member
The belt is finally 99% finished. Tomorrow it am going to add the gems and give the gold "gem" a final gold coat and then it will be done.
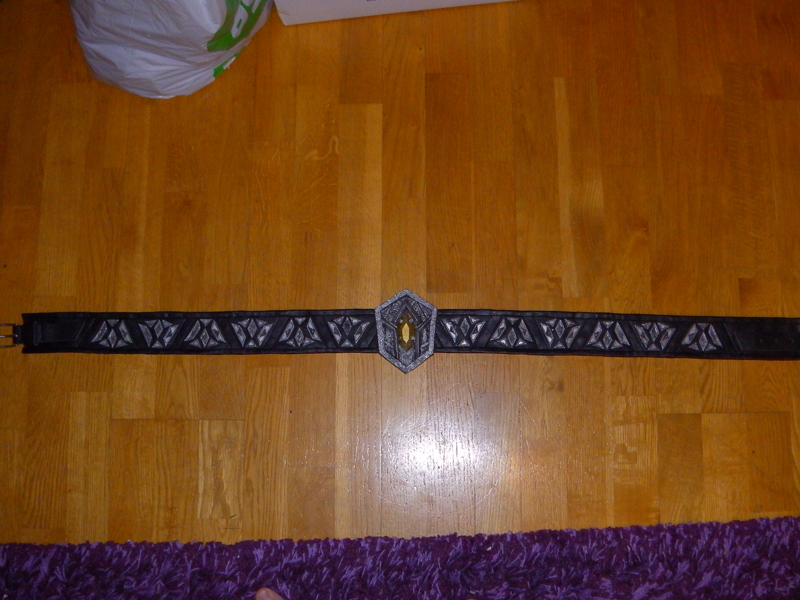
The buckle and other pieces are just super glued to the faux leather, I have had plans on drilling in skrews on the backside of the buckle to really make it stick, but for now this works.

For the back strap system, I found a childrens leather belt (with a LEGO stamp on.) I cut it apart and sewed it onto the belt.
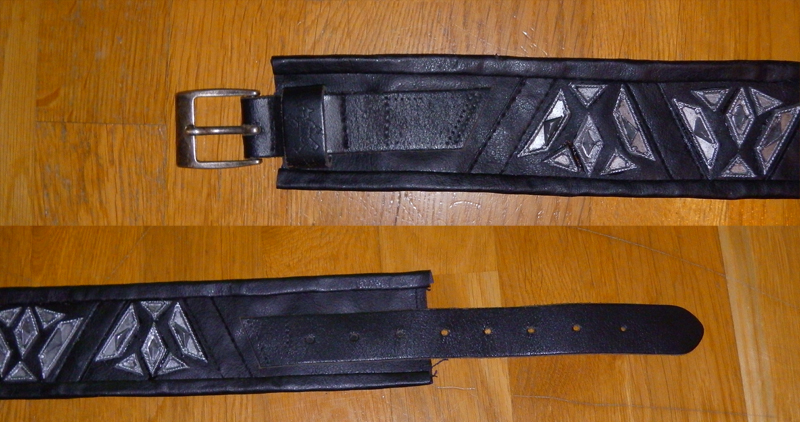
The strap system work the same as the original as you can see in the next picture
The original belts strap system.

The buckle and other pieces are just super glued to the faux leather, I have had plans on drilling in skrews on the backside of the buckle to really make it stick, but for now this works.
For the back strap system, I found a childrens leather belt (with a LEGO stamp on.) I cut it apart and sewed it onto the belt.
The strap system work the same as the original as you can see in the next picture
The original belts strap system.
Contec
Master Member
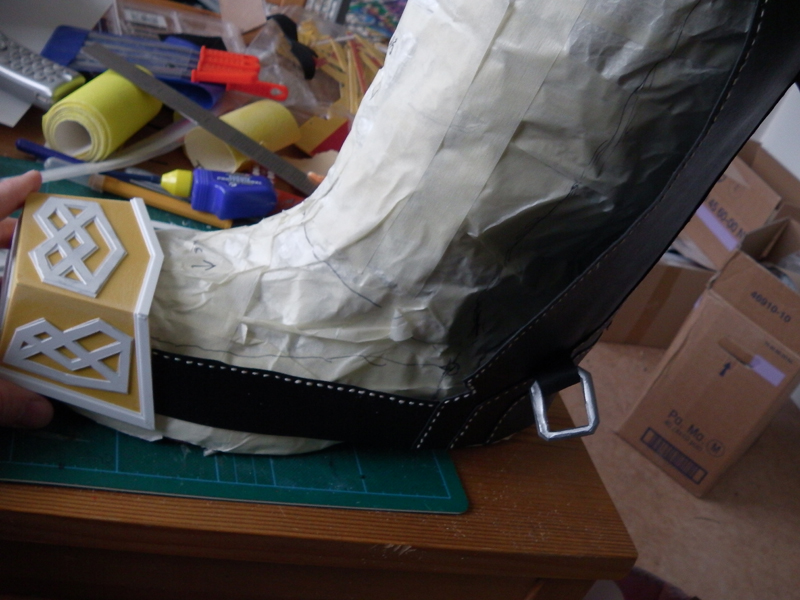
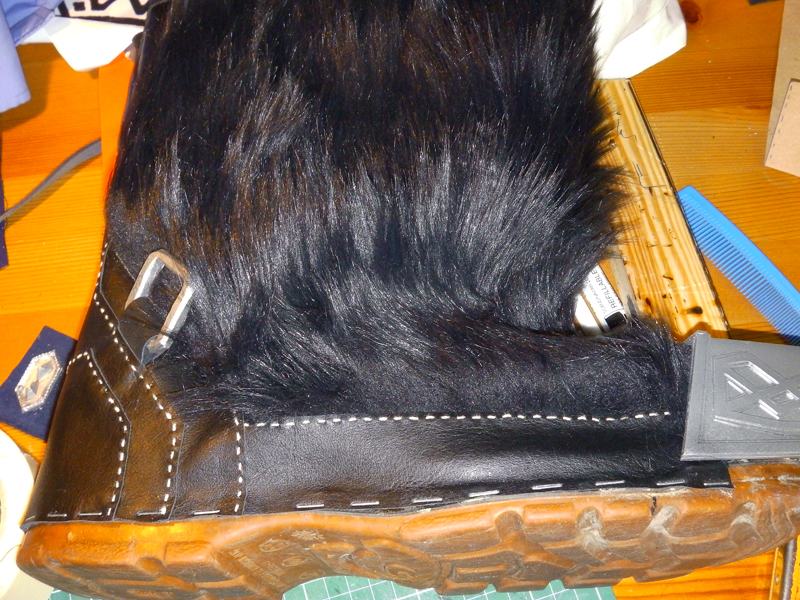
Glued the fur and the leather on the other boot and attached toe caps on both boots.
A pair of boots fit for a King!!! Now the only thing left on them is to attach the leather straps... I only have straps for one boot so that is something i need to order tomorrow.

As you can see on this picture, thorins boots are quite different from the other dwarfs....must be because he is the king..

and here are mine... ;P

A pair of boots fit for a King!!! Now the only thing left on them is to attach the leather straps... I only have straps for one boot so that is something i need to order tomorrow.
As you can see on this picture, thorins boots are quite different from the other dwarfs....must be because he is the king..
and here are mine... ;P
Contec
Master Member
Here i am working on the knee pad, its design is cut out onto strips of masking tape. These pieces are then moved onto the fabric i am going to use.

I'm using fabric paint that i mixed so i get a greyish color. After this one had been painted i removed all the stencil pieces one by one and attached them to the other side of the fabric. Did not wanna cut out two stencils for the same thing.
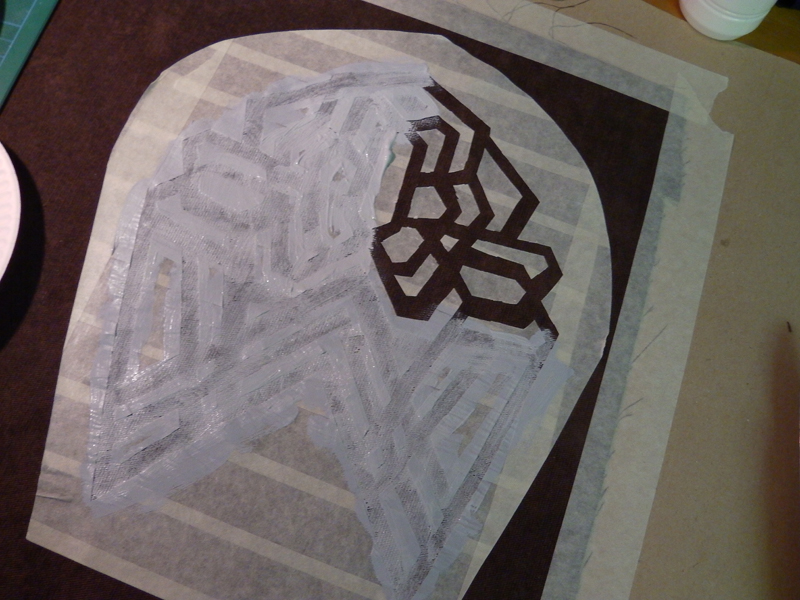
Its hard to get everything to line up when moving the pieces one by one, but a steady hand and a long time will work wonders.

Started painting the other knee pad.
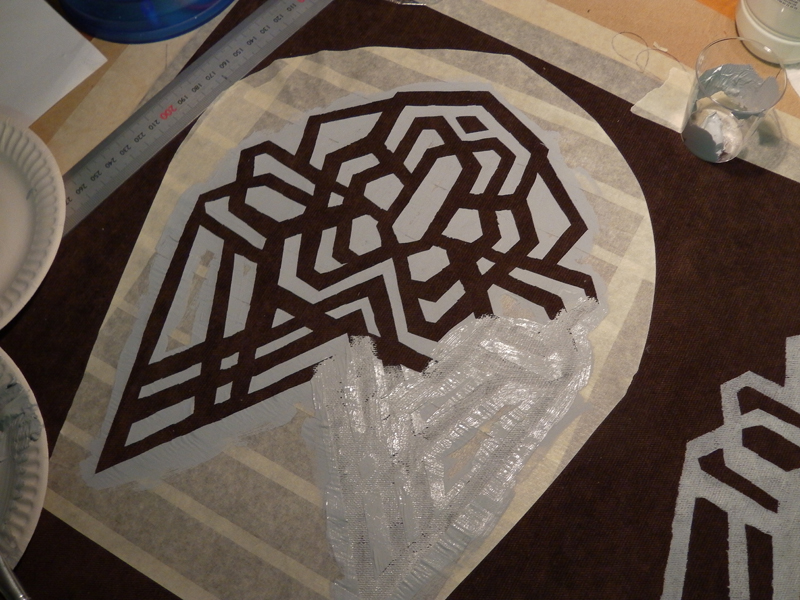
. When it have dried for 24hours i am going to iron on the backside to seal the paint to the fabric. Then i am going to cut them out and sew them onto my pants.

I also finished sewing the pants, so tomorrow i am going to add the knee pads.

I'm using fabric paint that i mixed so i get a greyish color. After this one had been painted i removed all the stencil pieces one by one and attached them to the other side of the fabric. Did not wanna cut out two stencils for the same thing.
Its hard to get everything to line up when moving the pieces one by one, but a steady hand and a long time will work wonders.
Started painting the other knee pad.
. When it have dried for 24hours i am going to iron on the backside to seal the paint to the fabric. Then i am going to cut them out and sew them onto my pants.
I also finished sewing the pants, so tomorrow i am going to add the knee pads.
Last edited:


Contec
Master Member
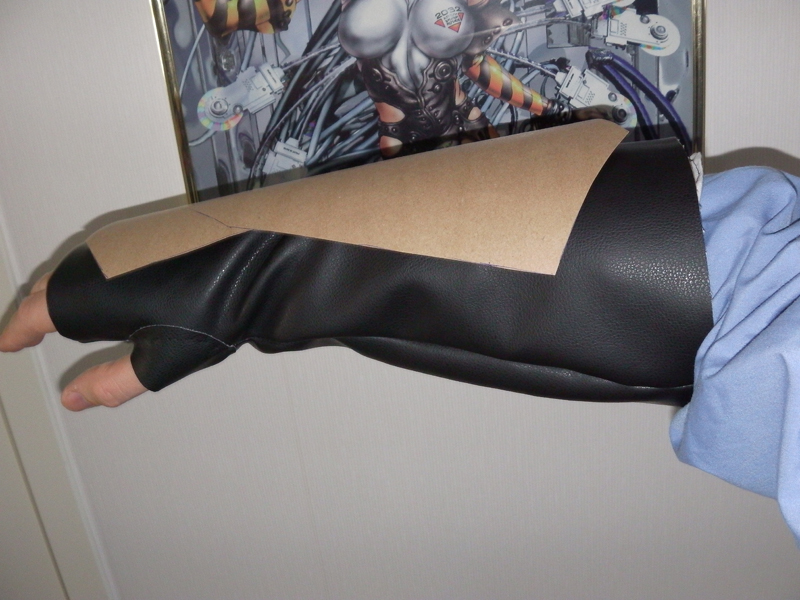
Today i made the fingerless gloves that thorin has. They were tricky to do because i needed them to be bigger so that the Muscle suit arms could fint into them as well.

Here i am trying the glove on with the paper stencil for the arm armor. I am going to adorn the sides of the glove with extra fake stitches later on but for now they work,
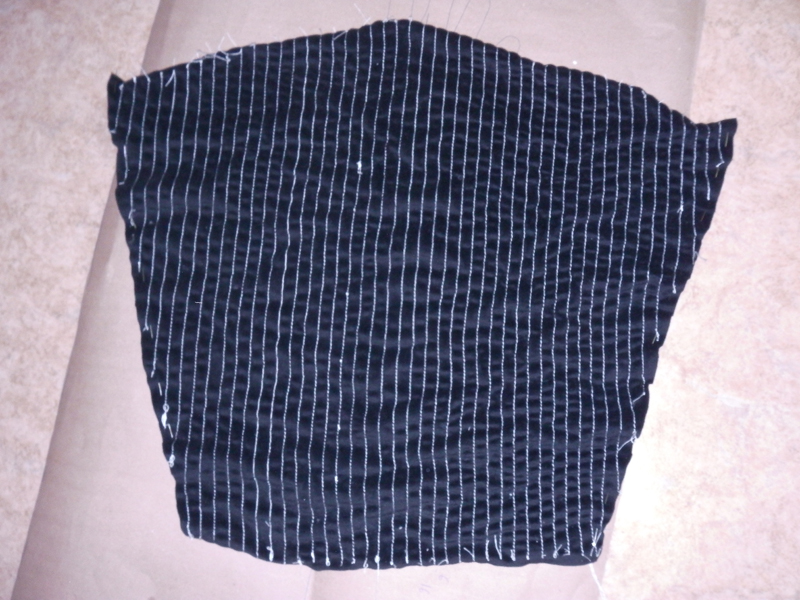
With the gloves done, i can start making the striped arm sleeves (funny thing is that thorin dont have a shirt that is attached to these sleeves. They are just there...) I started the build by taking apart a sleeve from a shirt and using that as pattern.

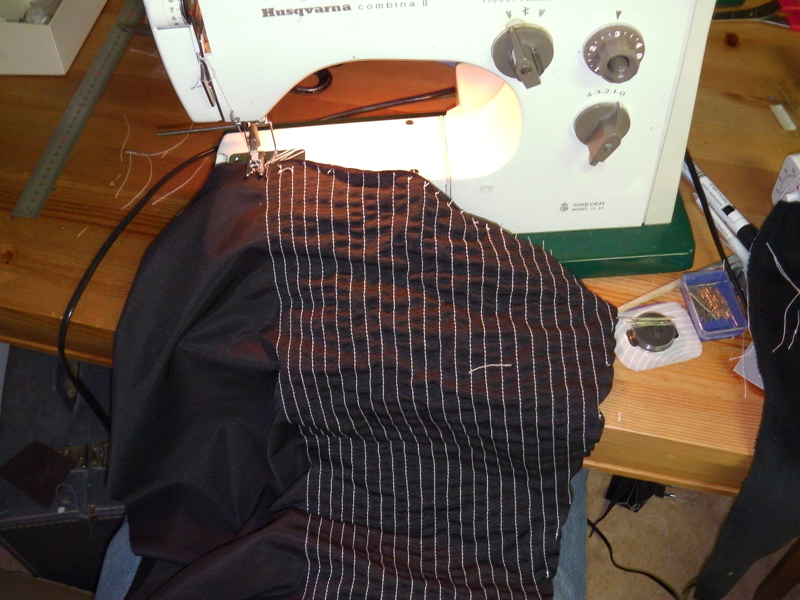
Then i started sewing lines into the fabric. The string i used is extra thick so that the lines would stand out more. The more lines i made the more the fabric would wrinkle it self. Its a cool effect and i noticed that it was because i tried to feed the fabric thru the machine instead of letting the machine move the fabric it self. One thing that is on the real sleeve is a V pattern on the horizontall but i am leaving that out for now. The size and pattern is the same as the shape of the chest metal pieces.

One sleeve striped and ready to sew together..
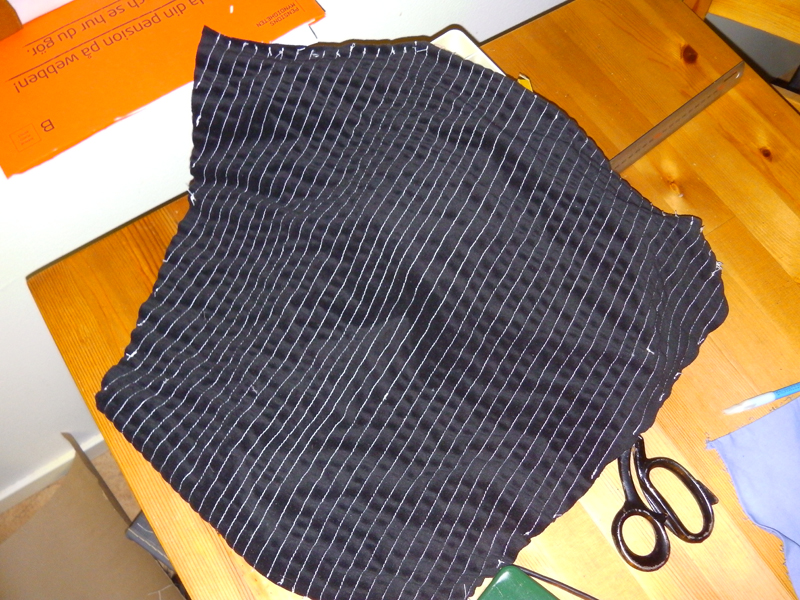
On to the next sleeve. Nr 2 took not as long as the first one. + i had learned a few tricks to make it much nices than the first one.

Sleeve nr 2 ready.
Together with the muscle suit arms and leather gloves. The ends is going to be covered by the many layes of clothes anyway so im not worried .
Here i am trying the glove on with the paper stencil for the arm armor. I am going to adorn the sides of the glove with extra fake stitches later on but for now they work,
With the gloves done, i can start making the striped arm sleeves (funny thing is that thorin dont have a shirt that is attached to these sleeves. They are just there...) I started the build by taking apart a sleeve from a shirt and using that as pattern.
Then i started sewing lines into the fabric. The string i used is extra thick so that the lines would stand out more. The more lines i made the more the fabric would wrinkle it self. Its a cool effect and i noticed that it was because i tried to feed the fabric thru the machine instead of letting the machine move the fabric it self. One thing that is on the real sleeve is a V pattern on the horizontall but i am leaving that out for now. The size and pattern is the same as the shape of the chest metal pieces.
One sleeve striped and ready to sew together..
On to the next sleeve. Nr 2 took not as long as the first one. + i had learned a few tricks to make it much nices than the first one.
Sleeve nr 2 ready.
Together with the muscle suit arms and leather gloves. The ends is going to be covered by the many layes of clothes anyway so im not worried .
coop5150
Well-Known Member
This^Any updates ?
Similar threads
- Replies
- 5
- Views
- 391
- Replies
- 0
- Views
- 230
- Replies
- 1
- Views
- 131