Contec
Master Member
Hello
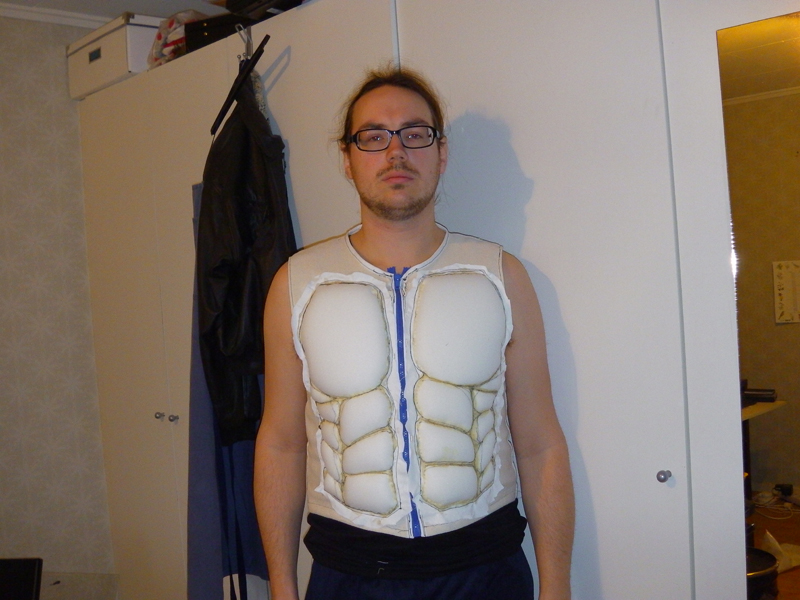
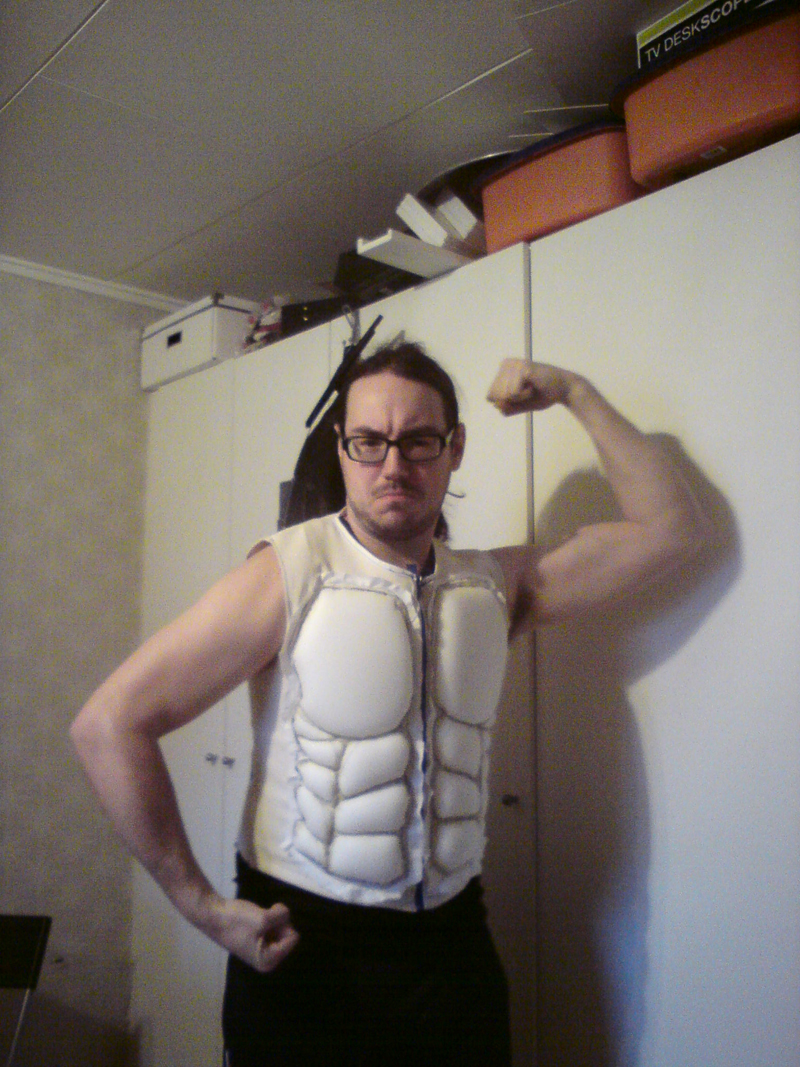
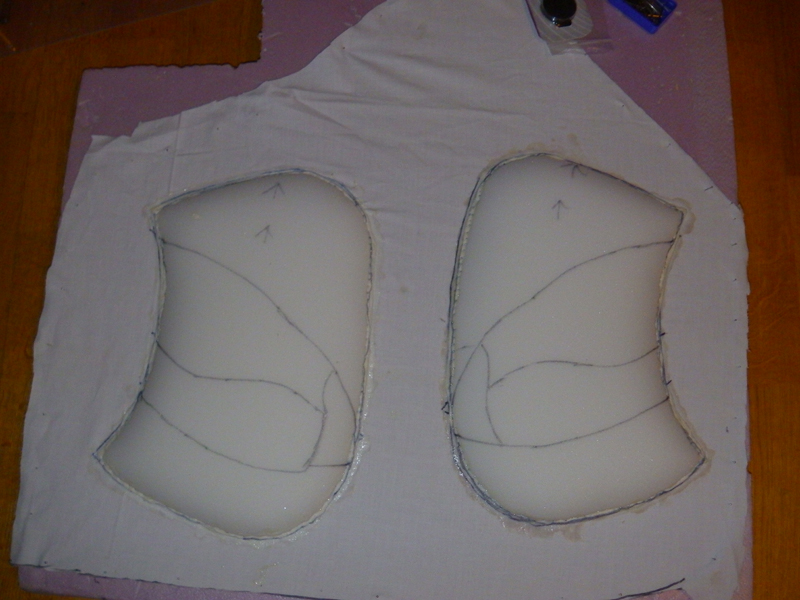
I been slowly making parts for my own Thorin Oakenshield costume. The look i am aiming for is the one he has in the first and second movie.
I must have gone over every other Thorin cosplay build on the net and got a pretty good idea on how to make everything.
One funny thing i noticed is that all of the Thorin Cosplays are done by females, and they do him really good.

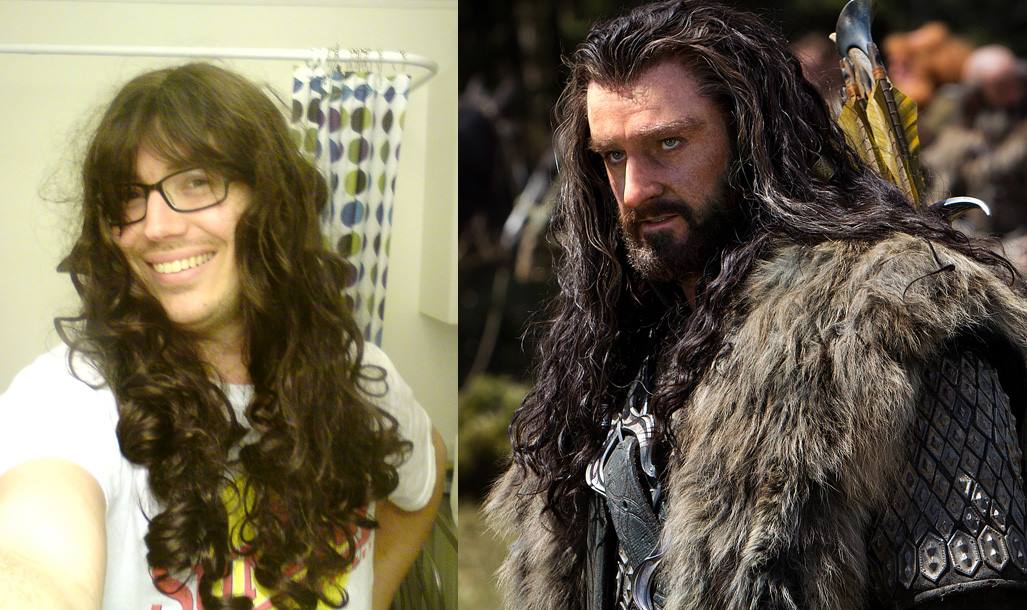
First thing that i needed to get was a wig so i got myself a long wig that I'm going to braid and add grey hair to... Don't i look pretty
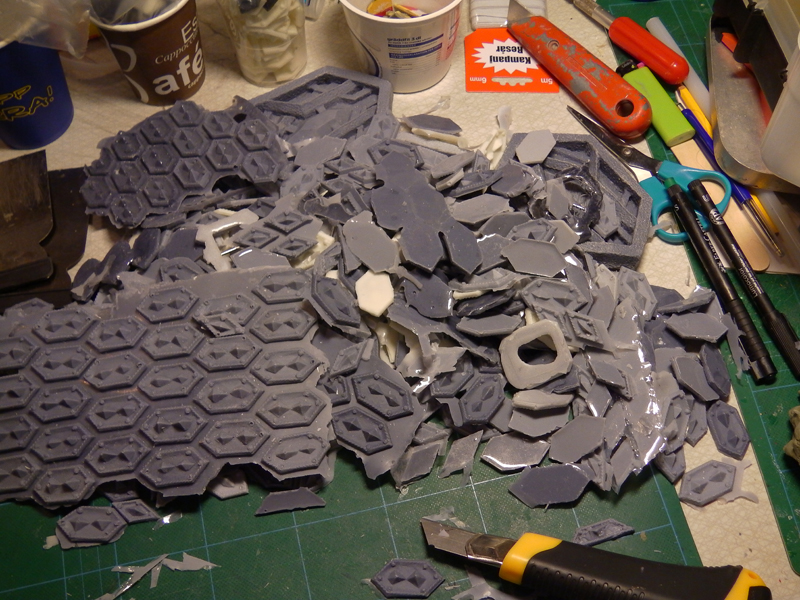
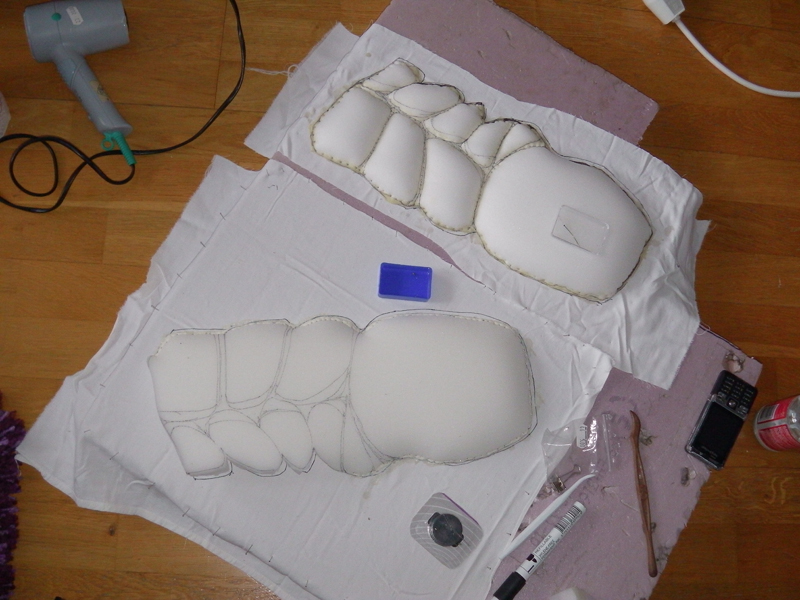
I'm starting with all the small metal parts on this costume before doing the fabric stuff. Here is my start on the protective plates that adorns his costume in the hundreds...These are made from plastic, metal wire and clay. When finished these will have a silicone mold made and then i can cast all the +200 that i need
The wire was made by twisting 2 wires together with my drill. It was later cut in pieces and glued onto the styrene pieces with superglue
Then i heated up a little clay and brushed it on. Then i used my fingers to clean away the clay, It make it look like they are handforged. That is also the reason i made several instead of just 1, Then they will not look all the same.
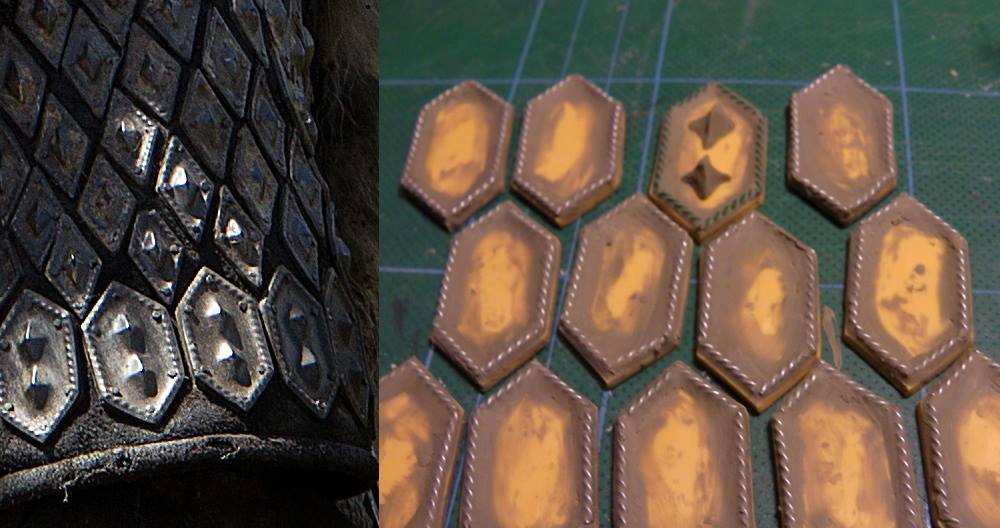


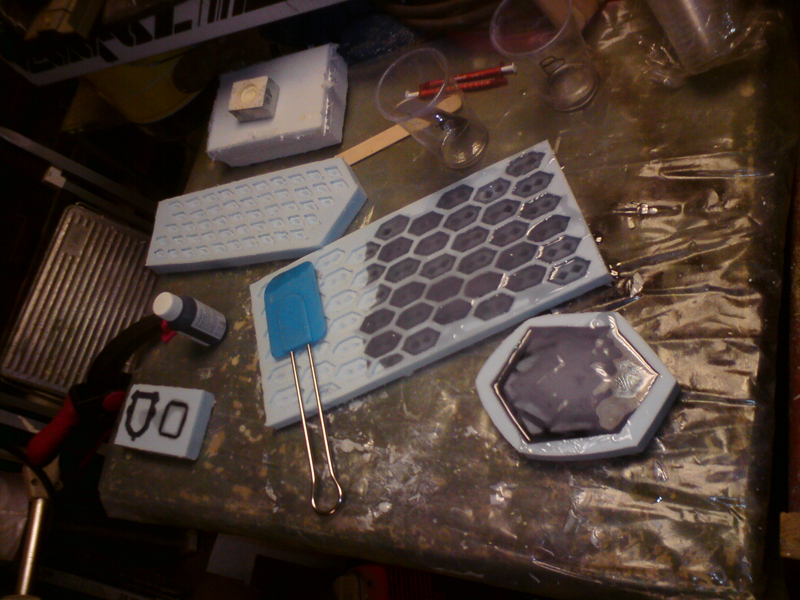
Here i finished sculpting all the spikes and fake rivets on all the different pieces. It has taken a few hours to do all that. Now on to cover it with silicone for molding .
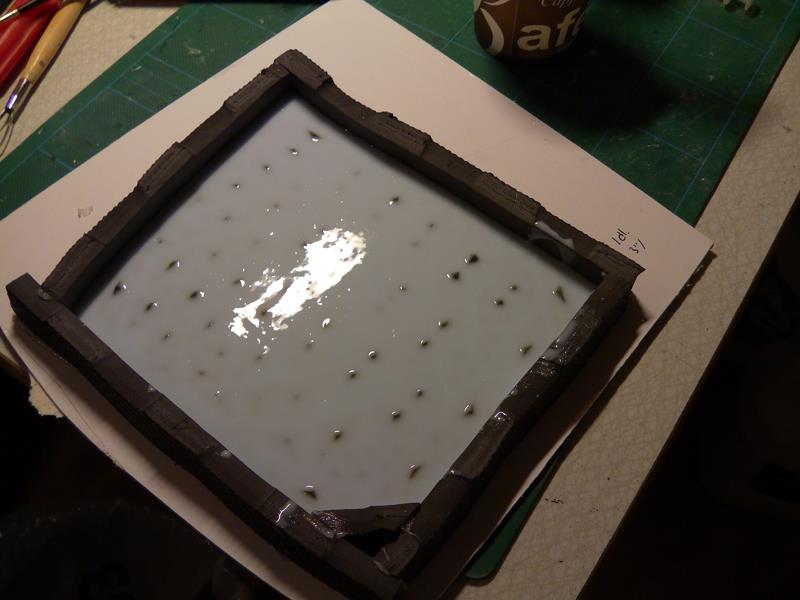
Now the first parts is under the first layer of silicon.
I hate the waiting time...
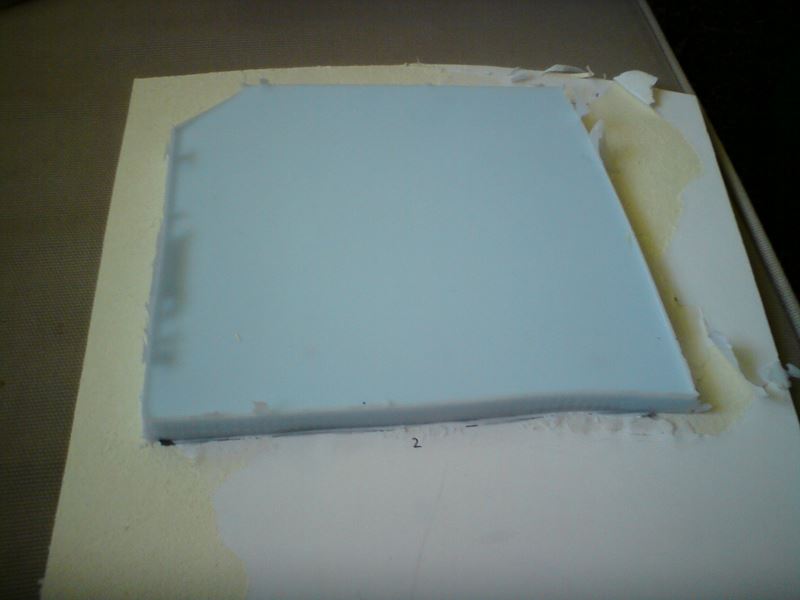
The last silicon layer has hardened and its time to demold
A few of the clay "rivets" was still stuck in the silikone so i spent some time removing them by hand.


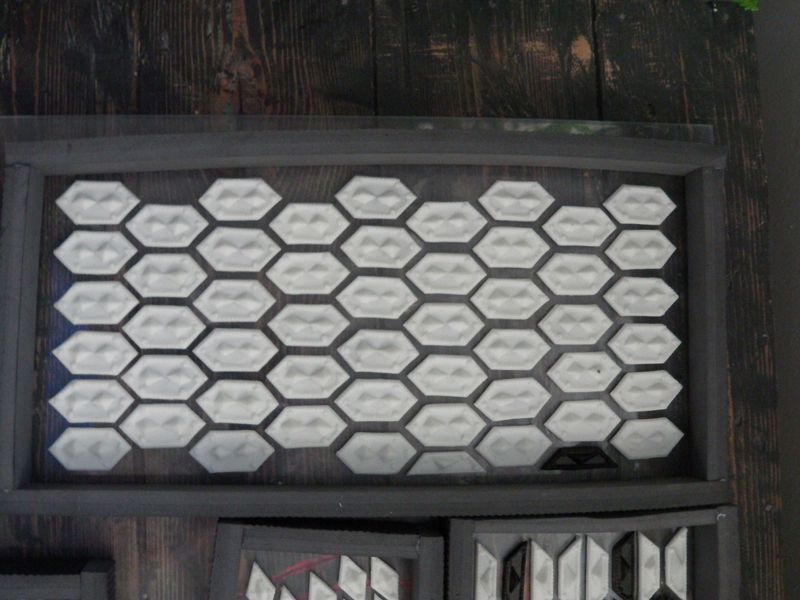
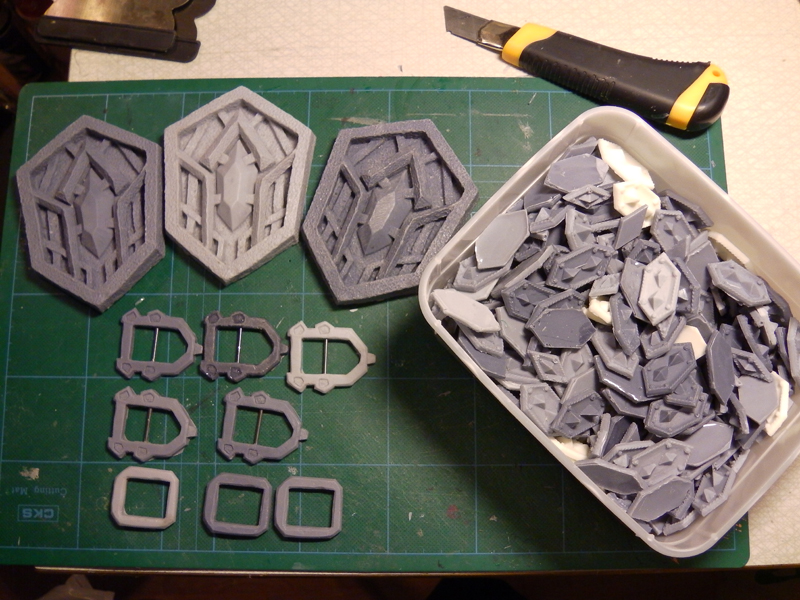
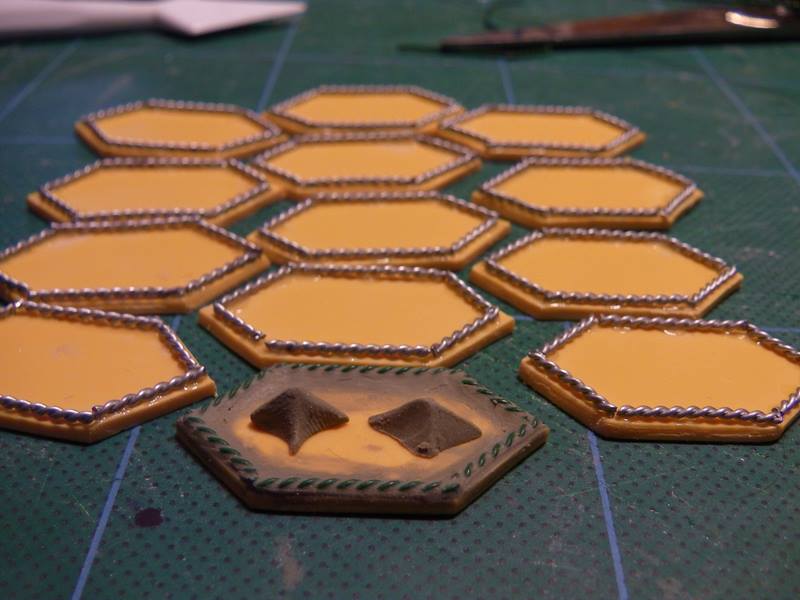
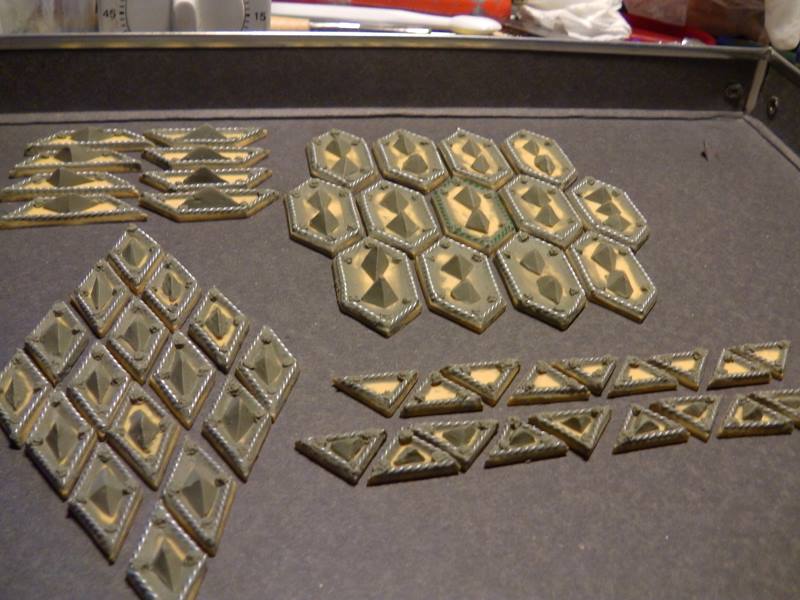
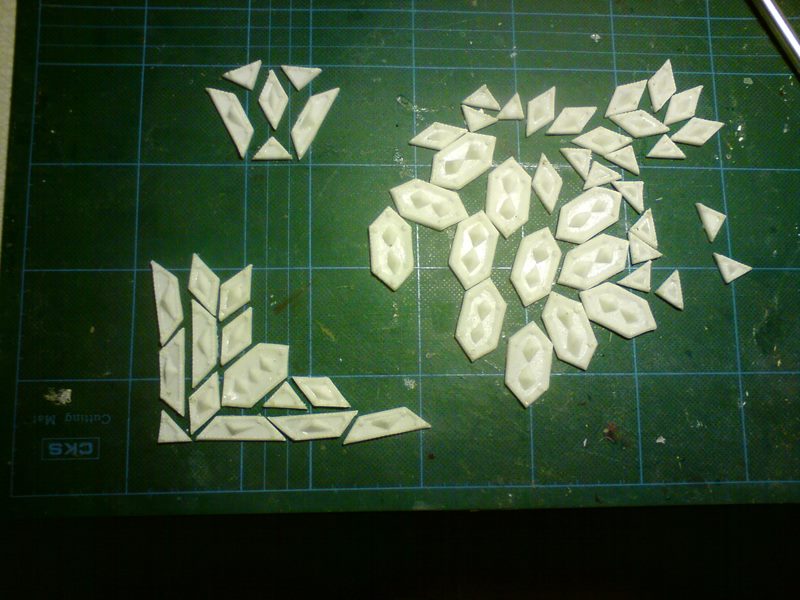
The first of many castings to come. I also arranged them in the configuration that is on the belt and on the kneeflaps. I checked the reference pictures and it seem like i have choosen the correct size for every part.
The only thing i am going to do is to fix the air bubbles that gets stuck in the "rivets" I guess a little powdering in the mold will solve that problem. Now i need to wait until i can go home to my fathers workshop and cast. It too cold on my balcony right now. Something must be wrong with this new resin i am using. It stinks so bloody much like gasoline its unbearable to have inside the apartment . I left them soaking in a water bucket on the balcony.
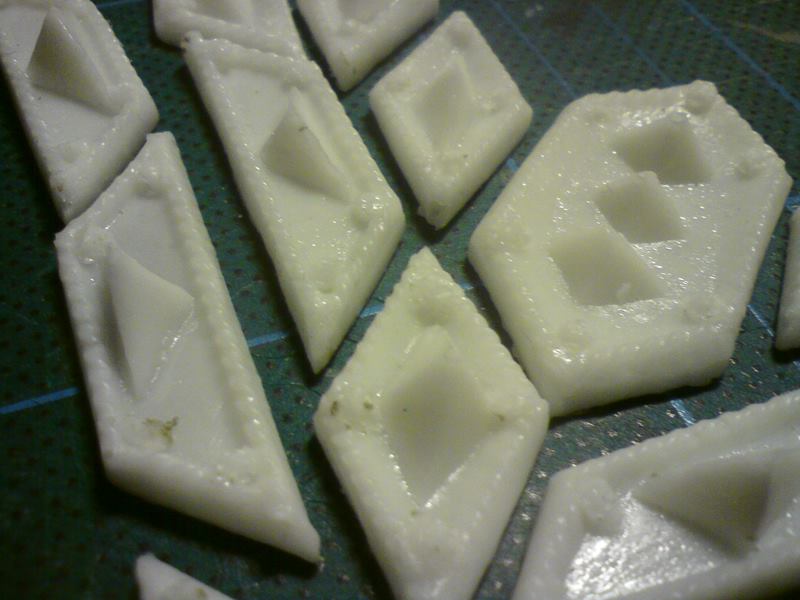
The casting looks much nicer after i started to powder the mold. That way the resin flows into all the small rivets and almost no air bubbles form.

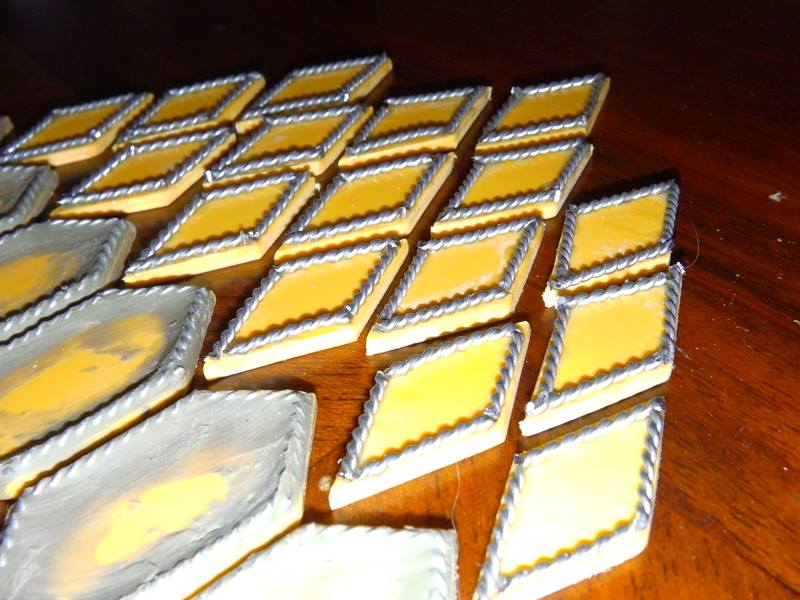
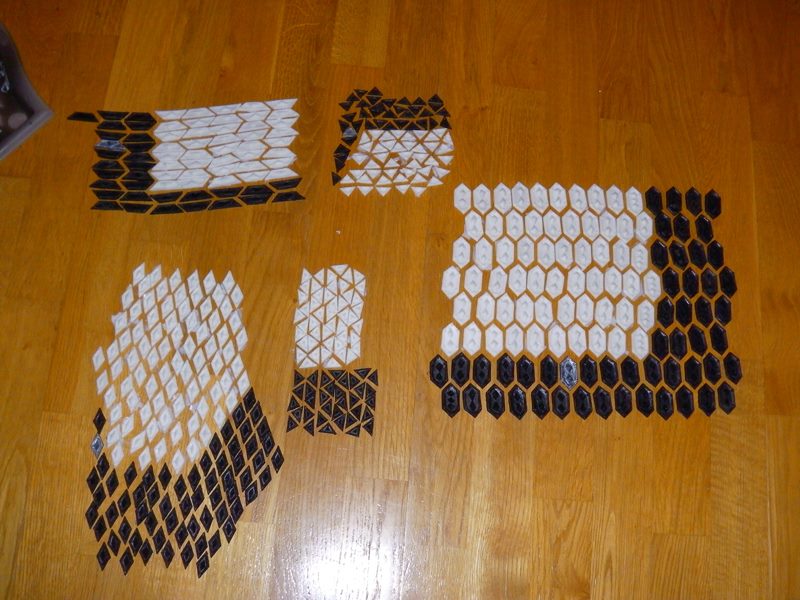
The resin pieces still stinks after being washed several times, So i thought i cover them with a coat of paint. Just a little matt black spraypaint on the front side of the pieces. The backside is going to be glued to the fabric anyway so it's just more trouble to do that side. Now i need to wait until the paint dries before i can cover them with the silverpaint and then weathering them.

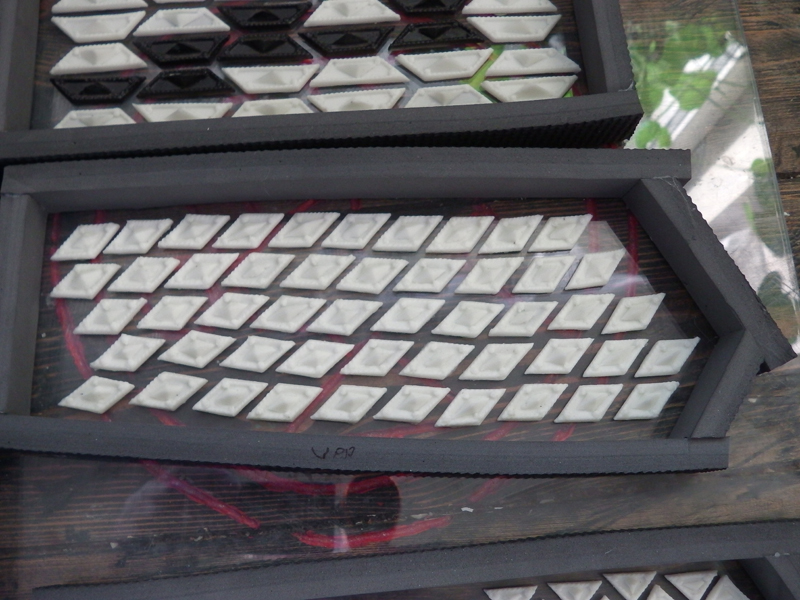
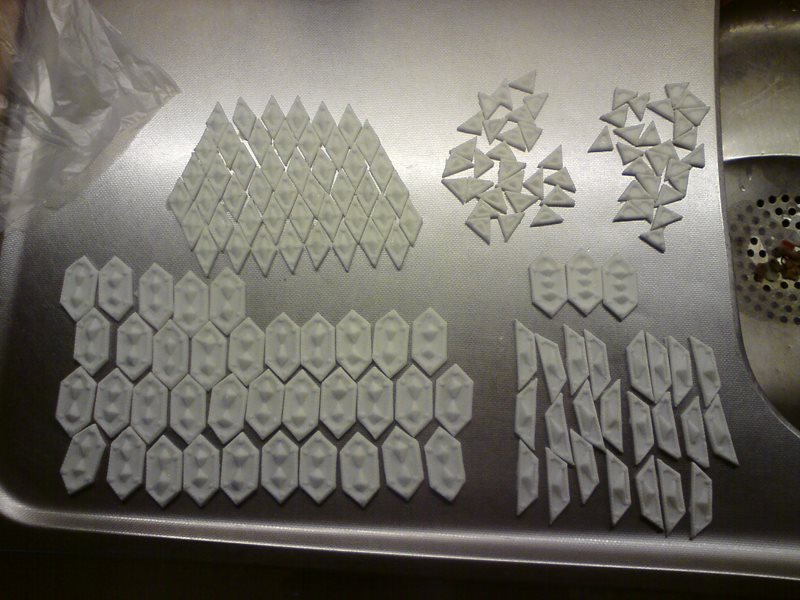
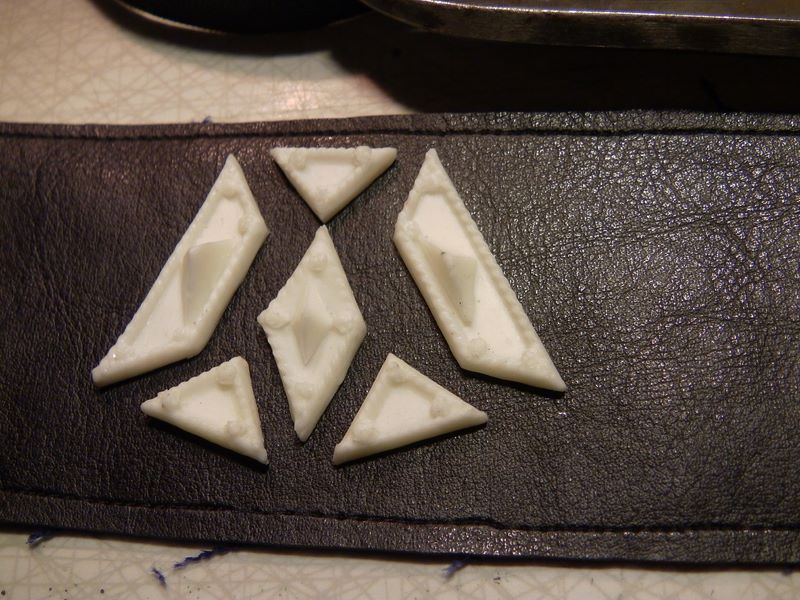
Spent 3 hours casting 5 sets of armor pieces (the white ones) Together with the pieces from before (black) things are shaping up.
It takes about 30 minutes for the cast to harden so i can crank out 2 cast per hour. I'm thinking i might need to do 8 hours of casting more.
- - - Updated - - -
This is the start of Thorins belt, Here is the real deal from various angles. I have bought a old leather belt that i am going to add just like the real deal has on the back. But its going to wait until i know how thick all the clothes layer going to be.

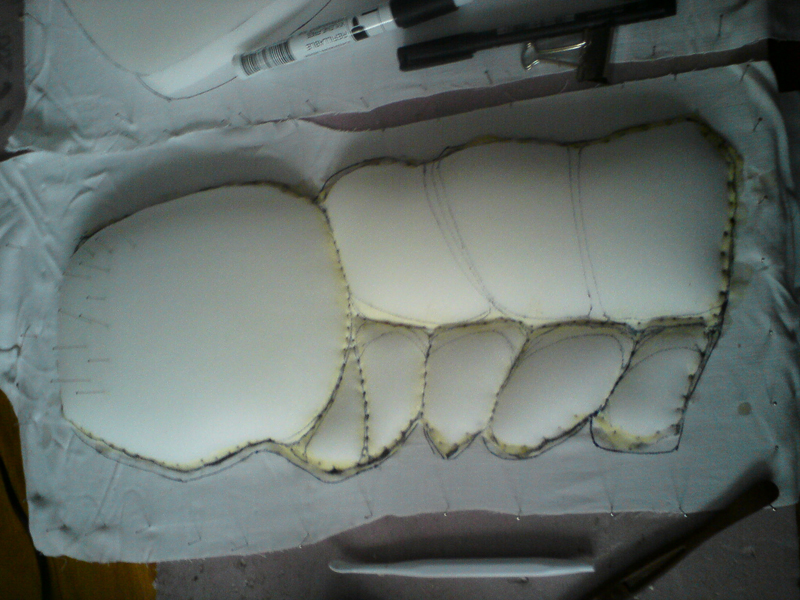
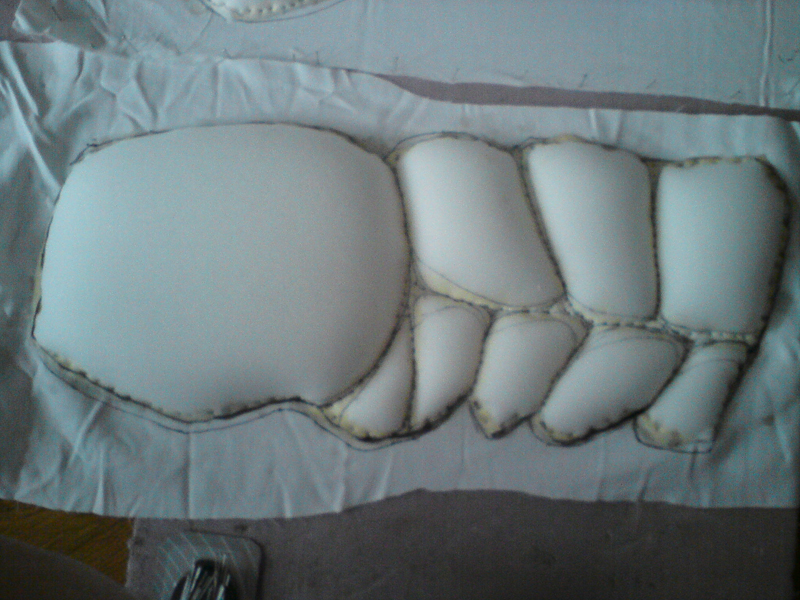
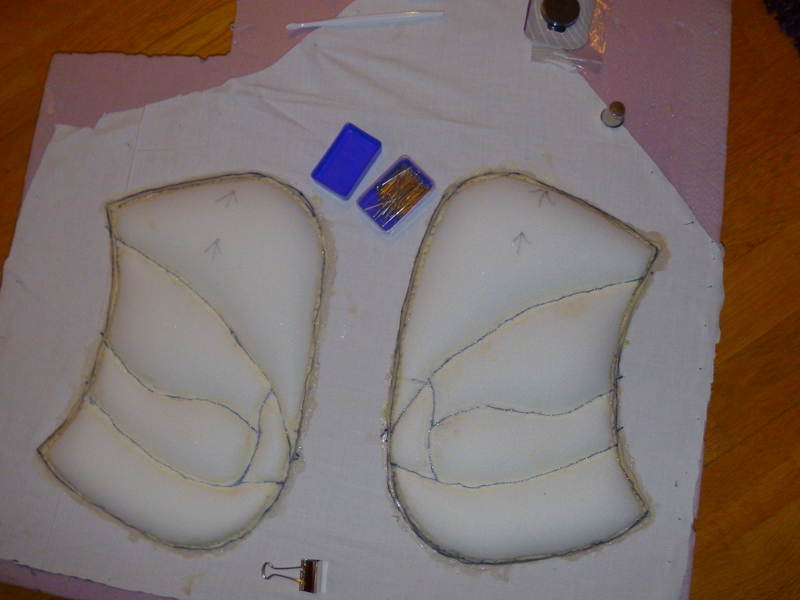
I start by using a long piece of faux leather that i sew onto a piece of jeans fabric for added strength
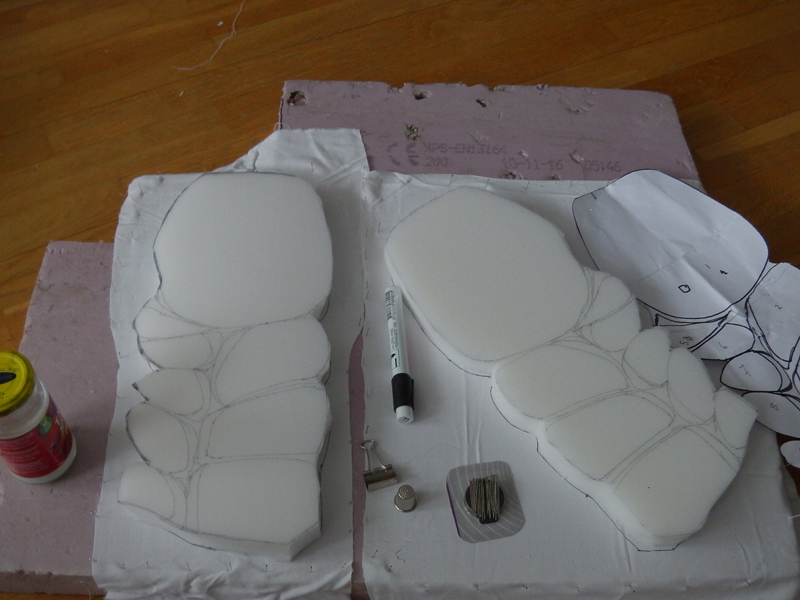
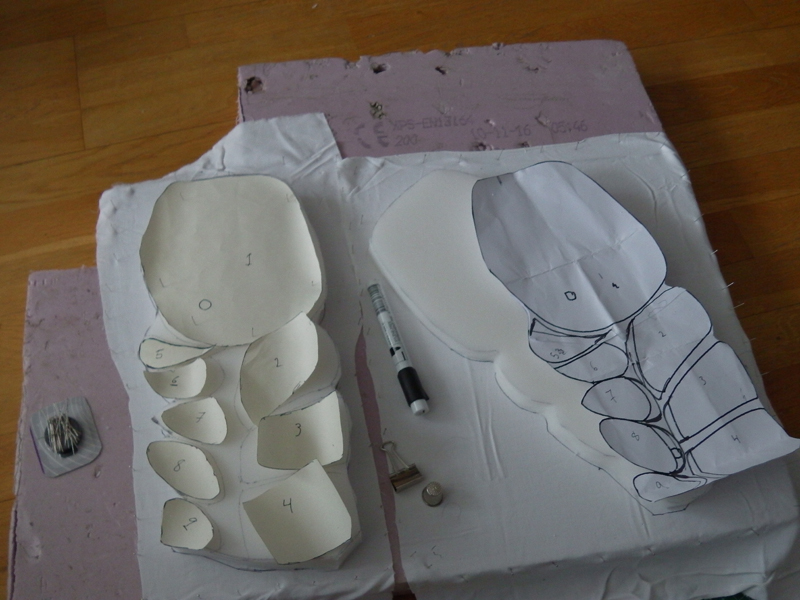
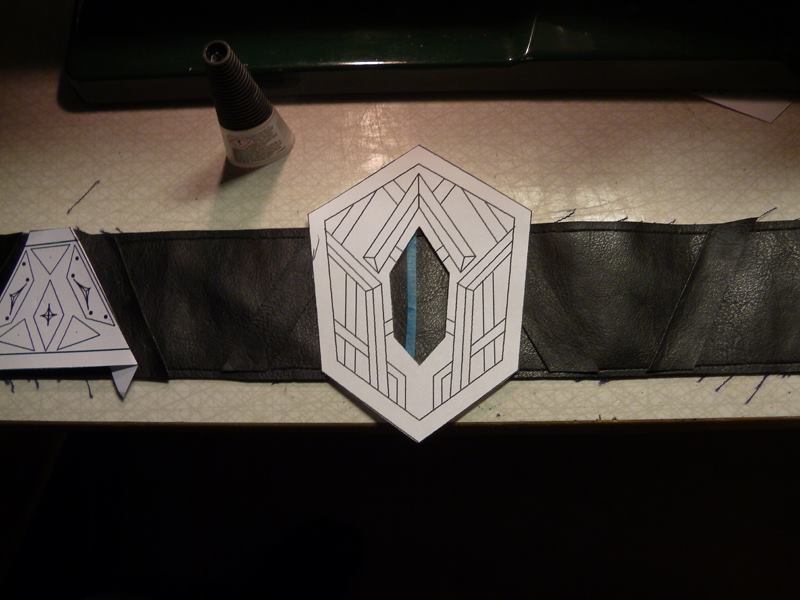
It has the same armor pieces that is on this shirt and they are oriented in this fashion.
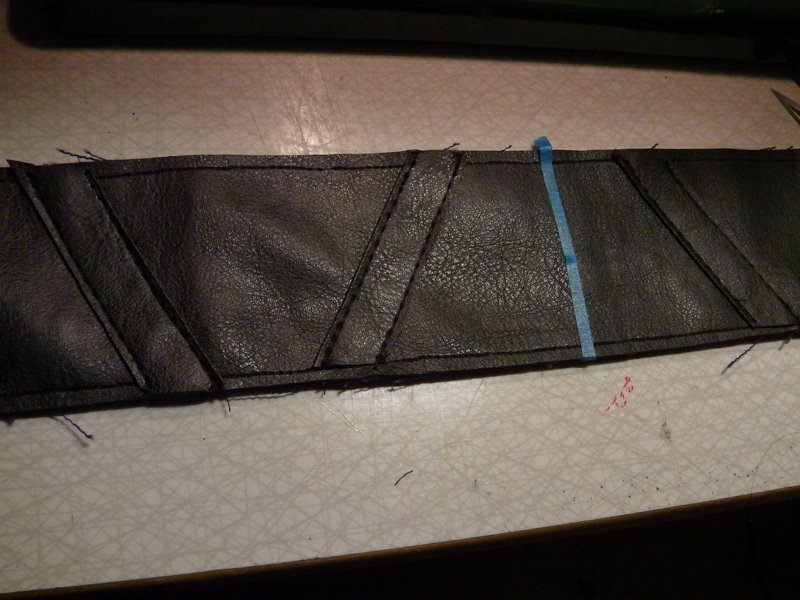
Then i cut out 14 smaller leather strips to sew onto the fabric like this.
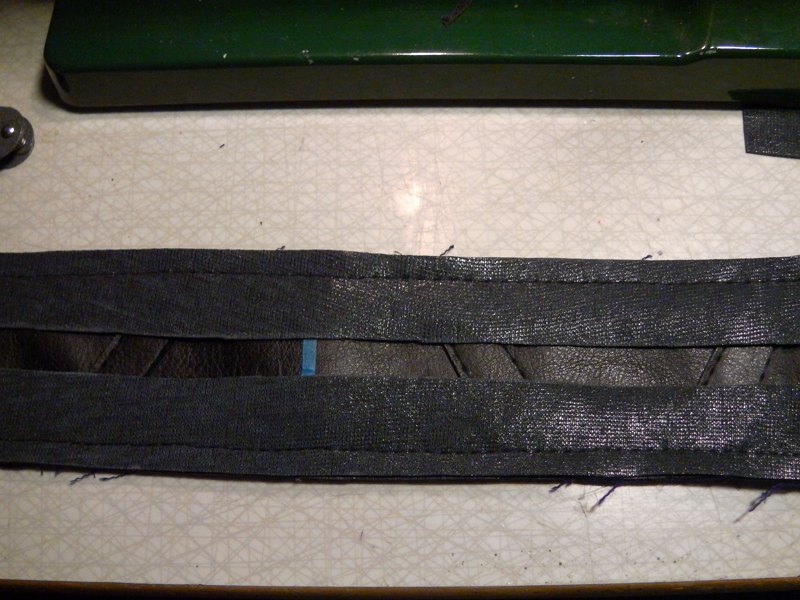
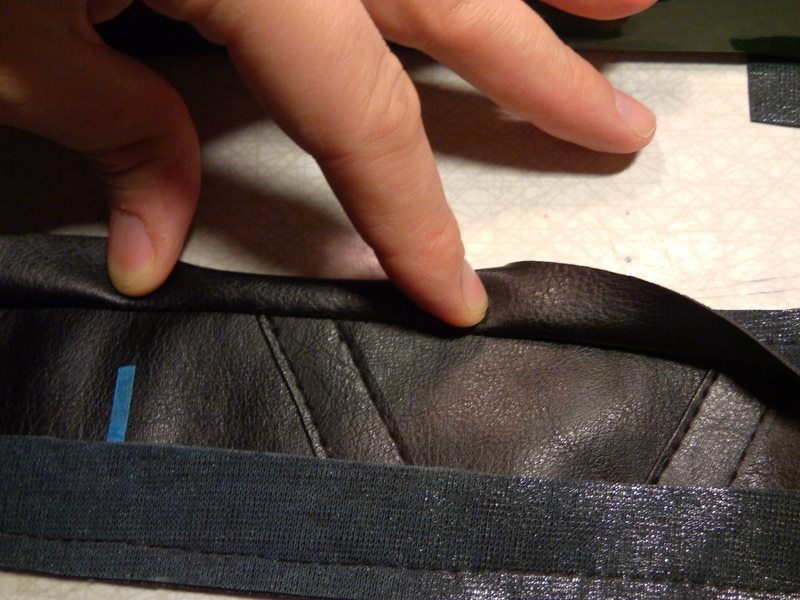
Then i sew on two leather strips with the inside out.
Then i just flip them over the edge and glue them down with super glue, Thus creating the belt trim.
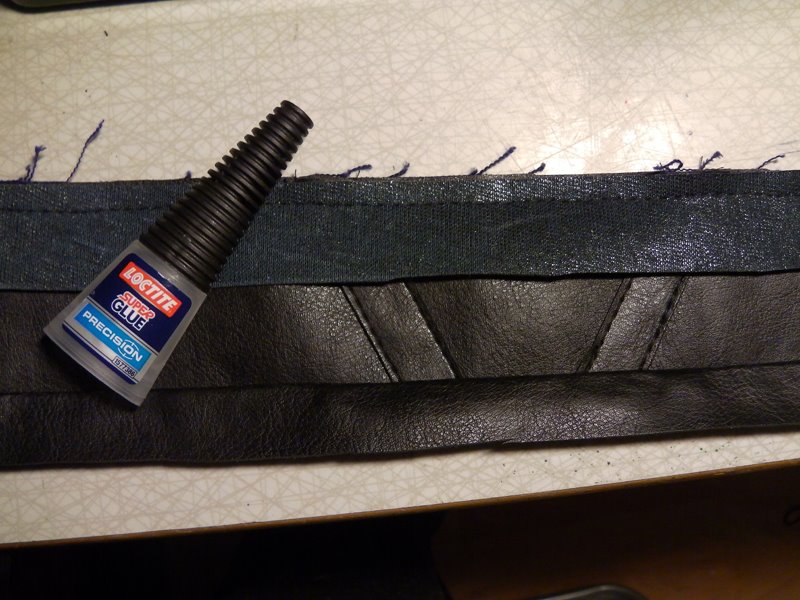
One edge almost ready, one more to go.
The finished piece, until i add the straps on the back and the armor pieces and belt buckle.

- - - Updated - - -
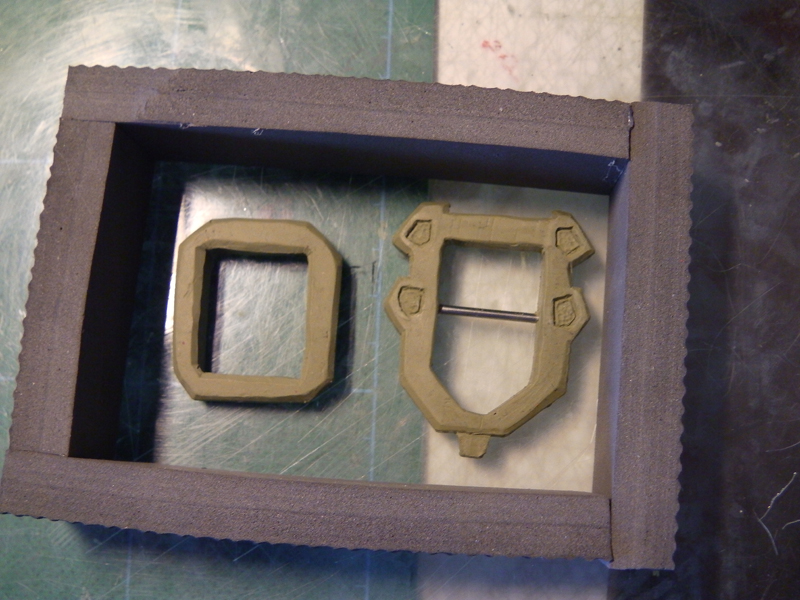
Started on the Beltbuckle. I had been thinking of sculpting it in clay so i can make a silikon mold. But i tried making it in Eva foam instead and then covering it in worbla. The time it would have taken for me to sculpt it in clay was the main reason for me to abandon the clay sculpting version.
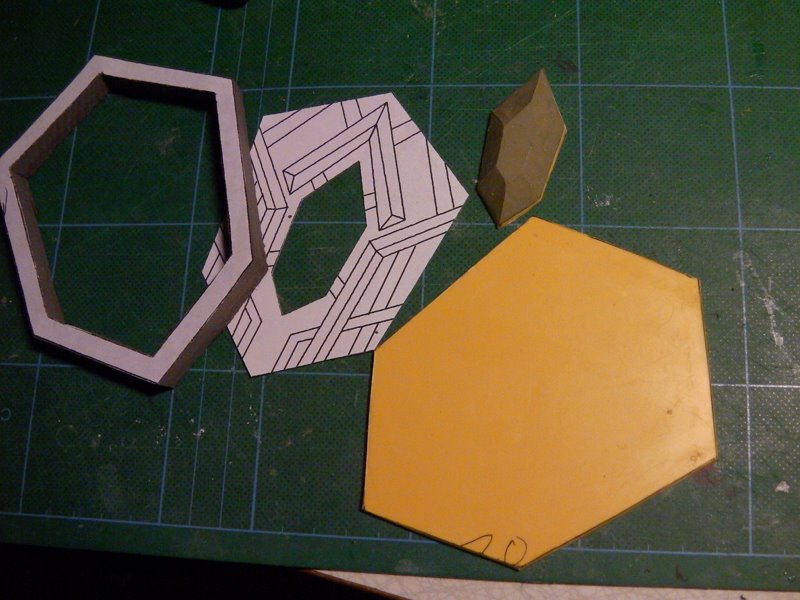
The cuts look a little rough but i am sure i can fix that in the worbla stage.. The foam is just stuck together with super glue.

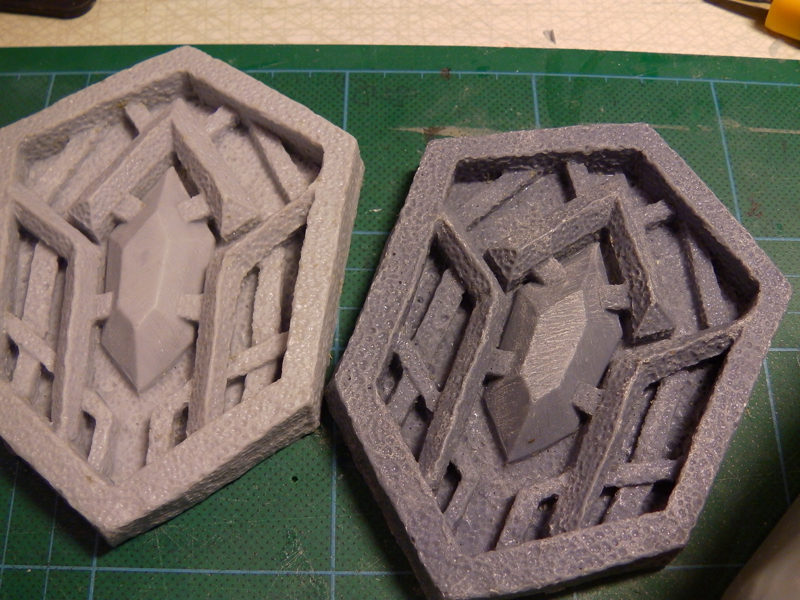
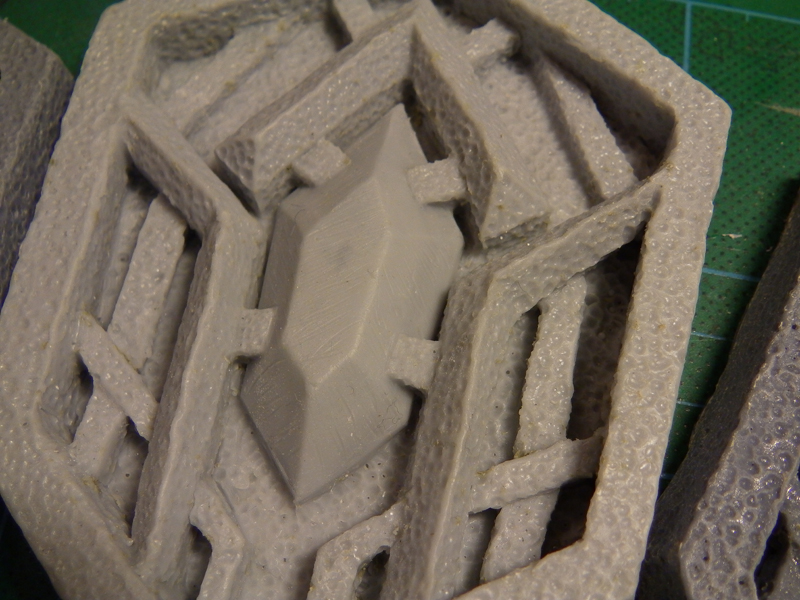
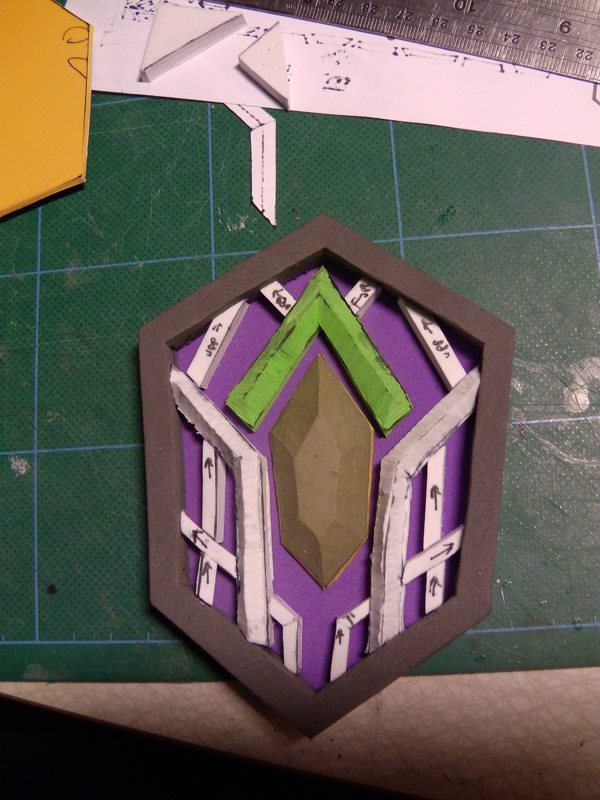
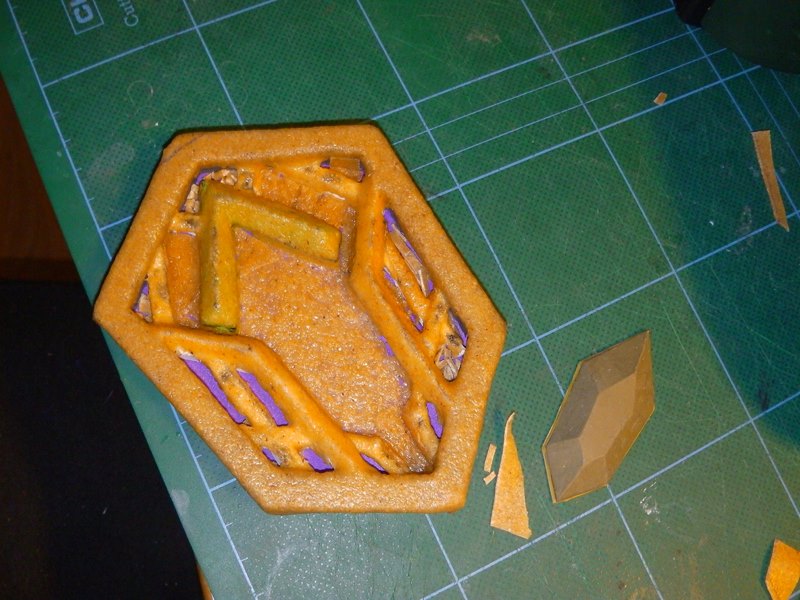
And the piece is finished until the worbla is added. The center clay crystal will be cleaned up and made into a silikon mold
Today i covered the foam with worbla...It did not turn out as good as i wanted it to be...so i thought about just having it as it is, but i know it would bug me forever if i did not fix it somehow....
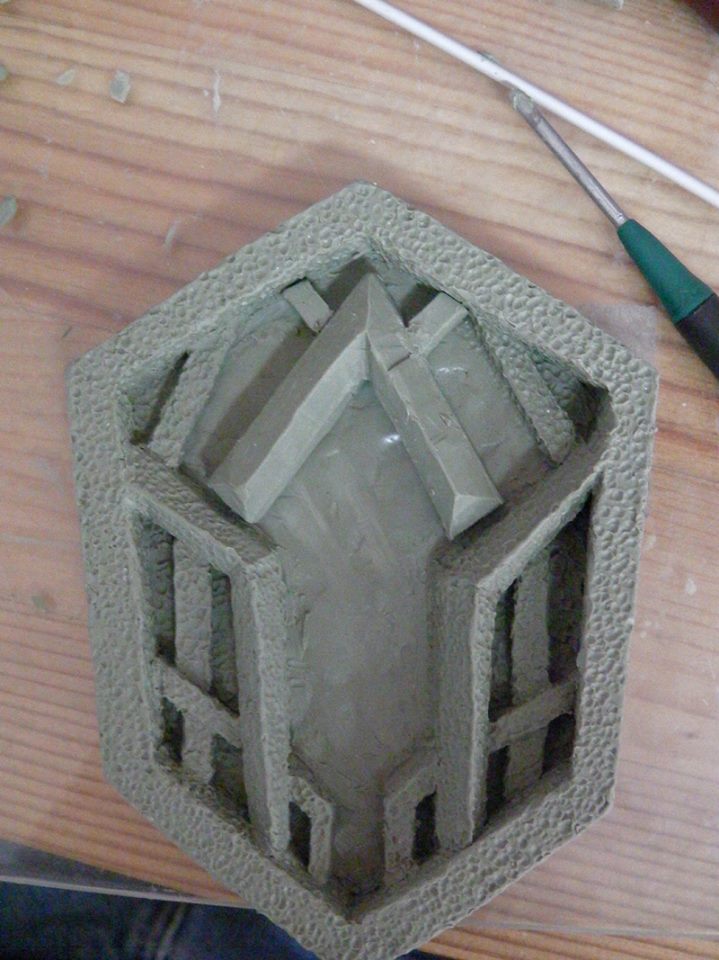
So i bite the bullet and just start over from scratch.. I wanted to avoid sculpting because it takes so long time, but i know its the only way to get the details that i want on the piece.. Starting by making the frame from plastiline clay...
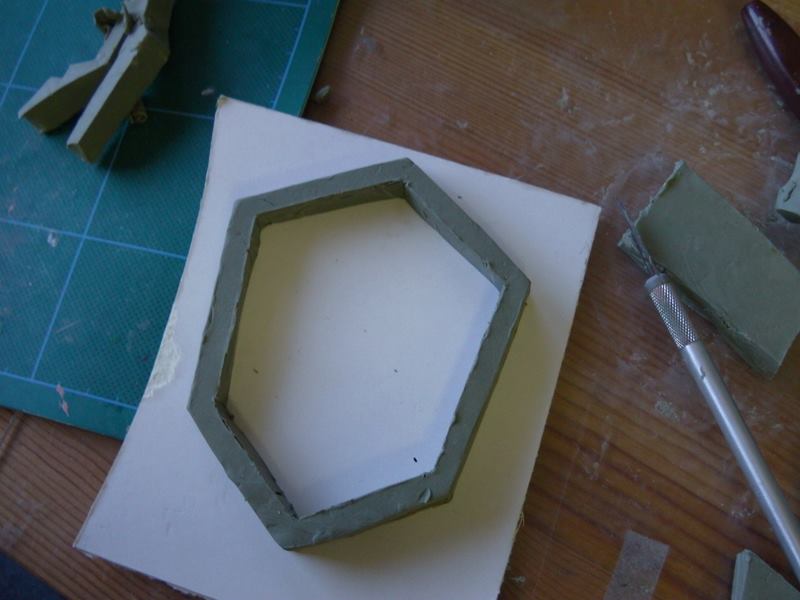
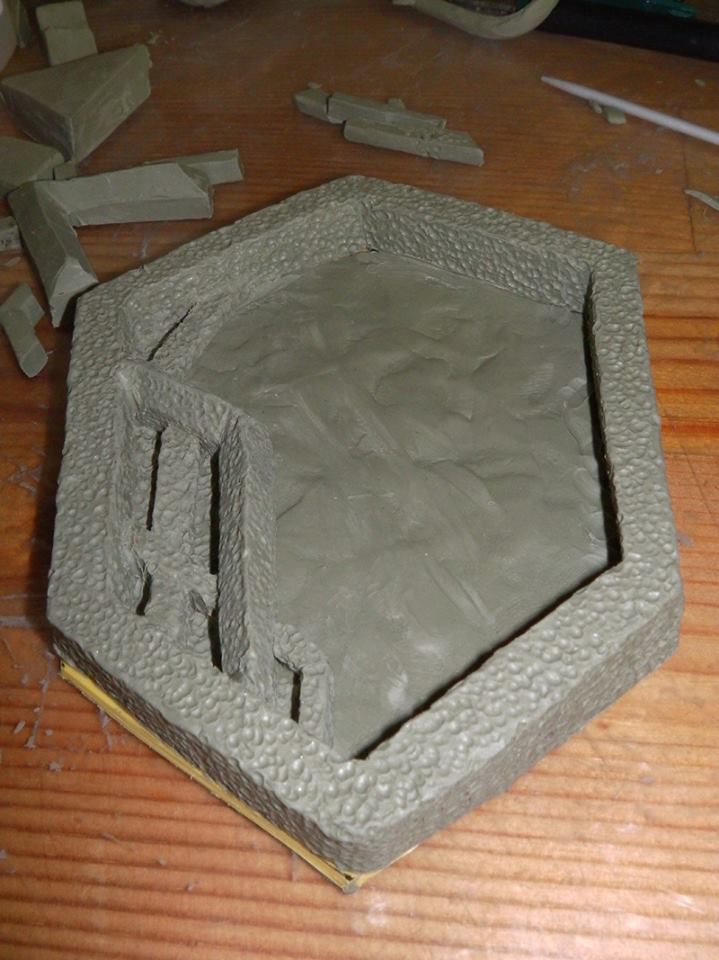
Then make all the smaller inner pieces.

Then its time to attached them piece by piece and give them a little texture with one of my sculpting tools.
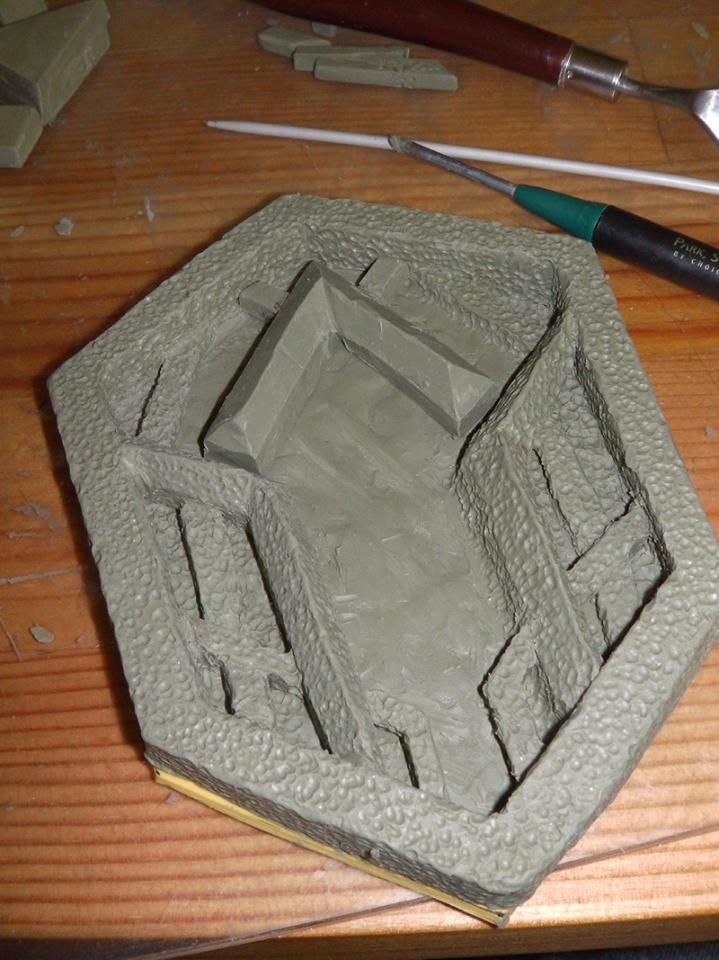
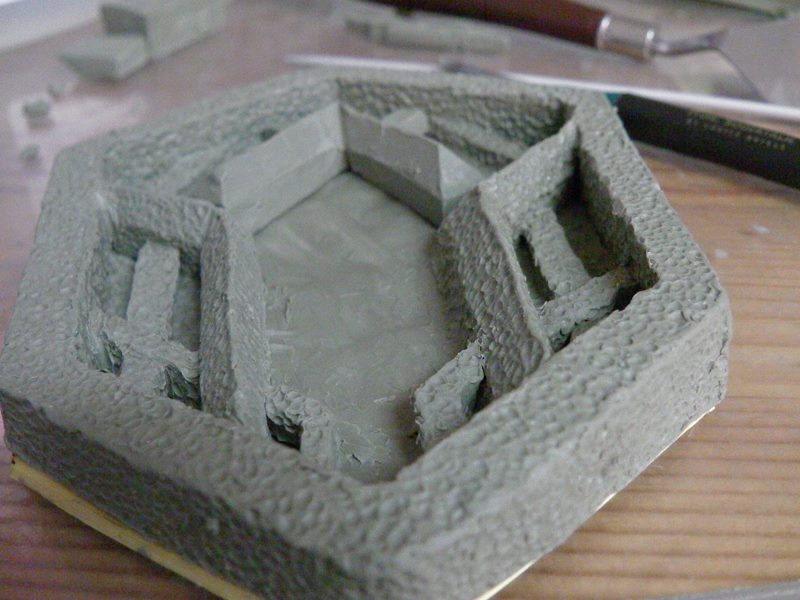
7 hours later and i only have a few pieces left.
The texture detailing takes the longest time..
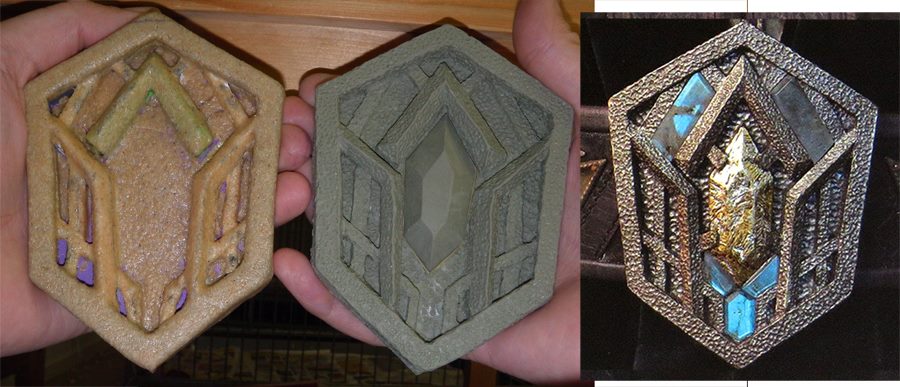
From Left to Right ; The foam and worbla buckle. The Sculpted clay version, The real movie prop.
It looks like i might need to re-sculpt the center crystal to a little smaller size.
I been slowly making parts for my own Thorin Oakenshield costume. The look i am aiming for is the one he has in the first and second movie.
I must have gone over every other Thorin cosplay build on the net and got a pretty good idea on how to make everything.
One funny thing i noticed is that all of the Thorin Cosplays are done by females, and they do him really good.
First thing that i needed to get was a wig so i got myself a long wig that I'm going to braid and add grey hair to... Don't i look pretty
I'm starting with all the small metal parts on this costume before doing the fabric stuff. Here is my start on the protective plates that adorns his costume in the hundreds...These are made from plastic, metal wire and clay. When finished these will have a silicone mold made and then i can cast all the +200 that i need
The wire was made by twisting 2 wires together with my drill. It was later cut in pieces and glued onto the styrene pieces with superglue
Then i heated up a little clay and brushed it on. Then i used my fingers to clean away the clay, It make it look like they are handforged. That is also the reason i made several instead of just 1, Then they will not look all the same.
Here i finished sculpting all the spikes and fake rivets on all the different pieces. It has taken a few hours to do all that. Now on to cover it with silicone for molding .
Now the first parts is under the first layer of silicon.
I hate the waiting time...
The last silicon layer has hardened and its time to demold
A few of the clay "rivets" was still stuck in the silikone so i spent some time removing them by hand.
The first of many castings to come. I also arranged them in the configuration that is on the belt and on the kneeflaps. I checked the reference pictures and it seem like i have choosen the correct size for every part.
The only thing i am going to do is to fix the air bubbles that gets stuck in the "rivets" I guess a little powdering in the mold will solve that problem. Now i need to wait until i can go home to my fathers workshop and cast. It too cold on my balcony right now. Something must be wrong with this new resin i am using. It stinks so bloody much like gasoline its unbearable to have inside the apartment . I left them soaking in a water bucket on the balcony.
The casting looks much nicer after i started to powder the mold. That way the resin flows into all the small rivets and almost no air bubbles form.
The resin pieces still stinks after being washed several times, So i thought i cover them with a coat of paint. Just a little matt black spraypaint on the front side of the pieces. The backside is going to be glued to the fabric anyway so it's just more trouble to do that side. Now i need to wait until the paint dries before i can cover them with the silverpaint and then weathering them.
Spent 3 hours casting 5 sets of armor pieces (the white ones) Together with the pieces from before (black) things are shaping up.
It takes about 30 minutes for the cast to harden so i can crank out 2 cast per hour. I'm thinking i might need to do 8 hours of casting more.
- - - Updated - - -
This is the start of Thorins belt, Here is the real deal from various angles. I have bought a old leather belt that i am going to add just like the real deal has on the back. But its going to wait until i know how thick all the clothes layer going to be.
I start by using a long piece of faux leather that i sew onto a piece of jeans fabric for added strength
It has the same armor pieces that is on this shirt and they are oriented in this fashion.
Then i cut out 14 smaller leather strips to sew onto the fabric like this.
Then i sew on two leather strips with the inside out.
Then i just flip them over the edge and glue them down with super glue, Thus creating the belt trim.
One edge almost ready, one more to go.
The finished piece, until i add the straps on the back and the armor pieces and belt buckle.
- - - Updated - - -
Started on the Beltbuckle. I had been thinking of sculpting it in clay so i can make a silikon mold. But i tried making it in Eva foam instead and then covering it in worbla. The time it would have taken for me to sculpt it in clay was the main reason for me to abandon the clay sculpting version.
The cuts look a little rough but i am sure i can fix that in the worbla stage.. The foam is just stuck together with super glue.
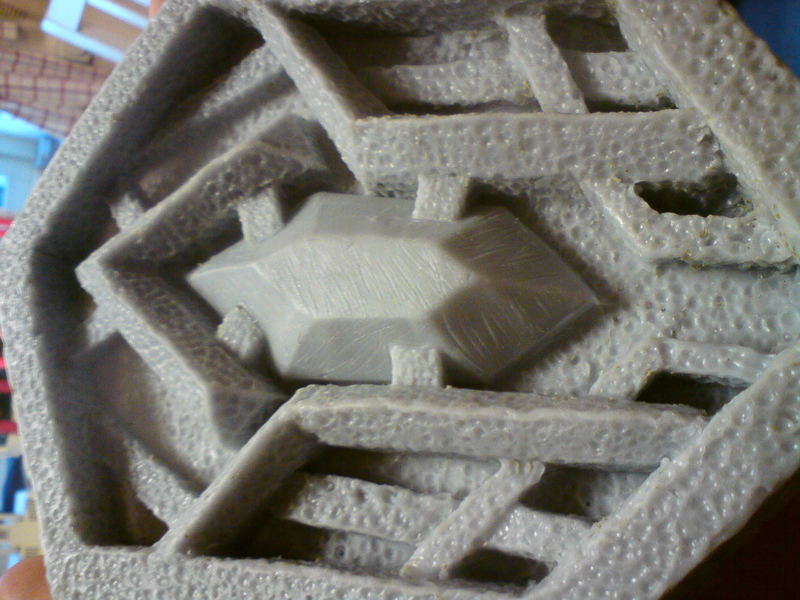
And the piece is finished until the worbla is added. The center clay crystal will be cleaned up and made into a silikon mold
Today i covered the foam with worbla...It did not turn out as good as i wanted it to be...so i thought about just having it as it is, but i know it would bug me forever if i did not fix it somehow....
So i bite the bullet and just start over from scratch.. I wanted to avoid sculpting because it takes so long time, but i know its the only way to get the details that i want on the piece.. Starting by making the frame from plastiline clay...
Then make all the smaller inner pieces.
Then its time to attached them piece by piece and give them a little texture with one of my sculpting tools.
7 hours later and i only have a few pieces left.
The texture detailing takes the longest time..
From Left to Right ; The foam and worbla buckle. The Sculpted clay version, The real movie prop.
It looks like i might need to re-sculpt the center crystal to a little smaller size.