thermal detonator

lovelyrhiannon

New Member
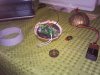
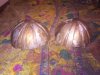
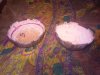
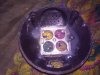
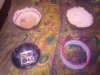
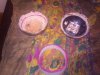
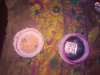
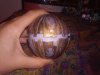
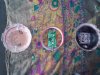
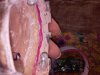
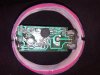
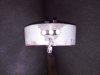
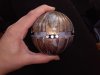
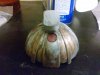
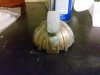
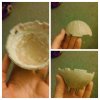
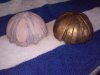
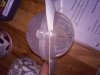
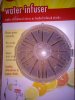
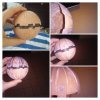
I just started working at a hardware store so I thought I would try my first build. It has the most random things, so I decided to only use items I could buy from there. I started off with a plastic lemon holder and went from there. I used bondo to fill in the slits.
 

Attachments

  • image (1).jpg
    image (1).jpg
    635.7 KB · Views: 226
  • 20150223_103940.jpg
    20150223_103940.jpg
    1.7 MB · Views: 192
  • 20150226_095345.jpg
    20150226_095345.jpg
    1 MB · Views: 145
  • 20150226_095323 (1).jpg
    20150226_095323 (1).jpg
    485.8 KB · Views: 219
Last edited:
I then used my dremel (which i got from the hardware store with my awesome discount) to cut out the teeth and I wanted a little more depth so I carved out every other segment. I used a piece of plastic gutter, lined it with bondo as well, for the center insert.
 

Attachments

  • image.jpg
    image.jpg
    400.3 KB · Views: 229
Last edited:
So I did a lot, a LOT of research on the paint job but I couldn't fine a way to get the originals look so I went with this. I first primed, then put down a gold coat, then bronze, then iron. I used, to tell the truth olive oil with a couple watered down coats to make the paint weird, so when it dried I could just wipe off the oil and the paint would still be there uneven. I just used the iron here and there and then wiped it off, leaving just a hint of left. I used a exacto knife to cut out pieces to weather it more and used my nail fill to scratch it up randomly. I know it looks bronzy but I think It looks like carved medal and since I am going to the convention with a steampunk cross play I thought it would work.
 

Attachments

  • image (2).jpg
    image (2).jpg
    788.8 KB · Views: 197
Last edited:
That looks absolutely stunning ... can't wait what you come up with for the lights and handle on top ... welcome on board ... some great skills and weathering techniques :)

Chaim
 
finished the other half. the guts come tomorrow in the mail.
 

Attachments

  • 20150301_205639.jpg
    20150301_205639.jpg
    798 KB · Views: 127
  • 20150301_205633.jpg
    20150301_205633.jpg
    512 KB · Views: 129
  • 20150301_210143.jpg
    20150301_210143.jpg
    519.9 KB · Views: 143
Excellent ...of course I'll be expecting to see a picture with a finished thermal detonator . . . in full steam punk Boussh outfit once you're done ;)

Chaim
 
So, I noticed that you are using the Disney Hot Potato for your electronics. Im not much of an electronics expert but I would caution the use of the 9V battery as the previous power source for the toy is 6V. With how cheap the electronics looked I doubt there is a voltage regulator so be careful that you do not burn out the circuits using the 9V.

I would honestly recommend using this coin cell battery holder. Not only does it provide the correct voltage but it is also smaller and may fit better in your project. It also has a handy on off switch.


thank you but i am not using that, it was just in the picture, but thanks again.
 
i added a top layer of sparsely placed silver scraps as an attempt to show how it had been worn off over time to reveal the brass underbelly.

to be able to glue the cup the battery holder resided in,to the bottom haft of the TD, i had to cut it out of it's cup holder and hot glue it right side up so i could change the batteries as needed once to was permanently secured to the TD.
 

Attachments

  • 20150317_215854.jpg
    20150317_215854.jpg
    1.5 MB · Views: 122
  • 20150317_215908.jpg
    20150317_215908.jpg
    1.6 MB · Views: 106
  • 20150317_215927.jpg
    20150317_215927.jpg
    1.7 MB · Views: 118
  • 20150317_215939.jpg
    20150317_215939.jpg
    1.3 MB · Views: 115
  • 20150317_220001.jpg
    20150317_220001.jpg
    1.3 MB · Views: 101
  • 20150317_220016.jpg
    20150317_220016.jpg
    1.3 MB · Views: 132
  • 20150317_220127.jpg
    20150317_220127.jpg
    1.1 MB · Views: 102
i wanted to be able to open and change the batteries at will and with the center ring being glued to the battery cup and the cup being glued to the bottom, the top haft had to be able to be tightly secured to the ring while still being able to be removed. so i hot glued screws to the top haft and cut out L shape holes in the ring right below. to prevent an wobble in the future i put hot glue in a top haft where the ring would sit when connected.
 

Attachments

  • 20150318_175112.jpg
    20150318_175112.jpg
    1.7 MB · Views: 101
  • 20150318_175123.jpg
    20150318_175123.jpg
    874.9 KB · Views: 111
  • 20150318_175136.jpg
    20150318_175136.jpg
    639.6 KB · Views: 93
  • 20150318_174254.jpg
    20150318_174254.jpg
    907.1 KB · Views: 114
  • 20150318_174332.jpg
    20150318_174332.jpg
    544.5 KB · Views: 104
  • 20150318_174927.jpg
    20150318_174927.jpg
    1.3 MB · Views: 140
Like a Boss! That's the best looking lemon holder I've ever seen. Nice work and very creative. Can't wait to see more!

Welcome to the RPF!
 
This thread is more than 8 years old.

Your message may be considered spam for the following reasons:

  1. This thread hasn't been active in some time. A new post in this thread might not contribute constructively to this discussion after so long.
If you wish to reply despite these issues, check the box below before replying.
Be aware that malicious compliance may result in more severe penalties.
Back
Top