The Probe Droid Resin Kit Instructions Tread

moffeaton

Master Member
RPF PREMIUM MEMBER
Heya gents!

I have received Hyperdyne's electronics, and have the servos on order. As soon as I get them, I can start on the main body. First I will tackle the legs, but before I begin, let me know if you guys want the instructions to go into detail on how to articulate them? It's going to be more work for you as a builder, but then you can pose the legs. It will also require you to buy some more brass stock - not a ton though.

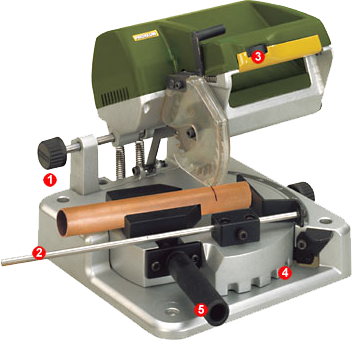
I suggest that you all get one of these for this model build as you will be cutting a fair amount of brass tubing - it also comes in handy for a lot of other builds, too. I use mine all the time:

Amazon.com: 2" High Speed Mini Miter/Cut-Off Saw, #919: Home Improvement

Also buy some Aves Apoxie Sculpt, or your choice of putty. I also think I'm going to make a side mount for this model - so it can be hung from the wall! The Apoxie Sculpt will come in handy for anchoring in the mount point...
 
J, a cool fix, would be a steel rod, with a welded flat plate on the end, that would bolt up to the droids centre body "hub".......just like the prop in Chronicles maybe?

Would save building something internal, just maybe a bit of reinforcement inside, and, be ILM savvy too :).

lee
 
Jason, these were going to be the base of the armature we are building, the set screw tightens the shaft that goes inside the PD,still designing this , however someone also had mentioned to do the wall mount as seen in the chronicles.
I can do both as the wall hung would be missing the panavise adaptor.

any good to you??
photo-2.jpg
 
sorry , i thought you were building the Vacs, DOH!!.
wrong thread, dont know if this fits the resin, sorry
Mars
 
Thank you for this thread Jason, this is really appreciated

How accurate is that Mini Cutter/Saw, can it cut straight and in accurate length?
 
Mars, no worries - but INTERESTED IN THAT FOR MY SCRATCHBUILD, YES!!! Ahem.

Cosmic_x, yep, it's able to cut 90º accurately enough for studio scale work. I cut the legs for this model recently, and all four legs are consistent, length-wise:

8967cf26b8be11e1abd612313810100a_7.jpg


a61b097cb9c111e1abd612313810100a_7.jpg


0e8fff4cbdb111e188131231381b5c25_7.jpg
 
Tube cutter works well too, just dont apply too much pressure, i tend to groove the brass now, and make the cut, with a swipe of the razor saw, mild clean with a file, and job done, perfect sleeved tubing.

lee
 
Yeah, I think I've figured out which leg parts go where. We spent a week without power in over 100º heat, so everything was set aside as I spent about a grand and a half on a generator, replacing all of the food we lost, and paying to have the partially fallen Oak tree removed from my back yard. Also - my fence is smashed in, so it's not over yet.

http://www.roboterkampf.com/

It's on my very short list, but please be patient. I also just received an Epilog laser cutter yesterday, so I need to finish installing it, and I have oral surgery tomorrow.

That is where we are with the instructions.

In the meantime - clean your parts, remove the flash. That will take a few days, yeah?
 
Laser cutter..... Tree...... Laser cutter..... Magnifiying Glass.... Tree....

Maybe not... Just put the kids to bed with Dispicable Me.

Looking forward to your build Jason. Sweet.
 
Jason, the guys are starting to request all the parts needed for a full kit all in one or two photographs. Could you do that for us one day soon? I think they want to ID and make sure they have everything they need for the build. Peace man.

Dave :)
 
I will have it for you tomorrow! Sorry, it's been a really busy and strange couple of weeks in our area. We are weathering another major storm right now - really getting tired of the 100º+ days and power outages!!!
 
No hurry buddy. Take all the time you need. :) I only got my own kit 2 days ago so it's definitely not a huge rush.
 
Okay, as soon as we solve the questions in this particular post, I can give you guys a proper visual inventory. I can't do that if I don't know if everything is included, right?

Okay, some of this seems to be slight "legacy" detailing from the original release, and I don't know if I'm looking at something that was deemed "close enough" to stand in for what would be "über accurate" parts... hence my questions below. First off - there seems to be a couple of pieces that are flat-out missing - they are highlighted in red below - don't have them, or anything close, in the castings I have:

IMG_0300.jpg

IMG_0472.jpg


First off, the easy stuff - the main parts. If you don't know that you need these, I can't help you. No one can ;)
L1120389.jpg


Here's a preview of everything ready to go - almost...
L1120390.jpg


And finally - where do these suckers go? As soon as we figure this out (and the missing red highlighted parts), we are ready to rock!
L1120391.jpg
 
Back
Top