The Ninja - Star Wars Vintage Parts Hunting & Props - UPDATE - Vintage Torsten Hallman GP Chest Protector

Vintage Flight Helmet hybrid Red-5 X-Wing Helmet Build - Part 12

Update for the vintage Flight Helmet hybrid Red-5 X-Wing Helmet Build, Dustin newmagrathea posted the Part 12 video.

The work in this video was done earlier this year but with Dustin under the pump with his job editing took a few months, the project is still on his his work bench waiting for some free time :)

Mostly I just complain about spray paint
 
Vintage Flight Helmet hybrid Red-5 X-Wing Helmet Build - Part 13

Update for the vintage Flight Helmet hybrid Red-5 X-Wing Helmet Build, Dustin newmagrathea posted the Part 13 video.

Recent update video, Dustin sanded the helmet & painted a second base coat before we do a final assembly and check all the vintage & kit parts fit correctly, the project is slowly moving forward :cool:

 
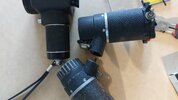
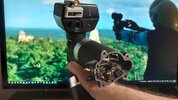
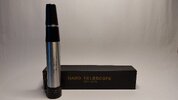
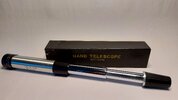
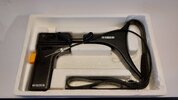
Vintage 30x30mm Hand Telescope

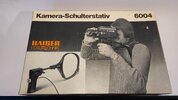
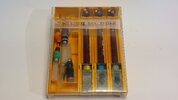
I finally pickup an accurate vintage 30x30mm Hand Telescope used to build the pre-production Fett Sling Blaster, shout out to Chris lonepigeon of (PofSW) for the accurate information, which helped the hunting, this will go nicely with my Fett display including vintage Kaiser Camera Pistol Grip Mount & vintage Rotring Sec-O-Mat Isograph Set.

1210.jpg


1211.jpg


1210.jpg 1211.jpg 1147.jpg 1148.jpg 1151.jpg
 
Prop Box from Scott Jua

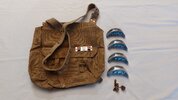
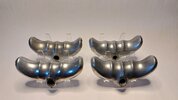
I recently asked Scott scottjua if he could work on a few small props, which I had been collecting parts, shout-out to Scott, I love the Biker Bag for Grogu, I think these will look cool in my collection.

Biker Bag for Grogu - The Mandalorian.

Vintage ElToro's (4x) used in the Millennium Falcon cockpit.

Vintage Brass Dice & Chain seen in the Millennium Falcon cockpit.
(I do not make any claim that these are screen accurate and are for my display & enjoyment)

1212.jpg


1213.jpg


1214.jpg


1212.jpg1213.jpg1214.jpg
 
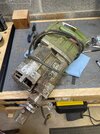
Vintage KANGO 637 (Green Body) Electric Hammer Drill

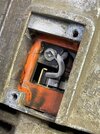
I finally scored a vintage KANGO 637 (Green Body) Electric Hammer Drill, which has the orange housing used for the ROTJ Bunker Bomb, Dustin newmagrathea posted a video of the removal of the Access Plate to inspect & confirm the accurate orange housing :) one step closer to collecting all the known vintage parts :cool:

1215.jpg


1216.jpg


1215.jpg1216.jpg

Checking for ROTJ Bunker Bomb Prop Parts

 
Vintage Hales No3 MK1

I recently picked up this beautiful vintage Hales No3 MK1 with clean Thick Cubes & the preferred accurate Windvane in original condition & patina with the remnants of the red painted lip, what's special about this Hales is that it's the only Hales I've found that has the original wadding disc's that are inserted into the inner brass tube, the Hales was recently sold and will make an awesome display Hales or part of the new owners vintage Obi saber :cool:

1.jpg


2.jpg


1.jpg2.jpg3.jpg4.jpg5.jpg6.jpg7.jpg8.jpg9.jpg10.jpg11.jpg
 
Vintage KANGO 637 (Green Body) Electric Hammer Drill

I finally scored a vintage KANGO 637 (Green Body) Electric Hammer Drill, which has the orange housing used for the ROTJ Bunker Bomb, Dustin newmagrathea posted a video of the removal of the Access Plate to inspect & confirm the accurate orange housing :) one step closer to collecting all the known vintage parts :cool:

View attachment 1609669

View attachment 1609670

View attachment 1609669View attachment 1609670

Checking for ROTJ Bunker Bomb Prop Parts

Can’t wait to watch this
 
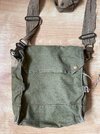
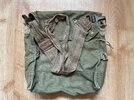
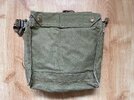
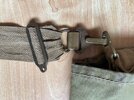
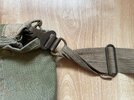
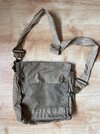
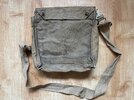
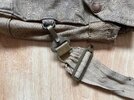
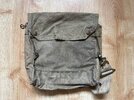
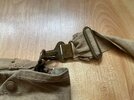
Vintage WWII Gas Mask Bags for Bowcaster Strap

I recently picked up these 2x vintage WWII Gas Mask Bags used for Bowcaster Strap, both are in nice condition with the Straps looking in great condition & complete, I am 50/50 if I will keep these in my collection or put in the Junk Yard.

Also big shout to to my good buddy Colin db94 in the UK for his help :)

1220 Green.jpg


1220 Green.jpg1221 Green.jpg1222 Green.jpg1223 Green.jpg1224 Green.jpg

1225 Khaki.jpg

1225 Khaki.jpg1226 Khaki.jpg1227 Khaki.jpg1228 Khaki.jpg1229 Khaki.jpg
 
ANH Yavin Scanner Build

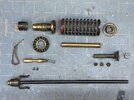
Well this is something new for me, with hunting being slow I thought I would turn my hand to prop building and pulled out the vintage parts I'd collected for the ANH Yavin Scanner, shout-out to 3DImpact for his awesome research to identify these parts.

1x Minolta Auto Spot 1
1x Arriflex 35-IIC 35mm Motor
1x Arriflex 35-IIC 35mm Variable Speed Motor
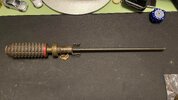
1x Brass Micro Screwdriver


Laying out all the vintage parts, tools and items required, I was surprised how complicated the assembly would be and estimated the project would take a few days to finish, the advice given to me as a kid in shop at school was ringing in my head measure twice and cut once.

One of the motors needed to be modified so out come my professional work-bench & the industrial dremel, after breaking four disc's I learnt less pressure is better, you'd think these disc's would be made so you can hook-in.
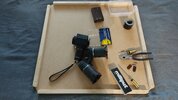
1231.jpg 1232.jpg 1233.jpg

I then decided I would use mulliput to form a solid spacer to hold the two motors together, oooh man how stressful is cutting two equal pieces of mulliput but it all seamed to workout and after curing the two motors were solidly held together and pasted the drop test on my fu...king foot, ooooch! man I wish I put those bloody safety boots on before starting, talking about safety Troy Seneca said I hope you were wearing safety glasses.... mmm :unsure: sure...

Shout-out to Markus OdiWan72 for the inspiration for the Mulliput Spacer.

Now on to the tape, after carefully measuring the lengths of tape required to hold the two motors & Spot 1 together not twice but three or four times I quickly learnt that this childhood advice was bull-**** and after more attempts then I like to say with the tape wrapping back on its self and being confused with mm, cm and inches & tossing away too many pieces of tape in the bin, I finally got the parts held together, my only concern now was after studying the reference research photos after I did the work.... did I get it correct, was the tape wrapped clock-wise or anti-clock-wise ooooh crap!!

Well after many hours of agonizing over the reference photos I convinced myself that I wrapped the tape in the correct direction.... success :D

I think after completing such a complicate build I can class myself as a hunter & prop builder and ready to join my fellow brother prop builders, Scott scottjua Troy Seneca & Dustin newmagrathea who have previously done some simple builds for me ;)

1230.jpg


1230.jpg

1234.jpg


1235.jpg


1236.jpg


1234.jpg 1235.jpg 1236.jpg
 
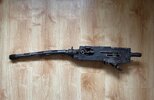
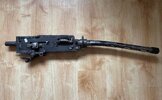
Relic Vintage WWII Browning .303 MG

I recently picked up this relic vintage WWII Browning .303 MG, I think the barrel shape shows just how violent its WWII service ended and the removal of the Booster ended up just as violent, firstly I need to give a shout-out to my good buddy Colin db94 in the UK for his help with the purchase and organizing a metal shop to take a swing at removing the Booster, which refused to budge.

1237.jpg


1238.jpg


1239.jpg


1240.jpg


1237.jpg 1238.jpg 1239.jpg 1240.jpg

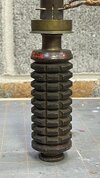
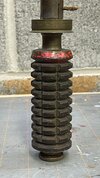
So off to the metal shop, Colin said the guy was the size of a bear with arms like levers and after hours that bloody Choke Nut would not come off, so onto the Barrel Jacket after removing the weld & Jacket Pin, the guy had to weld a bar on the Choke Nut and use a persuader bar most people could not lift, the force required was crazy to remove the Booster from the Barrel Jacket and despite the guy being super careful there was some small tell-tale indents but the Fins already had some minor damaged as this was a relic MG, so now back to that bloody Choke Nut the guy decided to cut it flush-ish and started to drill & cut the inner material, the plan was to knock out small sections until its all removed but after 4 hours working on Sunday they decided to call it quits for beers...
1241.jpg 1242.jpg 1245.jpg 1246.jpg 1248.jpg

The original Crown, B and British Military Arrow stamps on the Fin ends, which is cool to see as not all have the stamps;

1249 Crown Stamp.jpg 1249 Arrow & B Stamp.jpg

We also noticed the Booster Fin end profile looks slightly more square-ish to other Boosters I have seen, I would be interested in views of others, is this a common/uncommon profile given the Boosters were hand-made as with most of these vintage parts, maybe the Fin ends can be filed to give a more rounded profile?
 
Ian, which parts are you wanting more rounded? Do you mean the top ends of the fins, longways?

In any case, they can definitely be filed/grinded/sanded down to be more rounded.
 
Ian, which parts are you wanting more rounded? Do you mean the top ends of the fins, longways?

In any case, they can definitely be filed/grinded/sanded down to be more rounded.

Yeah Andy I was describing the longway ends of the fins they look slightly square-ish, maybe the machinist was in training or had a bad day lol!!
 
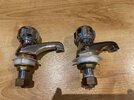
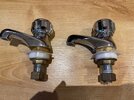
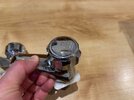
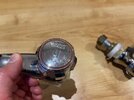
Vintage AS Handwheels & Taps (COLD & HOT)

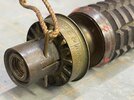
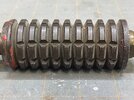
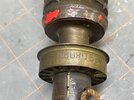
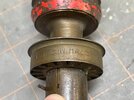
I recently hunted this pair of nice vintage AS Handwheels & Taps, the Handwheels are in nice used vintage condition and will make a sweet addition to any vintage parts Obi build, big shout-out to my buddy Colin db94 who helped with the purchase, I will be putting these in the Junk Yard.

1450.jpg


1451.jpg


1452.jpg


1453.jpg


1450.jpg1451.jpg1452.jpg1453.jpg
 

Your message may be considered spam for the following reasons:

If you wish to reply despite these issues, check the box below before replying.
Be aware that malicious compliance may result in more severe penalties.
Back
Top