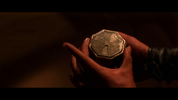
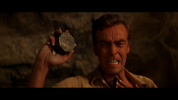
The Mummy Hamunaptra key 3.3

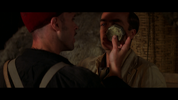
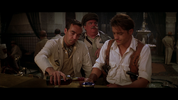
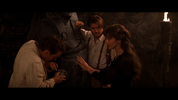
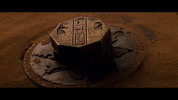
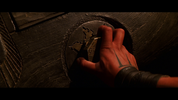
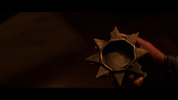
Yeah this is the only screenshot I can find of it in (somewhat) daylight, it appears pretty dark here.

Thanks !

Yes, looking at the surviving Hero prop, all that extra dark color must have faded or worn off. I'll go much darker than my initial paint test. And I may give plating another try as well. An actual metal plating would be really cool. But if it was THAT easy to metal plate 3D prints, everyone would be doing it. ;)
Adam Savage is planning to build a metal Hamunaptra key soon. It should be interesting to see how he tackles the process.
 
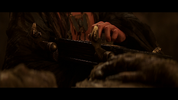
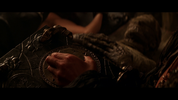
Here are some more screenshots if useful, there definitely seems to be a brighter color underneath that's disappeared from the prop as you said
 

Attachments

  • THE_MUMMY.Title0 00_06_2300002.png
    THE_MUMMY.Title0 00_06_2300002.png
    1.5 MB · Views: 124
  • THE_MUMMY.Title0 01_49_4800032.png
    THE_MUMMY.Title0 01_49_4800032.png
    1.6 MB · Views: 132
  • THE_MUMMY.Title0 01_41_3800012.png
    THE_MUMMY.Title0 01_41_3800012.png
    1.8 MB · Views: 121
  • THE_MUMMY.Title0 01_41_3600010.png
    THE_MUMMY.Title0 01_41_3600010.png
    1.5 MB · Views: 124
  • THE_MUMMY.Title0 01_29_1700043.png
    THE_MUMMY.Title0 01_29_1700043.png
    1.6 MB · Views: 120
  • THE_MUMMY.Title0 01_10_3800008.png
    THE_MUMMY.Title0 01_10_3800008.png
    1.7 MB · Views: 133
  • THE_MUMMY.Title0 01_00_0000007.png
    THE_MUMMY.Title0 01_00_0000007.png
    840.2 KB · Views: 132
  • THE_MUMMY.Title0 00_55_4000004.png
    THE_MUMMY.Title0 00_55_4000004.png
    1.6 MB · Views: 122
  • THE_MUMMY.Title0 00_47_4500029.png
    THE_MUMMY.Title0 00_47_4500029.png
    2 MB · Views: 132
  • THE_MUMMY.Title0 00_06_2600005.png
    THE_MUMMY.Title0 00_06_2600005.png
    1.8 MB · Views: 121
  • THE_MUMMY.Title0 00_06_2400001.png
    THE_MUMMY.Title0 00_06_2400001.png
    1.7 MB · Views: 124
Yes, I had noticed that the flaps were still brighter compared to the body despite paint degradation in the surviving Hero.

The brightest pictures of what you posted are the flaps. I wonder, then, if they didn't paint the flaps a bit different color than the body. The flaps seem maybe lighter and the body darker.

Another possibility is that they painted the whole thing darker, but from handling, some darkness paint wore off. Leaving it darker in some scenes and lighter if the scene was shot nearer to the end of filming. The surviving Hero is definitely mottled. Maybe some of that paint degradation happened during filming. That would imply that the whole thing was darker to start with.
 
Yes painting this is going to be tricky.........Are the files available yet =) My printer is all dialed in just waiting for this lol
 
The files are technically finished, but haven't been tested yet. I'd like to do the test print to see if anything needs adjusted before making the files available. Having trouble finding time to print : 2 Big pieces, and the 8 flaps and "ring" for the third print job. 3 days, each with time to print and watch that it doesn't mess up. I'm not one of those that hits print, and then goes to work. If I get up early on my next day off, I might get 2 of the print jobs done in one day. Fingers crossed.
 
Oh, hey. I'll go ahead and out myself for faulty thinking, because it might help others.

I woke up this morning with a realization that apparently my mind had been working on over night. When using an FDM printer, putting objects side by side doesn't significantly change the time to print compared to printing them one at a time.

But NOT true of RESIN printers. If two items are on the same platform, the time to print is roughly the same as printing ONE object. (the tallest object)

Translation : I put the TWO large objects on the platform to print at the same time, and it prints just as fast as printing the tallest one object. Potentially, I could do two print jobs in one day and get all three print jobs done. There are other concerns such as distance between objects on the bed, supports, and weight. But a person could put the top half, the bottom half, AND the flaps on the same bed, if you can fit them, and print all pieces at the same time. And it would still only take as long as One Piece. (awesome anime)
 
***UPDATE on Bronze***

As some of you know from following the OMNI threads, printing with metal from the available online services is pricey.
Even with little mark-up, Bronze-steel from imaterialise would be looking at about $1000.00 I was hoping for less, but it seems a design this size and complexity is in this range. I looked at Shapeways, and imaterialise, both. imaterialise was cheaper.
 
As cool as bronze piece would be, I’m okay with the finished resin (option 4).

Yes, on some things imaterialise is cheaper, and I thought it would be more affordable. But, it seems that hollowing it out did not significantly reduce the cost. Much of their cost must be due to size, so hollow doesn't reduce the overall physical size by much.
 
Yes, on some things imaterialise is cheaper, and I thought it would be more affordable. But, it seems that hollowing it out did not significantly reduce the cost. Much of their cost must be due to size, so hollow doesn't reduce the overall physical size by much.

I don't have an extra $1000 so I'll hold off on printing one.
 
Okay. It's January and a new year. The Holidays are over, and I'm coming back to this, as promised. One reason I had previously posted that I would come back to this in January is that I bought myself an 8k resin printer for Christmas. Halleluiah. :love:

I'm testing it out today.


Tried a metallic nail polish. Very metallic, but bit too gold, and it also flowed into the details and filled them up.
So, no go on that one.
 
Was that a metallic nail polish or was it nail polish powders? Indy Magnoli has a post about using powders to great effect. It looks awesome, weathers well, and you can get a pretty wide variety of colors if you look. It also looks different based on the base coat you use. I've used gold for a cheap kintsugi repair on some pottery.

Edit: here's Indy's thread
 
Last edited:
Yes, actually the nail polish SET which includes the powder. It reflects light off of it like it's true metal. Great for flat surfaces, but not precise enough to do the fine details in the key. The coat that the powder wants to stick to, flows into the grooves of the design.


key.jpg


key comp.jpg


I wish the color of the Hero key was still what it was originally. You can see GOLD parts, Brass looking parts, Bronze-ish parts. I picked one of the bit darker shades, but is it still too light? I tried filming it in dimmer light in the video.
 
Last edited:
Back
Top