Interest 'The Fifth Element' ZORG Industries ZF1 - Kit interest (Metal frame, metal & printed components, electronic movements and lighting effects)

Should have put 'polarity protection diode'! It stops your nice new circuit board puffing into smoke if you plug the battery in the wrong way round. Simple!

I hope you don't mind me mentioning my observations and questions. It seems like every time I do though, you've already got it addressed, or have plans to. If you'd rather me do it via DM just let me know. I just figure there might be more dummies like me out there with the same questions.

I am counting on the communities questions and feedback to help make the assembly guides and overall presentation of this kit as accessible as possible. Right now I have someone building one of my ZF1 kits who has never built anything like this before, and I am already discovering small helpful pointers that will be feeding back into the videos.


Regarding progression of the kits, I have packed up the first of the 'electronics box's'.

IMG_6400.JPEG


IMG_6398.JPEG


IMG_6399.JPEG


It contains:
  • 5 servos
  • Main Control Board
  • Front and Rear LED boards
  • Scope power loom
  • Main power loom
  • Trigger switch
  • Front and back slider switches
  • Yellow power button
  • Rocket fins
  • Darts
  • Conduit lengths
  • Top cannon barrel parts
  • Stainless steel rods
  • Threaded rod
  • Battery
  • Battery charger.
 
Latest user guide is up.

It details the electronic components, the Main Control Board, its setup and operation and initial servo setup.

This is the first video that needs to be watched, hence the Pt.1.


The purpose of this video is to become accustomed to how to setup and operate your ZF1. There are a few mechanisms that need adjusting once the prop has been completed and the Main Control Board will help you do that, without the need for pulling the prop apart and pulling your hair out.

It differs from the previous videos in that it has incredible live-action footage of my hands, behind black gloves. I have tried very hard to find myself a jacket similar to Gary Oldman's ZORG so that it looks as if he's telling you how to set up the ZF1 but alas, it has been to no avail.

As with all the other videos, this will be updated with new content, either with small video inserts or illustrations on the areas of the video that are still unclear so do not be afraid to throw some feedback back my way. It all helps create a much clearer picture for everyone!
 
Last edited:
Just watched it. Awesome! Makes sense even to ME! :)
I'm sure I'll still have questions once I get it in my hands, assemble, and test it out. I was going to ask you if the board is accessible once everything is fully assembled, but I see you even thought of THAT and mention at the end of the vid that it is. Genius!
Again, REAL nice work on EVERYTHING! A marvel of engineering! Tell your brain I said "well done!" ;)

Chris
 
"I have tried very hard to find myself a jacket similar to Gary Oldman's ZORG so that it looks as if he's telling you how to set up the ZF1 but alas"

Okay, if anyone does a really professional sounding Gary Oldman as Zorg impression, now is your time to shine.
Just sayin.
 
Hello everyone,

I have a small update regarding kits.

The standard kits have all been shipped and will be with purchasers soon if they're not already.

The DX kits are all well into production. I am very pleased to say I have finally managed to get the SLA printing side of production working reliably enough that some parts are easier to print and send out directly, instead of taking moulds and casting them out.

Here are some pictures of the SLA parts (printed in black because they are either finished in black, or aluminium so look best with a black undercoat)

IMG_6531.JPEG


These are the torch holders. It is a fairly complicated part to cast so I have decided to print them on my SLA resin printer and use them as production parts.

IMG_6533.JPEG


Pictured components include trigger bodies, knobs, nozzles and screen surrounds. They are all absolutely gorgeous to look at and the detailing is remarkable. I'm very happy and I know you will be too. There are enough parts here for 8 kits so more to print still.

IMG_6535.JPEG


This is a part of the flame igniter component, modelled directly from a Butane Micro Torch I used on my original ZF1. These parts all slot together to make up the igniter component.

IMG_6536.JPEG


Finally I have a picture of the more iconic parts of this prop; the Voyager hull, Estes rocket tip and slotted rocket vent and ring. These parts are going to be mould and cast. I have designed and printed the mould jackets and will be pouring silicone this weekend. If all goes to plan I hope to be shipping the first DX kits out by the 31st January.

Thank you so much for your patience, I think the wait will be worth it for you guys.

For anyone who bought an assembled ZF1, I will be starting assembly as soon as the DX kits have been organised, checked and sent off. You have not been forgotten!

Thanks for looking!

Jake
 
I have started sending off emails for deposit remainders as the first batch of ZF1 DX kits are very nearly complete.

I will need these paid before I can ship the boxes out.

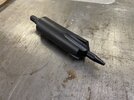
I will have more pictures of complete kits up soon as I finish casting them but for the time being here are some pictures of some of the metal turned components and metal barrel pistons complete with proper rod-ends.

IMG_6592.JPEG


There are a number of parts that are easier to SLA print then mould and cast. The rocket bodies (black objects to the left of this picture) and the scope 'voyager hull' bodies are good examples.

IMG_6591.JPEG


This is one of the barrel pistons. I have included the rod ends in the DX kit as an extra bonus for you guys as I think they elevate the whole thing just that bit more.

Thanks for looking!

Jake
 
this is actually something I would love to do on mine. would it be easy to remove the bottom part of the ZF-1? I guess the lining has to be unglued though
 
6D75FB74-9AF3-4D79-8901-C6F1844A92BD.jpeg


67777FC4-22ED-4509-AF65-E131494110E0.jpeg


To demonstrate (Grip is white as it has been primered ready for casting) The aluminium cover hides the threaded steel rod that runs through the grip and helps provide added structure to the prop.

I deemed this necessary due to the added weight from the extra metal and resin components, although ALL ZF1 kits and assembled ZF1s will have this addition.
 
Hello everyone,

I finally managed to take a group photo of the Deluxe kit upgrade components.

IMG_6649.JPEG


As you can see there is a mixture of metal and resin components, with half the smaller resin parts being SLA printed.

Since most parts are finished either black or aluminium, I have opted to use pigmented black resin where ever possible.

Below are some pictures of single parts..

?hash=85a6d217ae03c07b9e999ae3423e4eec.jpg


IMG_6651.JPEG


IMG_6652.JPEG


IMG_6653.JPEG


IMG_6655.JPEG


IMG_6656.JPEG


IMG_6647.JPEG


This is the upgraded main barrel (or the rear half of it at least) with the upgraded barrel piston and piston base.

Below is the mould for the gun grip and a fresh casting..

IMG_6639.JPEG


I have opted to cast the threaded rod into the resin, as per my original ZF1. This provides a massive strength increase to the prop to help support the extra weight..

IMG_6640.JPEG


...In conjunction with the resin trigger and rod cover it really looks (and feels) very good.

IMG_6641.JPEG


Below is a picture to demonstrate the amount of parts I have been casting out over the last 4 days. I am still not quite finished!

IMG_6645.JPEG


To all buyers of the DX kits and assembled ZF1's, I just want to say I really appreciate your patience. As you can see there are a lot of parts to make and I am getting through them as quickly as I can. I'm looking to have the packages ready for shipping within the next 2 weeks, but the main thing is making sure everything is together and to the high quality you all expect. I'm sure you will not be disappointed!
 

Attachments

  • IMG_6650.JPEG
    IMG_6650.JPEG
    991.8 KB · Views: 62
Excellent work! I can't wait to start working on this project.

I had a chance to view a few of the assembly videos and I must say that the engineering that went unit this build is incredible.

The true talent and artistry that can for found on the RPF never ceases to amaze me.
 
Are the voyager etc parts cast from original kit parts or 3d prints?

Have you considered making an add on module to make the gunfire sounds/muzzle flash?

Will you be making a 'closed' version pod?
 
Parts are modelled using bought voyager kit parts off my original fibreglass/metal ZF1.

The scope is printed using an SLA resin printer, as this also allows fixing points and grooves for the frame to be included within the body of the scope. Moulding and casting in resin the traditional way was considered, and I spent 2-3 days working out how to create a 5 part mould for this purpose, however I decided it was just too complicated for a result I wasn't guaranteed to get so went down the SLA print path.

The lower detail parts are again accurately modelled from Voyager kit parts, and SLA printed with fixing points, however these have been mould and cast in black pigmented resin as the cost of SLA resin and time it would take outweighed cost of silicone/resin and mould making labour.


Regarding the add-on module idea, yes I have. I'd like to add sound effects (if I can find someone who can rip or create the sound effects from the film) and I'll also being looking to create an AK74 airsoft rifle upgrade kit. This will enable you to fire BB's but also regain the cool movement effects from the servos.


I have a closed pod 3D model too. If anyone would like a printed copy of this please DM me and I can arrange shipping. I think I sold the last one for £75 + PP if memory serves.
 
I have updated the DX parts listing.

I have reached the packing up stage now. I have a few spots left on the next batch of kits so if anyone would like one, let me know. This process should go a lot faster now.

Thank you!

Jake
 
Does anyone (Jake or other viewers) know how to get that spattering/dotted effect for the shell? It's not just a little spatter, like you might do with flickering of a brush... it's a lot and VERY uniform (see attached photo of original ZF1).

There used to be some spray paint (and maybe still is) that gave you a spattering effect, but it was very bumpy, where this seems very smooth. Anyone who's seen the original in person, please let us know if you remember it the spatter being "even" or smooth with the base paint, or more textural/3D.

Appreciate any insight on this. :)
 

Attachments

  • Lft26.jpg
    Lft26.jpg
    212.1 KB · Views: 74
Hey,

Yes it's called a 'speckle' and I've used it usually on architectural models to create texture in the finish (great for simulating concrete for example).

It's easy to create, you just want to have a piece of scrap material nearby to practice on first before starting.

With a spray gun, you lower the air pressure almost until it stops completely, then set your trigger so it barely releases any paint. The lower the pressure, the bigger/coarser the spots will appear (until the gun is literally just spitting out globs of paint); the higher the pressure, the smaller/finer the spots become. You have to adjust the spray gun's air and paint feed to get the desired effect.

You can also achieve a similar effect with aerosol paints, but you do this by misting the the object from far away, and adjusting the paint flow to get the effect.

A nice speckle effect is usually achieved with 3-4 different colours of paint, and built up in layers. There's the base colour, which is not a speckle, and usually a lighter colour and a darker colour which are speckles, or maybe two lighter colours - it's up to you to achieve the desired effect.

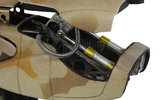
In the case of the ZF1 shell, there is the base tan colour, a medium brown speckle, dark brown speckle and then the base tan colour speckle (this pulls everything together and can help dilute some of the other camoflage colours)
 
Last edited:

Your message may be considered spam for the following reasons:

If you wish to reply despite these issues, check the box below before replying.
Be aware that malicious compliance may result in more severe penalties.
Back
Top