lastly, I'm sure the videos will be needed for the assembly, and although they are a bit slow I think, they look great and very clear so far
")
However, I have had no help so far to disassemble the assembled ZF-1, and it's been extremely straight forward! I went slow sometimes by fear of breaking something, but it was always easy and clever!
Thanks for the kind words Matt. Yes the videos aren't exactly summer blockbuster, Jerry Bruckheimer productions are they!
I am creating them with the phrase 'slow and steady' in my mind. The three I have released are prototypes so will be changed, as the most recent videos have a few new additions to help the builder after listening to feedback from the community.
I watched one of the videos and a thought occurred. What about what color things are supposed to be painted?
It's a good question! One of the last jobs I will be doing is to create a 'model aircraft' style camo drawing. Top, bottom, sides view with all the camo markings to help with placement of each camo shape. That will have each RAL colour so you can get some paint mixed up, or find a close matching paint already available. As for the components, well that'll be something we all have to work out together as I haven't actually painted a 'DX' kit myself yet so will be using my own experience and the experience of you guys to help create the painting guide for the next wave of ZF1 makers. I have ordered a lot of different types of aluminium paint, blue metallic paint and yellow and gold to try to find out what works and what doesn't.
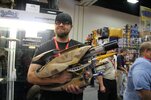
Absolutely phenomenal kit sir! I very much hope you'll be still making these Deluxe kits early next year, because I'll definitely be in the market for one.
Thank you! Yes I will be making more. I will be working over the christmas period casting out 40+ parts (per kit) in resin for the DX kits, with the Standard Kits coming in at well over 200+ separate parts per kit. The assembly guide videos are also being finished in my evenings.
My only thought after watching the first was the font, when rendered small on the part manifest screen, made it kind of hard to read the part names.
I will look into changing the font to improve readability. I think on the animated sections of the video it seems to be okay, even on my small phone screen, but on the 'need parts' section, I think the text could be bigger. I will change this in the final versions.
Thanks for being patient with me on this one guys! The standard kits are close to being shipped, and I will be starting work on the DX component casting in the next couple of days. My 4 printers are running 24/7, with parts coming straight off the beds and being bagged up, labelled and boxed ready for shipping.
I have also received the first of the latest (and probably last) revision Main Control Board.
This solves a few issues, and adds a couple of new features, including low voltage indication (the prop will flash when battery voltage falls below 5.8V), colour coded plugs for easier assembly, a dedicated 'servo trim mode' button on the board for tuning of servo positions and easier to access servo trim potentiometers. These will be packed as standard on all kits and I will be providing a comprehensive user guide as part of the assembly instruction videos.
Thanks for looking.
Jake