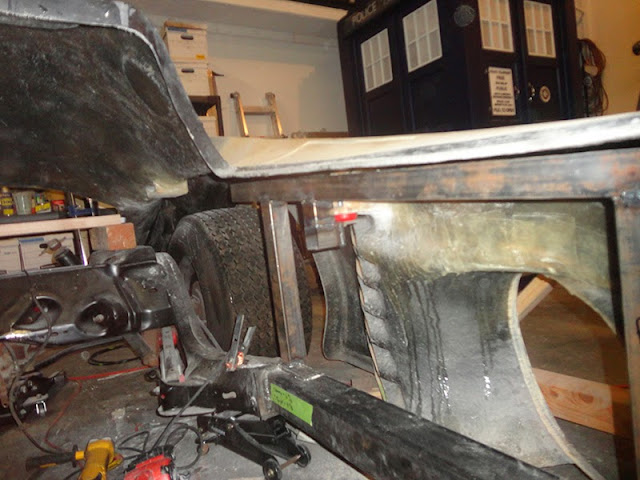
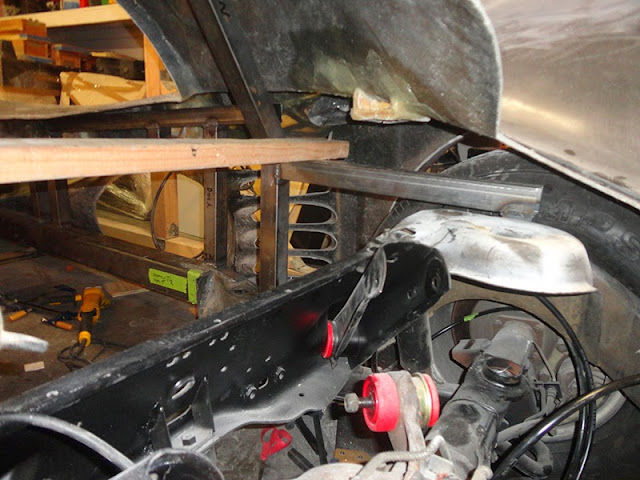
The 89 MattMobile Build Thread.

Matt,

Things are moving on very nicely! Do you have an estimated completion date or is it a "it gets done when it gets done" type of project? Either way its looking great brother!

Yeah the latter. Lol. I have set some personal deadlines in my head, but we shall see.


Sent from my iPhone using Tapatalk
 
New blog post with today's progress. Some box glassing, and a bunch of messing around with the fenders. Definitely worth a read if you want a cautionary tale about Batmobile building.

The Project Workbench: Fender Work and Support Boxes

shell.jpg
 
Great stuff Matt. Your Batmobile is going to be a real treat when it's done.

It's eerie seeing what some of this stuff was part of before it got bolted to the cars for the movie. I thought the front nozzle was scratch built, but the special effects team used a legit nozzle from a Rolls Royce Viper 203 Turbine, and the afterburner on the rear was from the very same turbine... although it was fixed with a cover & plates etc.

rolls-royce-viper-turbojet.jpg

bristol-siddeley-viper-11.jpg

e39e8e8e-8433-4225-9a5f-8964.jpg

oneo.jpg

cinefex1.jpg

onstarrear2.jpg
 
Last edited:
I just tried West System's resin for the first time on your recommendation, Matt. The first two sections of a mother mold I just laid up were in 3m polyester resin; the third is West System's epoxy. You really do get what you pay for! Between the hugely reduced fumes, the pump measuring, and the consistency of the product, there's no contest. Thanks for the tip!

A WB rep once let me sit in the keatonmobile and take pictures of anything. I have shots of the dash, the screens and mesh patterns underneath most of the cutouts, even the afterburner on/off switches under the "gas cap" on the driver's side rear fender. Unfortunately, I was a very green photography student at the time - the shots are in black and white and not everything exposed perfectly. I think there may be some good reference in there that'd be hard to find elsewhere though! I'll scan the good ones in case there's anything in there that might help you.
 
While waiting for BTW to arrive to do some welding, i started looking ahead to other issues. Ive mentioned before that the shell has much wonkiness to it. No disrespect intended to the seller/maker, just the nature of a casting this size.

The rear wheel wells are far from perfect circles, and even if they were, its proving to be impossible to center all four wheels in their respective wells.


MATT - Persevere and you will get there....it is a long road.
 
Last edited:
Don I remember hearing someone else over the CLTC about the $8k kit being "too good to be true" and recall someone messaging me stating they had the kits ready to go for said price. As a rank newbie in the club and no where near ready to make such a commitment, I politely declined.

I know there are some guys (Rusty comes to mind) who got a really great body kit and made a great looking car.

I'd be interested to know when you do opt to offer a wonky-free kit :)
 
The other day I spent about 8 hours doing something that I thought was going to be about a one hour job. This turns out to be pretty typical for me :D

The goal was to install t-nuts into the centers of each of the shell mounting blocks that I installed earlier. Sounds easy enough. The trouble is that most of the blocks were not easily accessible. I could not drill a hole into them because the drill wouldn't fit. I couldn't hammer the t-nuts into place because there was no clearance in which to put the hammer. Just an all around nightmare, though two of them went in pretty easily.

BUT, the truth is it was actually a lot of fun, as it was pretty much just problem solving all day long, which is the thing I love most about the process.

Also, we now have all of the mounting arms welded together with all of the necessary holes drilled. Just drilling the holes in quarter inch thick steel took more than an hour.

Next step is to get the chassis and shell all lined up again, then start welding the support arms into place.
 
took my first stab at learning to weld the other day! Pretty ugly results, but hey, it's a step in the right direction.

welds2.jpg
 
From one kiwi to another, I thank you for the kind words :D

From what everyone tells me, there's really nothing to it other than practice. So I just need to get on it.
 
UNGODLY amounts of progress over the past two days. I have turned into a welding fool. I'll cross post some pics later, but I'm too tired right now. Check out this blog post for TONS of pictures.

The Project Workbench: Mucho MattMobile Progresso

I'm really happy with the amount of progress I've made this week. The shell is ALMOST mounted on the frame as of right now. The goal is to get it all locked down by Sunday night of this week. Wish me luck!
 
THis image concerns me Matt,

rear+fender+post.jpg


It looks like it is supposed to be structural but is definitely not the best, or safest way to go about it.

I would suggest continuing the original boxed steel frame all the way to the mount at the very rear. Now I understand I am looking at a work in progress and for all I know this is just temporary but I have actually seen people drive cars with work like that and one good bump and it breaks apart and someone usually ends up in the hospital. I will say though, for a first time welder your welds look beautiful!!!

Please don't think I am being a know it all or anything like that, I am just concerned for you and your passengers safety and just offering an opinion. :)
 
I'll offer a fabrication suggestion that I hope is helpful;
wherever possible, use triangular shapes for stiffness.
A square can become a parallelogram and a circle can become an oval,
but once the sides are set, a triangle can't change.

In the example above


the extension can be triangulated off the frame, and the "L" bracket can be stiffened with a triangular tab welded to one side.

Hope that is helpful,
Mike
My Firefly/Serenity Collection:
SerenityMovie.net :: View topic - Firefly/Serenity Weapons Collection
 
lol. appreciate the feedback and insight, though worth mentioning that in my blog, i specifically reference that photo and point out that it needs reinforcement, and gave explanation about why I did it that way :D

BUT, please don't let that thwart you from giving feedback. For everything I catch, there will be a million and one things I miss.

A lot of the fabrication work I'm doing right now is limited by the fact that the shell is ON the car. Once I get everything worked out, I'm going to pop the shell off and do more welding (most of the outside seams are untouched) and adding in of structural support.

- - - Updated - - -

Here's a jig I put together to hold one of the side supports steady while I welded.

drivers+side+jig.jpg


Here's how the drivers side looks right now.

drivers+side+support+posts.jpg


And a good aerial shot.

aerial+view+mattmobile.jpg
 
Back
Top