You are using an out of date browser. It may not display this or other websites correctly.
You should upgrade or use an alternative browser.
You should upgrade or use an alternative browser.
The 89 MattMobile Build Thread.
- Thread starter MattMunson
- Start date
-
- Tags
- batman
Had to split my time a bit today between packing/moving and work. Much of my time in the shop today went towards a different project, one that has been back burnered for years, but is finally coming together.
On the MattMobile front, today I glassed up two more support boxes, both of which will next be mounted inside the shell. These two are going to go in the hood. I also picked up a bench grinder. I mounted my vice to my work bench today, which is something I've been meaning to do for a while now, but never had a specific need for it. BUT, now that it's approaching the time to start cutting steel to make the shell mounts, I decided it was necessary.
I move into my new place on Tuesday, which means the next few days (and possibly week) will be a bit nuts, but I really am riding a good wave of momentum right now, one which I would like to see continue.
Joker Laugh
Jr Member
Holy cow!!!!! This is awesome ^_^
Lots more work today. Yesterday i finished glassing up two more support boxes, and tonight I glassed them into the shell. LONG and tedious work. These two went in under the front part of the gun door opening and were very difficult to access from the inside. Lots of contortion going on!
But they look really nice, and i can see how much my fiberglassing skills have improved over the past two weeks. Much cleaner and smoother, fewer bubbles.
Sent from my iPhone using Tapatalk
But they look really nice, and i can see how much my fiberglassing skills have improved over the past two weeks. Much cleaner and smoother, fewer bubbles.
Sent from my iPhone using Tapatalk
Mr. Munson.
I have just read the entire topic (all 157 pages via the mobile app) And well, I just wanted to say it's a fantastic read. The detail you go into is great. Really makes the whole project come alive in a way pictures alone can't do. Sadly theres no 25foot garages near me or I might be tempted to import a shell. But I digress, I just wanted to say thanks for sharing this build with every one")
It's amazing seeing it come to life.
Now If you'll excuse me,I'm off to plasti dip my returns chest piece,this threads given me the kick to start working on it again.
Sent from my GT-I9505 using Tapatalk 2
I have just read the entire topic (all 157 pages via the mobile app) And well, I just wanted to say it's a fantastic read. The detail you go into is great. Really makes the whole project come alive in a way pictures alone can't do. Sadly theres no 25foot garages near me or I might be tempted to import a shell. But I digress, I just wanted to say thanks for sharing this build with every one
It's amazing seeing it come to life.
Now If you'll excuse me,I'm off to plasti dip my returns chest piece,this threads given me the kick to start working on it again.
Sent from my GT-I9505 using Tapatalk 2
Denton, thanks so much for the high praise, and DOUBLE mega thanks for taking the time to read through the entire thread! I hope that means you've also watched every episode of Rise of The MattMobile also!! If not, then you've got more homework to attend to
Bo The Welder and I put the finishing touches on another project tonight, a full restoration of a Harley Davidson.

Here's a link to MANY more pics.
The Project Workbench: Harley Davidson Ultima Restoration
Bo The Welder and I put the finishing touches on another project tonight, a full restoration of a Harley Davidson.
Here's a link to MANY more pics.
The Project Workbench: Harley Davidson Ultima Restoration
Chevyh0tr0d
Sr Member
I move into my new place on Tuesday, which means the next few days (and possibly week) will be a bit nuts, but I really am riding a good wave of momentum right now, one which I would like to see continue.
When is the house warming party Matt, I am sure many of us still remember your last 1? Damn cops on a Saturday night @10pm ruining it for all of us!!!
lol. No plans for a housewarming party quite yet. Still need to get moved in first!
I just put together a giant blog post that has a lot of photos that haven't been posted yet, and also kind of consolidates a lot of info about what's been going on for the past month. If you've fallen behind on MattMobile progress, this is the blogpost for you:
The Project Workbench: MattMobile Update - Support Boxes and Misc.
Example:
Attachments
I will post a pic when i get to the next step. Hopefully that will answer some questions
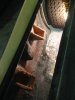
Today i moved! I now live in downtown LA, right next to FIDM. if youre ever in the area, be sure to look me up. Heres a pic from my balcony. Looking forward to putting the tardis out there.
p
Sent from my iPhone using Tapatalk
Today i moved! I now live in downtown LA, right next to FIDM. if youre ever in the area, be sure to look me up. Heres a pic from my balcony. Looking forward to putting the tardis out there.
p
Sent from my iPhone using Tapatalk
This is all great news! And you are even closer to us north-of-LA types now, too!
Hopefully our paths will cross again sometime soon. Been far too long, dude!!
Today has been fairly productive. Been cutting lengths of 2x2 steel and grinding them to right angles. Painstaking work, for sure. Im cutting out the steel needed for the support arms for the shell. My goal is to get them all cut before the end of the day.
Sent from my iPhone using Tapatalk
So you moved to LA, but the Matmobile is still in OC? Is that a big drive?
With no traffic, its about 45 minutes away. Which isnt really all that bad. Its farther than id like, but well worth the trip every time.
Sent from my iPhone using Tapatalk


Lots of progress today. I put the shell on rollers to allow easier placement over the frame. Turns out thats a tough game.

While waiting for BTW to arrive to do some welding, i started looking ahead to other issues. Ive mentioned before that the shell has much wonkiness to it. No disrespect intended to the seller/maker, just the nature of a casting this size.
The rear wheel wells are far from perfect circles, and even if they were, its proving to be impossible to center all four wheels in their respective wells.

Ive plotted out the size and location of the opening I want.

I next made a jig to use w my router to cut a circle of the correct size. I will then use that circle on both passenger and driver side as a buck to lay in a new wheel well made of fiberglass.

Hope that makes sense w these limited progress pics. Bottom line: another productive day at the shop!
Sent from my iPhone using Tapatalk
While waiting for BTW to arrive to do some welding, i started looking ahead to other issues. Ive mentioned before that the shell has much wonkiness to it. No disrespect intended to the seller/maker, just the nature of a casting this size.
The rear wheel wells are far from perfect circles, and even if they were, its proving to be impossible to center all four wheels in their respective wells.
Ive plotted out the size and location of the opening I want.
I next made a jig to use w my router to cut a circle of the correct size. I will then use that circle on both passenger and driver side as a buck to lay in a new wheel well made of fiberglass.
Hope that makes sense w these limited progress pics. Bottom line: another productive day at the shop!
Sent from my iPhone using Tapatalk
Similar threads
- Replies
- 16
- Views
- 2,153
- Replies
- 1
- Views
- 490