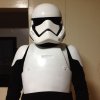
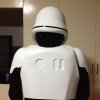
TFA Stormie Armor

Not the most exciting WIP pics ..........but we finally got the yoke/back armor as well as the knee plate molded. Another pic showing some work on detailing the shins to get them ready for molding.

Mardon (MLC)

View attachment 506865View attachment 506866View attachment 506867View attachment 506870


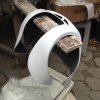
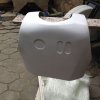
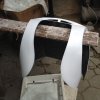
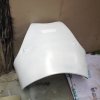
Out of the molds above, we finally pulled fiberglass products for 2 x knee armor and for the yoke/back armor. None of them are 'cleaned' yet, so they will still take some sanding and bondo any small imperfections. I just had them washed with minor white paint. The front armor got the same wash as well from the black gelcoat color posted in the previous page of this thread.

Mardon (MLC)
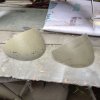
IMG_2577_zpsphnrlyba.jpgIMG_2575_zpsmnjm0rfr.jpgIMG_2574_zpshy3qbvpv.jpgIMG_2573_zpstlssitgd.jpgIMG_2576_zps5ipmyzap.jpg
 
Last edited:
Curiosity naturally got the best of me so out came my black lycra (yuck! - itchy!), neck seal, a roll of masking tape........and called my wife upstairs to bring down my phone and to tape parts together.
Please excuse the following pics as they were hurriedly taken and all being held up by just masking tape. The last pic shows the card ab armor Im still developing ...............and about 2 seconds after that last pic was taken, front armor fell to the floor! :D

Mardon (MLC)
 

Attachments

  • IMG_2596_zpsump8jaux.jpg
    IMG_2596_zpsump8jaux.jpg
    229.4 KB · Views: 234
  • IMG_2590_zpsx1kkdwoc.jpg
    IMG_2590_zpsx1kkdwoc.jpg
    233.1 KB · Views: 169
  • IMG_2604_zps0bfnsjv6.jpg
    IMG_2604_zps0bfnsjv6.jpg
    187.6 KB · Views: 214
Last edited:
For the past 2 days it seems I'm having difficulty in posting pics. Im trying a small file to check.

Here's the ab armor prototype in card.

Mardon (MLC)

Untitled-1 copy.jpg
 
looks as if you are almost complete now Mardon , just out of curiosity how many man hours do you think this project has taken?
 
looks as if you are almost complete now Mardon , just out of curiosity how many man hours do you think this project has taken?

An interesting question, but sadly one that I cant simply answer. My first post regarding these armors was May29, thinking that atleast I was almost done with the helmet. My next post was exactly a month later with card armor parts. What happened was, I revamped my helmet completely by the start of June - so I worked on it till the point I was satisfied to be molded. When molding was done, then I proceeded with doing the armors. I cant answer the question about man hours 'coz I never bothered logging the time but the only answer I could give would be a little less than 2 months I guess. Some days I work on it for hours, some not at all. On and off.

Mardon (MLC)
 
Update:

Shins and cod molded. Pulled products from those molds and we even cut the shins so they could be wearable.
New shoulder bells being developed and later molded.
5 x Wipers for the E-11 blaster and a new end cap.

Mardon (MLC)


IMG_2623.jpgIMG_2624.jpgIMG_2625.jpgIMG_2626.jpgIMG_2627.jpgIMG_2628.jpgIMG_2629.jpg
 
Well it's admirable that you are not afraid to revise your parts as you go, must admit it would have taken me this long to trim and glue a vac formed kit let alone sculpt mold and cast these pieces, said it many times in this thread but will say it again, this looks awesome, good job :)
 
Appreciate your comments guys, thank you!

Going back to the blaster this time.......did the cutouts on the rear and inserted a bondoed tube to slide right in smoothly. Dry fitted some parts to check any problems.

Mardon (MLC)


IMG_2630.jpgIMG_2631.jpgIMG_2632.jpgIMG_2633.jpg
 
Update on spats:

Before molding the body of the spats, we first molded the left and right spats flaps. These flaps would overlap part of the spats to tighten them around the bottom of the shins.
Locking greeblies for all armors will be molded at a later date.

IMG_2640.jpgIMG_2641.jpgIMG_2642.jpgIMG_2643.jpg
 
Update on bicep armors:

Card bicep armors receiving a thin fiberglass layer to hold its shape. Next we would apply bondo, sanding it then finally molding it and casting a copy.


IMG_2645.jpgIMG_2646.jpg
 
New shoulder bells - actual fiberglass products. Above it are the previous smaller ones. Working on some helmet orders.

IMG_2638.jpgIMG_2639.jpgIMG_2644.jpg
 
Back
Top