HopeOfTheFuture
Active Member
Terminator 3: Aerial Hunter-Killer Drone
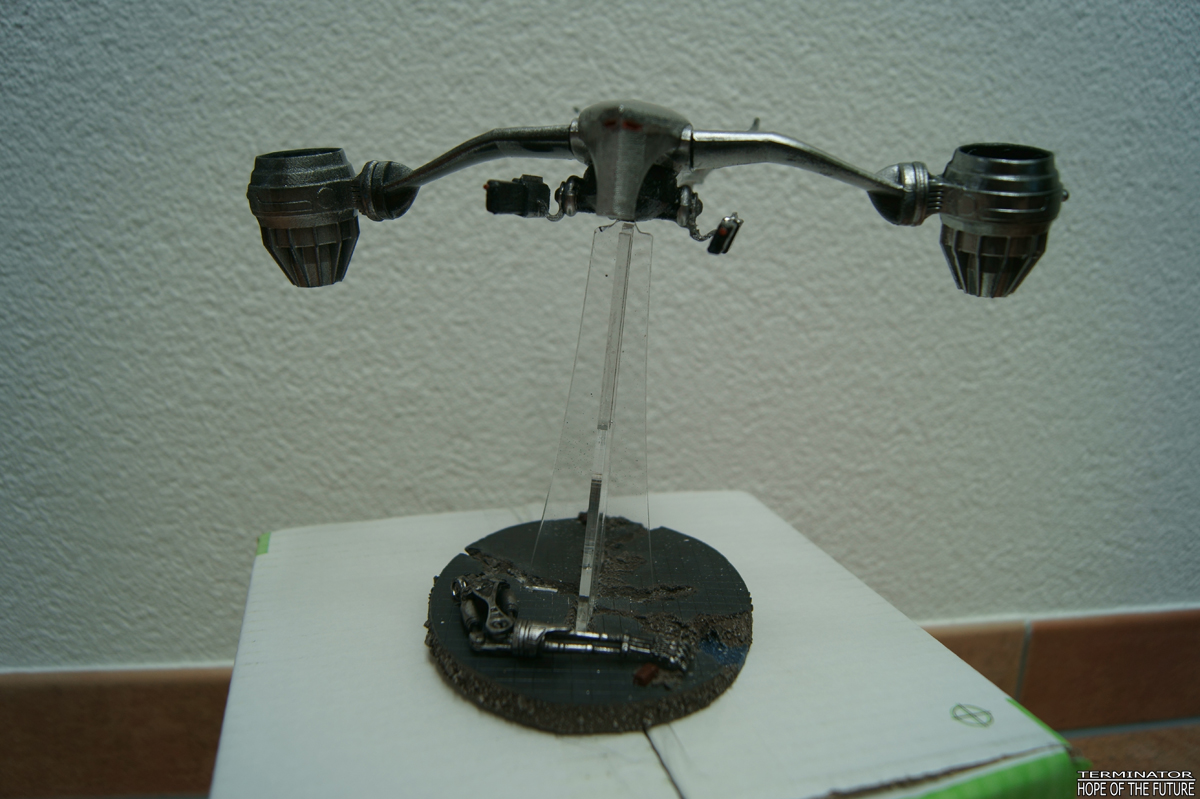
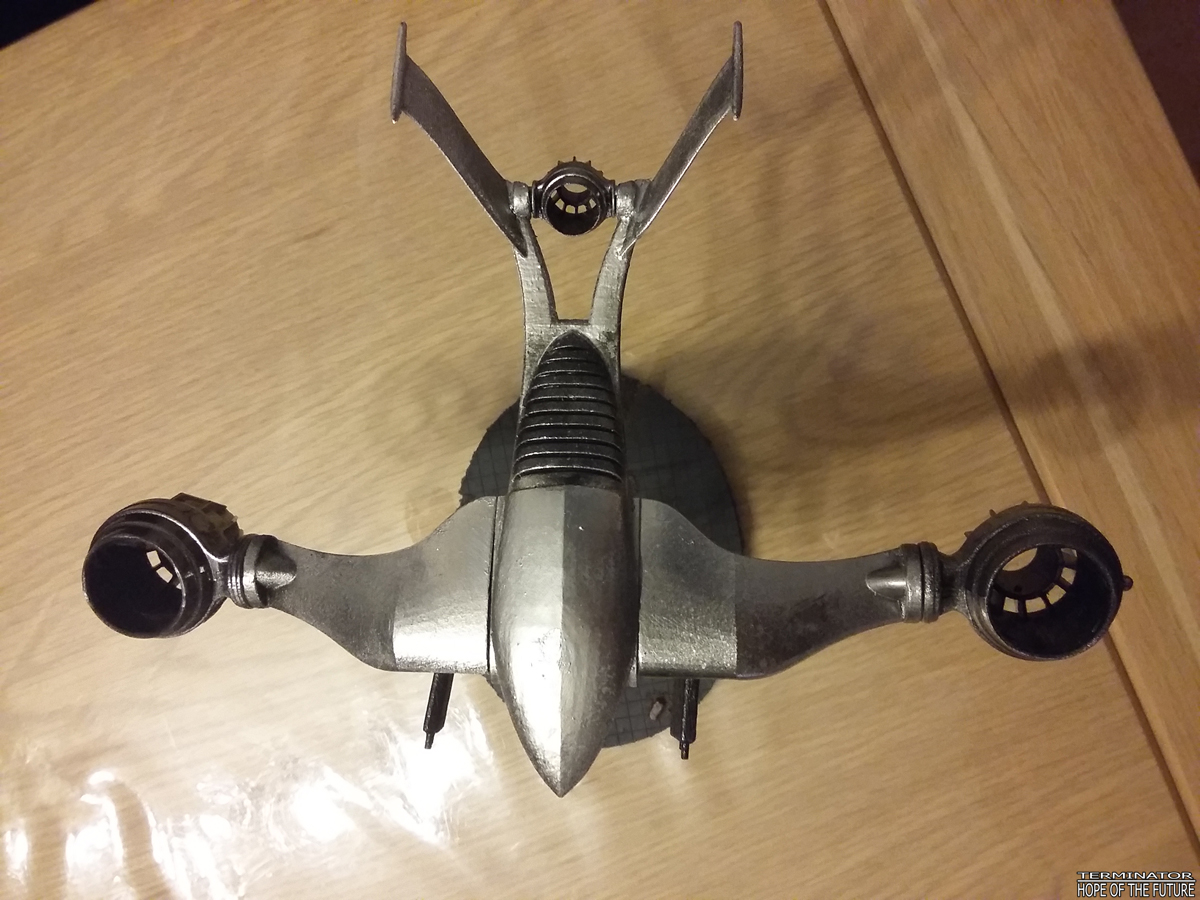
Final product:
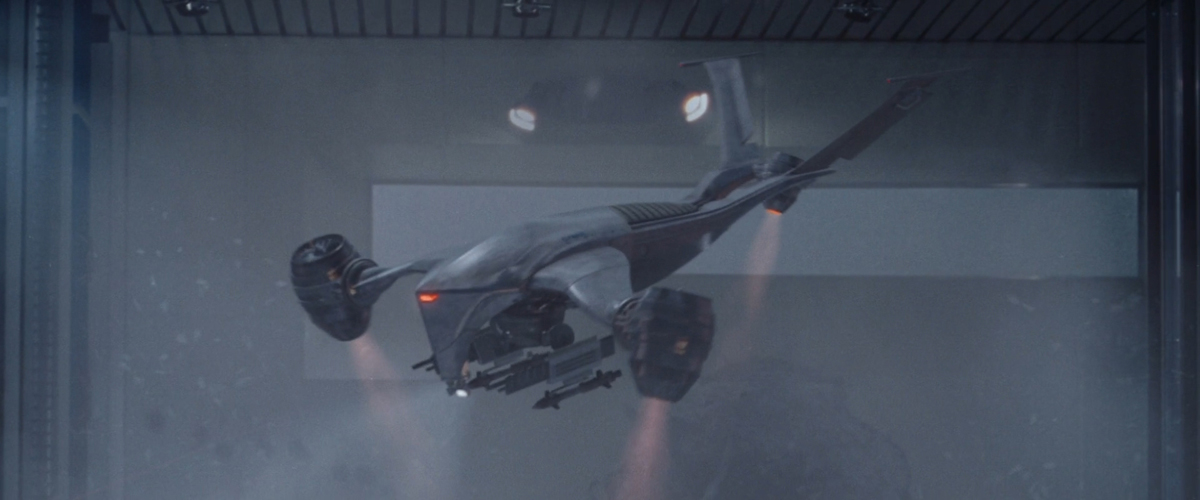
Here's the AHK of the movie:
Got my hands on this figure in resin. Unfortunately during the transport, the guns were broken off (and would cause a lot of problems during the cause of this project). I'm not really happy with the result. Like mentioned the broken guns. Also the paint job I did is mweh.... I had to grab the object a lot of times and this resulted in many finger prints and loss of paint on some areas. Even with a clear coat protection layer the paint got off too fast. :-(
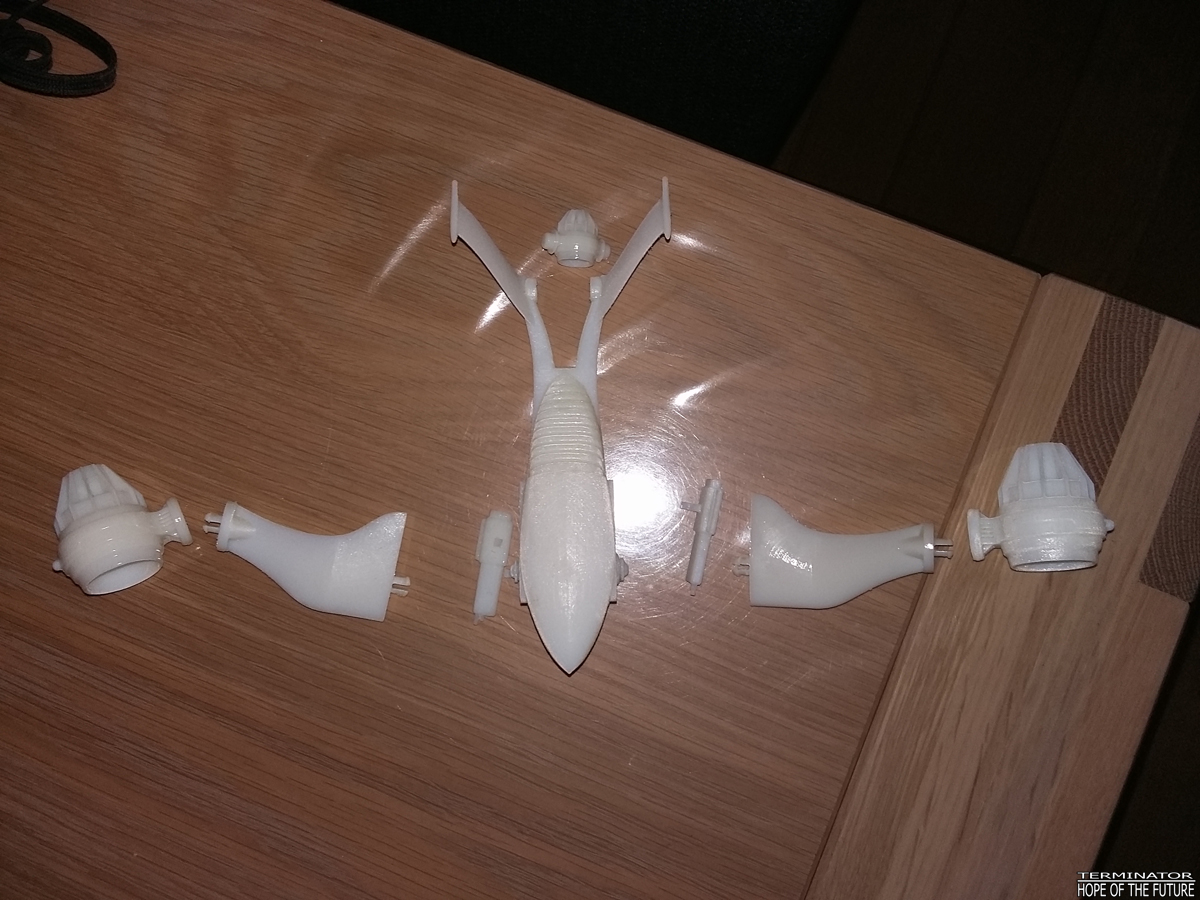
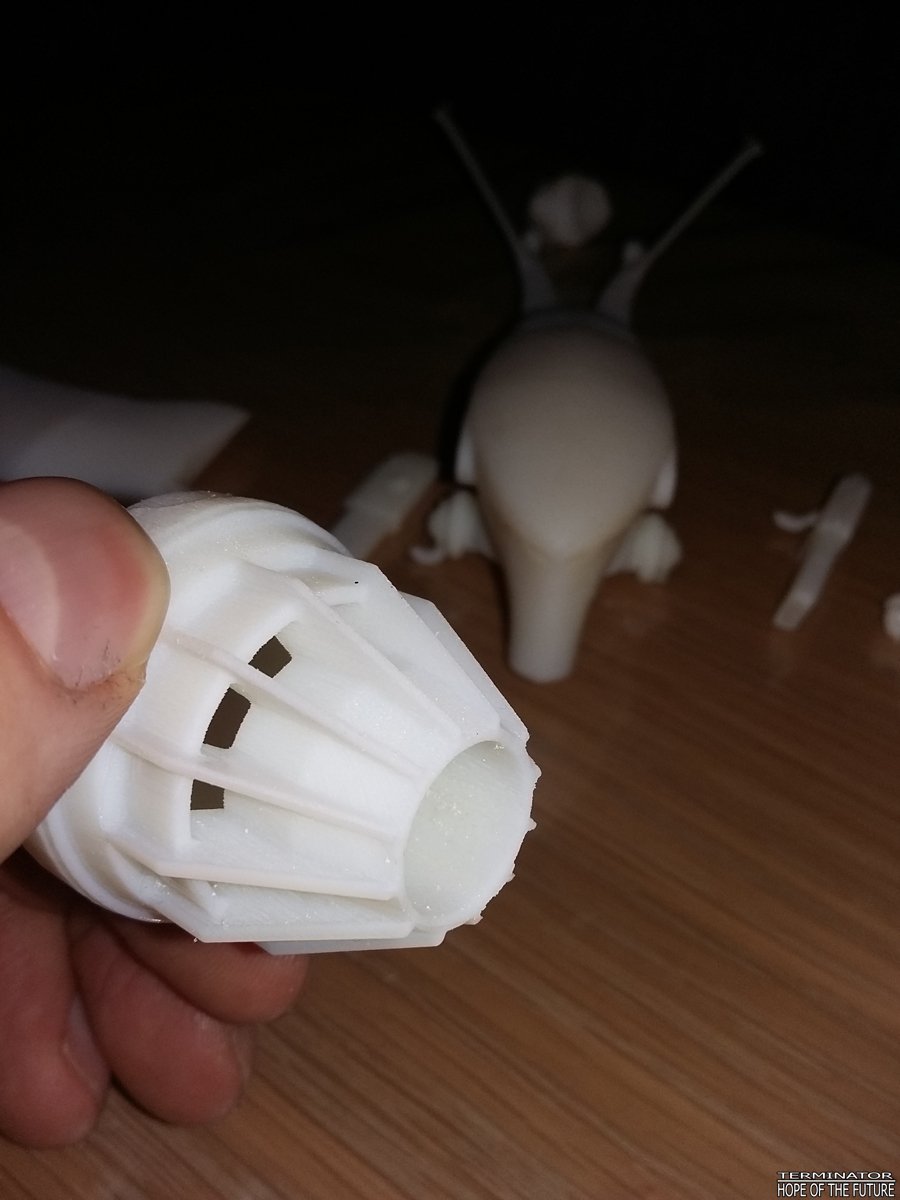
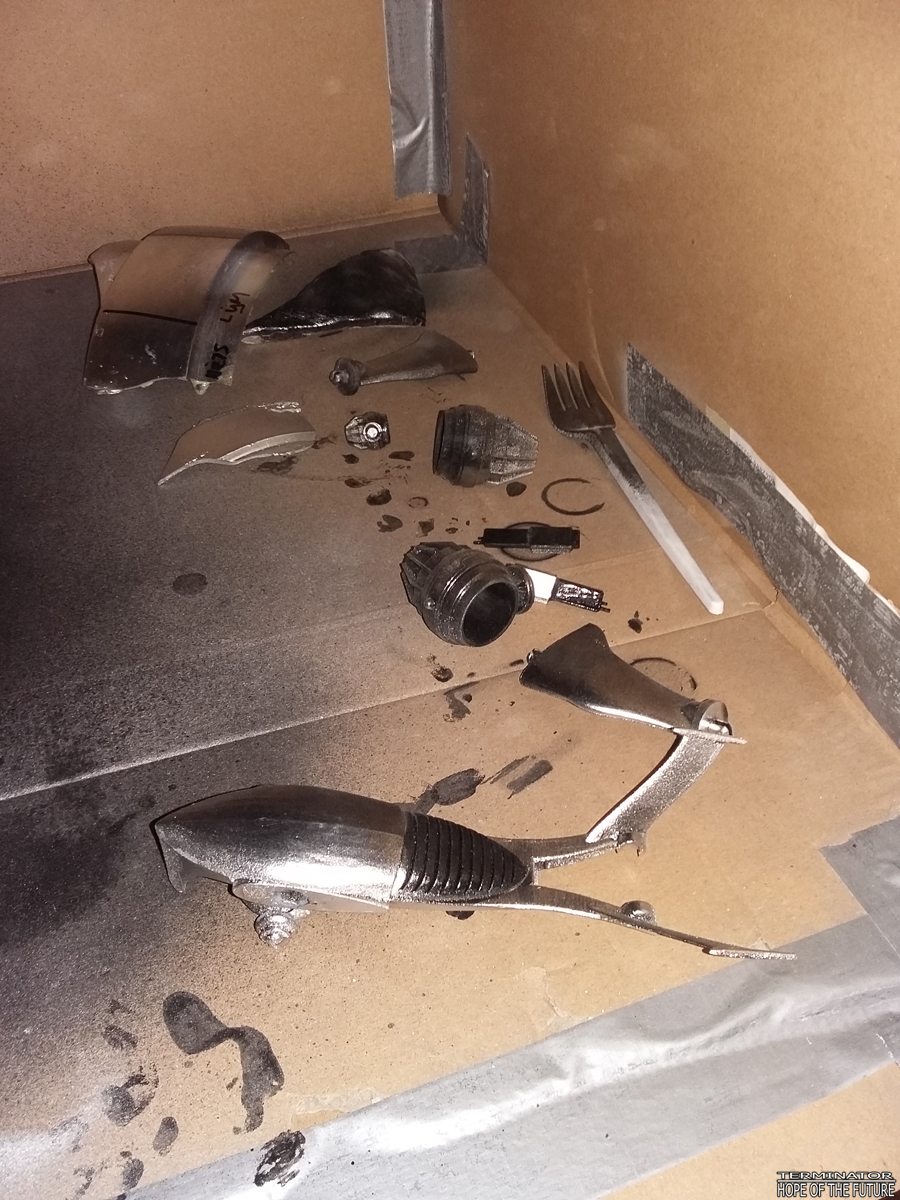
Here's the figure to start with. The guns should have been attached to the body. Broken off during transport. Disappointment #1
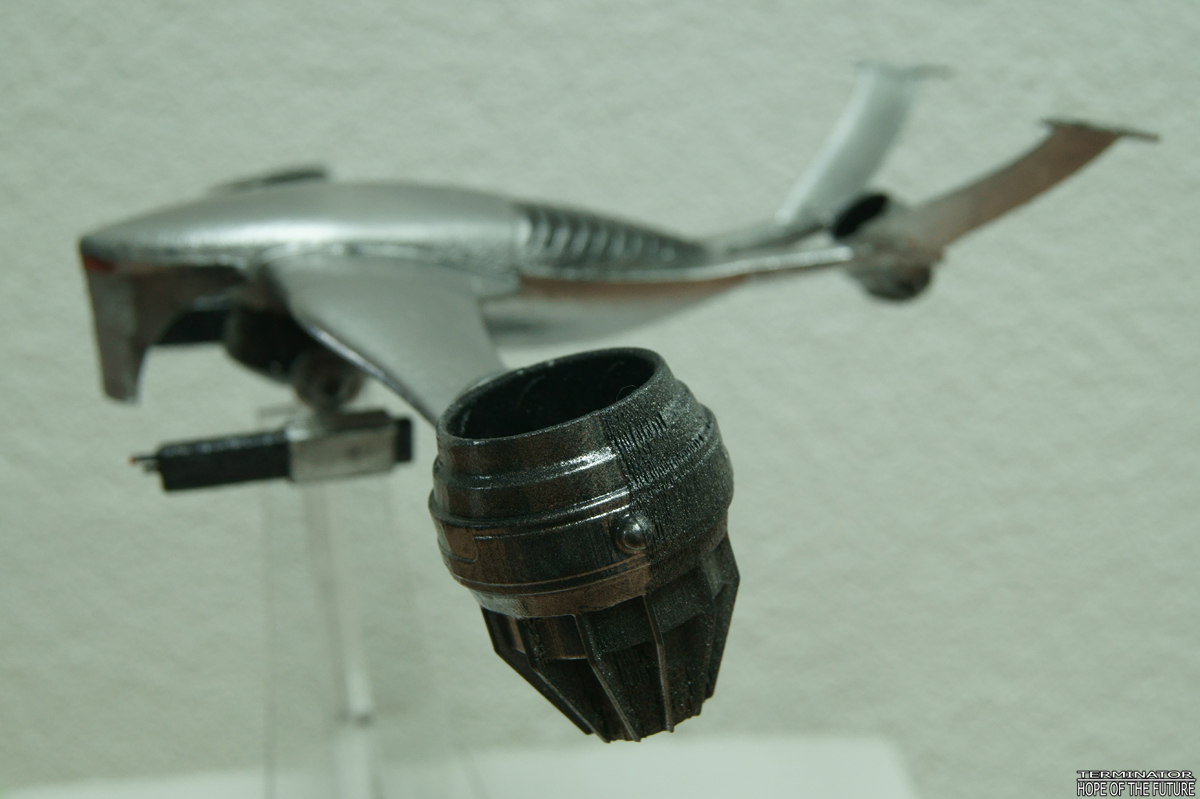
I gave the whole figure a black primer (Spaz Stix) and followed it with the Spaz Stix Mirror Chrome paint. Unfortunately it turned out more silver than chrome.
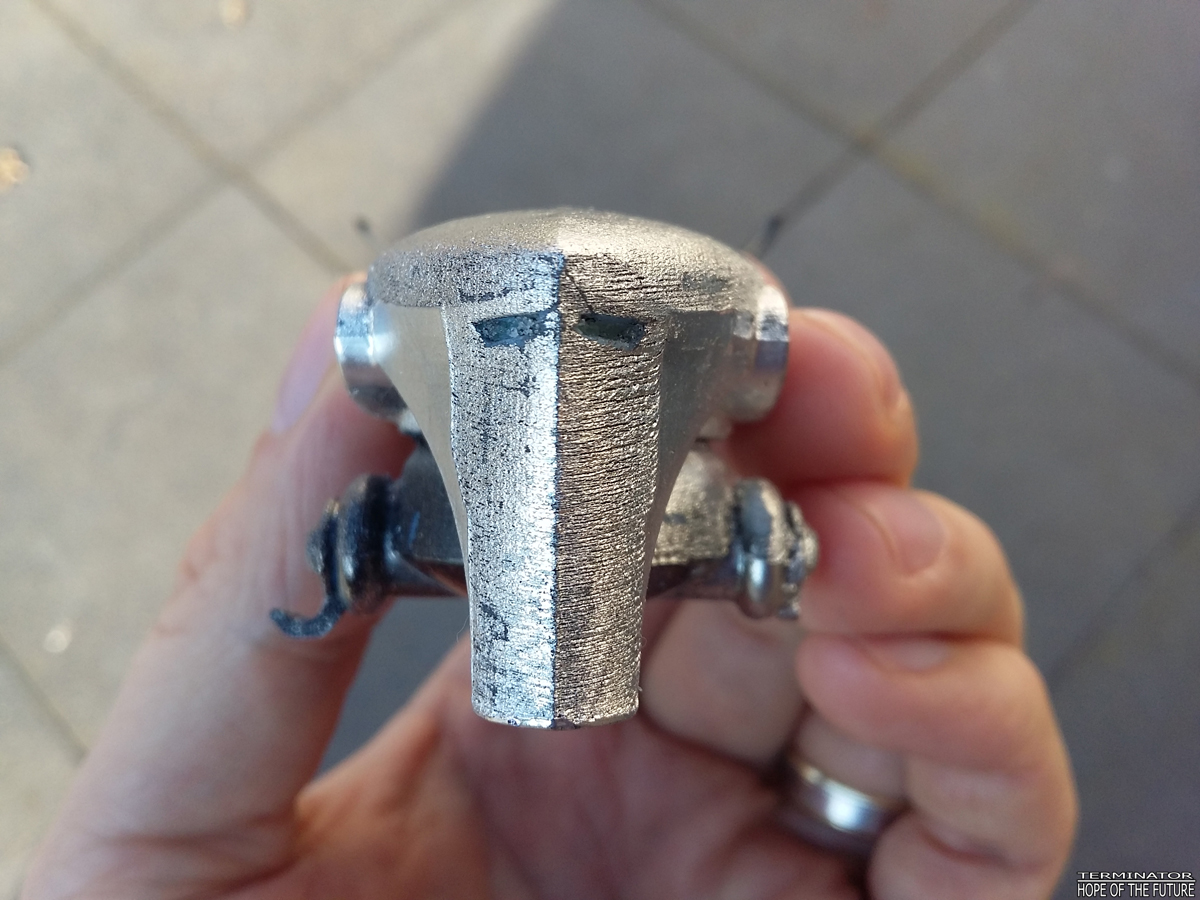
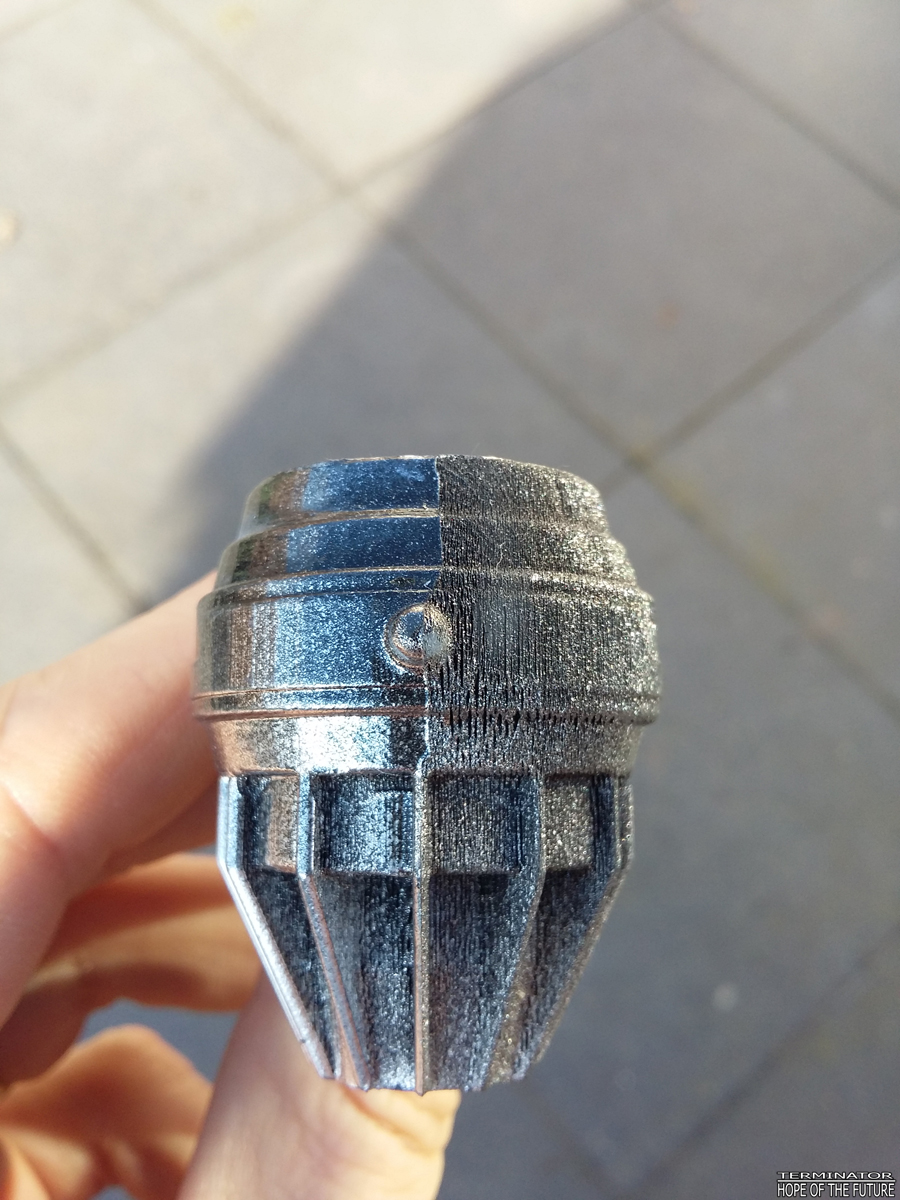
I have no idea if this is also part to blame on the structure of the figure. I could not discover any differences in the structure of the figure, but as you can see the paint responds differently to each side.
One side is nice smooth with paint, the other side is raw with the paint. Same material resin, same smoothness on each side but a completely different reaction of the paint. Mega bummer. Disappointment #2
Had to repaint parts of the figure again because the paint came off hen being handled. Disappointment #3
Then I painted the bottom black. And added red paints in the eyes and the gun lasers. Hit some chrome parts somehow so another chrome repaint for those spots. Disappointment #4
And ofcourse with re-chroming (read: re-silvering) the parts I hit the black part again. Disappointment #5
New black paint for the bottom again. Disappointment #6
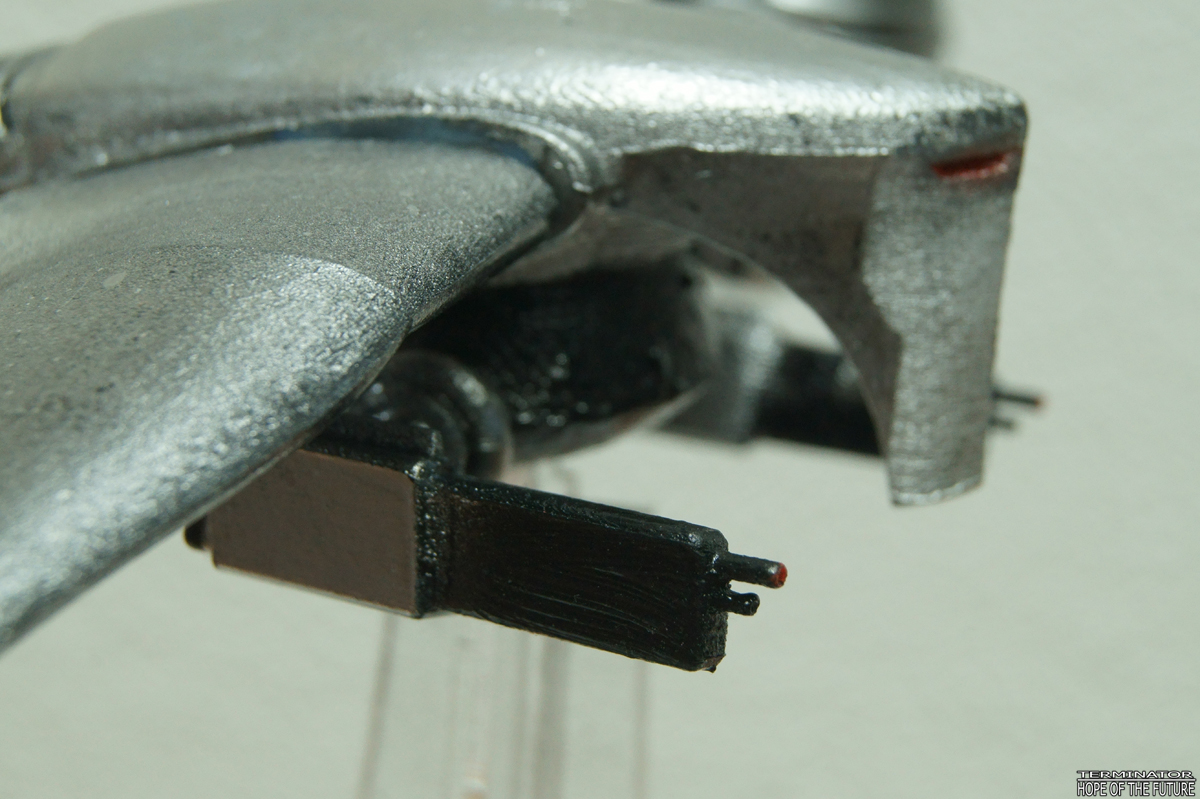
Attaching the guns. Glad that they stuck to the base, leave it to dry the paint. And ofcourse 30 minutes later the guns were laying on the floor. They didn't stick. Disappointment #7
Let's try to attach the other parts first. Leave the guns for last. And with adding the rear turbine, one of the rear wings broke off as the turbine wouldn't fit back in its place. And ofcourse more paint came off. Also one the attaching points to attach the wings to the body broke off because it became brittle of the paint. Disappointment #8 & 9
Used a lot of 2K glue to stick the turbine, the broken off rear wing and broken attaching point to the body. Didn't another chrome/silver repaint on the broken parts but they can be easily spotted. Disappointment #10
Managed to finally attach those guns. It's not tidy or so, but I'm glad these stupid things are final
ly back where they belong, though be it not perfectly aiming straight forward. Disappointment #11 But I'm glad that they stuck now.
Used a base from Ebay and some generic flyer stands to position the airship. Did make the flyer stands a bit shorter so the aircraft is closer to the ground compared to the Salvation AHK I did.
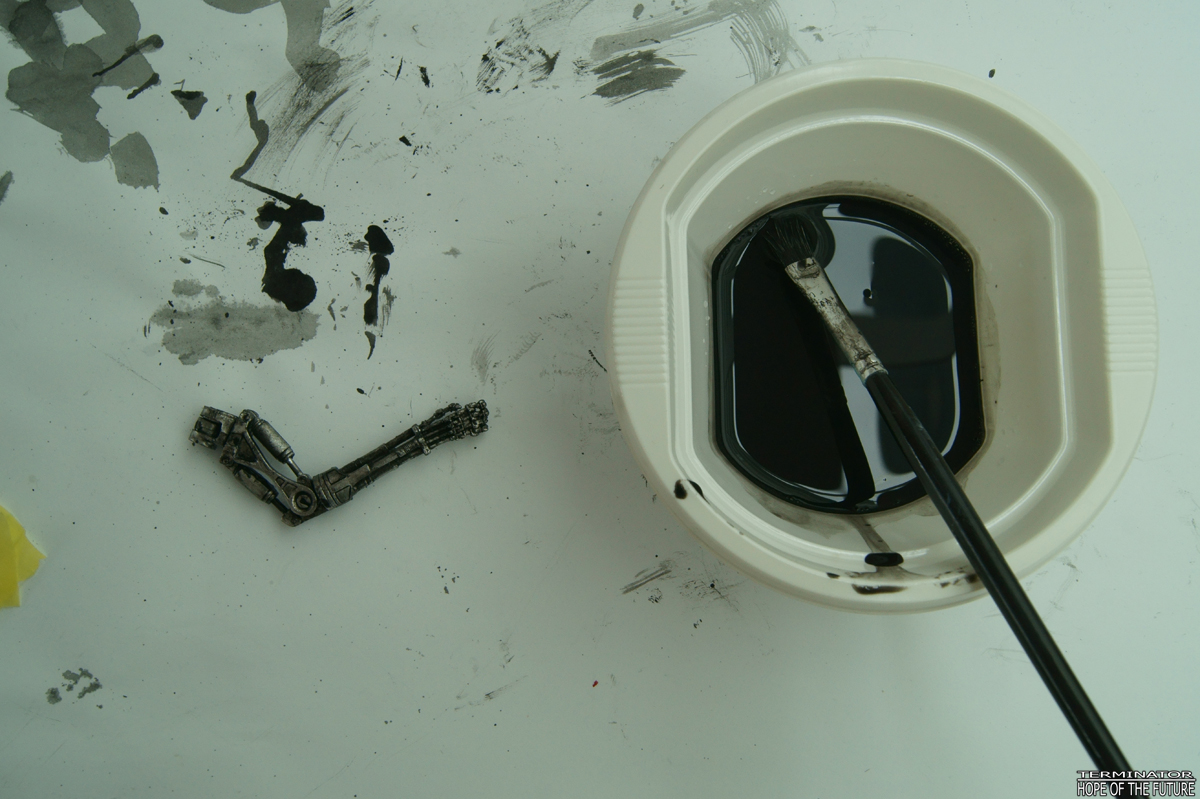
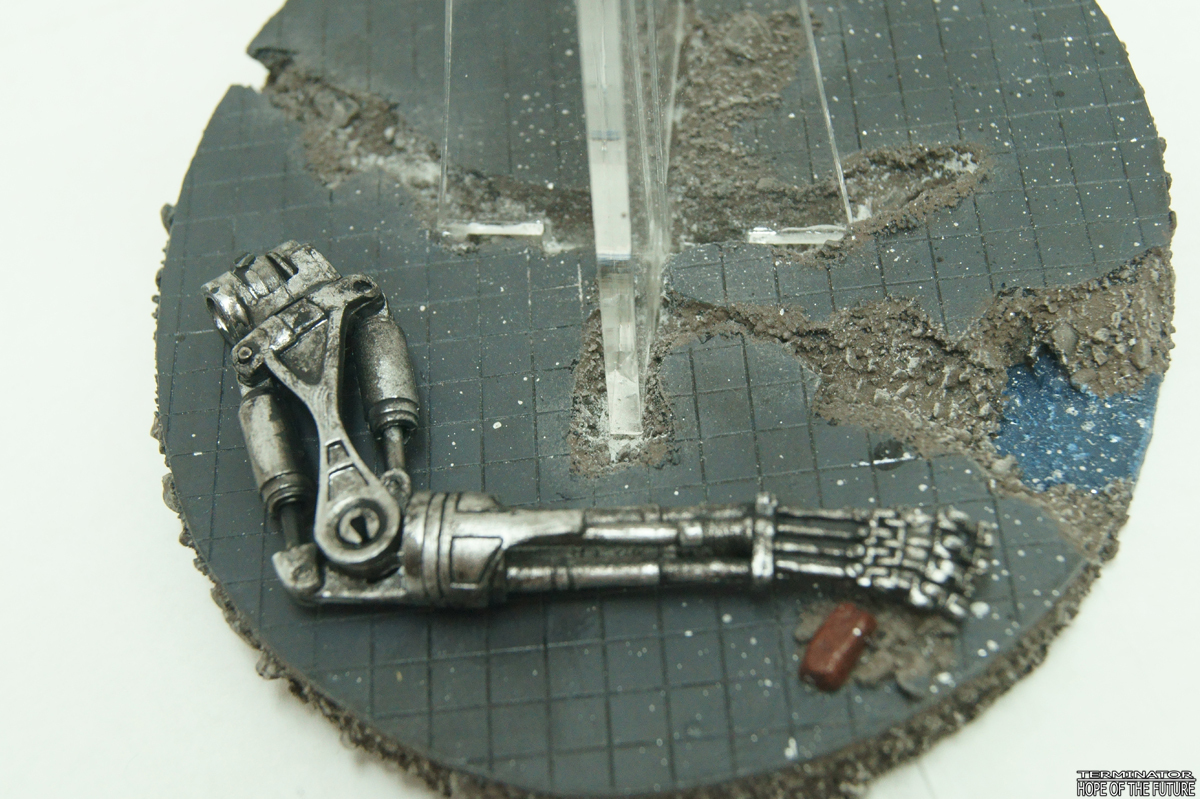
Final touch is adding a T-800 Endoskeleton arm to the base to make it more appear as some battlefield area. Perhaps it can be similar to the CyberResearch Systems area from T3. Used a Neca Endo I got cheap second handed on Ebay for this.
This project has caused a lot of frustration. Glad it is done now. Quickly into the display window and on to the next project. I'm going to take a shower, I feel dirty and used. Turned out to be a "not fun"- project.
Coming up next: Terminator 2: Centurion statue (legends in 3D)
Final product:
Here's the AHK of the movie:
Got my hands on this figure in resin. Unfortunately during the transport, the guns were broken off (and would cause a lot of problems during the cause of this project). I'm not really happy with the result. Like mentioned the broken guns. Also the paint job I did is mweh.... I had to grab the object a lot of times and this resulted in many finger prints and loss of paint on some areas. Even with a clear coat protection layer the paint got off too fast. :-(
Here's the figure to start with. The guns should have been attached to the body. Broken off during transport. Disappointment #1
I gave the whole figure a black primer (Spaz Stix) and followed it with the Spaz Stix Mirror Chrome paint. Unfortunately it turned out more silver than chrome.
I have no idea if this is also part to blame on the structure of the figure. I could not discover any differences in the structure of the figure, but as you can see the paint responds differently to each side.
One side is nice smooth with paint, the other side is raw with the paint. Same material resin, same smoothness on each side but a completely different reaction of the paint. Mega bummer. Disappointment #2
Had to repaint parts of the figure again because the paint came off hen being handled. Disappointment #3
Then I painted the bottom black. And added red paints in the eyes and the gun lasers. Hit some chrome parts somehow so another chrome repaint for those spots. Disappointment #4
And ofcourse with re-chroming (read: re-silvering) the parts I hit the black part again. Disappointment #5
New black paint for the bottom again. Disappointment #6
Attaching the guns. Glad that they stuck to the base, leave it to dry the paint. And ofcourse 30 minutes later the guns were laying on the floor. They didn't stick. Disappointment #7
Let's try to attach the other parts first. Leave the guns for last. And with adding the rear turbine, one of the rear wings broke off as the turbine wouldn't fit back in its place. And ofcourse more paint came off. Also one the attaching points to attach the wings to the body broke off because it became brittle of the paint. Disappointment #8 & 9
Used a lot of 2K glue to stick the turbine, the broken off rear wing and broken attaching point to the body. Didn't another chrome/silver repaint on the broken parts but they can be easily spotted. Disappointment #10
Managed to finally attach those guns. It's not tidy or so, but I'm glad these stupid things are final
ly back where they belong, though be it not perfectly aiming straight forward. Disappointment #11 But I'm glad that they stuck now.
Used a base from Ebay and some generic flyer stands to position the airship. Did make the flyer stands a bit shorter so the aircraft is closer to the ground compared to the Salvation AHK I did.
Final touch is adding a T-800 Endoskeleton arm to the base to make it more appear as some battlefield area. Perhaps it can be similar to the CyberResearch Systems area from T3. Used a Neca Endo I got cheap second handed on Ebay for this.
This project has caused a lot of frustration. Glad it is done now. Quickly into the display window and on to the next project. I'm going to take a shower, I feel dirty and used. Turned out to be a "not fun"- project.
Coming up next: Terminator 2: Centurion statue (legends in 3D)
") I wasn't even sure this was a cast first, but you can see some mold slippage in the same engine pic so I guess it's just someone that's either inexperienced or just doesn't care. Maybe the poor paint adhesion is down to release agents still being present on the model - did you clean it properly before applying paint?
I wasn't even sure this was a cast first, but you can see some mold slippage in the same engine pic so I guess it's just someone that's either inexperienced or just doesn't care. Maybe the poor paint adhesion is down to release agents still being present on the model - did you clean it properly before applying paint?