You are using an out of date browser. It may not display this or other websites correctly.
You should upgrade or use an alternative browser.
You should upgrade or use an alternative browser.
T1 and T2 Endoskeleton Research Thread
- Thread starter Too Much Garlic
- Start date
Too Much Garlic
Master Member
Interestingly enough. In the T2:3D movie the skull Schwarzenegger picks up from the downed endoskeleton and throws over his shoulder is not a T2:3D skull, but a production style skull. It has the indented front cover. I'll see if I can get a screen capture of it.
DeltaDesignRus
Well-Known Member
Draw on the photo what you are talking about, please.
I just noticed in those T2:3D pictures that the lower arm rod has a ring attachment at the bottom that seems to fit inside the lower arm shroud, so it sits more secure. That could be a thing to include when doing new 3D models.
Too Much Garlic
Master Member
Here you go. I initially thought the shroud could just be hollow on the originals, but the ring on the rod doesn't exactly look like the end piece in the shroud seen on originals in auction pictures. So it has to be a piece that gets screwed into the end cap piece on the shroud piece.

Too Much Garlic
Master Member
Or rather... it actually could be exactly that. Shroud is hollow and the end cap is attached to the rod instead, unlike on the LFS kit.
2023-11-09-12 - Entertainment Memorabilia Live Auction - Lot 409 - Terminator 2 - T-800 Endoskeleton Left Forearm - 007

2023-11-09-12 - Entertainment Memorabilia Live Auction - Lot 409 - Terminator 2 - T-800 Endoskeleton Left Forearm - 007
Too Much Garlic
Master Member
Another one where that ring seems to have popped out.
2020-08-26-27 - Entertainment Memorabilia Live Auction - Lot 795 - T2 - T-800 Endoskeleton Arm - 005

2020-08-26-27 - Entertainment Memorabilia Live Auction - Lot 795 - T2 - T-800 Endoskeleton Arm - 005
Too Much Garlic
Master Member
How do you best split the two fused spine pieces without resulting in a crappy looking top of the bottom piece and bottom of the top piece? I will join them again after the split after having positioned them according to reference. I tried in Blender... it worked okay by basically scraping away the bottom one, but when I came to the bottom edge of the top one... it no longer worked well and I made a mess of things, kept trying to redo it... got annoyed and eventually rage quit because it kept creating bunched up geometry and the tool refused to work there. Then I tried in Meshmixer... where the same happened... and I quit. Sadly... my patience these days isn't as good as it usually is. Guess I'm getting exhausted from being sick all the time.
I'll find a way, but if anyone knows a good way to do it, so it looks good, I'm all ears.
I need to clean the top and bottom of all 3 spine pieces, so they look like the originals.

I'll find a way, but if anyone knows a good way to do it, so it looks good, I'm all ears.
I need to clean the top and bottom of all 3 spine pieces, so they look like the originals.
DeltaDesignRus
Well-Known Member
It's simple, you just need to remove the lower vertebra, process the bottom surface of the upper vertebra to perfection, and then use the upper vertebra to subtract from the lower vertebra using Boolean operations, followed by manual refinement of the resulting geometry.How do you best split the two fused spine pieces without resulting in a crappy looking top of the bottom piece and bottom of the top piece? I will join them again after the split after having positioned them according to reference. I tried in Blender... it worked okay by basically scraping away the bottom one, but when I came to the bottom edge of the top one... it no longer worked well and I made a mess of things, kept trying to redo it... got annoyed and eventually rage quit because it kept creating bunched up geometry and the tool refused to work there. Then I tried in Meshmixer... where the same happened... and I quit. Sadly... my patience these days isn't as good as it usually is. Guess I'm getting exhausted from being sick all the time.
I'll find a way, but if anyone knows a good way to do it, so it looks good, I'm all ears.
I need to clean the top and bottom of all 3 spine pieces, so they look like the originals.
View attachment 1788005
Too Much Garlic
Master Member
There is filler between the two pieces that has to be removed, so if I fix one, then I cannot use that one to remove material from the other, as that filler would have been removed, so it won't cut where I need it to cut.
I'll just do it the way I fixed some of the Vader parts. The slow way, but cutting and trimming and then building new geometry to connect cut-out parts together.
I'll just do it the way I fixed some of the Vader parts. The slow way, but cutting and trimming and then building new geometry to connect cut-out parts together.
killuminati89
Active Member
I could do it for you exactly as you need it, but I need exact information in pictures and the file.... I do something like that all the timeThere is filler between the two pieces that has to be removed, so if I fix one, then I cannot use that one to remove material from the other, as that filler would have been removed, so it won't cut where I need it to cut.
I'll just do it the way I fixed some of the Vader parts. The slow way, but cutting and trimming and then building new geometry to connect cut-out parts together.
The video quality is terrible, but even with this source you could still make it look a little better:I think this is the best version of this documentary I've found on Youtube yet.
Simply by reframing, some color correction and AI sharpening
Too Much Garlic
Master Member
Thanks for the offer, but I would like to try to do it myself first.I could do it for you exactly as you need it, but I need exact information in pictures and the file.... I do something like that all the time
ghostman
Well-Known Member
After splitting, the holes were filled and polished with ZBrush.Color-coded polygrouping in ZBrush and then cut away
The cut-off hole area was Polygon filled in.View attachment 1788219
ghostman
Well-Known Member
Draw edge lines in black. Polygrouping.After splitting, the holes were filled and polished with ZBrush.View attachment 1788256
Apply remesher by maintaining polygroups.
ghostman
Well-Known Member
Further polish and clean.Draw edge lines in black. Polygrouping.
Apply remesher by maintaining polygroups.View attachment 1788260
The areas where details have been spoiled will be carved out later.
Too Much Garlic
Master Member
Looking cool. You forgot to trim the filler away from the bottom of each spine piece.
And I'm pretty sure the D-shaped impression on the top is the remnants of where the inner surface spacer section between each spine piece were on the originals.
I don't have zbrush. I tried it once and I couldn't figure it out. But I think I can split it like you did in Meshmixer.
And I'm pretty sure the D-shaped impression on the top is the remnants of where the inner surface spacer section between each spine piece were on the originals.
I don't have zbrush. I tried it once and I couldn't figure it out. But I think I can split it like you did in Meshmixer.
Last edited:
killuminati89
Active Member
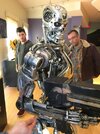
and lightstorm model pictures what i found on web its very cool model ...
Attachments
-
 Screenshot 2024-02-10 10462512.png2.9 MB · Views: 122
 -
 Screenshot 2024-02-10 1046251.png871.6 KB · Views: 116
 -
 Screenshot 2024-02-10 104711.png364.7 KB · Views: 123
 -
 Screenshot 2024-02-10 104342.png1.8 MB · Views: 108
 -
 Screenshot 2024-02-10 104251.png856.5 KB · Views: 111
 -
 Screenshot 2024-02-10 104236.png1.6 MB · Views: 99
 -
 Screenshot 2024-02-10 104127.png1.8 MB · Views: 114
 -
 Screenshot 2024-02-10 104116.png1.8 MB · Views: 107
 -
 JamesCameron-Studio2.jpg65.8 KB · Views: 102
 -
 21082872_1087488781385908_6524686443188362961_o.jpg131.3 KB · Views: 107
 -
 JamesCameron-Studio5.jpg40.2 KB · Views: 105
 -
 JamesCameron-Studio4.jpg81 KB · Views: 107
 -
 JamesCameron-Studio1b.jpg62.5 KB · Views: 103
 -
 terminator-2-prop.jpg290.3 KB · Views: 101
 -
 james-cameron-01s.jpg96.4 KB · Views: 98
 -
 james-cameron-02.jpg183.1 KB · Views: 99
 -
 52052292887_5bfd6b3b08_o.jpg1.1 MB · Views: 108
 -
 maxresdefault52.jpg136 KB · Views: 102
Last edited:
Too Much Garlic
Master Member
Cool videos and pictures.
I split off and trimmed the 1st spine piece. Need to trim the second too and then close the holes.
I think my initial observation that the 1st spine piece is warped is true because the two of them do not line up in the back when I line up their fronts. So, I'll try a shape deformer to see if I can bring the shape back to how the originals look.
Similar threads
- Replies
- 0
- Views
- 163
- Replies
- 1
- Views
- 524
- Replies
- 14
- Views
- 2,320
- Replies
- 28
- Views
- 2,688


