Saturday, Oct. 10.
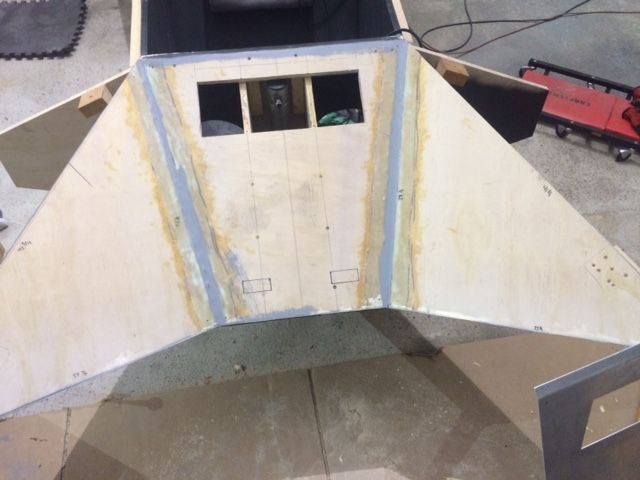
Not too early of a start today. Stayed up too late last night sanding edges. But today I was motivated to get the front nose panels in place. Originally we covered the 3 part nose with 1/10" thick fiberglass pre-made flat panels panted with Krylon aluminum paint. It looked OK, but you could tell by the luster that it was not real aluminum armor panels like the wings were covered with. When I had the first batch of armor panels laser cut, I had not yet built the front nose, so I couldn't confidently risk cutting the aluminum and it not fit. Now I get to correct that. The center trapezoid and the two triangular side pieces were only held on by screws in their corners, so it was easy enough to remove them.
After carefully measuring all the angles, I bent the bottom edge of each panel in a double bend "J" shape, 3/4" wide with about an inch tail that fits snug against the underside of the 3/4" plywood. If you run your hand under the nose of the speeder, you'll feel that the armor panel is a continuous curved piece that extends unseen under the wing that extra inch.
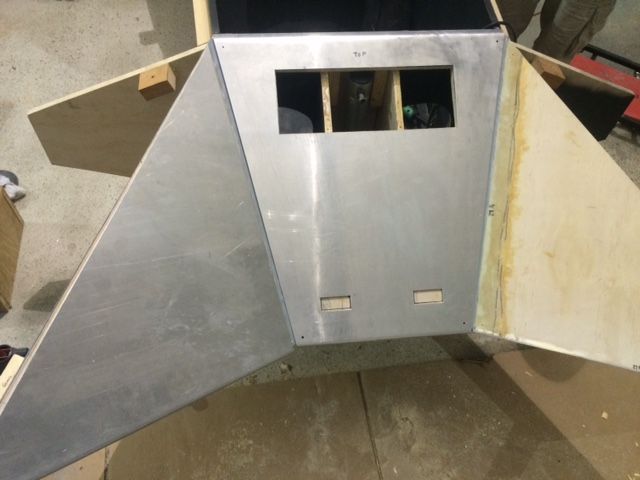
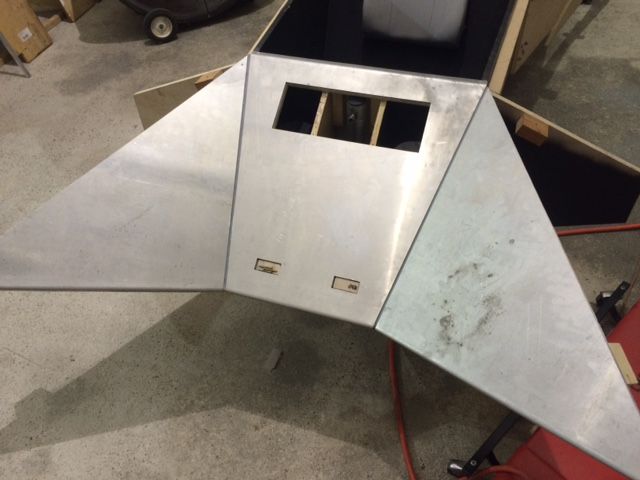
After all three panels were bent and installed in place with the gap set at 1/4" inch all around, I drilled holes in the corners at a 3/4" offset to the edge, like I did to all of the wing armor. I urethane glued the two triangular side pieces in place in addition to the screws. These won't need to be removed in the future. However the center piece has the large cutout for the grill work and two small rectangular cutouts for the forward flood lights. These will all need to be accessed in the future so this panel is only held in place with screws. Using the armor panel as a template, we traced the holes on the plywood under body and cut them out with the jig saw. You can see some discoloration on the aluminum panels due to surface oxidation. In some places I am planning to leave it in place as it adds to the "used" gritty distressed look that a military vehicle would likely have.
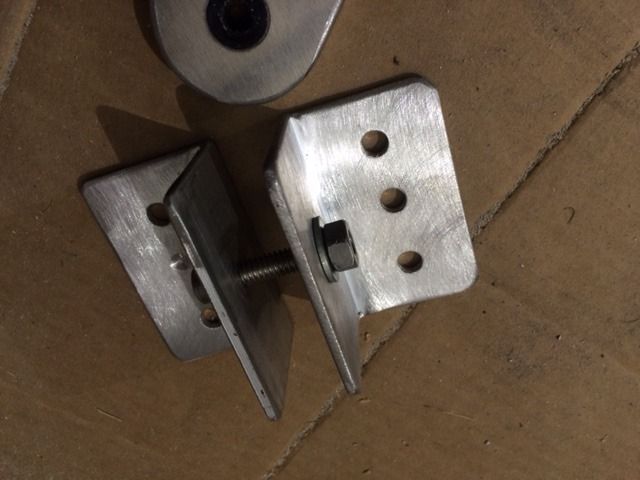
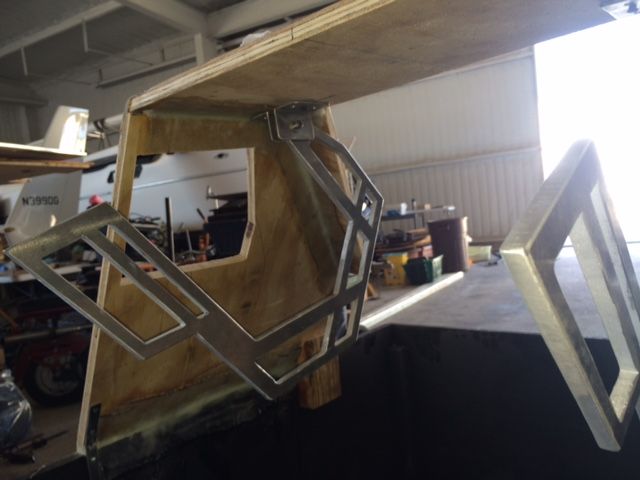
Next. The canopy hinges will mount to the roof with 1-1/2" wide angle brackets. I cut 4 pieces at 3-1/2" long and sanded all the edges smooth. Drilled the 1/4" holes on the end mill drill press. Once I set up a jig for the first one, the other three followed much quicker.

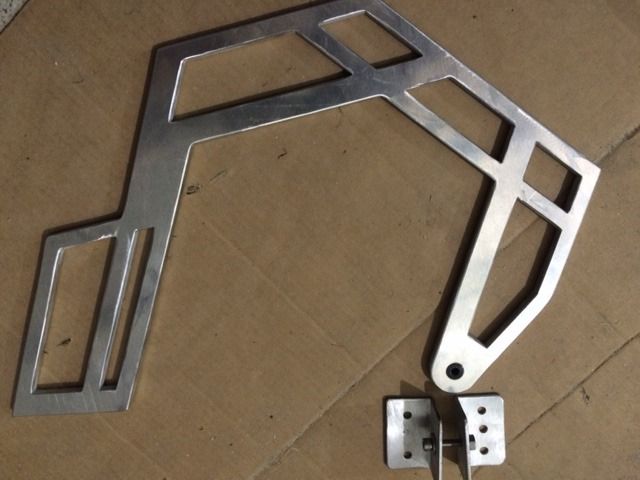
A black nylon bushing fits in the laser cut 1/2" diameter hole. The I.D. of the bushing is 1/4". This will be the pivot point for the canopy hinges and I wanted it to be a smooth silent operation. 1/4" stainless steel socket head cap bolts and acorn nuts hold everything together.


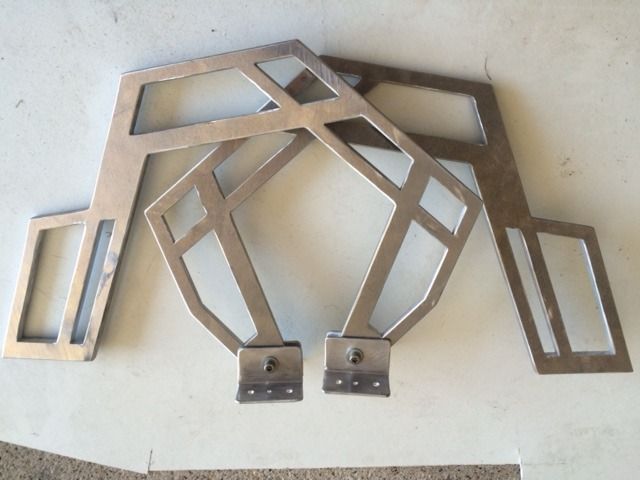
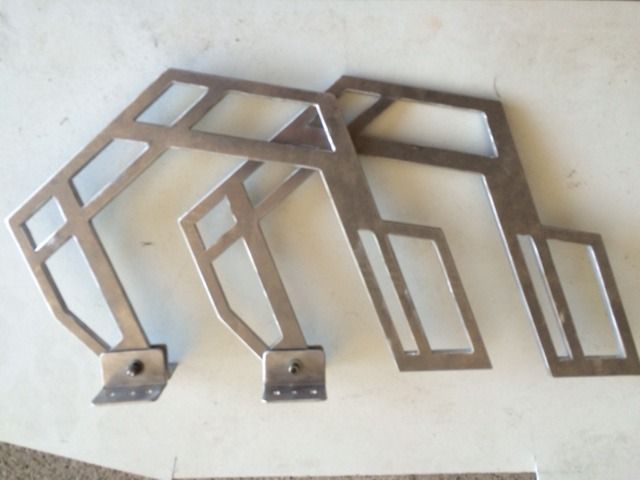
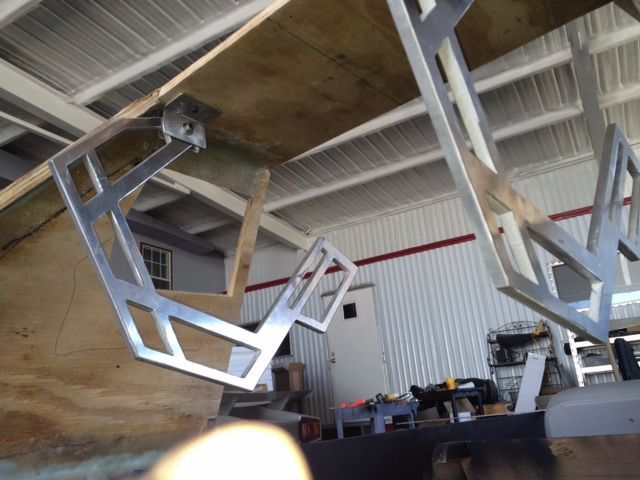
While we still had a little daylight and energy left, we did a quick position check by drilling a single hole for each bracket in the roof panel. Once we have the whole canopy attached and confirm the swing motion is correct, we will drill the final 4 permanent holes per mount plate and secure the hinges in their proper place.
Off to the house to clean up and spend a little Saturday night family game time. We'll be back at it Sunday after church and lunch.
")


