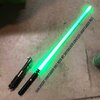
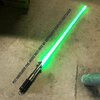
So I bought a Jedi Challenges lightsaber game off ebay which was faulty - I only wanted the saber anyway. My aim is to tear it down and turn it into an Anakin ROTS saber and hopefully another into Luke ESB.
Just spent 10 mins stripping this down. There are 2 screws under each button, 2 screws under 2 of the 6 grips and 3 screws which hold the middle together aswell as 2 under the clamp card area. The electronics simply slide out when all screws are taken out. Also need to pop out the buttons and the clamp card.
The good news is that you can make the tube more of an accurate size by trimming the plastic which hold the two sabers together, plenty of room modification
Here is a photo of it stripped down. My aim is to get graflex clamps for both and obviously the cards and correct grips for Anakin as I think the ones already on there are ok for Luke ESB.
Will update as I go along. I think I can get a pretty nice looking replica when these mods are done. This really is simple to take apart.
Lee
")