Studio Half Scale TOS Enterprise Scratch build

Status
Not open for further replies.
I will, I must, have one of these kits.

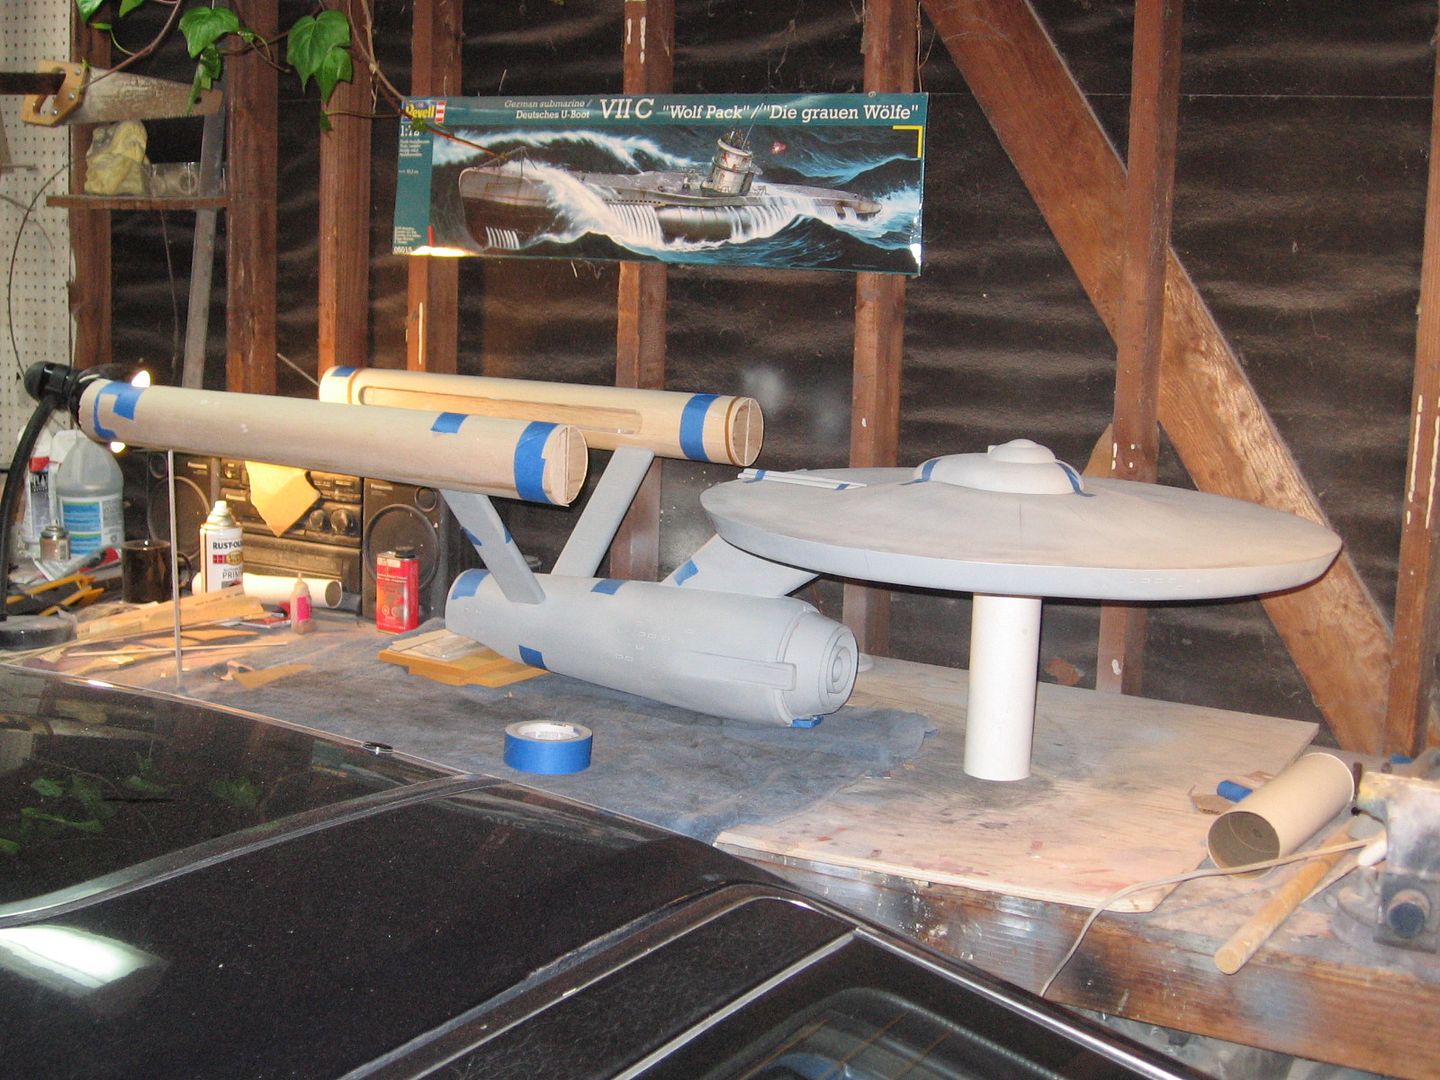
I couldn't sleep last so I was going over and over in my mind ideas for a support framework, stand, what to do for lighting, what to do for the motor for the nacelles...

I was looking over the pictures as well and didn't know if this tiny detail warranted a second look (again, not my photo):

accelerator.jpg


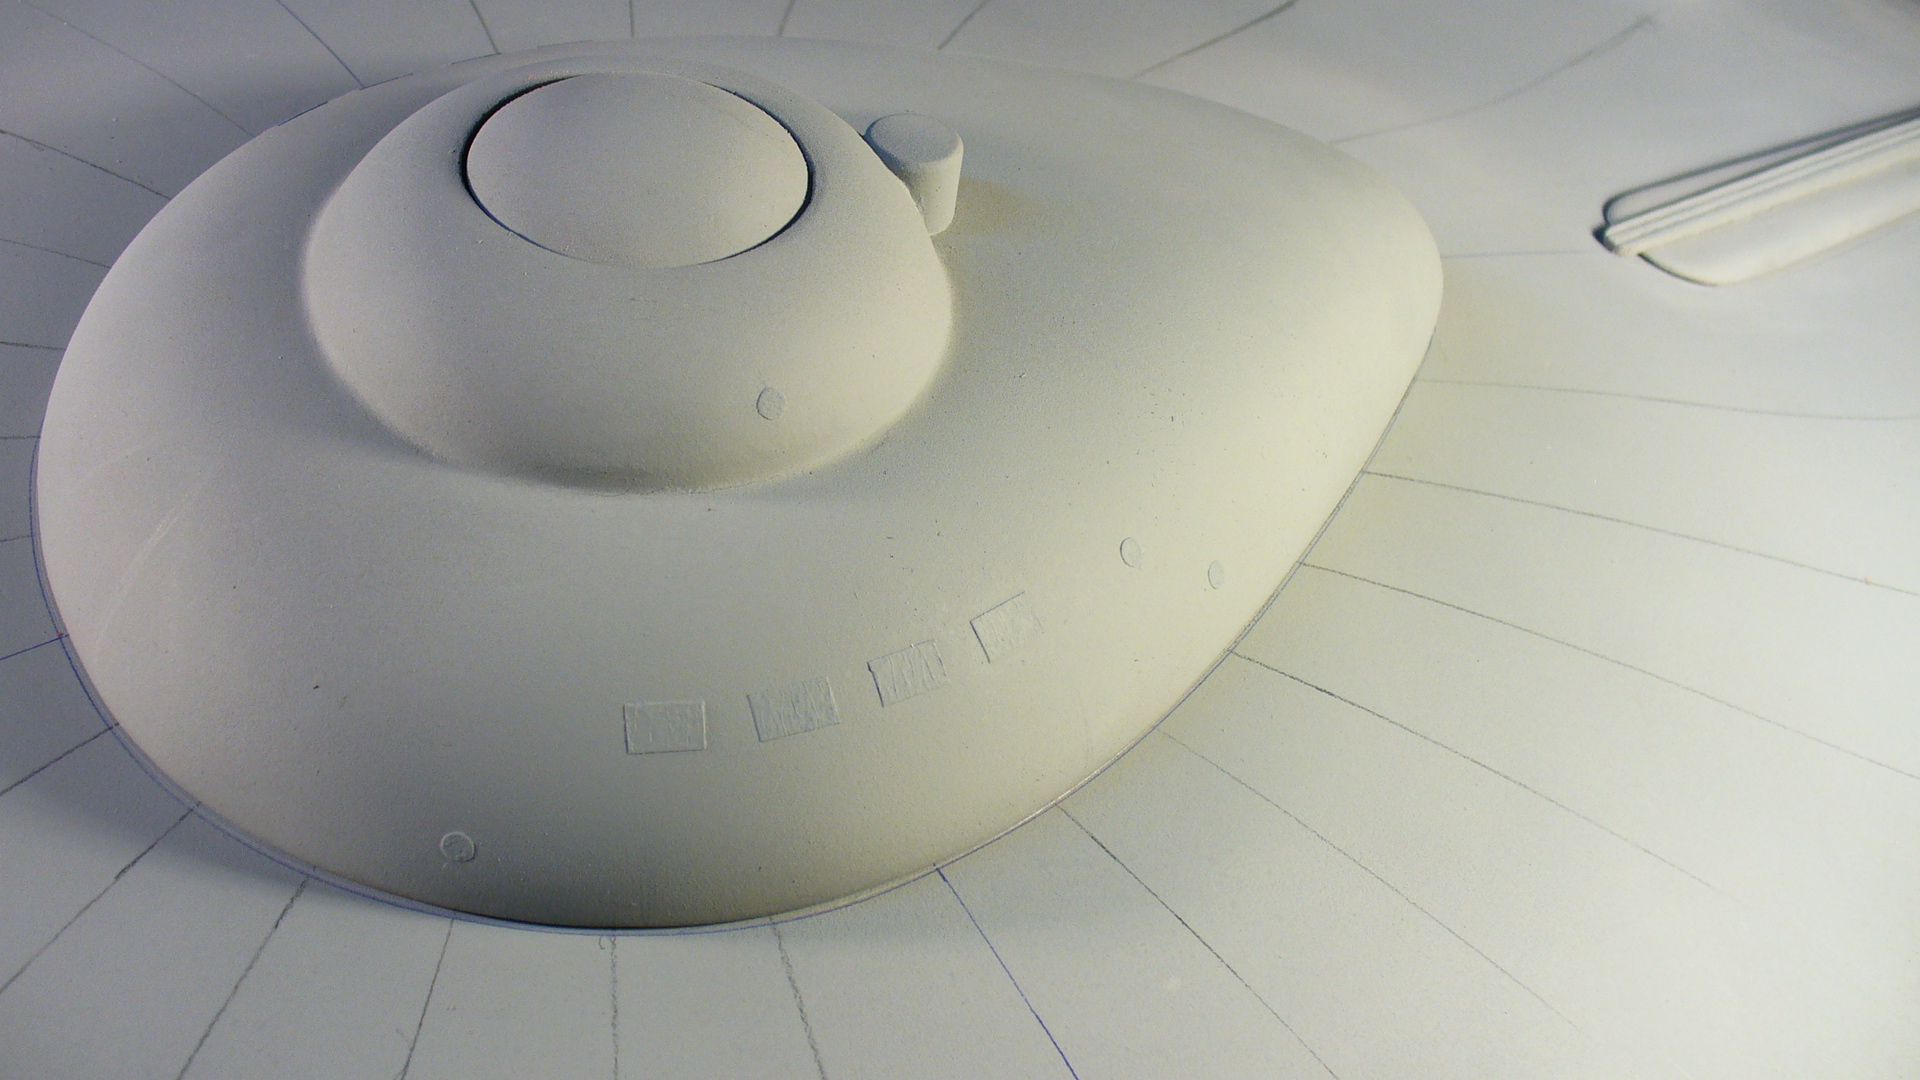
The tip of the "accelerator" I guess we're calling it looks to be flat and straight, and the leading edge possibly less rounded, during production but was modified at some point--most likely to accommodate damage. I couldn't quite tell from the pictures of your project how you had decided to shape that part but figured it was based more on the plans plus the Mirecki restoration photos as that's the best documentation to date.

Loving every minute of this!

Dave
 
The plans I'm using are as good as they get. Doug Drexler, Mike Okuda and others have been helping me step by step with documentation and other sources to get this model very close.

Thats a hard part and since I can't have it in my hands I have to take that best guess. Photographs create so many optical illusions it can drive one nuts and you have to know when to call it quits and move forward. I have all the photos you posted and more in great detail and hi res, but still the questions remain.

I may tweak it a bit more before I mold it. Thats the beauty of it all.

Thanks for all the kind comments and encouragement Dave. It's really appreciated.

Steve

P1050404.jpg
 
Steve,

It's really amazing to see this project come along. Your progress is really something. The look is so clean and elegant, it quite beautiful. Keep up the great work!

Cheers,

Guy
 
Thanks Blackbird!

And Guy you're too kind. Thank you. You guys and your comments are what keep me moving forward.

This can be exhausting at times because every single part so far is made by hand with only limited aid from the old drill press, scroll saw and band saw. and a few other basic tools.

Today I got the Nacelles base structures sheeted. A thankless job really. Not my favorite part. CA all over my fingers and the frustration of getting it right is a pain. But I'm happy to be at the end of it. After this it's on to making parts.

I'm not going to glass the nacelle super structure just yet. Tomorrow I'm moving on to the warp dome structures and the end caps. At this point I just have to see it all together for the most part as it is a dream come true that for so long was only an image in my mind.

Here's one picture of her all straight and true.

Steve

IMG_5819.jpg
 
Also guys it's my pleasure to thank Mr. Gary Kerr for all his assistance with this project too. I couldn't have done it without him.

Steve
 
I look forward to getting off work every night so I can read up on the progress of this model. Bravo!!!!! This is looking absolutely awesome!!!!!!!
 
That's a monster, Steve - just looking at the size compared to the car! So beautiful! That means when the kit gets built at home she stays home. The sheeting on the nacelles did they go through the same process of one single plywood-thin balsa sheet sprayed with vinegar-water solution?
 
Crackerjazz I sure did. Actually ammonia water works best.What a pain and it never comes out that well. It's after you glass the structure and you can preen it that it gets good.

Thanks again,

Steve
 
I'm all out of superlatives but Steve this build is just great. As always look forward to the next lesson.


Will
 
Thanks Blackbird!

And Guy you're too kind. Thank you. You guys and your comments are what keep me moving forward.

This can be exhausting at times because every single part so far is made by hand with only limited aid from the old drill press, scroll saw and band saw. and a few other basic tools.

Today I got the Nacelles base structures sheeted. A thankless job really. Not my favorite part. CA all over my fingers and the frustration of getting it right is a pain. But I'm happy to be at the end of it. After this it's on to making parts.

I'm not going to glass the nacelle super structure just yet. Tomorrow I'm moving on to the warp dome structures and the end caps. At this point I just have to see it all together for the most part as it is a dream come true that for so long was only an image in my mind.

Here's one picture of her all straight and true.

Steve

IMG_5819.jpg


Bumping this latest awesome update to this page. :cool
Really outstanding work.

David
 
Can't wait to see the molding process. Your documentation is so good I know it will provide an excellent lesson. And your methods are so elegant that I usually slap my forehead with a big "duh". Thanks again for sharing!
 
Steve,

I actually used your genius ammonia water trick on my own build, an AER9 from Fallout. Nothing as impressive as this - keep up the good work!
 
man It is my dream come true though I will never be able to afford one it is really something to see come together!
 
Steve, your workmanship is outstanding! Even in this unfinished state the model has the look and feel of the filming miniature. Fantastic job. When you soften the wood for forming, what ratio ammonia to water do you use and how long does it soak (or is it sprayed) on the wood? Do completely saturate it then glue it down while it's wet?

Steve
 
Actias I use it straight. Both in a spray bottle and if the part is small enough I submerge it. I soak it good and then rap it around the structure with either rubber bands or blue painters tape. Let it dry before gluing. T

Hope that helps and thanks for the kind words.

Steve
 
Looking better and better, sexier and sexier. Nearly into the final stretch, Steve, or is there still a lot to do?
 
Steve,

I'm watching this build as well, have from the start and I have to say it's been not only entertaining but informative. I'd like to say that it is very much appreciated having a craftsman of your caliber allow us a look into the processes of creating not only a great model, but, if I might add, a great work of art.

This is the kind of thing creative minds and hands need and love to see!

Thanks! :thumbsup
Robert W
 
Last edited by a moderator:
Noddy thanks a lot. There is a bit to do yes but I'm getting real close to molds. I won't start molding until every single part is finished.

Robert that very kind of you to say. My approach has never been CAD or CNC as I was a studio sculpture of creatures and monsters first. With models I see them as art as you do. Rather and non organic sculpture. So I tend to carve some out rather than machine it when I can.

Today I was finally able to get back to work. The puppy has been taking up much time and sleep but she's getting better all the time and I'm getting more sleep and work time.

Today I was able to make the end caps. They are roughed out and tomorrow I'll start pointing them up and primer sand. You guys know the drill by now.

Yes I am closing. After the end caps are done I'll finish off and glass the nacelles. Point, putty, sand and primer.

After that I have a few small parts to do. That deflector. I should have a lathe next week. Could have used it today to do the end caps but they came out well enough.

Then there's about a week of molding. Once I have the molds I will build two models. One for me. And one to sell or put up on Ebay for bids.

Steve

IMG_5832.jpg


IMG_5833.jpg


IMG_5834.jpg
 
Status
Not open for further replies.
Back
Top