Stormtrooper start to finish

Originally posted by clutch+Aug 18 2005, 11:52 PM--><div class='quotetop'>QUOTE(clutch @ Aug 18 2005, 11:52 PM)</div>
<!--QuoteBegin-Obi Sean Kenobi
@Aug 18 2005, 10:46 PM
Hi,

Have the same mannequin (thats my thread posted above :D )

As for the bicep armor on the bent left arm, just slide the armor up a little further under the shoulder bell, it'll look fine. 

Also, as for the right shin, if its not glued together in the back, open it up a little and use the mannequin stand that goes in the back of the right leg - that way your trooper can wear his boots.

Looks amazing.
Sean
[snapback]1061055[/snapback]​


Thanks for the heads-up Sean. Definitely the easiest and cheapest way to do the mannequin thing. As for the arm, it is almost a 90% angle. My bicep pieces are glued together. I have to thread the piece up the arm and it's not wide enough to make that 90 degree bend. The stand definitely makes him stand up better. Thanks.
[snapback]1061059[/snapback]​
[/b]

That sucks, and with the body glove on you cant slide the bicep down from the top of the arm either.
UNLESS.
1. Spraypaint the left arm black or cover it in the same or similar material as the bodyglove.
2. Dont put the left arm in the body glove sleeve, tuck the empty sleeve down inside the torso.
3. Slide the bicep down over the top of the left arm.
4. Attachleft arm to mannequin. The body glovesleeve that is covering the arm/torso attachment point is stetchy and shouldnt prevent you from putting the tab on the arm into the hole on the torso (the material will go in the hole)
Does that make sense. Betcha it works too.
OSK
 
Originally posted by Obi Sean Kenobi+Aug 18 2005, 11:07 PM--><div class='quotetop'>QUOTE(Obi Sean Kenobi @ Aug 18 2005, 11:07 PM)</div>
Originally posted by clutch@Aug 18 2005, 11:52 PM
<!--QuoteBegin-Obi Sean Kenobi
@Aug 18 2005, 10:46 PM
Hi,

Have the same mannequin (thats my thread posted above :D )

As for the bicep armor on the bent left arm, just slide the armor up a little further under the shoulder bell, it'll look fine. 

Also, as for the right shin, if its not glued together in the back, open it up a little and use the mannequin stand that goes in the back of the right leg - that way your trooper can wear his boots.

Looks amazing.
Sean
[snapback]1061055[/snapback]​


Thanks for the heads-up Sean. Definitely the easiest and cheapest way to do the mannequin thing. As for the arm, it is almost a 90% angle. My bicep pieces are glued together. I have to thread the piece up the arm and it's not wide enough to make that 90 degree bend. The stand definitely makes him stand up better. Thanks.
[snapback]1061059[/snapback]​

That sucks, and with the body glove on you cant slide the bicep down from the top of the arm either.
UNLESS.
1. Spraypaint the left arm black or cover it in the same or similar material as the bodyglove.
2. Dont put the left arm in the body glove sleeve, tuck the empty sleeve down inside the torso.
3. Slide the bicep down over the top of the left arm.
4. Attachleft arm to mannequin. The body glovesleeve that is covering the arm/torso attachment point is stetchy and shouldnt prevent you from putting the tab on the arm into the hole on the torso (the material will go in the hole)
Does that make sense. Betcha it works too.
OSK
[snapback]1061063[/snapback]​
[/b]

That's a good idea.
 
Thanks for the compliments everyone! I'm learning as I go. I got the majority of the junk in the helmet tonight. You run out of room quick!

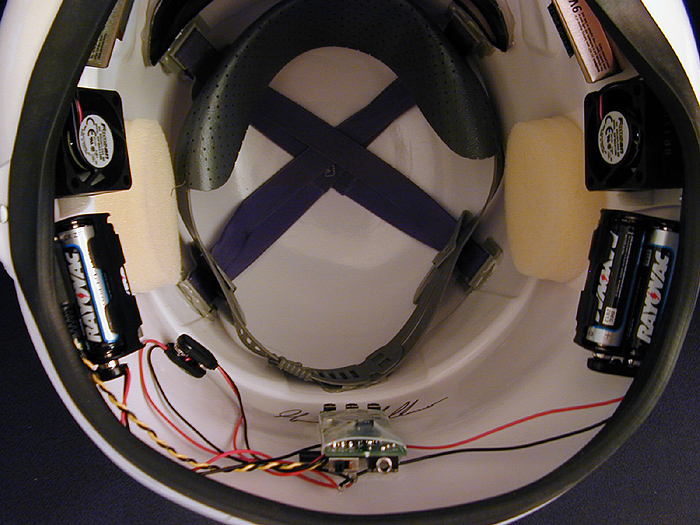
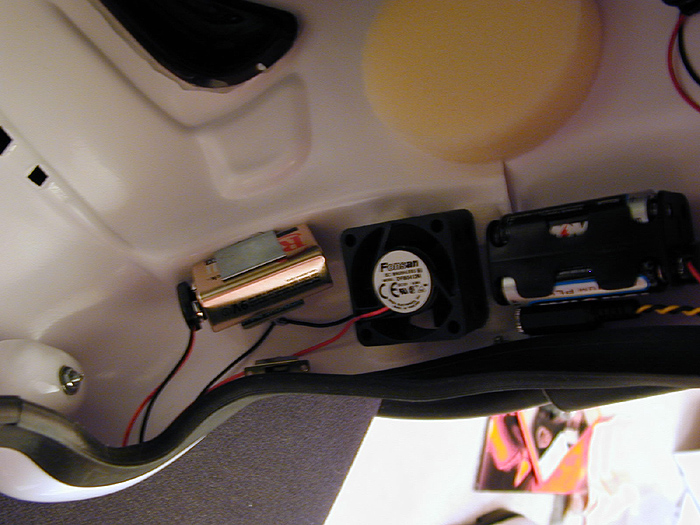
I traced the fan corners inside the helmet with a pencil and then hot-glued foam squares in each corner. The fans were then attached to the foam squares. The foam will dampen the vibration. I then soldered heavy duty 9V battery clips and the fans to submini slide switches. The switches and 9V battery holders were then hot-glued to the helmet. All solder points were coated with hot glue to prevent shorts.

helm03z.jpg


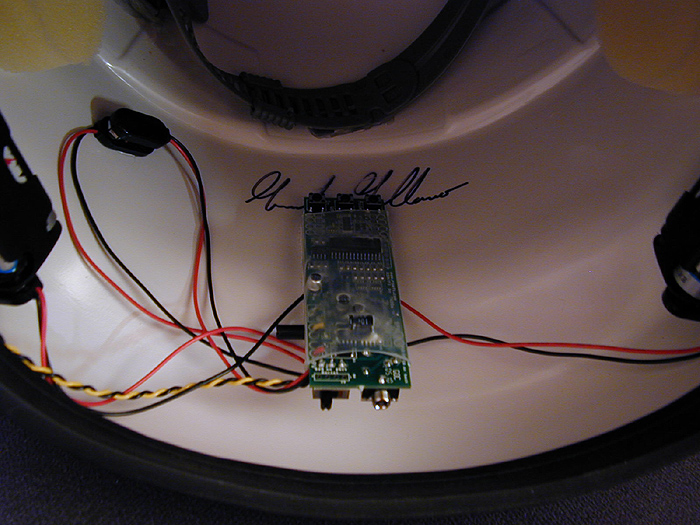
The ROM-FX board was velcroed to the back of the helmet. Due to the board's shape and the volume knob being on the back of the board, placement inside the helmet is tricky. It looks wonky, but this the best position I could find. The 2 battery packs were velcroed to the sides. I may go back and hide all the wires in some of that black tubing stuff, but no one can see them, so I'm not that concerned about it now.

helm01z.jpg


helm02z.jpg


All the batteries made it slightly heavier toward the back of the helmet, so I glued some lead weights to the front as a counter-balance. With all this junk in the helmet, it starts to feel more 'real'. Not just a plastic shell anymore. I plan on mounting the microphone to a piece of wire that will place it close to my lips. But first, I need to glue some screen across the mouth holes.

That's it for now.
 
Last edited:
I really fudged up when I glued the thigh piece shut. I've based all my expectations around FX armor tutorials on the web. 95% of the people glue them together. So I figured, what the hey, it looks big enough. Wrong. It is a super tight fit. I pulled up on it so hard that the snap popped off the shim that I had glued in. The thigh piece has come apart at the bottom of the seam, but trying to pull it apart is useless; it's welded shut. So either I get my fat arse on an exercise routine, or I've got myself a cool mannequin suit. Which reminds me, because the thigh is glued together, it won't go over the mannequin's foot. So now the feet have to be cut off and pinned. Now, do I glue the other thigh the same way, or space it out a little more? Decisions, decisions.... Told you guys this was going to be a long thread. :)
 
OOOOOH...sounds like your rushing this armour clutch.

I always tape the parts together and test fit,before comitting to glueing.That way you can adjust until your happy without damaging your suit.Now I don't really know what to suggest?
 
Originally posted by ANH trooper@Aug 24 2005, 08:59 AM
OOOOOH...sounds like your rushing this armour clutch.

I always tape the parts together and test fit,before comitting to glueing.That way you can adjust until your happy without damaging your suit.Now I don't really know what to suggest?
[snapback]1064445[/snapback]​

It wasn't really a 'rush', it was just a dumba@# move on my part. I learned the hard way that you can't just eyeball stuff. I can still wear the piece, it's just that there is no room to 'grow'. On a positive note, I've been needing a good excuse to get into shape. :lol
 
Originally posted by dadvader@Jul 27 2005, 04:16 PM
My thighs are glued both front and back,the only problem this creates is i have to put my legs through and then put on my boots.

My feet just barely fit through but it works out great..

Just my $.02
[snapback]1043835[/snapback]​


yeah, i have my thighs glued all the way around and my calves glued in the front and velcro up the back.

thighs on first, then shoes, then calves.

it's pretty hot to watch. no, really. ok, fine, maybe it isn't.
 
Originally posted by clutch@Aug 23 2005, 11:34 PM
I really fudged up when I glued the thigh piece shut.  I've based all my expectations around FX armor tutorials on the web.  95% of the people glue them together.  So I figured, what the hey, it looks big enough.  Wrong.  It is a super tight fit.  I pulled up on it so hard that the snap popped off the shim that I had glued in.  The thigh piece has come apart at the bottom of the seam, but trying to pull it apart is useless; it's welded shut.  So either I get my fat arse on an exercise routine, or I've got myself a cool mannequin suit.  Which reminds me, because the thigh is glued together, it won't go over the mannequin's foot.  So now the feet have to be cut off and pinned.  Now, do I glue the other thigh the same way, or space it out a little more?  Decisions, decisions....  Told you guys this was going to be a long thread. :)
[snapback]1064222[/snapback]​


you can probably get it apart if you're careful.

if you use a razor, you can slice through the middle of the weld. i did this with 2 pieces of abs cemented stuff and it worked ok. there's a REALLY high risk of damage though, so go sloooooooooow
 
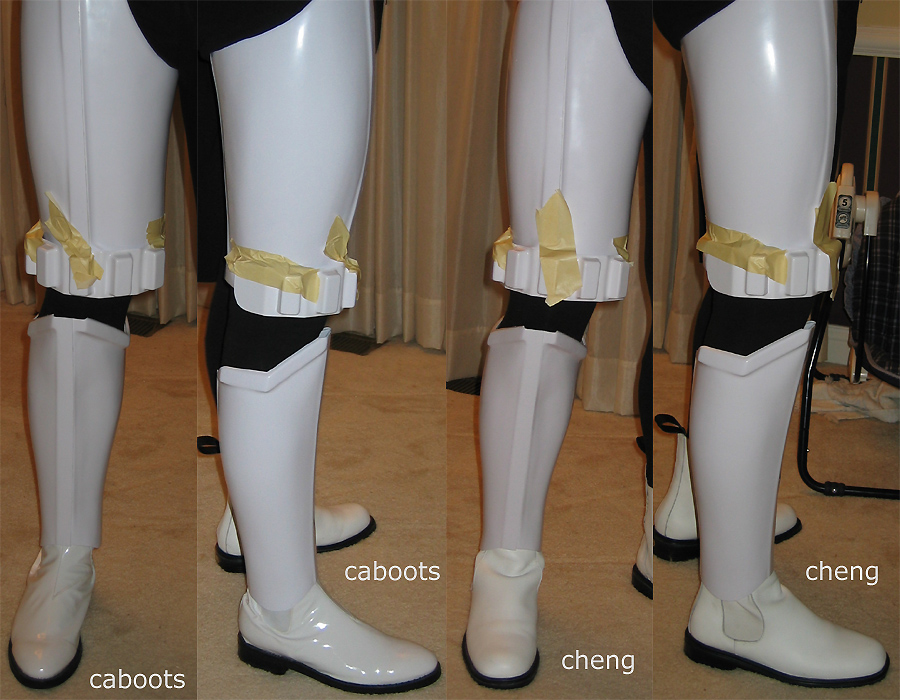
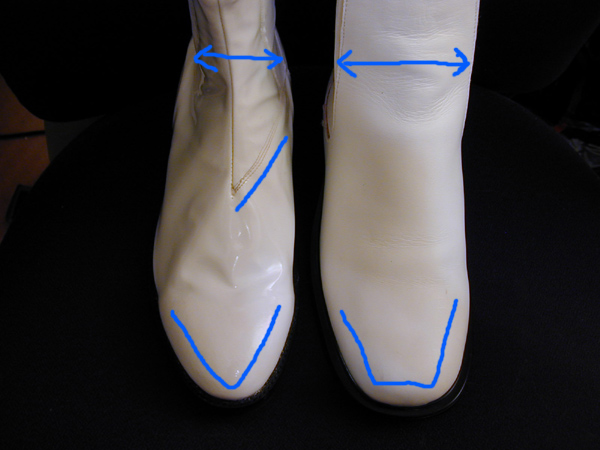
While I'm procrastinating about gluing stuff together, I thought I'd compare boots.

Here's a test fit of the thigh and calf with the boot on:

bootc05z.jpg


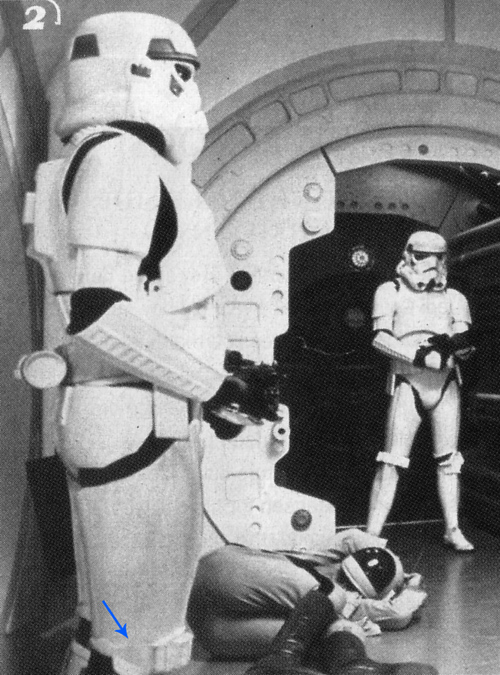
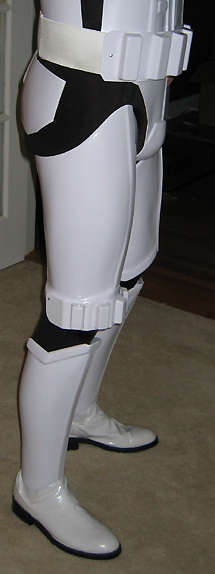
Notice how the knee power cell thingie is taped on. :) I'm Mr. TestFit from now on. In pictures I've seen of actual suits, it seems to hang pretty low on the thigh as this picture shows. It also shows that the rounded side goes on the bottom:

reallegz.jpg


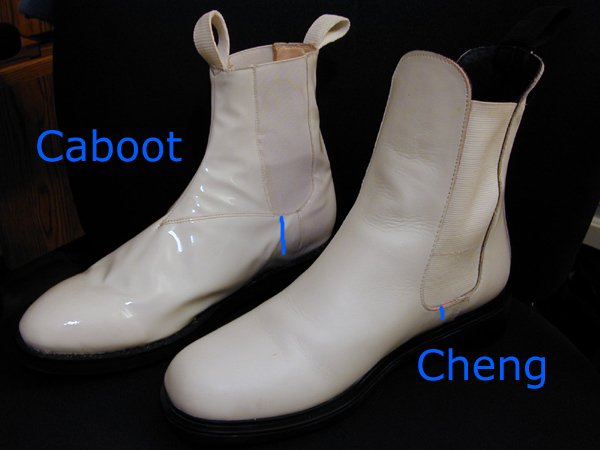
The M. Cheng boots look wide when the calf piece is clamped together. Both boots feel about the same to me comfort-wise.

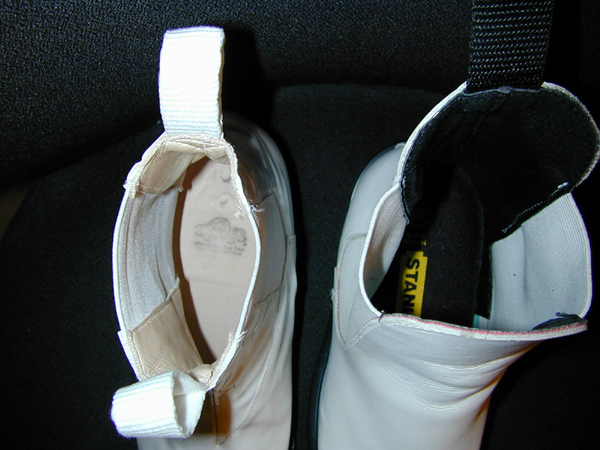
Here are pics of the right boots together:

bootc01z.jpg


bootc02z.jpg


bootc03z.jpg


bootc04z.jpg


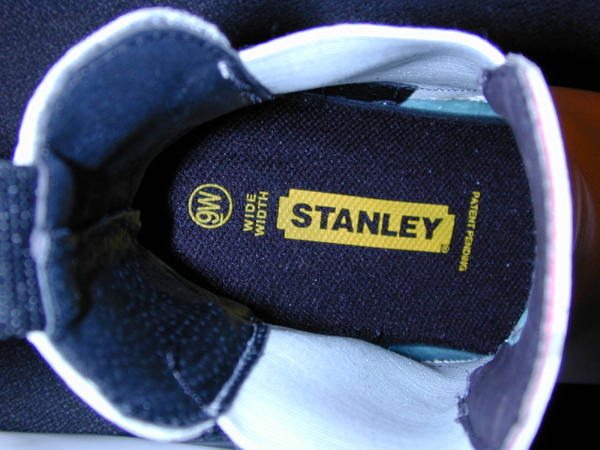
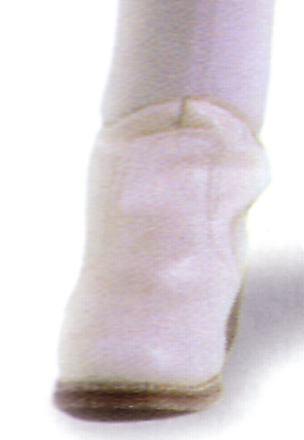
The Cheng's say 9W, but are really 10's. They are definitely made of better materials than the Caboots. Looking at the SW Visual Dictionary, the Caboots look more like ANH boots and the Chengs look more like RTOJ boots as crazy as that sounds. ANH on the left, ROTJ on the right.

bootc06z.jpg


bootc07z.jpg


I added the grip-tion part. :) Speaking of the visual dictionaries, boy can they come up with some winning entries. I especially like Lando's 'Winning smile.' :lol
 
Last edited:
Originally posted by clutch@Aug 27 2005, 01:52 AM
While I'm procrastinating about gluing stuff together, I thought I'd compare boots. 

Here's a test fit of the thigh and calf with the boot on:
bootc05.jpg


Notice how the knee power cell thingie is taped on. :)  I'm Mr. TestFit from now on.  In pictures I've seen of actual suits,
it seems to hang pretty low on the thigh as this picture shows.  It also shows that the rounded side goes on the bottom:
realleg.jpg


The M. Cheng boots look wide when the calf piece is clamped together.  Both boots feel about the same to me comfort-wise. 
Here are pics of the right boots together:
bootc01.jpg

bootc02.jpg

bootc03.jpg

bootc04.jpg


The Cheng's say 9W, but are really 10's.  They are definitely made of better materials than the Caboots.  Looking at the SW Visual Dictionary, the Caboots look more like ANH boots and the Chengs look more like RTOJ boots as crazy as that sounds.  ANH on the left, ROTJ on the right.
bootc06.jpg
bootc07.jpg


I added the grip-tion part.  :) Speaking of the visual dictionaries, boy can they come up with some winning entries.  I especially like Lando's 'Winning smile.'  :lol
[snapback]1066437[/snapback]​
hey clutch,nice job on the armor.i'm putting together a gino sandtrooper armor.i put my knee power cell thing down low,mine is round on top and bottom,i also have it off center with three powercell toward the inner thigh as all of the sandtrooper pictures i have seen had it like that.keep up the good work. :thumbsup
 
Last edited by a moderator:
Thanks again for the kind words everyone. Here's a small update. I've got one thigh strapped. There is a lot of stress on the buttons to hold that thigh piece up because it's such a snug fit on my leg. I glued the other thigh shut but I left it bigger. It is darned near perfect. I also put masking tape along the edge so that if any glue squirted out, it would end up on the tape. I could then just peel it off. The back of the left thigh is the cleanest job I've done which makes sense. It was the last seam I glued. :) It took me forever to get up the courage to rivet that knee piece on. I've seen them on all kinds of ways, so I just went with one. I wanted it low as possible to close the gap between the thigh and calf. I must have long legs. Now for a touch of white paint. The sniper plate on the other leg should be interesting. It won't go on any way that seems right. It will lean to the outside because the ridge on the calf is lower on the outside than the inside. I'm going to glue it in place first and then maybe rivet it.

legrivet.jpg
 
Last edited:
It's looking great so far mate...good job :thumbsup

I'm liking those Cheng boots very much, especially the shape of the toe...i've got some CABoots myself, which I like, but those Cheng boots look sweet.

Cheers, Gord.
 
Hi,

Armours looking great.

Just out of interest has Mark Cheng changed his boot style completely? I have two pairs from him from a few years ago and they are very shiny much more like the caboots just without the stitching on the leather part of the shoe. Both pairs still look great but have turned slightly yellow with time.

Keep up the great work Clutch :) can't wait to see your finished trooper.

Cheers Chris.
 
yes that is what i was pointing out..
and i am 5'10"
[snapback]1059638[/snapback]​
[/quote]

Trallis - Did you tighten up the leg armor? If so - how?

Last time I had the suit on it seemed the thigh piece as too large.
 
Here's another opportunity to learn from my mistakes.

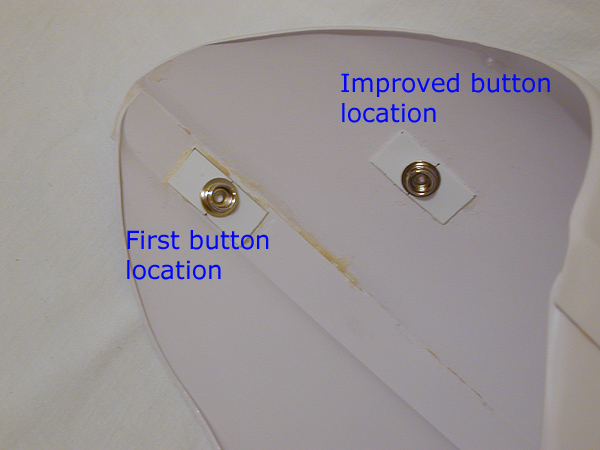
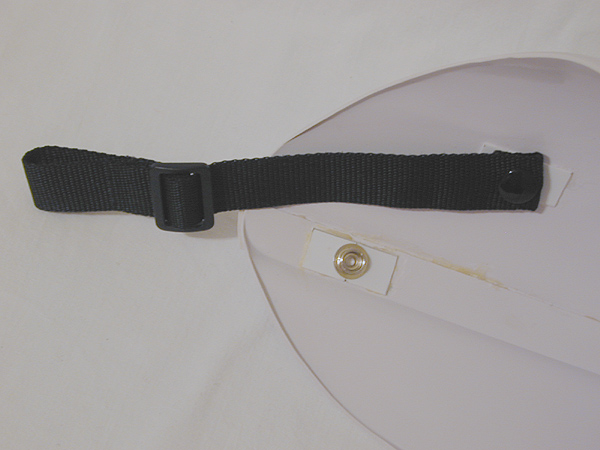
The thighs are held up by straps looped around a belt. The logical place for the stap button seemed to be in the center of the thigh. After gluing them on, I realized that it is not the optimal location. The thighs didn't seem to hold up well and the straps would be visible because they are set further in.

I glued a second set of snaps a little further down and out. This gives me a little leeway for adjustment and the straps will be hidden by the boxes that hang off of the belt.

thighbutton01.jpg


thighbutton02.jpg


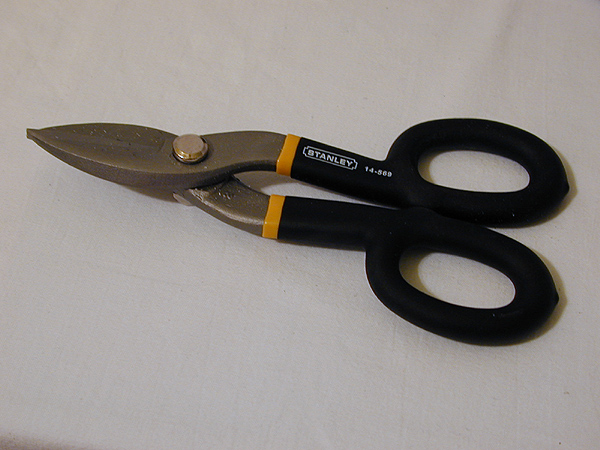
I highly recommend these heavy duty Stanley snips. They cut through abs, metal, and heavy duty velcro like they were paper.

Snips

shears.jpg
 
Last edited:
Now I'm getting into the midsection. I can wear the front and back with the sides touching. Not too uncomfortable, but it makes my arse stick out. :) I plan on using snaps for both sides, so I'll prob. leave a half inch gap on each side to give me some breathing room. Looks like it will be such a snug fit that I won't need the suspenders. I'm sure this is what it feels like to wear one of Madonna's bustiers!

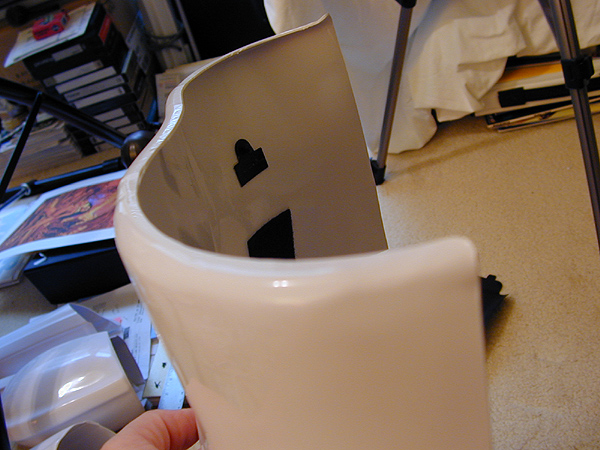
The back piece had a ridge that bothered the heck out of me:

backridge.jpg


I don't know about accuracy, but I cut it off and it is much more comfortable now:

backnoridge.jpg


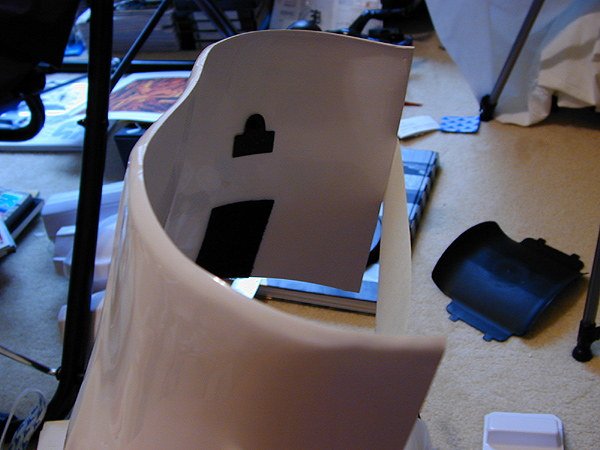
I always thought the arse plate flared out, so I got out the hot air gun and threw caution to the wind. Oh boy, this was nerve wracking. I got the sides curving in more now. I started to see where it was curling in this corner and stopped immediately. This stuff has a mind of it's own. It can be fine one minute and BAM! Plastic is going where it wants to.

melt.jpg


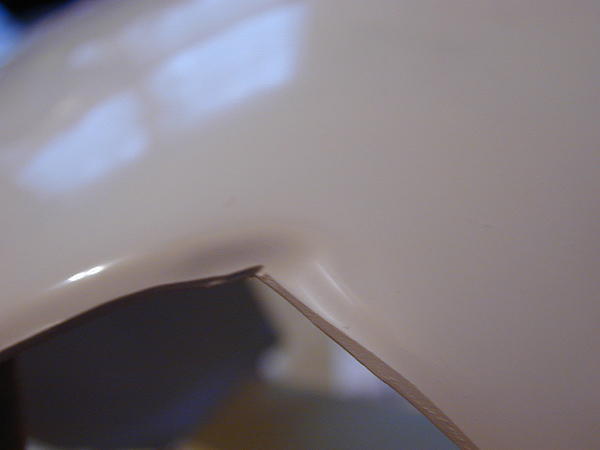
This really happened with the bottom piece because it is thin. It started to warp. :(

melt2.jpg


Luckily, that will be on the bottom and I won't have a lot of people looking down there. I hope.
 
Last edited:
Back
Top