Stormtrooper Helmets From Makerofthings

anamorphicWayne

Sr Member
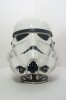
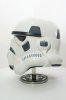
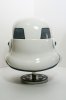
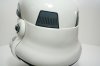
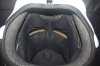
I know some folks here have spoken out about makerofthings, but is there anyone willing to share their results of one of his helmet kits?

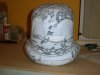
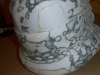
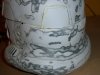
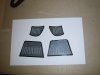
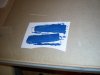
Unfortunately, I am one of those poor schmucks who purchased one and I'm having a hell of a time with it. Mind you, I'm not an expert at making props.

So, I'm just wondering if anyone has actually completed one, so I know there's still some hope. :facepalm
 
I bought 2 AP (Authenty Props) buckets. The first one seemed to take forever. I was lucky have a guy (one of the local 501st) help out that had done several TKs before, so got two done in about 5 hours.
stormtrooper-helmets-makerofthings-2013-09-08-09.10.24.jpg-232474d1378603413


Can you post images of yours? I (and others) might be able to assist if we can see what is happening here.


2013-09-08 09.10.24.jpg
 
Okay Thank you. The problem started when I noticed a lot of misalignments while I was constructing it and unfortunately during painting it. I know this kit was a recast from a TE2 and it's not symmetrical, but there are some serious warping going on with it. I don't know if this is normal, but I found the following issues: the right TOP dome is 5mm bigger than the left, the right eye is 10mm wider than the left, the front face warps in a 'C' shape, a bulge along the edging of the piping at the back and the back decals are not centered or size consistent.

So, I attempted to correct these problems the best I can with a heat gun, strips of styrene and putty. But after muck up after muck up, I' m at this stage. At the moment, I have stripped off most of the paint, assembled it (except for the ears), secured the edging/cracks and now waiting for Bondo-ing.

After that, I thought of coating it with something, because I didn't get all the paint off and I'm concern that a simple priming might do something freaky again (bubble, peel, crack).
 

Attachments

  • 100_2247.jpg
    100_2247.jpg
    768 KB · Views: 369
  • 100_2248.jpg
    100_2248.jpg
    748.3 KB · Views: 269
  • 100_2249.jpg
    100_2249.jpg
    740.3 KB · Views: 253
  • 100_2250.jpg
    100_2250.jpg
    696.4 KB · Views: 210
  • 100_2251.jpg
    100_2251.jpg
    746.7 KB · Views: 191
  • 100_2252.jpg
    100_2252.jpg
    706 KB · Views: 200
I've found it's usually better to wait and save up for a better made kit then going for the cheaper fixer-upper one because it always takes more time and sometimes just as much money in materials to build it correctly.

I too bought an AP bucket and after trimming and painting it took about 30 minutes to actually assemble into a finished helmet.
 
I am pretty sure the new MOT helmets are recast of the RS helmet. Just to note the real helmets are non symmetrical as well as are the traps slightly different. Your left eye could be trimmed more too
 
My buddy bought an entire suit from him a few years ago. I've built a few TKs myself, so I helped him. its thin, no doubt, but went together OK.


Thanks for all your input everyone.

I know the original helmets are non symmetrical and most of the kits are based on that. Also, I can't trim the left eye as it's basically the whole eye/cheek that is out.

I decided on MOT because I'm not experienced with this sort of thing and if I did screwed it up, all I wasted was bit of my time and effort.

I would like to try and salvage it, unless someone thinks otherwise.
 
I bought one probably 3 years ago and finally got it finished. It had a bumpy cap which I didn't like. I did very minimal bondo to the cap and I just primed it and wet sanded with 400 hundred between each coat. I used a high build spray can primer and probably did 5 coats. It came out smooth, you would never know it was a bumpy cap. But, I also put two cans of white and one can of gloss, wet sanding between each couple of coats, and finished off with 3 stages of buffing compound. Basically, the more you wet sand and buff, the better the paint and the surface will look.

I usually use auto quality base coat/clearcoat on my helmets but I have done a couple with spray paint (Rustoleum Pro) and clear coats and gotten a pretty decent result. The spray can clears seem to yellow over time as opposed to the auto clear.

Here's a few pics of my MOT Styrene helmet. I'm happy with the look..falcon mot.jpgfalcon mot 2.jpg
 
I bought one probably 3 years ago and finally got it finished. It had a bumpy cap which I didn't like. I did very minimal bondo to the cap and I just primed it and wet sanded with 400 hundred between each coat. I used a high build spray can primer and probably did 5 coats. It came out smooth, you would never know it was a bumpy cap. But, I also put two cans of white and one can of gloss, wet sanding between each couple of coats, and finished off with 3 stages of buffing compound. Basically, the more you wet sand and buff, the better the paint and the surface will look.

I usually use auto quality base coat/clearcoat on my helmets but I have done a couple with spray paint (Rustoleum Pro) and clear coats and gotten a pretty decent result. The spray can clears seem to yellow over time as opposed to the auto clear.

Here's a few pics of my MOT Styrene helmet. I'm happy with the look..View attachment 232842View attachment 232841


Wow. Very impressive. Thank you for your input. So, for this project you would recommend the auto quality paint instead of the conventional paint? And do you think it would be advisable to apply a thin layer of acrylic clear coat, after the Bondo, as a base for the primer or is that not necessary?
 
I would bondo the areas that need it (rear traps and cap) plus I would fill in the tear areas (under the eyes, why did you cut that out?) and fill in the tube stripes, these are just decals). I would spot prime the bondo areas until you get those areas looking smooth. Then I would prime the whole helmet at least 5 times. You need to do one coat and let it dry for a day. Then wet sand with 400 grit. Let dry. Then repeat this process as many times as it takes to have a smooth helmet.

Given your experience, I would just use Rustoleum pro spray can and many clear coats.
Apply 2 coats of white. Let dry for a day. Wet sand with 400, then repeat.

Same with the clear coat.

If you do not have any 3M buffing compound or any type of wax, then the last clear coat should just be applied over the last sanded 400 clear coat and it should be nice and shiny. If you do have compound and wax, I would wet sand the final coat of clear with 1000 grit and buff out for a mirror finish..!


Thank you so much FalconV8. Your advice has been very useful. I believe it's the best way to go.

As for the 'cut tears and tube stripes', I wanted to use some artistic license. When I first saw a Stormtrooper on the screen back in 77, I always thought those tube stripes were 'air vents'. So, when I found out they were merely decals, I was kind of disappointed. I ended up making a mesh to be put on the inside, behind the tube stripes slots and for the decals, I used thin pieces of styrene. I don't know how it'll look, but I want to give the helmet more of a functional look.
 

Attachments

  • 100_2026.jpg
    100_2026.jpg
    766.3 KB · Views: 126
  • 100_2035.jpg
    100_2035.jpg
    816.1 KB · Views: 145
As for the 'cut tears and tube stripes', I wanted to use some artistic license. When I first saw a Stormtrooper on the screen back in 77, I always thought those tube stripes were 'air vents'. So, when I found out they were merely decals, I was kind of disappointed. I ended up making a mesh to be put on the inside, behind the tube stripes slots and for the decals, I used thin pieces of styrene. I don't know how it'll look, but I want to give the helmet more of a functional look.

Looks okay so far! Good idea.
 
Update: Stormtrooper Helmets From Makerofthings

Sorry for the delay everyone. Well, I have finally completed my MOT helmet. And I must say, it didn't turn out too bad, despite the issues I had with it. Thanks again for everyone's advice. Cheers!
 

Attachments

  • IMG_2449.jpg
    IMG_2449.jpg
    315.8 KB · Views: 242
  • IMG_2451.jpg
    IMG_2451.jpg
    306.3 KB · Views: 215
  • IMG_2452.jpg
    IMG_2452.jpg
    301.8 KB · Views: 170
  • IMG_2454.jpg
    IMG_2454.jpg
    341.9 KB · Views: 168
  • IMG_2456.jpg
    IMG_2456.jpg
    382.8 KB · Views: 185
  • IMG_2458.jpg
    IMG_2458.jpg
    355.6 KB · Views: 184
  • IMG_2459.jpg
    IMG_2459.jpg
    310.5 KB · Views: 138
  • IMG_2464.jpg
    IMG_2464.jpg
    394 KB · Views: 167
  • IMG_2465.jpg
    IMG_2465.jpg
    371.4 KB · Views: 168
  • IMG_2467.jpg
    IMG_2467.jpg
    618.2 KB · Views: 222
Great job Wayne. The venting makes a lot of sense and would be great for trooping. Did the padding come with the original kit?

TazMan2000
 
This thread is more than 10 years old.

Your message may be considered spam for the following reasons:

  1. This thread hasn't been active in some time. A new post in this thread might not contribute constructively to this discussion after so long.
If you wish to reply despite these issues, check the box below before replying.
Be aware that malicious compliance may result in more severe penalties.
Back
Top