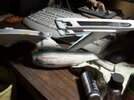
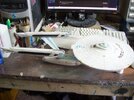
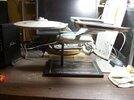
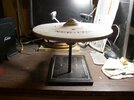
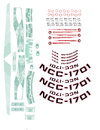
Star Trek: TMP AMT/Ertl 1:537 Refit (model and help topic!)

pengbuzz

Sr Member
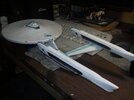
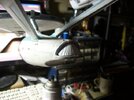
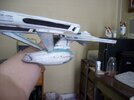
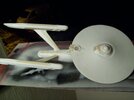
My 1/537 "smoothie" refit, from 2016 to April of last year (I had this since 2008, but finally began it around 2016 or so).

Initial construction:

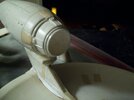
1.jpg2.jpg3.jpg4.jpg5.jpg

First painting:
6.JPG7.JPG8.JPG

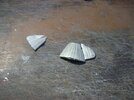
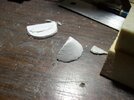
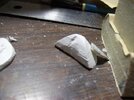
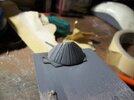
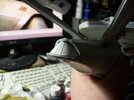
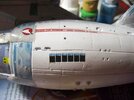
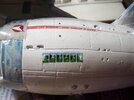
Shuttlebay Door replacement:
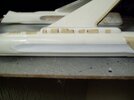
9.JPG10.JPG11.JPG12.JPG13.JPG14.JPG15.JPG

Second painting and decaling:
16.JPG17.JPG18.JPG19.JPG20.JPG21.JPG

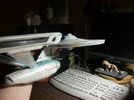
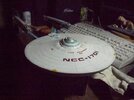
Finished model:
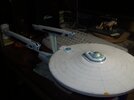
]23.JPG24.JPG

On stand:
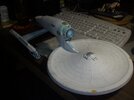
25.JPG26.JPG


Model Photography and final refined Photoshop image:

Original model:
002.JPG.97f573c8fcdadb4ed46384c1da57f247.JPG


Model with background removed:

1752230241_Finished2footRefit.jpg.58d918206f1d7f61dd234af3351b8e02.jpg


Final Photoshop image with CG elements and lighting on model:

Earth Departure 1.jpg


Thanks for looking!

Addendum 09/13/2022: since folks need help with their 1/357 Refit/ E-A kits, if anyone has suggestions, other stuff to add or if you NEED HELP, by all means please do! It took me a long time to work out all of this, and I don't want other folks to have to go through the same thing!
 
Last edited:
I have this exact kit. A couple of questions:

- Did you use custom decals, or the ones that came with the kit? I believe the included ones are rub-on and not water transfers, so not sure if they are workable.
- Was there any special method used to keep the nacelles straight? I heard it’s one of the weak points of this kit.
- I didn't get the dry transfer ones, so I actually requested decals from Round 2 (their reissue of this kit) and they sent them to me. I think if you contact them, they have an order form where you can request them (for a shipping fee). The reissue decals are actually pretty good and sized appropriately!

That said: I don't think the dry-transfer ones are sized correctly, and at their age, are probably not going to be worth the trouble. Here's how to get the ones that came with the recent reissue kit:

Link to Round 2's part request (don't worry about the upc/ receipt part)-

Round 2 Request A Part

Request form:

Round 2 Parts Request Form

The kit number/ SKU for the reissue is: AMT1080

Note:
It says on their downloadable form "Note that we cannot support AMT, MPC, Hawk, Lindberg and most Polar Lights kits manufactured prior to the fall of 2008." Please ignore this, as the reissue kit is pretty much the same as the original kit (the only difference is that your kit doesn't have all the tiny engraved panels that the later kits do. trust me: the decals will work just fine!).

The price for it should be about 10 -15 dollars s/h (when I got it, it was a fair sized sheet with the hull bottom markings, options for the "A" version, botanical garden windows, pinstripes, saucer rim band decals, etc).

Your second question:

- I just "eyeballed" it as best I could in trying to keep them straight. On this kit, the nacelles/ pylons aren't going to be perfectly straight no matter what you do (a flaw in the original sculpt); what I did though was to use a 5 minute epoxy-type adhesive and do them one at a time. If you do that, do NOT glue the warp engines on until you get the pylons seated and cured.

ALSO: when building the pylons: REINFORCE THEM WITH BRASS ROD OR STRIP!! The small plastic tabs that are meant to connect them to the hull are weak as all get-out (even weaker on the STV/ VI versions with that stupid slot cut into them) and will not hold the weight/ mass of the nacelles.

With all of that said: let me set out a plan that may help you with this:

1) Assemble the secondary hull but do not attach the dorsal or strongback (parts where the pylons attach) just yet. Instead, hollow out each half of the pylons themselves to accept a piece of brass strip or rod. Test fit repeatedly until you are satisfied they will side on securely, then drill out the strongback pylon mount pieces and test fit them there as well.

2) Mount the secondary hull onto a stand (like a post or something stronger than the old stand(s) they include); for mine, I found a heavy metal rod that extends all the way up into the dorsal (it ends at the inside of the saucer), but I can remove the ship if I need to. You're going to want to make sure that the secondary hull won't move while you're working on it. Test fit the strongback pieces into place with the pylons, then on the underside, secure and reinforce the brass tabs/ rods with epoxy. You're going to want to secure the brass hardware on the secondary hull strongback FIRST so that the stop of the secondary hull doesn't split along the seam or "pull up" from shear forces due to the pylons or saucer dorsal pulling on them.

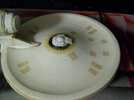
3) Assemble the saucer/ secondary hull dorsal; on mine, I glued a plastic plate under where the dorsal meets the secondary hull as a more solid mount for the dorsal, then drilled a hole for the metal rod from the stand to extend through. This is far more solid that just gluing the dorsal to the edges of the secondary hull strongback plates. You may even want to glue some plate inside the dorsal itself (just under the Photon Torpedo bay) and consider drilling both plates to accept pins to mount them together. It's up to you, but be sure to test fit extensively whatever you decide!

4) Fit the saucer to the neck before you do the pylons: you'll need to shave down one side of where the saucer meets the dorsal to get it to sit perfect even. Do not use the peg on the top of the dorsal, as it is only connected to one half and is not aligned properly. Cut that off and consider drilling/ gluing your own brass rod for this. Test fitting will be your best friend here (as with the other assemblies). I mounted my saucer first as both a reference point as well as a temporary securing point (using tape) for the pylons/ engines.

5) I recommend at this stage priming and painting the components, as it will be a lot harder once they are in place. Let everything dry solidly before continuing. You might also want to decal some of the harder-to reach/ "royal pain" areas before final assembly and clear/ matt coat them.

6) This is the tricky part: once everything is solid, you're going to want to do one pylon/ engine at a time. Put the saucer in place and hold it with tape or something temporarily, as this will help serve as a guide for you. Test-mount the pylons and engines with no adhesive whatsoever, so you can see how everything is lining up. Note: you're not going to get both perfect from all angles due to the way the model is, so just go for what looks best to you! You need to check from both right/ left, top/ bottom, and front/ back and get them aligned the best that you can. Make sure to mark gently with pencil (or some other way to not mar the surface) where you want the pylons aligned to. Then, epoxy one pylon in place, then test fit the nacelle again. If it looks good, then proceed to the other pylon and test fit that one's nacelle as well (check the first nacelle in respect to the hull, then the second one to both the hull and the first nacelle). make sure to check the sides, top/ bottom and front/ back aspects.

7) Now that the pylons are secured, you should be able to finish whatever detail painting/ decaling you have left with few issues. Once that's done and sealed, you can epoxy the saucer into place permanently (watch out for adhesive squishing out from the dorsal/ saucer join; I recommend focusing the epoxy near the pins and the inner part of the saucer) and then the nacelles (same thing: watch out for squish and focus on the inner parts of the tab to the engines!).

All of this is just my recommendations for how to proceed; others here may have better advice for you. Use your best judgment on how to proceed, as you mileage may vary in working on this.

All the best on your project; good luck, and please feel free to reach out with any other questions/ issues!


-pengbuzz
 
Last edited:
Good to know

I have a built kit that was given to me free that is sorely in need of a repaint as the paint work is a bit sloppy and the decals have started peeling off, or are completely gone.

Also as you mentioned the connections to the pylons must have been weak as they were previously broken before I received it

I did not want to spend too much restoring it, but would at least like a good set of decals
At the very least, drill a hole into the pylon and the secondary hull and put in a brass rod; otherwise the pylons aren't going to stay put and those engines will snap if you so much as sneeze.
 
- I didn't get the dry transfer ones, so I actually requested decals from Round 2 (their reissue of this kit) and they sent them to me. I think if you contact them, they have an order form where you can request them (for a shipping fee). The reissue decals are actually pretty good and sized appropriately!

That said: I don't think the dry-transfer ones are sized correctly, and at their age, are probably not going to be worth the trouble. Here's how to get the ones that came with the recent reissue kit:

Link to Round 2's part request (don't worry about the upc/ receipt part)-

Round 2 Request A Part

Request form:

Round 2 Parts Request Form

The kit number/ SKU for the reissue is: AMT1080

Note:
It says on their downloadable form "Note that we cannot support AMT, MPC, Hawk, Lindberg and most Polar Lights kits manufactured prior to the fall of 2008." Please ignore this, as the reissue kit is pretty much the same as the original kit (the only difference is that your kit doesn't have all the tiny engraved panels that the later kits do. trust me: the decals will work just fine!).

The price for it should be about 10 -15 dollars s/h (when I got it, it was a fair sized sheet with the hull bottom markings, options for the "A" version, botanical garden windows, pinstripes, saucer rim band decals, etc).

Your second question:

- I just "eyeballed" it as best I could in trying to keep them straight. On this kit, the nacelles/ pylons aren't going to be perfectly straight no matter what you do (a flaw in the original sculpt); what I did though was to use a 5 minute epoxy-type adhesive and do them one at a time. If you do that, do NOT glue the warp engines on until you get the pylons seated and cured.

ALSO: when building the pylons: REINFORCE THEM WITH BRASS ROD OR STRIP!! The small plastic tabs that are meant to connect them to the hull are weak as all get-out (even weaker on the STV/ VI versions with that stupid slot cut into them) and will not hold the weight/ mass of the nacelles.

With all of that said: let me set out a plan that may help you with this:

1) Assemble the secondary hull but do not attach the dorsal or strongback (parts where the pylons attach) just yet. Instead, hollow out each half of the pylons themselves to accept a piece of brass strip or rod. Test fit repeatedly until you are satisfied they will side on securely, then drill out the strongback pylon mount pieces and test fit them there as well.

2) Mount the secondary hull onto a stand (like a post or something stronger than the old stand(s) they include); for mine, I found a heavy metal rod that extends all the way up into the dorsal (it ends at the inside of the saucer), but I can remove the ship if I need to. You're going to want to make sure that the secondary hull won't move while you're working on it. Test fit the strongback pieces into place with the pylons, then on the underside, secure and reinforce the brass tabs/ rods with epoxy. You're going to want to secure the brass hardware on the secondary hull strongback FIRST so that the stop of the secondary hull doesn't split along the seam or "pull up" from shear forces due to the pylons or saucer dorsal pulling on them.

3) Assemble the saucer/ secondary hull dorsal; on mine, I glued a plastic plate under where the dorsal meets the secondary hull as a more solid mount for the dorsal, then drilled a hole for the metal rod from the stand to extend through. This is far more solid that just gluing the dorsal to the edges of the secondary hull strongback plates. You may even want to glue some plate inside the dorsal itself (just under the Photon Torpedo bay) and consider drilling both plates to accept pins to mount them together. It's up to you, but be sure to test fit extensively whatever you decide!

4) Fit the saucer to the neck before you do the pylons: you'll need to shave down one side of where the saucer meets the dorsal to get it to sit perfect even. Do not use the peg on the top of the dorsal, as it is only connected to one half and is not aligned properly. Cut that off and consider drilling/ gluing your own brass rod for this. Test fitting will be your best friend here (as with the other assemblies). I mounted my saucer first as both a reference point as well as a temporary securing point (using tape) for the pylons/ engines.

5) I recommend at this stage priming and painting the components, as it will be a lot harder once they are in place. Let everything dry solidly before continuing. You might also want to decal some of the harder-to reach/ "royal pain" areas before final assembly and clear/ matt coat them.

6) This is the tricky part: once everything is solid, you're going to want to do one pylon/ engine at a time. Put the saucer in place and hold it with tape or something temporarily, as this will help serve as a guide for you. Test-mount the pylons and engines with no adhesive whatsoever, so you can see how everything is lining up. Note: you're not going to get both perfect from all angles due to the way the model is, so just go for what looks best to you! You need to check from both right/ left, top/ bottom, and front/ back and get them aligned the best that you can. Make sure to mark gently with pencil (or some other way to not mar the surface) where you want the pylons aligned to. Then, epoxy one pylon in place, then test fit the nacelle again. If it looks good, then proceed to the other pylon and test fit that one's nacelle as well (check the first nacelle in respect to the hull, then the second one to both the hull and the first nacelle). make sure to check the sides, top/ bottom and front/ back aspects.

7) Now that the pylons are secured, you should be able to finish whatever detail painting/ decaling you have left with few issues. Once that's done and sealed, you can epoxy the saucer into place permanently (watch out for adhesive squishing out from the dorsal/ saucer join; I recommend focusing the epoxy near the pins and the inner part of the saucer) and then the nacelles (same thing: watch out for squish and focus on the inner parts of the tab to the engines!).

All of this is just my recommendations for how to proceed; others here may have better advice for you. Use your best judgment on how to proceed, as you mileage may vary in working on this.

All the best on your project; good luck, and please feel free to reach out with any other questions/ issues!


-pengbuzz
Wow I wasn’t expecting such a detailed response, thanks for your time and effort!
 
No problem! :) I just want this to come out for you the best that it can!
I looked at the Request form for the Decals, and have a few questions:

- Am I supposed to fill in the online form first, then print out the second and send it as a letter?
- Are you sure I don’t need to provide a receipt or unique code for them to send it out? It seems to be a required step on the online form.
- I’m based in the UK, not the US. It seems Round2 want cash in hand for the postage expense, but I don’t have dollars. What was your experience, and do you think they still might post to the UK?

Thanks again
If you don't have the receipt and the upc code, you have to pay for shipping. if you do have them and send them, they should just ship it to you.
My experience was that I sent the form online and mailed the payment for the shipping and they mailed me the part, but I live in the US.

What I would do is contact their customer service department via email and ask them directly, since you live in the UK. That way you get it straight from them.
Thanks for this, I wrote them an email and see what they say.
 
I got a response, the rep said it would be $29.95. Basically $10 for the paper, $20 for the international shipping. Seems rather expensive for just one sheet of paper...
 
I hope Shaw does some drawings of this kit as he did the AMT TOS Enterprise

The 1/537 is different from Kimble’s—-with a proper drawing here:


Also nice:
 
I got a response, the rep said it would be $29.95. Basically $10 for the paper, $20 for the international shipping. Seems rather expensive for just one sheet of paper...
Wow... O.O That's absurd!!!

I put together a sheet for my ship a while back (before my decal paper supply had run out which shut down my hopes for that, forcing me to contact R2), let me give you that file:
 

Attachments

  • AMT Refit Decals Final.jpg
    AMT Refit Decals Final.jpg
    5.6 MB · Views: 148
Last edited:
I have a built kit that was given to me free that is sorely in need of a repaint as the paint work is a bit sloppy and the decals have started peeling off, or are completely gone.

Also as you mentioned the connections to the pylons must have been weak as they were previously broken before I received it

I did not want to spend too much restoring it, but would at least like a good set of decals
Not to hijack OP's thread, but I have a set of Tom Sasser's old accurizing parts for the 537 -- the basis for his tooling of Polar Lights' 1:350. I'm never going to use them. If you want to put them into your restoration/upgrade, PM me and we can figure something out.
 
Wow... O.O That's absurd!!!

I put together a sheet for my ship a while back (before my decal paper supply had run out which shut down my hopes for that, forcing me to contact R2), let me give you that file:
Thanks so much! I was thinking about getting some decal paper for the Aztec pattern too, so I’ll give these a go too.
 
Thanks so much! I was thinking about getting some decal paper for the Aztec pattern too, so I’ll give these a go too.
Cool; just make sure that when you print these, you print them 11 x 8.5 inches; they're sized for the 1/537 at that scale/ You may need to do a test print on paper first to get the size right.
 

Your message may be considered spam for the following reasons:

If you wish to reply despite these issues, check the box below before replying.
Be aware that malicious compliance may result in more severe penalties.
Back
Top