MonsieurTox
Master Member
Hey guys, do you have any idea about this part ?

Thanks !
I quote myself in case someone who knows what this part is missed the post ! That's one of the 2 last (big) parts which are to be found for the facia ! Thanks guys !
Hey guys, do you have any idea about this part ?
Thanks !
So those bits are the last one we're missing on the facia ?
Anyone knows more about those ones ?
Thanks ! We're close ! :love
Thanks for the info Blackpig, I dont understand why this part is not the same and since the new one is smaller we should see the shape of the original part... and it doesnt look to have been repainted and I cant notice any touch up in this area.
Anyway that's too bad we have less pics in the US Chronicles ! :cry
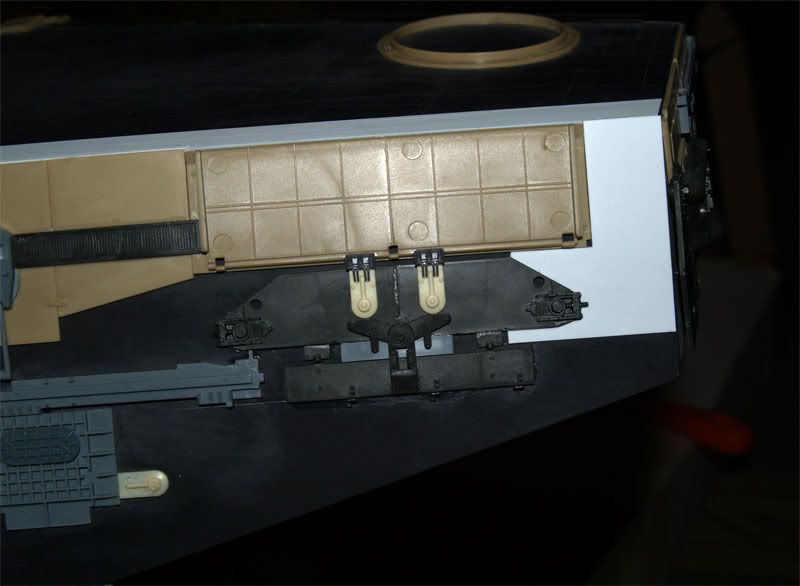
I did something on my bridge, it's not glued yet, but I think it's how the original is, Ill post a pic tomorrow, thats about the plating ! I need your opinion on that !
")
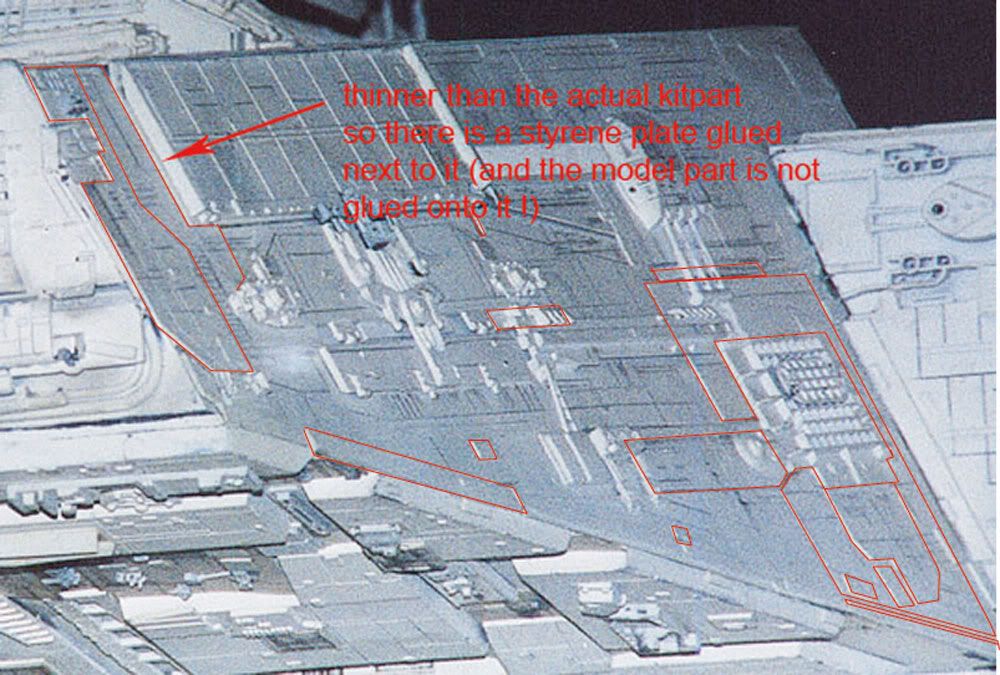
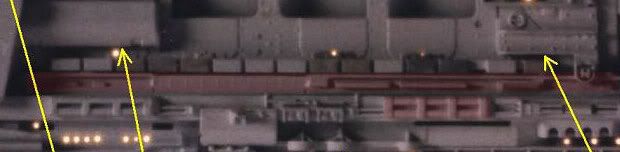
If you look at the ILM model from the right side you can see there is a step formed by a plate. And it's match all the shadows we can see in pics (weird to say something match shadows :lol).
There is another strip right under the M5 fender going to the hornet part I think (its not in my pic).
Let me know frankly what do you think about that ! Thanks


 ). I'm not sure though !
Hey Blackpig thanks for the input ! I didnt know exactly the shape of the styrene plate so I cut it like that, are you sure it's cut at angle ? I cant see it in any pics
Oh yeah I see it now for the croc part !
Yeah I inserted the M5A1 part between the croc parts yesterday after having take a look at the pic of the layed parts you posted earlier in this thread. I also did that on the left side but, even if the base is the same, I mean they used the M5A1 part, they glued something onto the tip of it ! I dont know what it is so I let it like that for now.
Argh yeah I thought the mobelwagen parts were identical but they are not. Beside the notches and the raised edges, the most problematic problem are the ejection holes because they glued styrene chips on them to hide them. I have 2 solutions : putty the ejection holes and glued the chips into the next case. Or adding the chips on the ejection holes but they will not be in the right case. I could go with the second because that's the easier way to do... and it will not be very noticiable. I just cant removed the parts unfortunatly
I have no idea what the small part is ! I dont have good pics of the back, hard to tell from overcompressed pics ! :wacko
I cant thank you enough for your invaluable help, thanks Blackpig !
Hey Monsieur Tox. You are really great SD builder!! :love
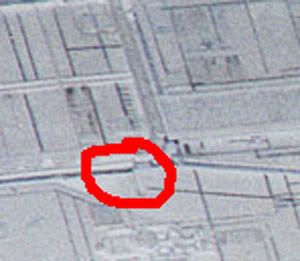
I can see a hollow to the red circle that the pic1, don't you think so?
But I'm not sure about this. Sorry!! We need the pics clearly!!!:love
I mean about the mobelwagen parts,the exchange to another armor part.(pic2)
Thanks
BlackPig
Did you noticed that Blackpig ?
It looks like they shaved the nut of the right (portside) croc part and put it back (the fit is not flush, there is a shadow). I think it's a cover part for the Falcon mounting point !

Well to be honest I cant see anything on the first pic ! :lol Maybe a part or styrene strip on the left red circle ? That's very confusing :wacko
Why I should replace my Mobelwagen ? (except the fact I put the right part on the left and the left on the right) ? I cant remove them, it's too late I did the plating on the top which cover the gap created by the top of the mobelwagen so I cant remove them :cry
Did you put the right part on the right ?
If you done, It's O.K. That's why.:thumbsup
And I will PM for you.
Thanks
BlackPig
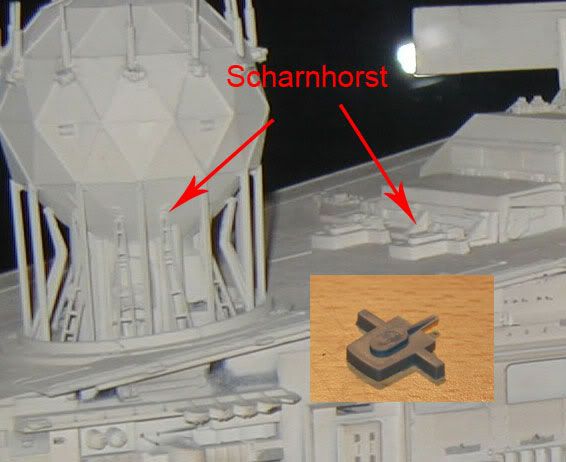
Ok I found them, they are from the KGV :
Let me know what do you think, size, shape match the pics !
I dont know what the other parts are, looks like small guns with the barrels cut off ?
You're very welcome my friend, it looks like those parts are also on the right side, argh I need to buy another KGV. And I need 11 more Gneisenau. This thing will kill me !
lol:lol).