So I Built a Vacuum-Former... Mostly

Falafel Flop

New Member
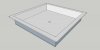
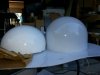
I finally finished a vacuum-former I started last year (it went into "storage"). It is roughly 12" x 18" with 3/4" plywood sides and bottom, 1/4" pegboard top with a supporting block inside at the center (to eliminate sag).

6iWMl4r.jpg

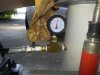
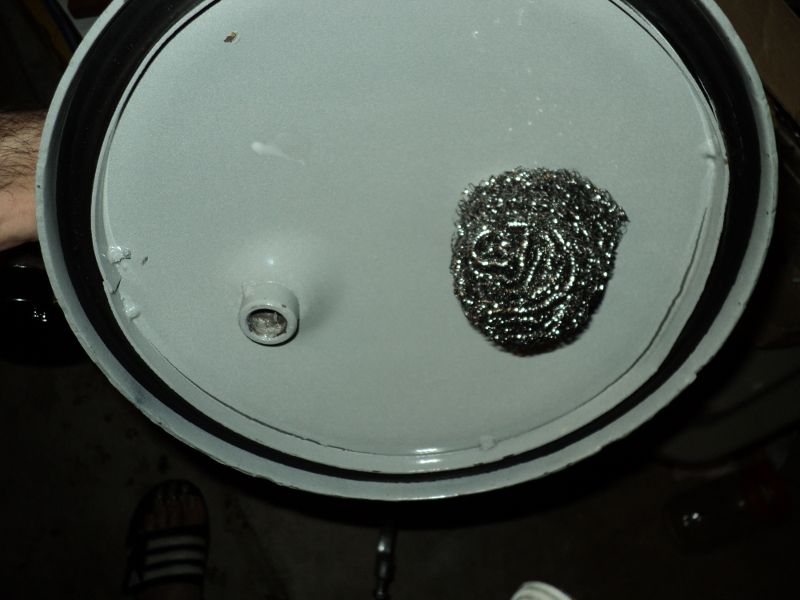
I plan on using it to make lighter canopies for the above R/C helicopter (lighter weight really adds speed at that size) to begin with and then progress to more complicated things. I've never used a vacuum former before, so this will be a learning experience (I purchased a few small sheets of .013 PET to use starting out). I attempted my first ever pulls earlier today and decided it needed more work. So I'll be applying a high-heat gasket tape around the edges on the top of the platen and will find a way to get a better seal where the vacuum connects (I definitely need to work on the seal).

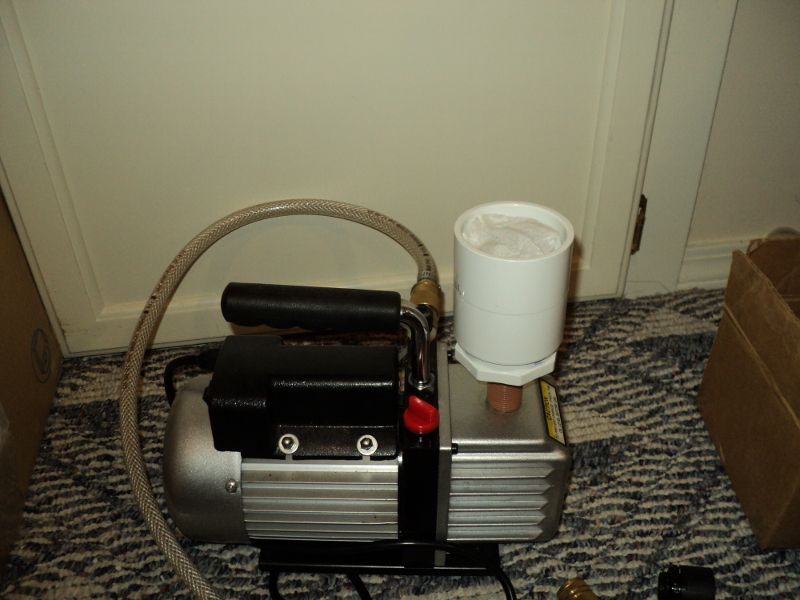
I used a normal upright vacuum for the process even though everyone recommended the MINIMUM of a shop vac. You can probably assume how my first couple pulls came out lol. So I also plan on picking up a shop-vac soon.

Lastly, I used the oven and was not fond of the possibility (no matter how distant) of melting plastic in there so I plan on making a heater box like XRobots did. Hopefully I can get the materials soon (patio heater and wood) and get it built before too long. Unless you'd say the oven is still a good method...

I'd appreciate any tips if you can spare the time!

Regards

6iWMl4r.jpg
 
Last edited by a moderator:
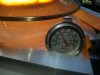
Vacuum Forming (postive) is fun when it works and really frustrating when it doesn't. I have had too many fails with positive vacuum forming and now have turned to reverse vacuum forming and have had far greater success.

I think for making parts like canopies that you mentioned, you might have greater success because all you need is a cutout the same size as the part.

My proof of concept.

attachment.php


This is 3mm (1/8") Perspex. The dome is 250mm dia (10") and about 127mm (5" high). It is not 100% because this was just testing a theory and not meant to be perfect in shape. It also was not formed using a clamp system, hence why the edges warped and ultimately broke the seal.

A couple of points -

I am not using a vacuum cleaner, rather a 3CMF vacuum pump which is the same pump used with my vacuum chamber for degassing resin etc. The best vacuum cleaners are said to pull about 6"HG (inches of mercury). This rig pulls 30"HG! So suction will never be an issue.

I made my seals from thin insertion rubber sheet. This way you can cut out the center hole.

For heat, I am using both a portable oven top known as a "turbo cooker" plus heat gun and these sources can be used for both positive and reverse forming.

The key difference here is that once a seal is made, heat is then applied. With positive forming, you have to heat the plastic, then evacuate the air and make a seal before the plastic cools. Time is often not on your side.

With this method, you take your time heating as you go.

I will make some other odd shapes soon and post results.
 

Attachments

  • 20150319_090535.jpg
    20150319_090535.jpg
    114.4 KB · Views: 1,370
So with reverse forming you apply heat while the vacuum is on and the plastic is over the mold (as opposed to heating it up and placing the moldable plastic on in one fell swoop)? I'm still trying to understand how it all works lol

And as far as a vacuum pump, aren't they moderately pricey? I mean I'm not living in poverty, but I'd rather not drop $200 on something that can't be used for more than that purpose.

Thanks for stopping in by the way, this seems like it could be a really fun process once you get the hang of it.

Lets start with the gear. A good vacuum cleaner (like a Dyson) can cost several hundred dollars. I bought my vacuum pump for $103 on ebay (including shipping). I initially bought it for the vacuum chamber and once that was made, I decided to see if I could use that rig for other things. That is when I discovered reverse vacuum forming.

So instead of making a positive buck (male) and pull plastic over that, you make a female mold and suck the plastic into the cavity.

The highest part of this mold is the rim, so you can place a rubber seal around that if needed and get a seal before you heat and clamp the plastic to that rim.

When you heat the plastic, you will notice that it raises towards the heat source, then it slumps. In some cases, this raise can burn the plastic or even melt if it touches the heater.

When you apply heat to a reverse form, the plastic is already under suction, so as it softens, it can't raise up. It will be begin to pull down into the cavity only. It can only go as far as the wall of the mold. So each part you pull is exactly the same size. On a positive form, you can have different sized parts based on the thickness and heat in the plastic.

If your mold is simply a hole in the box (like how I did my dome), then you have to watch the process and heat more evenly. In the case of making a dome for the canopy, you would concentrate the heat more centrally and not heat the edges as much. You would stop heating as it pulls down so as not to over stretch the edges.

I am also wanting to test a hybrid form using positive bucks for this method rather than having to make negatives of everything. I already own a stash of positive bucks. I believe that the shape of the "platen" could be a large "dish" with angled side walls where the walls are as deep as the part you wanting to pull. If you have smaller parts, you stack blocks of wood under them to raise them up and only pull to their depth. You also only need a single hole to evacuate the air rather than the peg board or traditional platen.

EDIT: So I jumped on YouTube and found some videos that should explain this better. And one of the best videos is actually making a hot tub.

Videos:


https://www.youtube.com/watch?v=Cox8fR1rUBI


https://www.youtube.com/watch?v=Yk9NNwY8MiA


https://www.youtube.com/watch?v=iVQPDmOh-Gw


https://www.youtube.com/watch?v=KGAuunWs8io


In the video by Versformer 3D, they say they are using a foam to make bucks and I got thinking about poly expanding foam. You buy this in either a pressure pack can or as a A/B mixer. The point being, it could be useful for making female molds.


https://www.youtube.com/watch?v=EKAVeSB3YTs
 
Last edited:
Okay, so based off of your input, maybe I should just invest in a decent vacuum pump and use the kitchen oven for the time being (bit of a trade off for the better I suppose).

Anyways, reverse forming seems like an excellent alternative for more detail. As far as the female mold, does the expanding foam have the smoothness of, say, plaster of paris? I'm curious just due to the fact that it seems to be more porous in its final state.

I like your idea on the hybrid version, it would save a substantial amount of space for sure. Instead of stacking blocks, you could have something along the lines of a pair of third hands

42745-03-1000.jpg

Now as far as the vacuum into the mold, would I be correct in assuming that it only requires vacuum on the outside of it (like when using the standard male platen)? I'm just surprised the plastic would be sucked into nooks and crannies without having at least a few small holes near the low points. For a lot of my applications, this could be a better option (reverse forming) if that proves true.

Interesting videos -and what a coincidence, I actually was watching the Pacquiao mask vid just a couple days ago!
 
Okay, so based off of your input, maybe I should just invest in a decent vacuum pump and use the kitchen oven for the time being (bit of a trade off for the better I suppose).

If using this in your kitchen, just be aware that vacuum pumps tend to let out an oily smoke until they reach a full negative vacuum. You can plug the exhaust port with a sponge to catch the oily smoke. Using the oven will heat the plastic, but you are still rushing to get a seal that way.

Anyways, reverse forming seems like an excellent alternative for more detail. As far as the female mold, does the expanding foam have the smoothness of, say, plaster of paris? I'm curious just due to the fact that it seems to be more porous in its final state.

I would suggest that the female tool needs to be made from a bit of both unless housed in a seal-able box. Foam on its own probably won't be enough. Today I did some vacuum testing before starting on my new rig for this and found that raw MDF won't cut it. It is too porous and seems to suck air after about 6"HG. Laminated MDF on the other hand seems fine with suction up to 15"HG with no problems but it seems you may need the edges laminated as well. I am also concerned about the seals on the joins and edges now.

I don't really be wanting to make all my molds as heavy as concrete if I don't have to.

Ordinarily, Plaster Of Paris is not great for vacuum forming bucks as after a few pulls, it tends to crack. You can make bucks out of Utra-cal (cement powder?) but may still need to cloth reinforce the molds. Female molds don't have the same pressures applied. The issue here is can it stand the vacuum. Though the heated plastic is the soft part that gives before the walls break.

Female molds can be stacked, so storage is easier. Male bucks have to be stored in other containers and can be broken if not stored properly.

I like your idea on the hybrid version, it would save a substantial amount of space for sure. Instead of stacking blocks, you could have something along the lines of a pair of third hands

My initial box will be 200mm deep. Most of my bucks are close to 100mm tall, so 75 x 35mm pine will be fine to lift the parts.


Now as far as the vacuum into the mold, would I be correct in assuming that it only requires vacuum on the outside of it (like when using the standard male platen)? I'm just surprised the plastic would be sucked into nooks and crannies without having at least a few small holes near the low points. For a lot of my applications, this could be a better option (reverse forming) if that proves true.

Technically 1 hole should be all that is needed from INSIDE the mold to the pump. As the vacuum is increased, air is pulled, the heated plastic collapses to fill the void. Like with positive forming, you will still need to avoid undercuts etc.

The next video in the series was "slump" forming where they basically heated the plastic and let gravity take over. They made the perfect canopy for a RC aircraft.

My intention is to sit my rig on top of the vacuum chamber I already have. As I increase suction, the soft spot is the plastic on the top. I am doing mine this way as the chamber is a convenient 500mm tall and makes a good working height, but also because I have a re-pressure valve on the side of the chamber to release the parts when I'm done. My plumbing is already done and pulls a full negative atmosphere (30"HG), so I am simply replacing the Perspex lid with the base of the female tool for extended duties. .

The point being that once this is all set up and working, you can heat the plastic into cavities on the edges before working to the centre. Provided you have a proper seal on the top rim, the air will be pulled out via the hole and that plastic will be sucked into the cavity as well as being forced into the cavity by positive air pressure outside.

Interesting videos -and what a coincidence, I actually was watching the Pacquiao mask vid just a couple days ago!

Yeah the mask in thin, but amazing detail. It is also the ability to use thicker plastic and as is mentioned in one of the videos, up to 1/4" (6mm) which is what I am interested in. That thickness is just about impossible for a DIY positive form. So provided I can work out a cost effective way to make this box, should be good to go.
 
I so can't wait until I sort this box material out.

I ran that dome test again using 3mm Perspex and this time I got a whopping 7.5" pull.

Material is 3mm Perspex
Tempature was set at 200 degrees C, though my temp gauge only shows 100.
Suction was limited to 15"HG which is about 3x what a vacuum cleaner can pull.

attachment.php

attachment.php

attachment.php
 

Attachments

  • 20150427_145240.jpg
    20150427_145240.jpg
    166.9 KB · Views: 1,232
  • 20150427_145251.jpg
    20150427_145251.jpg
    149.5 KB · Views: 1,297
  • 20150427_162029.jpg
    20150427_162029.jpg
    125.1 KB · Views: 1,209
If using this in your kitchen, just be aware that vacuum pumps tend to let out an oily smoke until they reach a full negative vacuum. You can plug the exhaust port with a sponge to catch the oily smoke. Using the oven will heat the plastic, but you are still rushing to get a seal that way.

Thanks for the tip, I'll keep it in mind.

Technically 1 hole should be all that is needed from INSIDE the mold to the pump. As the vacuum is increased, air is pulled, the heated plastic collapses to fill the void. Like with positive forming, you will still need to avoid undercuts etc.

That's true, the air really only needs one place in that area to be able to go through.

The next video in the series was "slump" forming where they basically heated the plastic and let gravity take over. They made the perfect canopy for a RC aircraft.

So with slump forming (on a small scale), gravity would be enough to fill in details? I can certainly see applications, but I would think that a vacuum would be necessary to some extent.

My intention is to sit my rig on top of the vacuum chamber I already have. As I increase suction, the soft spot is the plastic on the top. I am doing mine this way as the chamber is a convenient 500mm tall and makes a good working height, but also because I have a re-pressure valve on the side of the chamber to release the parts when I'm done. My plumbing is already done and pulls a full negative atmosphere (30"HG), so I am simply replacing the Perspex lid with the base of the female tool for extended duties. .

The point being that once this is all set up and working, you can heat the plastic into cavities on the edges before working to the centre. Provided you have a proper seal on the top rim, the air will be pulled out via the hole and that plastic will be sucked into the cavity as well as being forced into the cavity by positive air pressure outside.

Yeah the mask in thin, but amazing detail. It is also the ability to use thicker plastic and as is mentioned in one of the videos, up to 1/4" (6mm) which is what I am interested in. That thickness is just about impossible for a DIY positive form. So provided I can work out a cost effective way to make this box, should be good to go.

Interesting; It can definitely create a higher quality finished product. Keep me posted on your progress, I find this intriguing!


I so can't wait until I sort this box material out.

I ran that dome test again using 3mm Perspex and this time I got a whopping 7.5" pull.

Material is 3mm Perspex
Tempature was set at 200 degrees C, though my temp gauge only shows 100.
Suction was limited to 15"HG which is about 3x what a vacuum cleaner can pull.

http://www.therpf.com/attachment.php?attachmentid=469903&d=1430122138
http://www.therpf.com/attachment.php?attachmentid=469904&d=1430122138
http://www.therpf.com/attachment.php?attachmentid=469905&d=1430122148

Wow, that's a lot of progress. I see what you mean about the advantages of a vacuum pump. By the way, how can I tell which vacuum pump to buy used? I mean as far as quality and power.
 
That's true, the air really only needs one place in that area to be able to go through.

I tend to think of the air as a liquid. A bath only has one drain hole and if it gets blocked, the water won't drain. The same will apply to the air being sucked out.


So with slump forming (on a small scale), gravity would be enough to fill in details? I can certainly see applications, but I would think that a vacuum would be necessary to some extent.

I found that amazing and didn't think plastic would heat like that. His heater must be really hot. I would have assumed vacuum would be needed to at least assist here. I also posted that link in a Xeno thread where some guys were discussing making the clear dome for the head. On that scale, I think gravity would be fine. The challenge is heating the material and not burning it. I did a clear Persex pull once but set the thermo too high and the surface bubbled.


Interesting; It can definitely create a higher quality finished product. Keep me posted on your progress, I find this intriguing!

The more I look into this, the more I find this method superior in every way. And I liked his comment where the part can look as good as an injection molded part. He is right though, way more work in making the tools. However, if you look after them, they should last ages.


Wow, that's a lot of progress. I see what you mean about the advantages of a vacuum pump. By the way, how can I tell which vacuum pump to buy used? I mean as far as quality and power.

I have been playing with vacuum forming for a while and kept having fails - either heat or suction or both. I figure that this way, I can pretty much isolate each link in the chain and remove or change out the weak links as I go. This time I have also started at the end of the chain (suction and seals) and am working my way back to the front (heating). Last time, I started with the platen and then proceeded to build the form around that and that is where I fell into trouble with seals and heat. Suction and seals are not an issue right now and heat is good for now as well Will see what happens as I increase the size of the rig. Having said that though, my method does not require the plastic to be heated prior to the start of a pull, so I can progressively heat the plastic and pull the part in stages by keeping the form under vacuum.
 
It's been a busy week :eek

I found that amazing and didn't think plastic would heat like that. His heater must be really hot. I would have assumed vacuum would be needed to at least assist here. I also posted that link in a Xeno thread where some guys were discussing making the clear dome for the head. On that scale, I think gravity would be fine. The challenge is heating the material and not burning it. I did a clear Persex pull once but set the thermo too high and the surface bubbled.

:unsure yeah I can imagine there's gotta be a fine line as far as the right temperature in that method.

The more I look into this, the more I find this method superior in every way. And I liked his comment where the part can look as good as an injection molded part. He is right though, way more work in making the tools. However, if you look after them, they should last ages.

I agree on all accounts. Especially if you're going to be mass-producing a specific item, it's a no-brainer. Once I figure out my current set-up and get a few positive pulls (as I have yet to get even one of those) I'll probably go that route for my smaller helicopter canopies. Like you say, if you take care of the tools, they'll last ages.

I have been playing with vacuum forming for a while and kept having fails - either heat or suction or both. I figure that this way, I can pretty much isolate each link in the chain and remove or change out the weak links as I go. This time I have also started at the end of the chain (suction and seals) and am working my way back to the front (heating). Last time, I started with the platen and then proceeded to build the form around that and that is where I fell into trouble with seals and heat. Suction and seals are not an issue right now and heat is good for now as well Will see what happens as I increase the size of the rig. Having said that though, my method does not require the plastic to be heated prior to the start of a pull, so I can progressively heat the plastic and pull the part in stages by keeping the form under vacuum.

Ahh, so you make sure the seal is good working from the pump down. That's logical. I definitely envy your set-up... do you have any pictures of it?

And by the way, where do you find sheets of plastic for when you form? Australia and the US can't be that different in terms of the types of locations you can purchase it from lol. It's just that ebay sheets are not cost-effective in the least

---

Also, I found this while I was searching the web. Go figure, you can convert a tire-inflator type of compressor into a vacuum pump.

Compressor Mod

Vacuum Tank (replace vacuum cleaner with modified compressor)

It's a bit of a frankenstein's monster but I think this might work for my entry level purposes. Like you were saying, the shop-vacs don't have enough pressure. According to some of the comments, some people got close to 30 Hg! And a lot cheaper than I would have thought.

That option aside, I did find some vacuum pumps available in my area.

Older One
Newer One

With an actual vacuum pump, is the tank necessary? If not, I'll probably go that route.
 
Last edited:
I saw this thread a few days ago. I found it doing some searches because I am out growing my small 14 inch square table. Intresting, I thought. I come back today I am blown away by what cavx is doing! I too want to see more pictures of your whole rig, especially what you are using as a heater, that is my main hang up. I saw your rig in another thread where you were using halogen lights and am considering that option. Are you still using that?

Depending on where you are located you may not even know you have a plastic dealer in your area. Do a search for local plastic dealers. Or, look for sign and trophy shops. They use lots of acrylic and other plastic to make trophies, name plates, etc. Call and ask them where they get their plastic. They may be willing to sell to you or give their supplier a referral. It will be cheaper if you find a local supplier who will most likely want to sell nothing smaller than a 4x8 foot sheet. It sounds like a lot, but I did some math. Depending on thickness I get a 4x8 sheet for about the same price as 3 or 4 packs of Plastruct and have so much more material left over for any of my various projects.

I already have a vacuum pump that I use to degass resin. It was less than $100 at Harbor Freight. It has worked very well for a "cheap" tool. I was bugged by the oil mist that it exhausts as well. I read online that the cloud is actually very bad for you to breath so I went looking for filter options. A real filter is very expensive. Someone here on the rpf suggested a DIY solution of a stainless steel or copper pot scrubber. Here is what I came up with. The top is PVC. The threads on the pump were actually very difficult for me to find. It turns out that a toilet float unit is perfect and cheap. I cut it up and glued it to the PVC and stuffed the scrubber in and topped with a paper towel(to make me feel better). If you read about the real filters they will say this filter is worthless, the oil mist is so small it will go right through. Maybe some does get through, but the inside of my filter is coated in oil and I no longer have that visible cloud, so it is an improvement.

DSC05605_zpsr9mnppuo.jpg


The scrubber also works great as a diffuser on the inside of my pressure pot.

DSC05603_zpstraazqmm.jpg
 
:unsure yeah I can imagine there's gotta be a fine line as far as the right temperature in that method.

Actually a fine line to all this stuff.

So Perspex works with temps up to 200 degrees C. ABS is seems wants temps closer to 130 degrees C. I just burned a piece of ABS the other day at 200 degrees C. I think in time, creating a LUT (Look Up Table) would be useful for all the different temps for different plastic types.

Ahh, so you make sure the seal is good working from the pump down. That's logical. I definitely envy your set-up... do you have any pictures of it?

No pictures of the complete rig yet as I still building the last bits. Not just a seal, but one that can take suction way above 6"HG.

And by the way, where do you find sheets of plastic for when you form? Australia and the US can't be that different in terms of the types of locations you can purchase it from lol. It's just that ebay sheets are not cost-effective in the least

I have an ABN (Australian Business Number) so I can go into trade places and get sheets of plastic for less than retail.

With an actual vacuum pump, is the tank necessary? If not, I'll probably go that route.

Umm depends on whom you talk too. The idea behind a surge tank is take the suction from say 6"HG with the vacuum cleaner to well over 15"HG instantly. Intially my vacuum chamber was to double as a surge tank. What I found was it ran out too fast. It would need it to be at least 4x the size to be of any real use.

With this new method, I don't need it as I can place the space under the plastic under a heavy suction before I start heating. So as soon as the plastic softens, it starts to be pulled in. The cool thing about this is that heated plastic will normally bow up towards the heating elements before it slumps. If it touches, it is all over. This way, the plastic can't bow up. So the pump is off during this process and only needs to be turned on as the pressure inside the chamber raises. Turning the pump on will need to happen once the plastic is at temp to evacuate all the air. And because the vacuum goes up in the decreasing space (as the plastic pulls down), the pump will be able to pull down to a full vacuum if needed and this will give the absolute best detail possible. Unlike tradition vacuum forming, I will probably be able to leave the heat on as well during the pull to ensure the plastic stays at the ideal temp. It won't burn because as it pulls down, it actually moves away from the heat.

I saw this thread a few days ago. I found it doing some searches because I am out growing my small 14 inch square table. Intresting, I thought. I come back today I am blown away by what cavx is doing! I too want to see more pictures of your whole rig, especially what you are using as a heater, that is my main hang up. I saw your rig in another thread where you were using halogen lights and am considering that option. Are you still using that?

Right now I am using a small bench top oven called an "easy cooker". These sometimes go by the name "turbo cooker". An Aussie invention apparently :) The halogens get hot fast, but to max their potential, I will install a small fan to force the heat onto the plastic. This cooking unit I am using has both a fan and halogens plus a thermostat all built in. For $40, it is awesome.

Depending on where you are located you may not even know you have a plastic dealer in your area. Do a search for local plastic dealers. Or, look for sign and trophy shops. They use lots of acrylic and other plastic to make trophies, name plates, etc. Call and ask them where they get their plastic. They may be willing to sell to you or give their supplier a referral. It will be cheaper if you find a local supplier who will most likely want to sell nothing smaller than a 4x8 foot sheet. It sounds like a lot, but I did some math. Depending on thickness I get a 4x8 sheet for about the same price as 3 or 4 packs of Plastruct and have so much more material left over for any of my various projects.

Absolutely cheaper to buy 8 x 4 sheets than it is to buy 2 x 3 sheets from a hard ware store. I have several plastic trade outlets close. I will have to buy a small bench saw to cut them up though or I have to pay a cutting fee. In fact the other week when I bought my light diffuser for the 2015 jacket, I paid the same for the 8 x 4 plus a cutting fee as the 3 x 2 would have cost.

I already have a vacuum pump that I use to degass resin. It was less than $100 at Harbor Freight. It has worked very well for a "cheap" tool. I was bugged by the oil mist that it exhausts as well. I read online that the cloud is actually very bad for you to breath so I went looking for filter options. A real filter is very expensive. Someone here on the rpf suggested a DIY solution of a stainless steel or copper pot scrubber. Here is what I came up with. The top is PVC. The threads on the pump were actually very difficult for me to find. It turns out that a toilet float unit is perfect and cheap. I cut it up and glued it to the PVC and stuffed the scrubber in and topped with a paper towel(to make me feel better). If you read about the real filters they will say this filter is worthless, the oil mist is so small it will go right through. Maybe some does get through, but the inside of my filter is coated in oil and I no longer have that visible cloud, so it is an improvement.

I am lucky where I live, the temps seldom fall below 12 degrees in winter. Right now, it is about 18 degrees C. So I can open my work shop up and let it vent.
 
I think in time, creating a LUT (Look Up Table) would be useful for all the different temps for different plastic types.

Yes, I agree. I see a possible thread in the future as well.

Umm depends on whom you talk too. The idea behind a surge tank is take the suction from say 6"HG with the vacuum cleaner to well over 15"HG instantly. Intially my vacuum chamber was to double as a surge tank. What I found was it ran out too fast. It would need it to be at least 4x the size to be of any real use.

With this new method, I don't need it as I can place the space under the plastic under a heavy suction before I start heating. So as soon as the plastic softens, it starts to be pulled in. The cool thing about this is that heated plastic will normally bow up towards the heating elements before it slumps. If it touches, it is all over. This way, the plastic can't bow up. So the pump is off during this process and only needs to be turned on as the pressure inside the chamber raises. Turning the pump on will need to happen once the plastic is at temp to evacuate all the air. And because the vacuum goes up in the decreasing space (as the plastic pulls down), the pump will be able to pull down to a full vacuum if needed and this will give the absolute best detail possible. Unlike tradition vacuum forming, I will probably be able to leave the heat on as well during the pull to ensure the plastic stays at the ideal temp. It won't burn because as it pulls down, it actually moves away from the heat.

So then, you have the heat right above the plastic, which in turn is right above the buck with vacuum pump already on while the plastic is heating? I'd REALLY like to see that. :popcorn

Right now I am using a small bench top oven called an "easy cooker". These sometimes go by the name "turbo cooker". An Aussie invention apparently :) The halogens get hot fast, but to max their potential, I will install a small fan to force the heat onto the plastic. This cooking unit I am using has both a fan and halogens plus a thermostat all built in. For $40, it is awesome.

This method seems vastly preferable to the oven method. Especially with a vacuum pump hooked up an on beforehand, it's not only more efficient, but a bit safer (no possibility of melting plastic in the oven, less fumes because it can be done in a workshop area). How far away from the plastic is the heat? And how do yo have it mounted above?

I am lucky where I live, the temps seldom fall below 12 degrees in winter. Right now, it is about 18 degrees C. So I can open my work shop up and let it vent.

Lol, in New England the weather from day to day is less predictable than the Mayweather/Pacquiao fight on Saturday (we all know Mayweather's got this lol)
 
Yes, I agree. I see a possible thread in the future as well.

As soon as this is built I will start a thread I think. Apart from Spar baths, I can't believe no-one else is doing this.

So then, you have the heat right above the plastic, which in turn is right above the buck with vacuum pump already on while the plastic is heating? I'd REALLY like to see that. :popcorn

So if you look at this image here...

attachment.php


...the heating unit is just 2" off the plastic which has already began to be pulled in. You can see the domed pull starting. Once the plastic was about 3" deep, I removed the two cross pieces and sat the heater directly on the frame that holds the plastic forcing all the hot air into the cavity. As the plastic pulls deeper, it moves away from the heat source, so burning is less likely unless I crack up the temperature.

With a traditional vacuum forming, you need to two frames to hold the plastic. In this case, one frame sandwiches the plastic between itself and the top of the rig. So long as the rig seal in not ever compromised, the top frame need not be a solid unit. So what I have been able to do now is make up frames from 1" square tube alloy and those plastic right angle joiners and make adjustable frame for different jobs.

When this thing is built, I will have the whole bottom layer sheeted in rubber. From there, I can make up a smaller frame or even have pre-made female molds that have their own walls and sit them inside the rig on this rubber to make a seal. This means I don't need to use sheets of plastic the same size as the full rig anymore. If I have to make a small part, I only need a small sheet of plastic. Before I was wasting 2 square feet of plastic on parts just 3" long. Now I can use 4" square of plastic to make the same part provided the tool is female.

This method seems vastly preferable to the oven method. Especially with a vacuum pump hooked up an on beforehand, it's not only more efficient, but a bit safer (no possibility of melting plastic in the oven, less fumes because it can be done in a workshop area). How far away from the plastic is the heat? And how do yo have it mounted above?

Absolutely. I'd like to think I have thought this right through based on all the things that caused fails and frustration on my previous attempts. Another thing I am yet to confirm is that if water boils under vacuum at room temp, does the plastic actually get hot under the same conditions? Does this actually help maintain the heat into the plastic and give better pulls? I know that at 15"HG or more, providing the plastic is hot enough to be formed, it will have no choice but to pull in to every nook and cranny on the tool.

There is cool stuff (yes pun intended) that happens too. When boil off resin in my chamber and re-pressurize, I don't just whip open the re-pressurization valve. I open mine slowly and when I reach in to pull out the pot, the chamber is warm. If I open the valve suddenly, it pulls air in fast and (I showed my kids that) a cup of water that was boiling under full vacuum will almost freeze when instantly re-pressurized. I have seen a YouTube video where the water freezes. Mine has not done that yet, but is ice cold. And so this is something that will also be useful because when vacuum forming over male tools, you can't turn off the suction until the plastic has cooled and set hard again or you risk losing detail in the pull due to plastic having a "memory" - it want to return to its original flat state. With this rig, if I whip open the valve, it instantly cools the chamber and therefore cools the plastic as well.

In theory as the air rushes in, there is a massive pressure increase and the plastic that was sealed and pulled down tight should now be lifted slightly almost as if you had compressed air forced into the chamber. Ever had plastic pull down so tight on a male tool that you could get it off without cutting the plastic? Should no longer be an issue.
I am hoping to get a call from the cabinet maker today so I can go and pick up all my parts.
 

Attachments

  • 20150427_145251.jpg
    20150427_145251.jpg
    149.5 KB · Views: 889
...the heating unit is just 2" off the plastic which has already began to be pulled in. You can see the domed pull starting. Once the plastic was about 3" deep, I removed the two cross pieces and sat the heater directly on the frame that holds the plastic forcing all the hot air into the cavity. As the plastic pulls deeper, it moves away from the heat source, so burning is less likely unless I crack up the temperature.

Yeah I saw the picture but couldn't tell. I see what you're saying though; especially with this setup, the vacuum prevents the plastic from rising and burning. I used to work in a cabinet shop (where I built my current platen) but I'm so limited with my tools I can only do a little as this point. How long have you been working with vacuum forming (to be able to get this far)?

With a traditional vacuum forming, you need to two frames to hold the plastic. In this case, one frame sandwiches the plastic between itself and the top of the rig. So long as the rig seal in not ever compromised, the top frame need not be a solid unit. So what I have been able to do now is make up frames from 1" square tube alloy and those plastic right angle joiners and make adjustable frame for different jobs.

When this thing is built, I will have the whole bottom layer sheeted in rubber. From there, I can make up a smaller frame or even have pre-made female molds that have their own walls and sit them inside the rig on this rubber to make a seal. This means I don't need to use sheets of plastic the same size as the full rig anymore. If I have to make a small part, I only need a small sheet of plastic. Before I was wasting 2 square feet of plastic on parts just 3" long. Now I can use 4" square of plastic to make the same part provided the tool is female.

So, if I understand correctly, your female mold will be the only section of the platen that vacuum will affect, as the rest will be sealed with rubber?

Absolutely. I'd like to think I have thought this right through based on all the things that caused fails and frustration on my previous attempts. Another thing I am yet to confirm is that if water boils under vacuum at room temp, does the plastic actually get hot under the same conditions? Does this actually help maintain the heat into the plastic and give better pulls? I know that at 15"HG or more, providing the plastic is hot enough to be formed, it will have no choice but to pull in to every nook and cranny on the tool.

There is cool stuff (yes pun intended) that happens too. When boil off resin in my chamber and re-pressurize, I don't just whip open the re-pressurization valve. I open mine slowly and when I reach in to pull out the pot, the chamber is warm. If I open the valve suddenly, it pulls air in fast and (I showed my kids that) a cup of water that was boiling under full vacuum will almost freeze when instantly re-pressurized. I have seen a YouTube video where the water freezes. Mine has not done that yet, but is ice cold. And so this is something that will also be useful because when vacuum forming over male tools, you can't turn off the suction until the plastic has cooled and set hard again or you risk losing detail in the pull due to plastic having a "memory" - it want to return to its original flat state. With this rig, if I whip open the valve, it instantly cools the chamber and therefore cools the plastic as well.

In theory as the air rushes in, there is a massive pressure increase and the plastic that was sealed and pulled down tight should now be lifted slightly almost as if you had compressed air forced into the chamber. Ever had plastic pull down so tight on a male tool that you could get it off without cutting the plastic? Should no longer be an issue.
I am hoping to get a call from the cabinet maker today so I can go and pick up all my parts.

Jeez, I didn't even know that the pressure was a factor in that regard! So aside from releasing the plastic, it actually loosens and cools it as well.

By the way, do you have a STEM background?
 
Yeah I saw the picture but couldn't tell. I see what you're saying though; especially with this setup, the vacuum prevents the plastic from rising and burning. I used to work in a cabinet shop (where I built my current platen) but I'm so limited with my tools I can only do a little as this point. How long have you been working with vacuum forming (to be able to get this far)?

It has been an on and off thing. My first go at vacuum forming was when X-Robots posted his "C-3PO bottom" YouTube video and I was inspired by that. This is just a case of not being put off by it not working and rather than giving up, investigating why and looking for another way around. The table sat to side for months at one stage.

So, if I understand correctly, your female mold will be the only section of the platen that vacuum will affect, as the rest will be sealed with rubber?

Correct. I've drawn up what my rig will look like.

attachment.php


The rig I am making is 600mm x 600mm x 200mm or 2 foot square by 8" tall. I see no reason why I could not make a 2400mm x 1200mm (8 x 4 feet) version.

This is really such a simple idea. So it is basically a big box with a small hole in the bottom (and without a lid) that will sit on top of my vacuum chamber (with it's Perspex lid removed). The vacuum pump is connected to the vacuum chamber to extract the air and provide the suction. The release valve is still required. The base of this rig now becomes the lid of the chamber and the chamber acts as a stand. It will still need the rubber seal between the chamber and the rig to ensure no air leaks at that join. The plastic now becomes the lid of the rig or female tool being used. As the plastic is heated, it pulls down into the cavity and over (taking the shape of) anything sitting inside. It is not that different to traditional vacuum forming over a male tool on a platen. Just that now I have removed the seal issues and time factor. I can take my time with this.

For smaller parts like the tile, I simply pack wood and other materials into the cavities around it so the plastic does not have to over-stretch into the void.

I will place a sheet of rubber inside the bottom of this box for the use with smaller female tools when I make them up. Like the main rig they will need to be able to take much higher suction than 6"HG so I will have to box them in laminated MDF as well.

So for right now, the sheet of plastic will attach (with a rubber seal) to the rim of the rig. I will use the 1" square alloy tubes to make frames to clamp the plastic down so warping does not break the seal. Prior to sealing up the rig, I will need to have placed my vacuum forming tools inside the rig. In the case of a shallow tool like my "alien wall tile" (just 30mm thick) I will need to raise it up and the best thing to use will be blocks of wood. As long as the highest point of the tool does not extend up past the rim of the rig, I will be able to get a seal. The less the plastic has to pull down, the better. The more it has to pull down, the thinner it gets. I am chasing thick walls here for stronger parts.
Jeez, I didn't even know that the pressure was a factor in that regard! So aside from releasing the plastic, it actually loosens and cools it as well.

Most pro vacuum form rigs have a compressor inlet. So what happens is the plastic expands as it is heated and it shrinks a bit as it cools. Sometimes, the plastic can basically heat shrink onto the buck. Compressed air can help loosen it off. In the case of a female tool, any shrinkage during cooling will cause the plastic to pull away from the tool.

By the way, do you have a STEM background?

No nothing official in this field. Just the ability to step back and see the bigger picture :)
 

Attachments

  • new vacuum forming rig1.jpg
    new vacuum forming rig1.jpg
    118.4 KB · Views: 903
And here is a diagram of why I want to do female tools instead of male. It is all about capturing the details and being able to use much thicker plastic as well as not having over sized parts.

attachment.php


What I didn't show in the diagram is the thinner wall of the plastic.
 

Attachments

  • vacuum forming.jpg
    vacuum forming.jpg
    88.9 KB · Views: 923
Awesome work, cavx. Keep it up!
I'm trying to figure out how you get from a sculpt to a solid inverse of the sculpt (aka the female tool) without ruining the original sculpt. This inverted shape would drop into the vac. chamber as the female tool, but it needs to be rigid enough to allow the plastic to suck up against it. Is it simply a release agent followed by a fiberglass / resin?

Thoughts?

Correct.

Yeah making female tools will be a work in progress. For some things I want to build, it is case of layering up MDF in a reverse shape to make a hollow.

I want to pull a Pred Bio and am looking at an expanding foam to make a female mold off my sculpt. I am just not sure how I will get the original part out with out damaging either the sculpt or the female mold. From there, fibre glass would be a win for sure.
 
The rig I am making is 600mm x 600mm x 200mm or 2 foot square by 8" tall. I see no reason why I could not make a 2400mm x 1200mm (8 x 4 feet) version.

The full size of your rig is 8x4?!

No nothing official in this field. Just the ability to step back and see the bigger picture :)

Cool, well you just seem to have done your homework into perfecting the whole process (I'm over here tripping over myself just trying to get my first decent pull lol).

And here is a diagram of why I want to do female tools instead of male. It is all about capturing the details and being able to use much thicker plastic as well as not having over sized parts.

http://www.therpf.com/attachment.php?attachmentid=471711&d=1430460263

What I didn't show in the diagram is the thinner wall of the plastic.

The potential for detail is exponential with the right set up.
 
This thread is more than 8 years old.

Your message may be considered spam for the following reasons:

  1. This thread hasn't been active in some time. A new post in this thread might not contribute constructively to this discussion after so long.
If you wish to reply despite these issues, check the box below before replying.
Be aware that malicious compliance may result in more severe penalties.
Back
Top