SLS 3D Printed Thomas Bangalter's Daft Punk helmet project.

Rabid Irish

Active Member
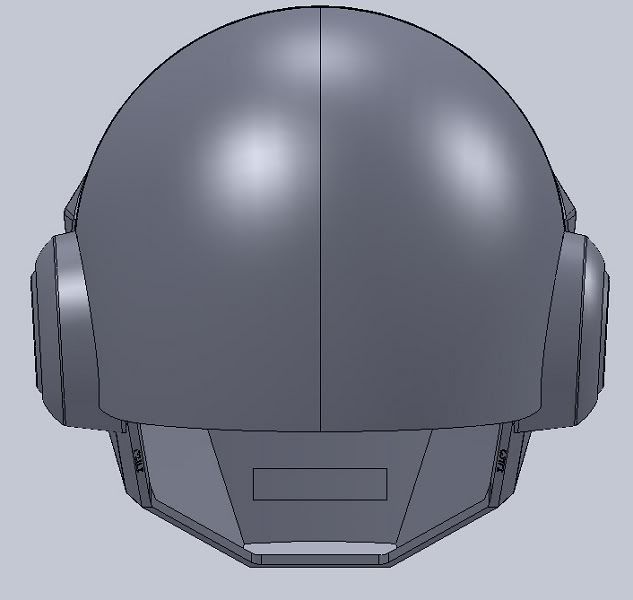
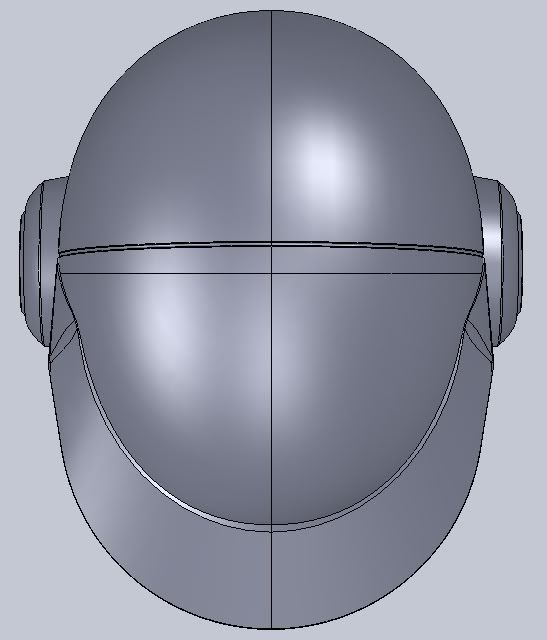
Hello all. Here is the current progress of my 3D printed Thomas Bangalter Helmet using the selective laser sintering process. It you are not familiar with the process have a little read here about it Selective laser sintering - Wikipedia, the free encyclopedia

I am a beginner when it comes to builds, so pretty much all of this is new to me. Some of you may have been following my progress on this project on tdc.com. This has been an ongoing project for over a year, which has just recently had huge developments. At first it was going to be a from scratch build. When that did not pan out I contacted a highly skilled Solid Works writer who goes by the alias ThreeFN. He was extremely generous and made the decision to take on the 3D rendering of Thomas' helmet for me. We went through a few different Thomas versions till we nailed it.

new2.jpg

new1.jpg

new5.jpg

new3.jpg


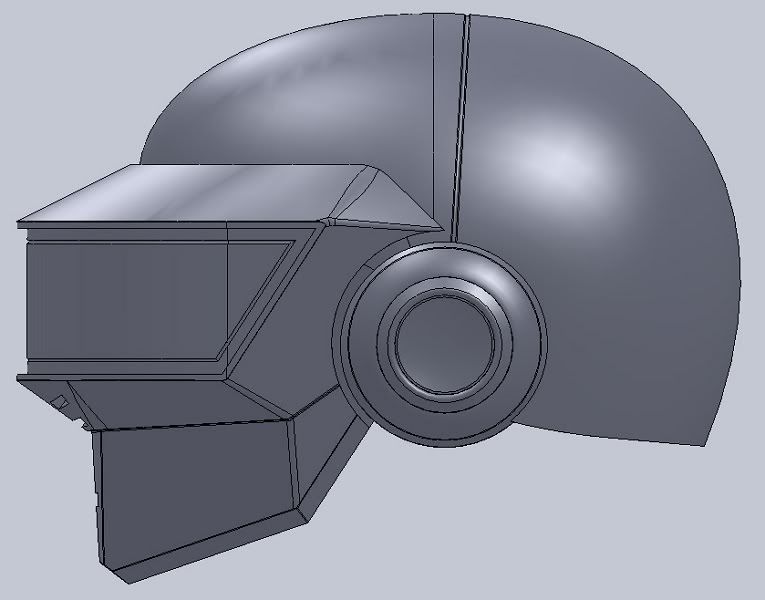
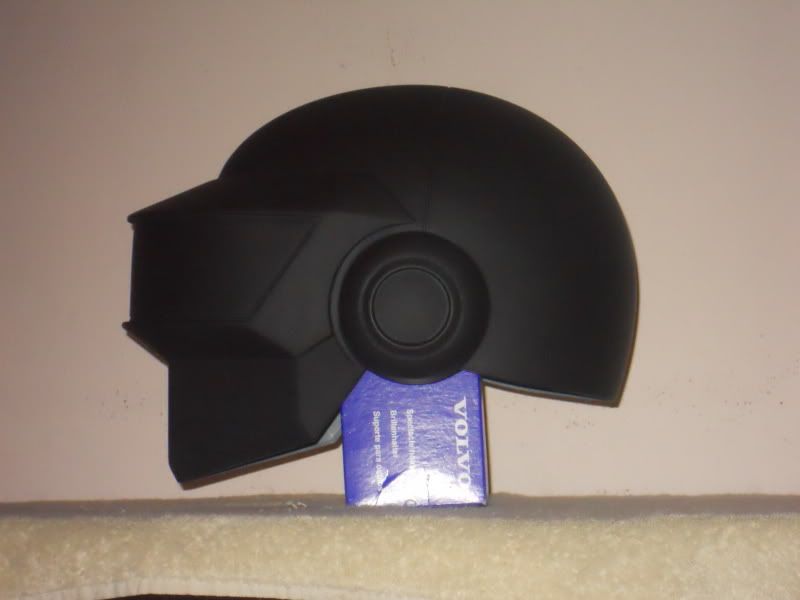
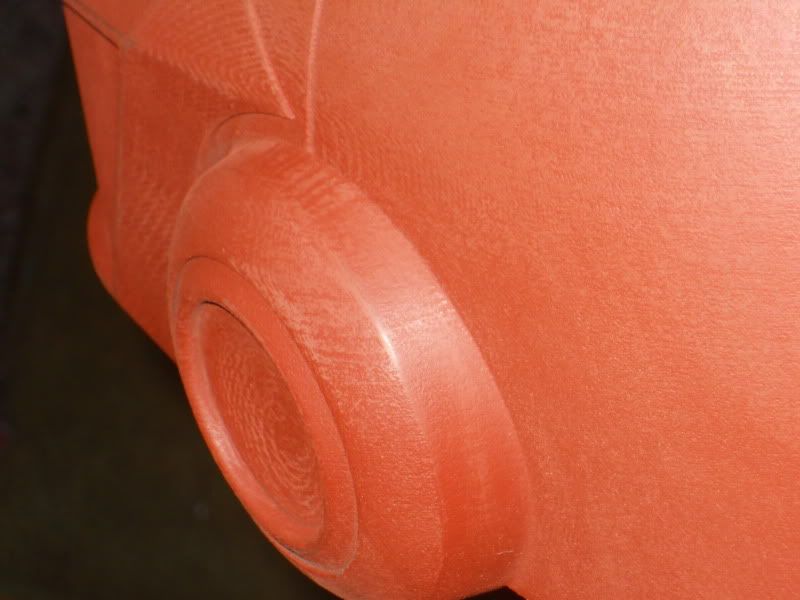
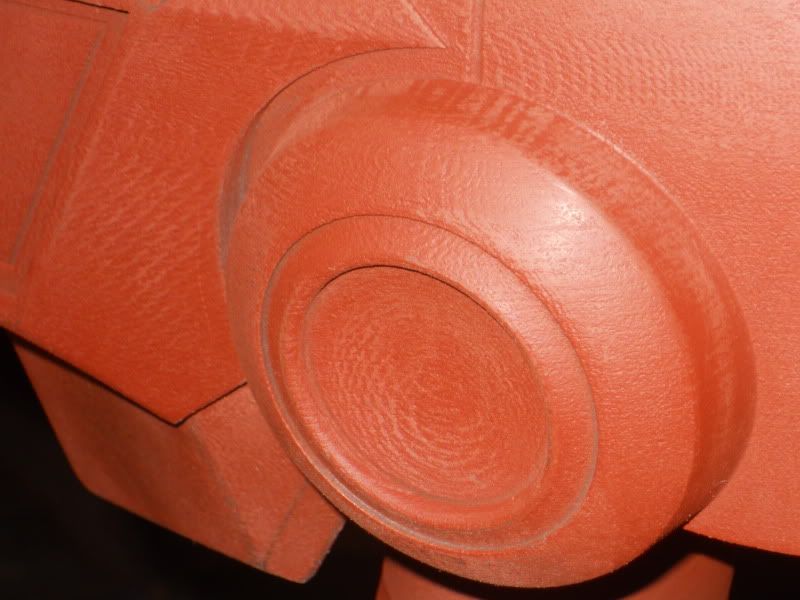
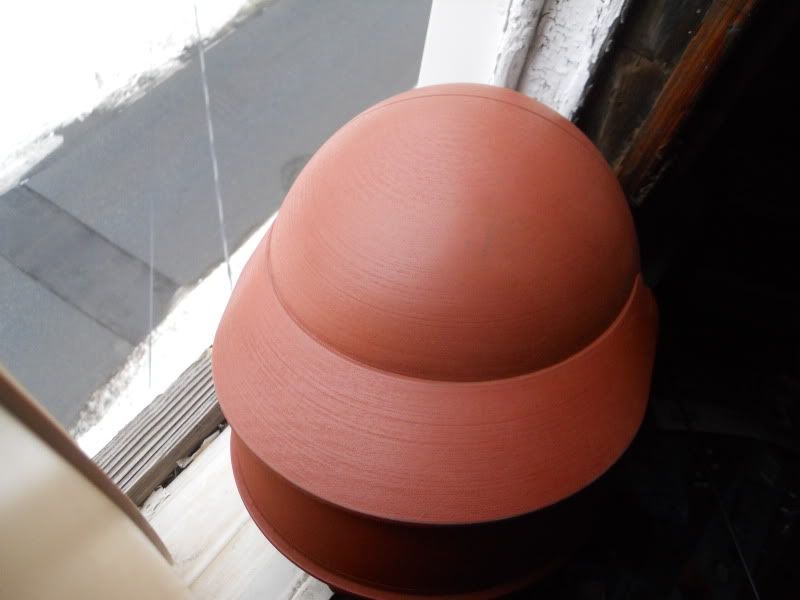
I ended up using a contact through my current employer to sub out the 3D print. There have been a total of 3 print's. The very first was just a trial test run to figure out a correct scale and adjust features. Second print was the first stab at getting the scale right plus some adjustments. It was intended to be the final, but once I received it I realized there were a few more changes that needed to be implemented with another rescale. Here are the results.

second print............

1-2.jpg

3-3.jpg

10.jpg


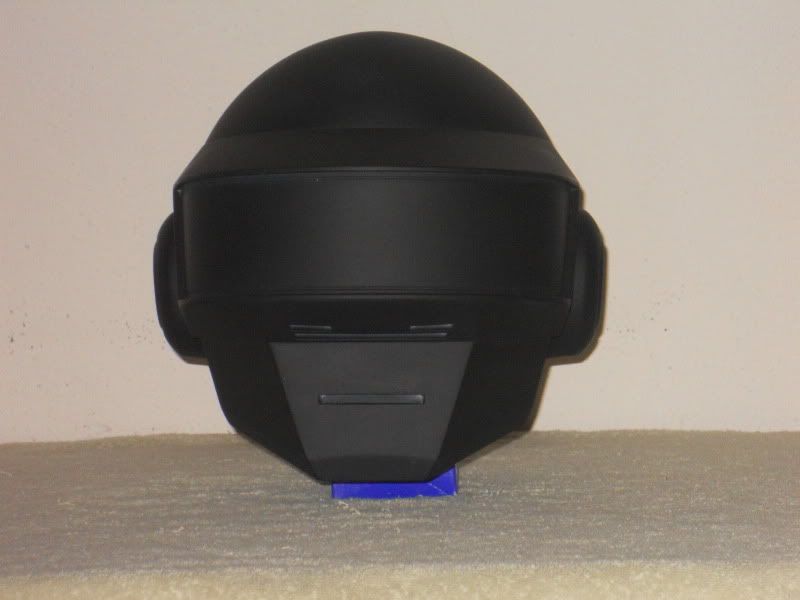
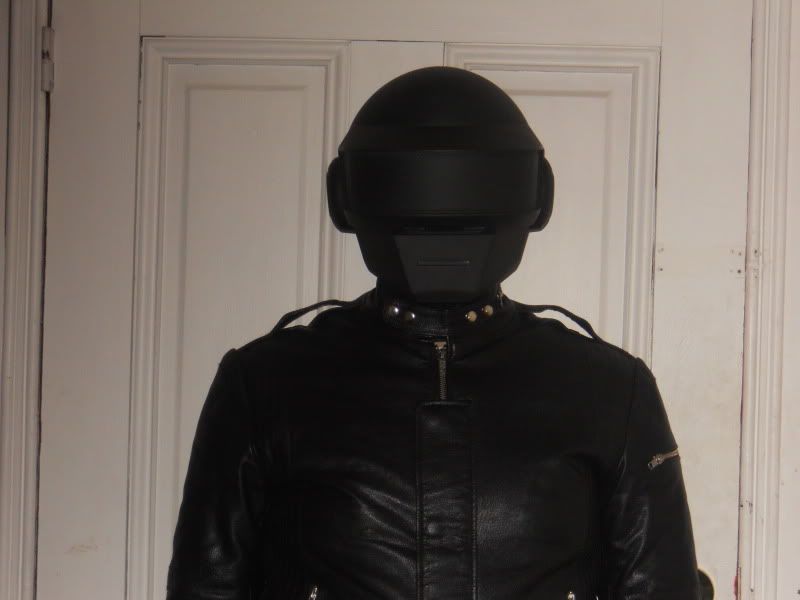
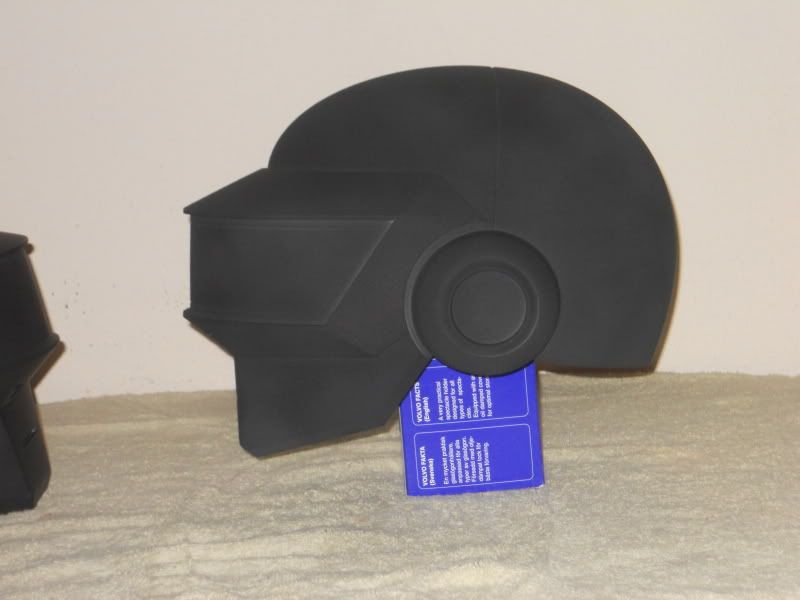
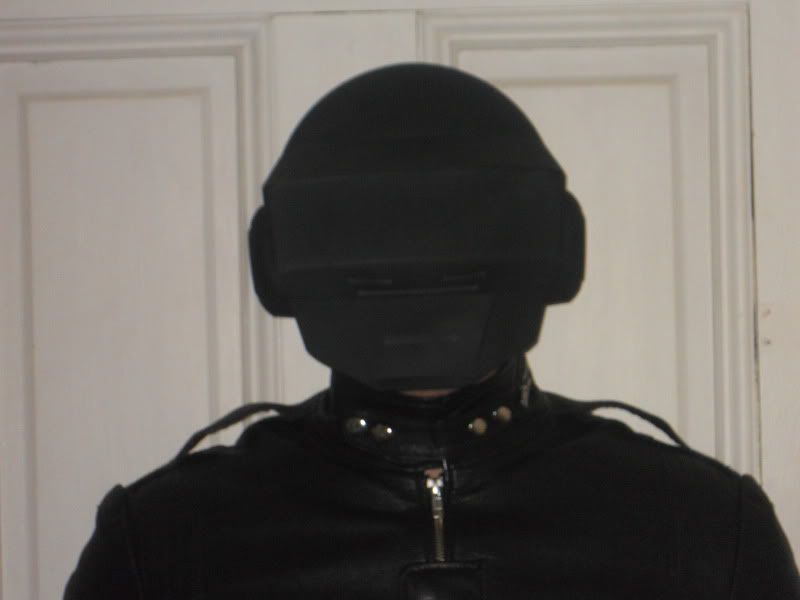
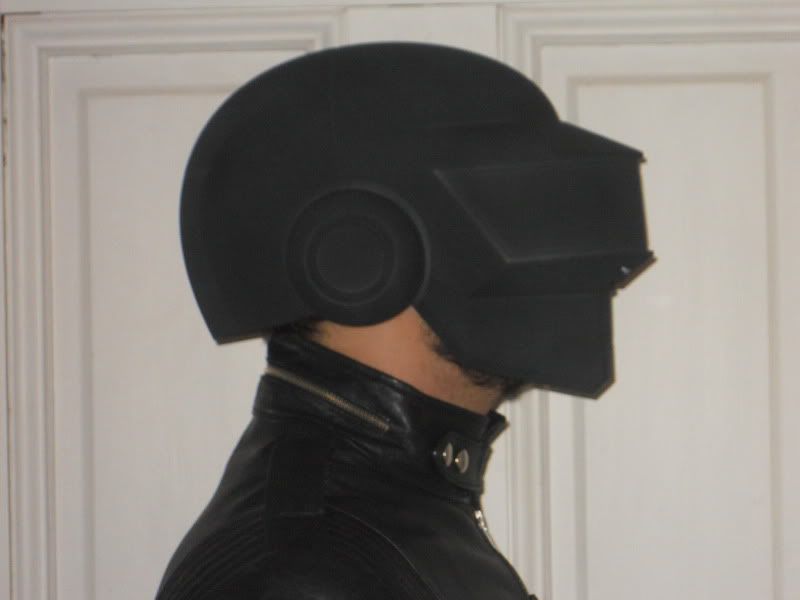
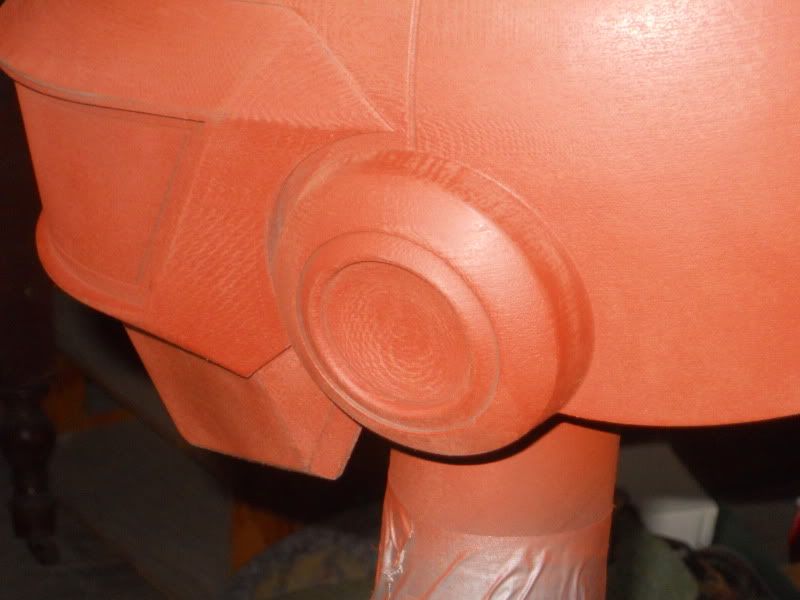
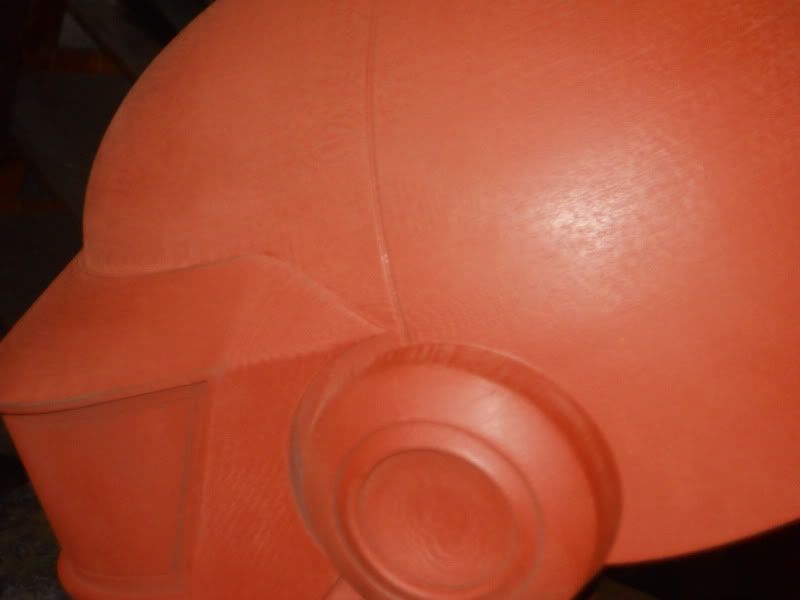
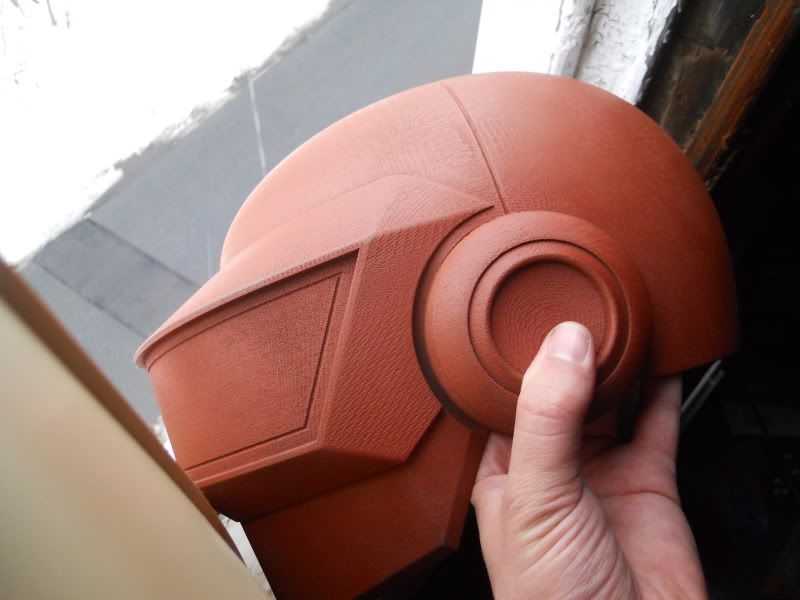
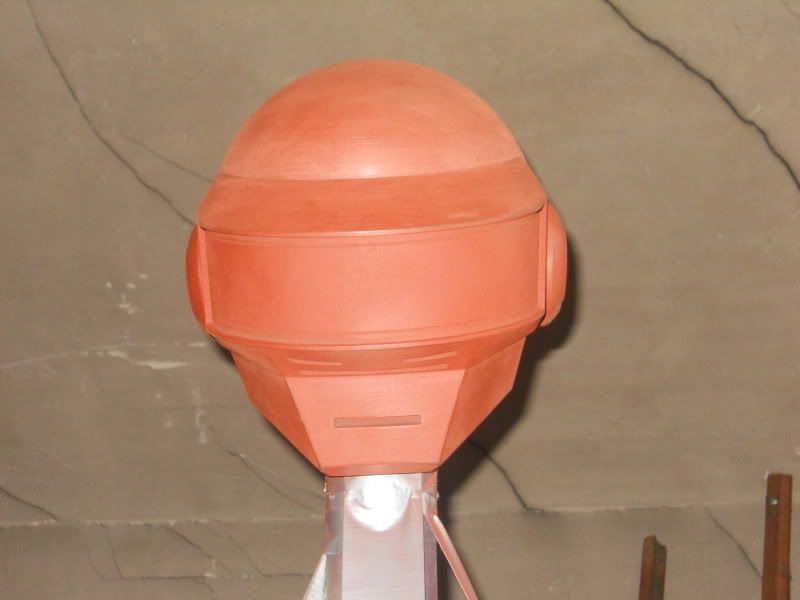
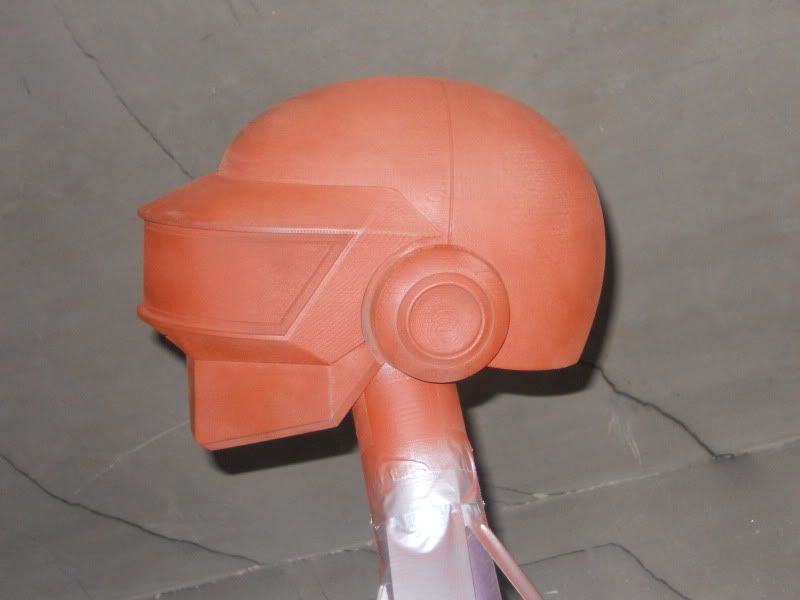
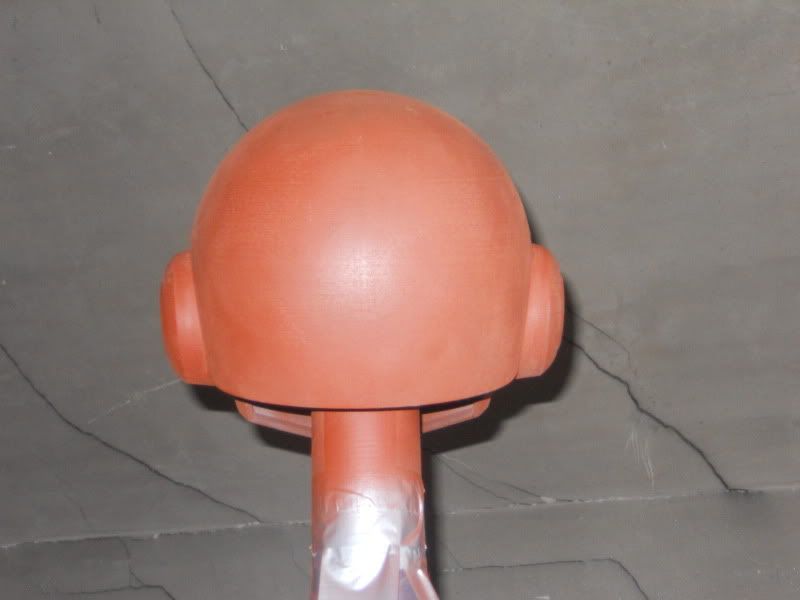
Third and final print...........

b.jpg

a.jpg

Looks low on my head because I forgot to put some padding in to raise it up correctly
e.jpg

f.jpg


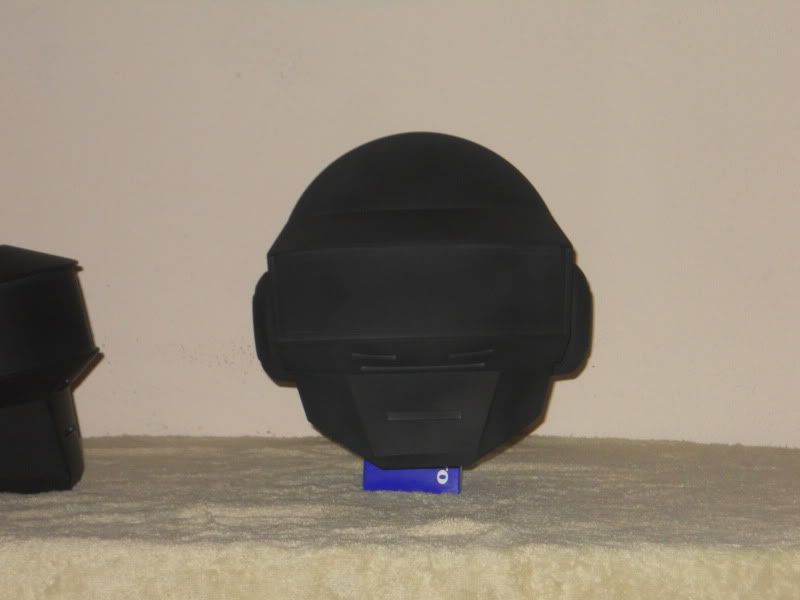
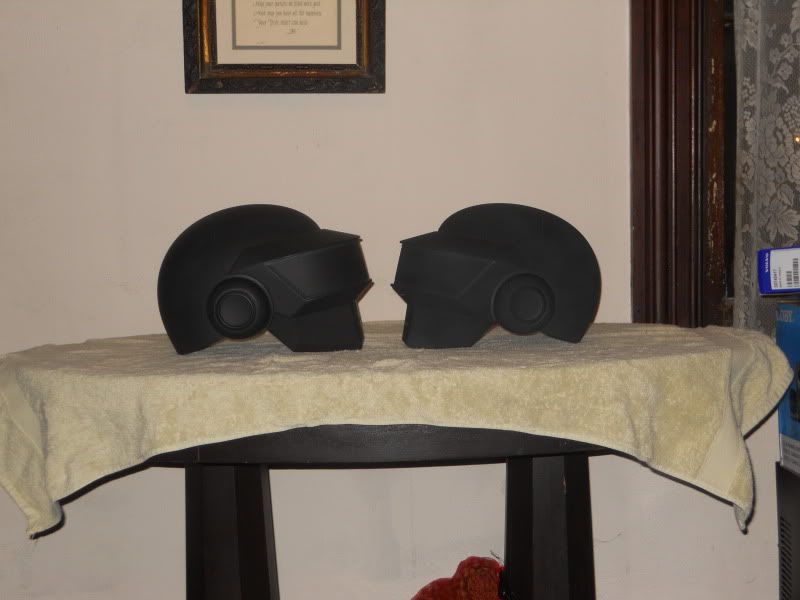
and a comparison shot face to face.

h.jpg


I plan on using this print as a master mold and have a question for some of you vets on here about silicone. Do you recommend smooth-on rebound 25 or Dragon Skin, and why? I am looking to pull at least 20 casts. Do you think I can get away with a one part mold, or do you think it will need to be a two or three part mold?

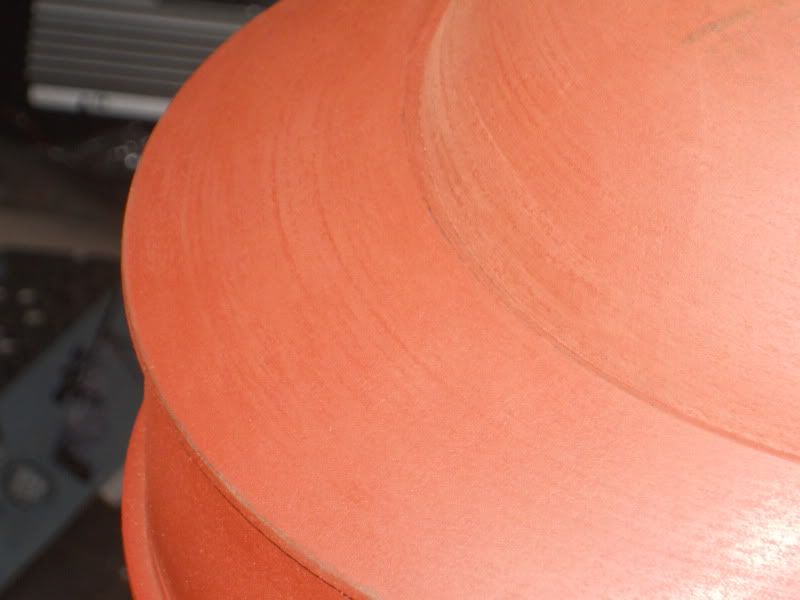
I am about to begin the sanding and smoothing process to get ready for molding. I will try to keep this as updated as possible. hope you all enjoy, and thanks in advance for any advice.

EDIT: I know these are terrible pictures. When I get some free time and a better camera I will post some proper images that really bring out the detail in this print. Super Big thanks to ThreeFN for all his hard rendering work he did for me!
 
Last edited:
I would say Rebound 25 I think it lasts a bit longer in the long run over Dragon Skin, as for how many part mold I think you could get away with a one part mold, make sure to create a lip at the edge of the helmet for the mold so that when you are slushcasting the mold with the resin if you do it that way you get the edge of the helmet perfect and not thin. As long as your mothermold is two halves that can be screwed together you should be fine.
 
I had planned on adding a lip with clay or possibly cardstock to the print for the mold making process, but that is terrific advice. Are there particular types of clay to stay away from when working with the rebound 25 silicone?
 
You want to use a oil based, non-sulphur clay something like Van Aken which is what I use. People also use Chavant as well but the two are pretty much the same type of clay. That's just about with any kind of silicone you use that you want to use that type of clay other clay like air-dry has sulphur in it which is bad for the mold.
 
Well sanding has not gone as well as I would of liked it to. Learn as you go I guess right? So I used just a primer instead of a filler primer. It did not build up enough to fill in the printing paths as I like to call them. Helmet still looks quite rough. I used 400 grit. Perhaps some of you professionals can chime in and give me some advice to get this thing nice and smooth. Here are some progress pictures.

DSCN1716-1.jpg

DSCN1717-1.jpg

DSCN1718.jpg

DSCN1719.jpg

DSCN1720-1.jpg

DSCN1722.jpg

DSCN1723.jpg

DSCN1726.jpg

DSCN1727.jpg

DSCN1728.jpg
 
Last edited:
From what I've heard, this result with the stepping is caused by using a low poly count model to print instead of a high one. I'm sure people more knowledgeable about those things can chime in, but I was told that they are basically cutting corners. Did you get it at a discount?

Seems you need to use putty or some type of filler to paste on there and then just sand smooth. Filler primer, as far as I've worked with it, stinks. You need something better.
 
Just chatted with someone about using spray putty. Two coats of it then hit it with 100grit, followed by another coat of spray putty and a go over with 200 grit. After that Check to see if it needs another coat and 200 grit rubdown. Then proceed with primer and 400 grit, then 600, 800 ect. Finish with a 2000 grit wet sand.

I got the print done for less than it would cost the average Joe since I used a contact through my work to do it. We worked around things to make this fit my budget. I have gotten a lot of pm's about the cost of the print. I recommend it, because of the speed and detail SLS can offer. But on the other hand since most people do not have the connection I have through work it is not really feasible for most.
 
Last edited:
From what I've heard, this result with the stepping is caused by using a low poly count model to print instead of a high one.
...

The stepping is caused by the machine´s resolution during the printing process. Think of it as being similar to PAL TV and an HDTV ;) The machine this was printed on looks more like a PAL machine ;)

Low poly count would have caused rounded areas to come out blocky, the poly count on this one must have been pretty high.
 
Damn that must have been awful expensive to print that out at 1:1 scale, and you wound up printing up 3 copies to get the results you wanted

Who did this, and what did it run you for a single print? I gotta know. It must have been reasonable to manage 3 prints at this scale.
As far as finishing goes. I would have printed it larger. Then ordered two 5 pound boxes of "All Season" base plate wax. I think it shrinks 3 percent.
Make a silicone or urethane mold. Double boiler melt the wax and pour it into the mold. Use a alcohol torch, steel wool, 3m sanding sponges, toothbrush, and pantyhose to polish it up and remove the stair stepping artifacts.


The "Stair Stepping" effect is related to the SLA printer layer thickness issue.

Machines that make thinner layers between follow up layers (DLP) have less stair stepping issues, but the price goes up, up, up!


Wish those guy who made and offered that CNC machine book would work on a DLP 3d printer next. I'm sure it would be a lot more simpler to make than a CNC machine. Since only one stepper motor is needed.


Home user DLP projector retrofitted with a UV light source.

Interfaced with a open source program to project time controlled images into the UV resin build vat.

Clear UV curing resin (UV cure acrylic nail polish) pigmented to opaque it so the layers cure at specific controllable thicknesses.

One stepper motor to control the build bed. This build bed lowers itself into a "self leveling" tub/vat of UV curing resin. This would bode better than the "Build up- Slide off the build plate" method the Envisiontech Perfactory machine uses.

Oh yeah and a slice program to covert PLY and STL files into 2d image batched files to save to a folder that you can send out to the projector, or into the program that sends it out to the projector.
 
Last edited:
I´m far from beiing an expert but i´ve read several times that it is easier to take a first copy of the original by moulding and then work with the first copy to get it smoother.
I hope the experts will chime in and give you good advices as this looks to be a great start!
 
I have been wanting to learn in a CNC program how to model.

If you want, if you can convert your model into an .obj, .stl, or .fbx I can open it in a program like Maya and add some geometry to it for you to see if it goes through the CNC machine cleaner, but the spray putty idea sounds pretty interesting.
 
I am ganna pick up some spray putty tomorrow and give that route a go. With patience and a steady hand I am sure it will come out great.
 
I think the idea of leaving the master alone and do all the work on a master cast made from that master would be better. Though, it means you will have to mold things more than once.
 
I´m far from beiing an expert but i´ve read several times that it is easier to take a first copy of the original by moulding and then work with the first copy to get it smoother.
I hope the experts will chime in and give you good advices as this looks to be a great start!

Correct. I did eeerrrr... am still doing that with my Typho Blaster :rolleyes A resin copy is far more rigid, hence better workable surface.
 
No sense in doubling my work. I will get the master perfect and then use it for molding. This print is extremely rigid and a perfect base to serve as my master.
 
No sense in doubling my work. I will get the master perfect and then use it for molding. This print is extremely rigid and a perfect base to serve as my master.

Don't look at it just as doubling your work. Often a "waste mold" is a necessary step in production, especially when the working surface of the master isn't ideal.

Ultimately, you'll figure it out as you work with the initial master, but I would suggest trying it out on one of your extra prints first to make sure it all goes to plan.
 
This thread is more than 11 years old.

Your message may be considered spam for the following reasons:

  1. This thread hasn't been active in some time. A new post in this thread might not contribute constructively to this discussion after so long.
If you wish to reply despite these issues, check the box below before replying.
Be aware that malicious compliance may result in more severe penalties.
Back
Top