Sewing Basics - Tools

MaulWalker

Sr Member
Like woodworking or metalworking, sewing has its own set of specialized tools. This thread is to identify those tools and how to use and care for them.

This is one of a series of threads. The goals of these threads are to:
demystify sewing
educate the inexperienced
share tips and tricks for the experienced
and perhaps get those who think they can't sew to realize maybe they can.

Anyone can contribute to this thread. I suggest that you change the subject line to the name of the tool you are describing.

Lynn
 
Scissors/Dress Making Shears

Scissors, or more correctly dressmaker shears, feature offset handles that allow you to run the bottom blade along the cutting surface. This keeps more of your hand above the fabric and disturbs the fabric less.

View attachment 75224


Scissors are sold in right and left hand models and by blade length. Long blades great for long straight cuts while shorter blades are good for curved lines and small cuts. A good overall size is 8".

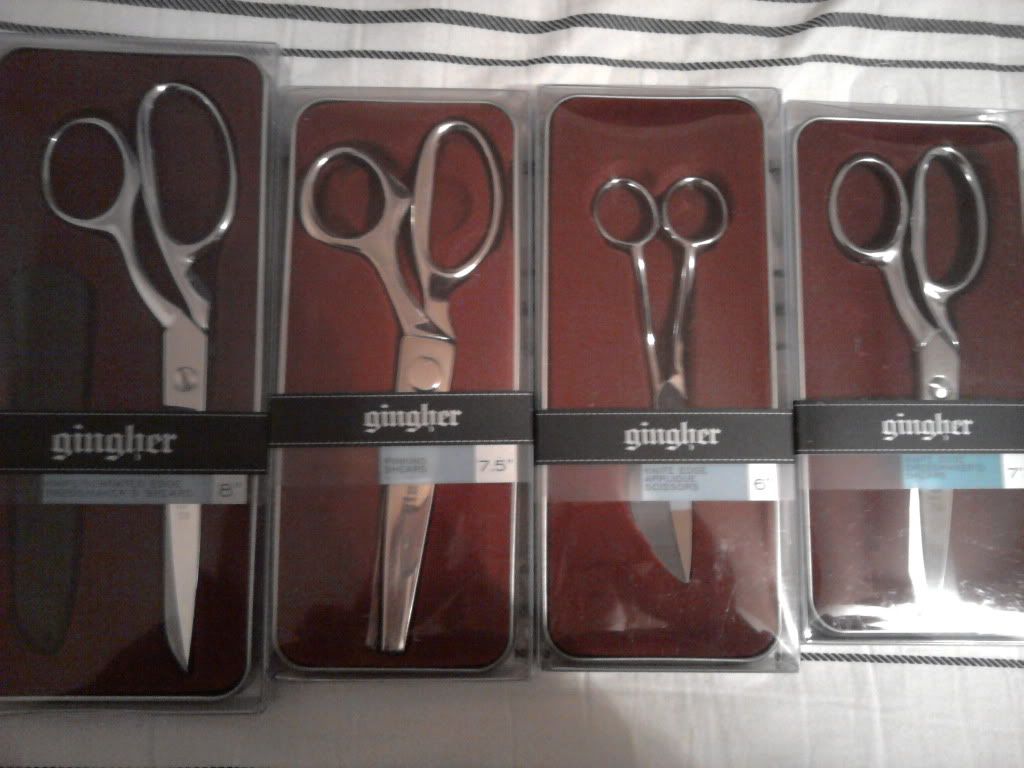
If money is no object, the best scissors you can buy are Gingher. These are heavy, solid metal scissors, beautifully shined with the Gingher name etched on outside of the blade. The blades hold their edge, however they must be professionally sharpened. I know of one instance where a pair of Ginghers were packed in checked luggage and “disappeared” between home and the final destination. A pair will cost you about the same as a Dremel.

The most common sewing scissors now are the steel blade with plastic handle ones. Some brands include Fiskars and Dritz. These are much lighter than the solid metal ones; you will appreciate that if you are cutting out a large amount of fabric. These scissors don’t hold their edge as well, however you can sharpen them yourself. You can buy a sharpener or some scissors are sold as a set with a sharpener.

Caring for Your Scissors
In the old days, if you picked up someone’s sewing scissors and tried to use them for something other than fabric, the scissors’ owner probably emitted a shriek that rattled the glassware. Somewhere in the following tirade would be the line “Those are my GOOD scissors!” That was because all scissors had to be professionally sharpened. Finding someone who could sharpen scissors was a challenge; to some extent it still is. Some professional sharpeners will schedule visits at local sewing stores once every six months or so.

Those of you who use other bladed tools know that the sharper the blade, the easier, faster, and safer it is to do the work. Same thing with scissors. Dull blades tend to gnaw on the fabric and will raise blisters on your hands.

Save your sewing scissors for sewing only. The sharpeners will help keep the blades sharp but won’t work as well to bring a blade back from extreme dullness. Some people take this to the extreme and will cut paper patterns out with cheap scissors so their sewing scissors are truly only cutting fabric.

You can do just about everything with your big scissors; however you may want a small pair for small jobs like trimming loose threads. These in the attached thumbnail are my favorites. They are actually medical scissors and you can find them at flea markets, swap meets, etc.


One set of specialized scissors are pinking shears. These cut and leave a zigzag, or pinked edge. These must be professionally sharpened. Some people like to use pinking shears on fabrics that fray. Pinking shears are not an absolute necessity, unless you are doing a historical costume where pinked edges were a common seam finish.

You may also see electric scissors in the stores. They sound like a good idea, but I don’t know anyone who uses them regularly. I used a pair back in the 60s – they had one speed – fast – and lost their edge extremely quickly and gnawed, rather than cut, fabric.
 
Last edited by a moderator:
Seam Rippers

If thread is the equivalent to glue in the propping world, then the seam ripper is the glue remover.

There is an old saying in sewing, "As you sew, so shall you rip." There are times when the pattern sewing directions will tell you to remove basting stitches. Or you are going to mess something up and need to take it apart. This is when you want to use a seam ripper.

View attachment 75229

Notice that the blade is shaped sort of like your index finger and thumb. The "index finger" has a sharp point. You slide the point under a stitch. Then push the "index finger" further under the stitch until it reaches the "web between the index finger and the thumb." This area is sharpened and will cut the thread.

Then you can remove the rest of the stitches just by sliding the index finger under the next stitch and lifting it loose. Yes it takes some time, especially if it is a long seam.

Note, seam rippers work best on simple stitches - straight and zigzag. You may not be able to remove complex stitches or serged seams.

There is another use for the seam ripper. You can use the "web" to cut buttonholes. Use a straight pin at the end of the buttonhole to keep from cutting the stitching.

View attachment 75230


A note of caution - yes, you are going to end up stabbing yourself with this tool. Yes, you will probably bleed.

There is another saying in costuming that "it's not yours until you bleed on it." The easiest way to remove blood is your own saliva. You have enzymes in your saliva that work on your own blood, but no one elses. Lick the blood spot or suck on it until it is removed. If that icks you out too much, hydrogen peroxide will work, but pretest it on your fabric first.
 
Wow. Fabulous idea. I shall frequent this thread. And yes, Ginghers are the cream of the crop. Can't live without mine. I actually have two 8-inch ones and 2 smaller embroidery ginghers. They are worth every penny. If you keep a look-out, purchase them using 40% off coupons (like at JoAnne Fabrics) as they rarely go on sale. When they are fresh from being professionally sharpened, they are just absolutely wonderful to cut fabric with. And also, paper is the worst thing for ginghers.
 
Late last night I realized I should provide my qualifications to create this sort of resource.

I learned to sew when I was eight. I've been sewing for 45 years. (You do the math!) The first Girl Scout badge I earned was the sewing badge; I made a sleeveless dress with neck and armhole facings, a zipper, and a hand-sewn hem.

I mostly sewed my own clothes, sometimes I would make clothes for others. When I discovered Folkwear patterns, I started combining vintage looks with contemporary clothing. I have also done some home decoration sewing. (I never want to make curtains for an Airstream trailer again!)

I suppose costuming was inevitable. I remember watching the non-special edition of ANH in the theater and my first thought on seeing Vader walk through that blast hole in the bulkhead was "Whoa! Is his cape cut on the bias?" However, I did not start costuming until after SW: TPM came out. Finally, female Jedi! I saw a guy on-line who made Jedi garb - $250 US for an undertunic, tunic, tabards, and obi (pants not included.) Another $150 for a cloak. And all the fabrics were incorrect. I knew I could do better.

My second cosutme was Mon Mothma from ROTJ (I am Ms. May in the 2012 Ladies of the RPF calendar.) I have made costumes from other movies (POTC: Curse of the Black Pearl and Wizard of Oz), and Ringo's uniform from the Sgt. Pepper's Lonely Hearts Club album cover. I also have gone back to my "vintage" roots and do a lot of historical costuming. So far, all my historic impressions/costumes have been from the 20th century. I thought that would prevent me from having to do any extensive handsewing. My last historic costume was a set of clothing that would have been worn by a lower-middle class Blackfoot Indian woman circa 1910. Her economic status was such that she would not have had access to a sewing machine, so all parts of the costume are hand-sewn and some parts are also hand-beaded.

I also have presented panels on costuming at DragonCon, taught others to sew, and consulted extensively with other costumers. Ask Art Andrews about Boba Fett's cape! I have also made a few costumes or costume parts for others, however I prefer not to - there are too many costumes I want to make for myself. I also compete in CostumeCon masquerades. I entered Sgt. Pepper in a sci-fi/fantasy masquerade and walked away with Best in Class Novice. My first entry in the Historical masquerade was the Blackfoot. I ended up with Best in Show Workmanship, Best in Show Documentation, and Overall Best in Show.

If you have questions, ask. My access to the RPF is limited during the day, but I will get back to you eventually.
 
Re: Sewing Basics - Scissors

Wow. Fabulous idea. I shall frequent this thread. And yes, Ginghers are the cream of the crop. Can't live without mine. I actually have two 8-inch ones and 2 smaller embroidery ginghers. They are worth every penny. If you keep a look-out, purchase them using 40% off coupons (like at JoAnne Fabrics) as they rarely go on sale. When they are fresh from being professionally sharpened, they are just absolutely wonderful to cut fabric with. And also, paper is the worst thing for ginghers.

If you noticed in Jessica's post, she has four pair of scissors. There is another truism - scissors grow legs and play hide and seek. And it is always they hide, you seek. They may be where you cut out the fabric, or you left them on the ironing board, or you laid some of your garment on top of them, etc. More than one pair will save you some time. I've seen some people who work in the fabric stores wear theirs on long cords around their neck. I may try that.

In the States, the major fabric stores have mailing lists. Sign up for them. You will get regular fliers sent to your address with coupons, typically more than one. One coupon will be for up to 50% on one cut of fabric. Another coupon will typically be 40% off on notions. Sewing tools fall under notions.

Lynn
 
Irons

Perhaps the most overlooked sewing tool is the iron. Yes, I hear the groans. There are a few things that move your garments from looking "home made" to looking professionally made. The iron is one.

Pattern instructions will tell you to "press seams open" or "press pleats", etc. Skipping this step will result in seams that don't lie flat or pucker or collars or cuffs that don't have nice sharp edges. Ironing also helps shrink in extra fullness when you ease in (we will cover ease later) fullness like on a sleeve.

A cheap iron will do. Even the most basic iron will have adjustable heat settings appropriate for various fabrics. A steam iron is nice although you can fake it with a damp pressing cloth.

An ironing board is not required. You can fake one by using a folded towel on your kitchen counter. I do not recommend using a wooden table, especially if you are using steam as you can damage the finish on table.

A pressing cloth is a nice to have. Typically these are made of cotton organdy which is slightly see-through. Press clothes help prevent the iron leaving a shiney mark on your fabric. I have also used a clean dish towel - dampen it if you want steam.
 
I had never used a pressing cloth until I had to use stitch witchery for a project. Now I use it all the time. We have very hard water and sometimes crust develops on my iron. The pressing cloth helps protect my fabric from that and anything else that might be on the surface. Helps protect the iron from any stray stitch witchery too.
This is a great thread. My mom has taught me a lot of these things over the years, but you're doing a great job breaking it down.
 
Great idea for a series of threads! Even those of us sewing for years could use some professional tips from an expert!!

That is so true about the scissors! I have 3 other scissor users in my house and to keep them away from my 'good' scissors, I bought a pink pair of easy action sheers:

Easy-Action-Scissors-No.-8_product_main.jpg


Both the shape and the color reminds them those are 'FABRIC ONLY' scissors. I actually ended up preferring this style now for the way it feels in my hand.
 
Re: Seam Rippers

I think I actually managed to stab myself with a thimble once.

That reminds me of a painful story. Learn from my mistake. I have friends that race motorcycles professionally. They brought me their suites because the needed me to patch the knee with leather. They said it doesn't have to be pretty just patched so their knees don't scrape the ground. So I was using scrap leather and sewing the patches on by hand because there's no way to get the machine up to the knee with out taking stitching out on the leg creating more of a job. The eye of a BIG FAT leather needle went through my thimble into my thumb deep enough to hit the tip of my thumb bone. Talk about painful!!! also pieces of metal got into it from part of the thimble that broke and when the eye of the needle it the bone it cracked off piece of the eye....

Moral of the story.. some times the fast short cut is not they way you should do things!!!
 
Great idea for a series of threads! Even those of us sewing for years could use some professional tips from an expert!!

That is so true about the scissors! I have 3 other scissor users in my house and to keep them away from my 'good' scissors, I bought a pink pair of easy action sheers:

Easy-Action-Scissors-No.-8_product_main.jpg


Both the shape and the color reminds them those are 'FABRIC ONLY' scissors. I actually ended up preferring this style now for the way it feels in my hand.

I have a sewing work shop in my basement. Thread racks didn't work for me, I have too much thread. So I put up peg boards. I also hang up scissors and such on the peg broads although my back ups usually stay hung and my favorites find there way around my cutting table. But I have a husband and 3 children. I label all of my sewing scissors "Cloth Only!" I don't want them using my good scissors on PAPER!

PS My favorite sewing scissors are Gingher!
gingherscissors.jpg
 
Gingher Scissors

Great thread idea! I sew professionally in the Theatre industry and there are several tools that I just couldn't do without...My Gingher scissors are definitely on that list! I have their 8” standard dressmaking shears, tailor points, and embroidery snips. They are near and dear to me and I don’t start a project without them. Dressmaking shears are only for cutting fabric and I’m even selective about what fabrics I cut with them. I don’t cut any specialty fabrics with sequins, beads, or anything like that with them. You can buy a cheaper pair of sewing shears for those fabrics. If the weight of the solid metal scissors is a problem for you, then you can get plastic handled Ginghers that have the same blades. Tailor Points are also known in the Gingher line as short 4-5” craft scissors. They are for trimming and grading seams, cutting buttonholes, notching, etc. They are sharper than dressmaking shears and have extremely sharp points on the end, hence the name tailor points. Embroidery snips are great for cutting threads at the sewing machine or an alternative to a seam ripper. The blades are very tiny and allow you snip the seams. There are also thread snips that you can buy for this.

http://gingher.com/
 
Last edited by a moderator:
machines and their parts

Well I guess I will contribute the next big necessity when it comes to sewing lol, machines.

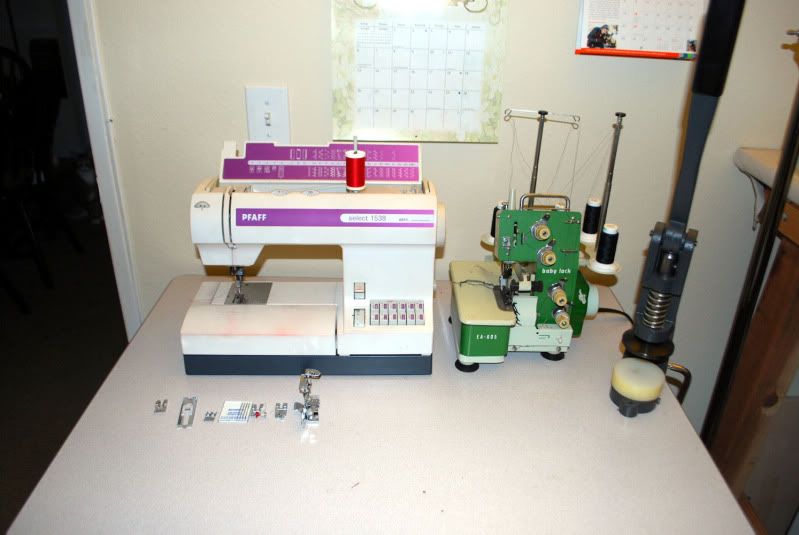
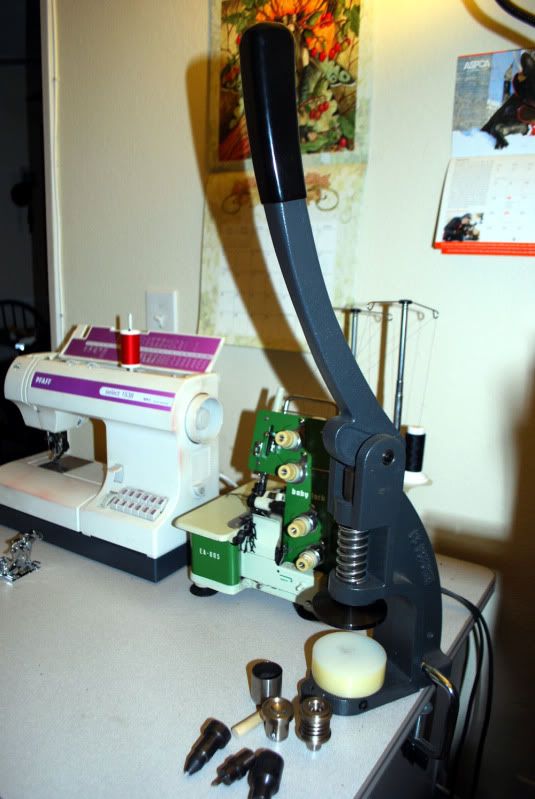
Here are 3 machines that I use:

DSC_0922.jpg


The first is a sewing machine, the second is a serger (a very old serger lol but it does the job) and the last is my hand press for grommets and covered buttons.

I didn't take another pic of my serger but for those just starting out a serger is not necessary. They're extremely expensive for one and very difficult at times to thread. (the serger I want is about $1500 but threads itself with a push button that shoots the thread through the machine with a jet of air)

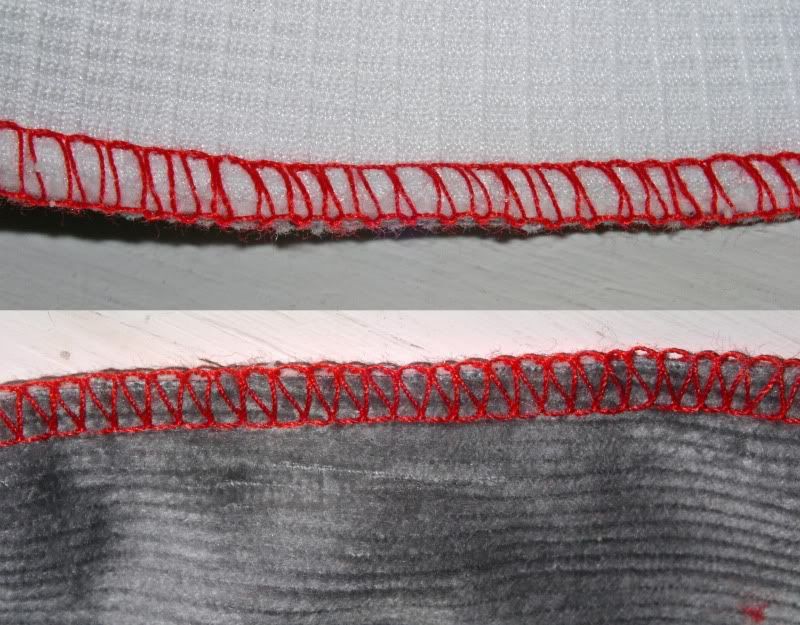
This is a basic serger, or overlock as it's sometimes called, stitch:

3_thread_overlock_stitch.jpg


It's very useful to keep seams from fraying or to use for the bottom of a garment when you don't have time to hem it.

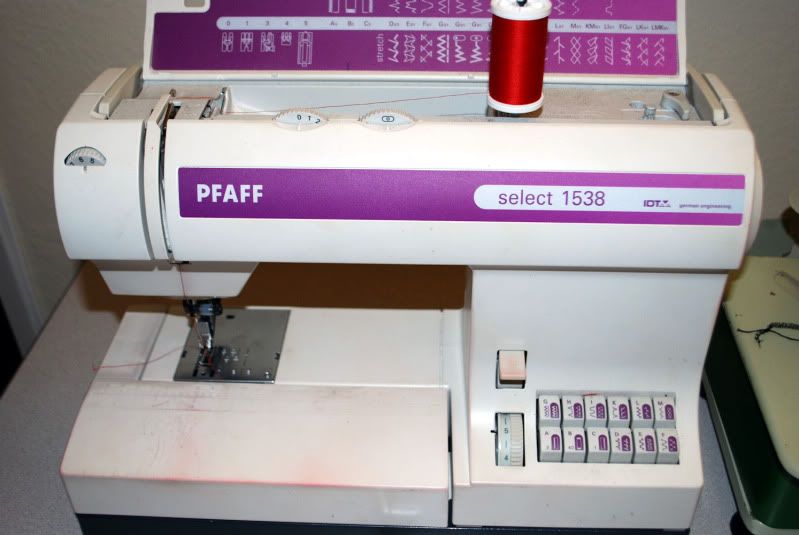
The sewing machine:

DSC_0926.jpg


I'm a firm believer that even if you're just beginning you should buy a good solid machine. Usually that means you're going to spend at least $200 on it. I say $200 because some may find a good machine on something like ebay or craigslist. My machine was about $700 and it was on sale due to it being a end of the year model. My machine has stitch settings for buttonholes, zig zag, invisible hem (with appropriate foot) some decorative stitches and some stitches that I never use because I think it's for quilting lol!!! On average it's always good to have a machine that can at least do straight stitch and zig zag. Some of the older industrials only do one or the other.

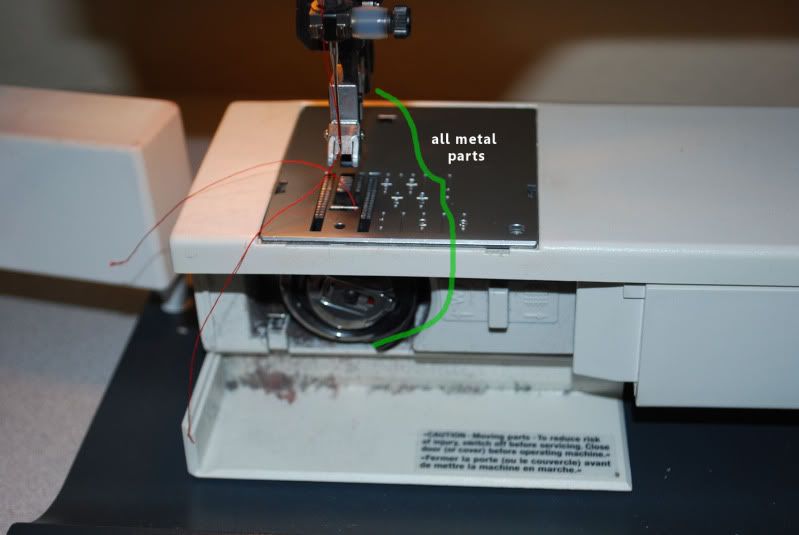
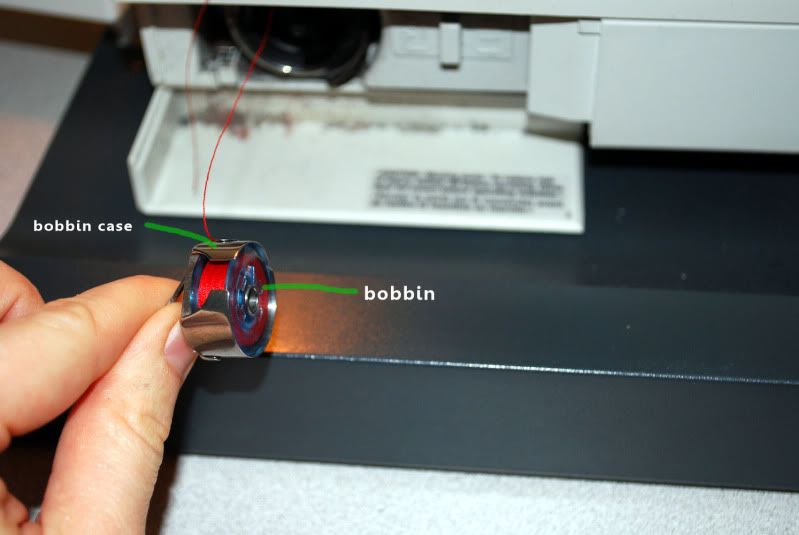
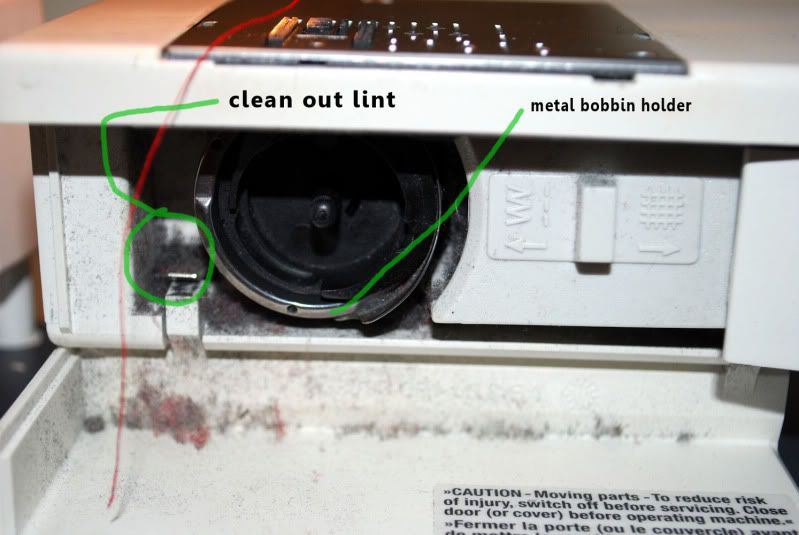
One way to know if a machine will be sturdy enough is if it has mostly metal parts, especially in the bobbin area. Plastic parts will break and crack. When buying a machine that was the first thing my Prof told me:

"Make sure it has all metal parts"

Here's some examples:

DSC_0927.jpg


DSC_0928.jpg


DSC_0929.jpg


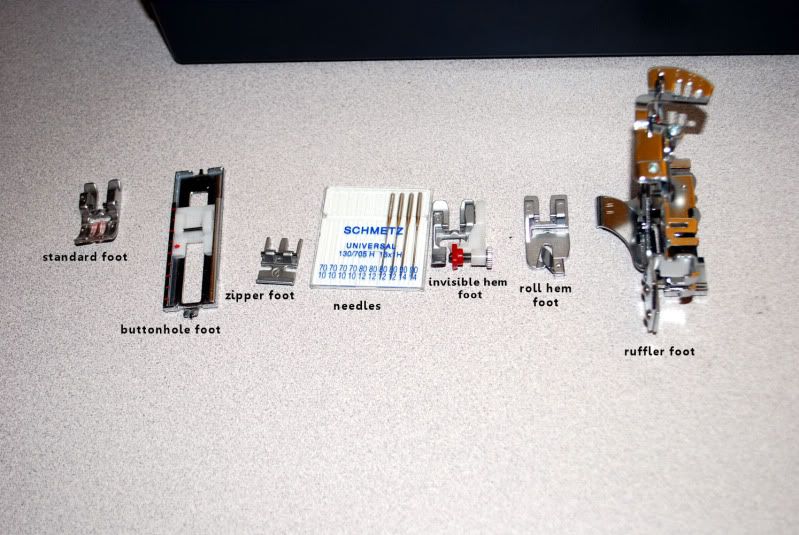
All machines have interchangeable feet for different stitches or for specialized stitches. Be careful because some machines, like my pfaff, have parts that only fit that brand.

DSC_0925.jpg


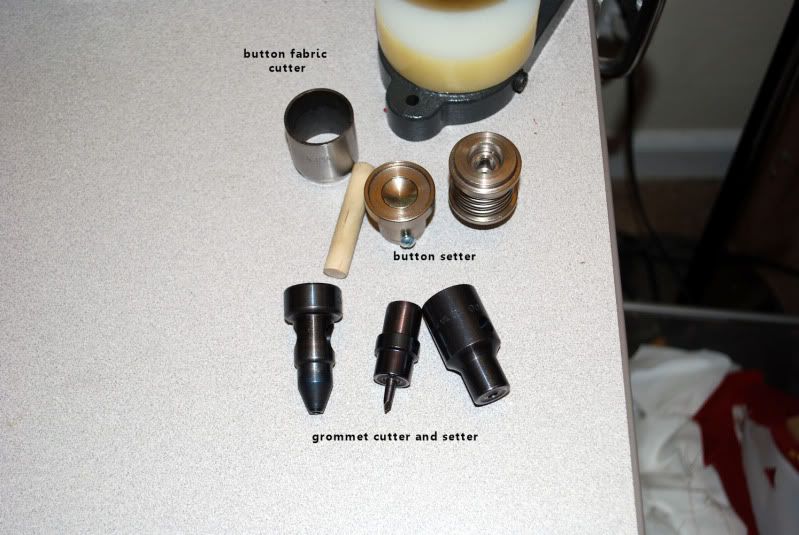
My fav machine is my hand press. It's how I cut grommet holes and press grommets into my corset and how I make covered buttons. Note that each size has it's own die and press. So these pictured are for a 00 grommets and a 5/8" button.

DSC_0924.jpg


DSC_0923.jpg


Hope that helps! I'll post more when I have time.
 
Seam Rippers and Razors

Retractable blade seam rippers and razors: Seam ripping can take forever if you did not realize your mistake early or maybe put an entire skirt section together before realizing it was backwards. A Razor is great for getting seams out faster, but it’s obviously risky. You hold the seam taut with one hand and then use the razor to cut the thread on the right side of the fabric, without cutting the fabric. Sounds crazy I know, but once you figure it out then you can get seams out fast without harming the fabric. Another option that I like is my Ginger retractable blade seam ripper. It’s a razor edged claw like blade that works just like a traditional razor except it’s curved so you cannot harm the surrounding fabric.

http://gingher.com/product/01-003779-seam-ripper-w-retractable-blade/175/Retractable Blade Seam Ripper
 
This thread is more than 12 years old.

Your message may be considered spam for the following reasons:

  1. This thread hasn't been active in some time. A new post in this thread might not contribute constructively to this discussion after so long.
If you wish to reply despite these issues, check the box below before replying.
Be aware that malicious compliance may result in more severe penalties.
Back
Top