Saw Gerrera Partisan build (WIP)

Thanks to phil1880 for pointing out that this canister is the same as the shoretrooper 'Pringles can'. I completely missed that connection - I guess I haven't stared at enough shoretroopers! There are some good greeblies available for the top of the canister. I suppose I'll have to redo these at some point before finishing this build...

Dan
 
Not a lot of progress this last week, but some minor things were accomplished. Again thanks to phil1880 I got the canister lids squared away. I looked up some good photo ref of the Shoretrooper canisters and 3D modeled out some new lids, which ought to be here next week.

lid_modeled.jpg

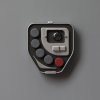
Also, I had been sitting on my modeled bandolier greeblie thingy, which I have been calling a 'body cam' for lack of any other detail on the thing. To me it looks like the little black/dark area near the top resembles the lens area of a GoPro-type camera, so I've taken to calling it a 'body cam'. Accordingly, I added that kind of implied detail to my 3D printed version.

5D3_5024_small.jpg5D3_5027_small.jpg

I'm sure now that I've committed to it someone will finally find good reference images and I'll have to redo this too...

Dan
 
Anymore progress on this ???

Thanks for watching the thread! Progress slowed a lot as the holidays came on and as I got to the point of waiting on all the various vendors to finish off the commissioned alterations to things like boots and the main clothing. I'm hoping to have a blast of near-final progress during February...

Dan
 
Thanks all! Happy to help anyone interested in building this one with more details as I know them.

As hoped/promised, February will show a bit more progress on this finally. Many of the clothing items will be done soon, over the next few weeks. In the mean time I've gotten the 'smoke grenade' canisters fixed up and ready to paint. Remember the good photo reference of the Shoretrooper canister lids (plus my 3D model):

lid_modeled.jpg

I got those updated parts back from Shapeways, primed and sanded them, and now have them assembled and ready to paint:

5D3_5250_small.jpg5D3_5251_small.jpg

Tracking down the proper color I found that to be Montana Gold Sierra Beige and purchased a can. Just waiting on a good outdoor painting day (I don't care much to spray paint indoors - spray dust and fumes - but there are only so many winter days in Colorado that are conducive to spray painting outdoors :) )...

Dan
 
A little more progress - got the gloves taken care of. Thanks to phil1880 I got the gloves made by the same fellow over on the Rebel Legion forum. They are not quite screen accurate (wrong material, some issues with the stitching pattern, the comm greeblie window is too large), but they're actually not bad and will do just fine until Wampa Wear or Magnoli are providing some good, high-quality versions for us.

5D3_5252_small.jpg

I made my own comm greeblie based on some very high quality photos of one of the screen-used Rogue One ones from an exhibit. 3D modeled in modo and printed from Shapeways. The central circuit board button is a square of red 1/8-inch thick plexi cut to size and beveled on the sides, again based on photos of the Rogue One piece (the actual circuit patterns vary from greeblie to greeblie). I just added some aluminum tape for the pattern and when glued to the black background it provides the highlight to the pattern.

5D3_5266_small.jpg5D3_5268_small.jpg5D3_5273_small.jpg5D3_5276_small.jpg5D3_5275_small.jpg

Hiking around with the gloves a bit moving dirt and rocks about and working on my vehicles for a while added some grunge.

5D3_5288_small.jpg5D3_5293_small.jpg

And we'll call that good enough for now. Some other bits are coming together finally, still slower than I'd want, but we're getting there. More to come...

Dan
 
Well, here's my take on it. Unless someone has measured the size from an actual Rogue One screen-used prop we're left with using the available photo ref to guesstimate. This image from page 169 of the Rogue One Ultimate Visual Guide provides a fairly face-on view of this greeblie:

5D3_5295_small.jpg

My approach to these things is to take the average adult male pupilary distance (64 mm - https://en.wikipedia.org/wiki/Pupillary_distance) and use that as a scale bar to measure the sizes of other things in an image. I suppose one could also in this case use the known scale of features on a rebel pilot helmet. Assuming this actor has the average pupilary distance the original version of this image from my camera sets the scale:

pixel_scale.jpg

We then measure the dimensions of the greeblie and convert:

measured.jpg

The millimeter dimensions labeled here are actually rounded up so a window size matched to that ought to give a bit of margin to fit the greeblie inside.

It'd be great if someone has confirming or more reliable data from the actual prop. I'm open to other interpretations, but this is my approach...

Dan
 
Wow :)
I've only just realised why you would want a dark green scout and came looking. This is amazing and the Blaster came out absolutely top notch too.

So, so, cool.
Rogue one has been the absolute best part of this Disney deal.
 
Thanks! Yup, the RS kits came out at just the right time, right as I was starting this costume build.

Heh, your Hasbro DH-17 conversion was the thing that introduced me to this forum, so that means a lot... :)

Dan
 
Yeah my DH-17 came out great, but your one is just the cats pyjamas Dan :)

The best thing about this place is every day is a day at school...Star Wars school.
 
Well, here's my take on it. Unless someone has measured the size from an actual Rogue One screen-used prop we're left with using the available photo ref to guesstimate. This image from page 169 of the Rogue One Ultimate Visual Guide provides a fairly face-on view of this greeblie:

View attachment 799981

My approach to these things is to take the average adult male pupilary distance (64 mm - https://en.wikipedia.org/wiki/Pupillary_distance) and use that as a scale bar to measure the sizes of other things in an image. I suppose one could also in this case use the known scale of features on a rebel pilot helmet. Assuming this actor has the average pupilary distance the original version of this image from my camera sets the scale:

View attachment 799982

We then measure the dimensions of the greeblie and convert:

View attachment 799983

The millimeter dimensions labeled here are actually rounded up so a window size matched to that ought to give a bit of margin to fit the greeblie inside.

It'd be great if someone has confirming or more reliable data from the actual prop. I'm open to other interpretations, but this is my approach...

Dan

Well, doh - I forgot to include the foreshortening factor due to the actor's head being angled a bit from a straight-on view. If his head is turned away from straight on by about 30 degrees or so the above derived dimensions of the greeblie will be a bit on the large side. Assuming a 30-degree angle the greeblie dimensions should be about cos(30), or about 0.866 smaller than quoted above.

Sorry about that!

Dan
 
The focal distance will have quite an effect on this calculation. If the camera was quite far from the subject (which is usually the case in these photo shoots), the foreshortening is reduced dramatically for a much "flatter" depth. You might be over-calculating.

That being said, I'm happy to use an eye-ometer in this case... and, ironically, I think your resized version (the smaller one) is probably closer to accurate anyway. :) But for the glove window, too big would be better than too small, so I'll probably just stick to the original measurements.


While I agree that this method works best when the camera is far from the subject, thus producing a 'flatter' depth (which I do think is this case with this photo), the geometric foreshortening due to an angled subject will be independent of the distance. Which, in the end, means that we both agree that the smaller estimate above - i.e., 0.866 * (45 x 60 mm) - is probably more correct.

The very detailed photos I have show the window in the gauntlet fitting pretty closely to the greeblie, so the tighter the fit to the greeblie the better, from a screen-accuracy perspective. Yes, leaving a bit of 'wiggle room' is probably a good idea, though, given that folks will be supplying their own greeblies and there may well be a bit of variety in sizing there (at least until we get access to accurate measurements direct from a screen-used prop)...

Looking forward to seeing what you come up with - I'm 'in' for a purchase, for sure!

Dan
 

Your message may be considered spam for the following reasons:

If you wish to reply despite these issues, check the box below before replying.
Be aware that malicious compliance may result in more severe penalties.
Back
Top