ROTJ bunker buster grenade build , Xmas 2020 .

CatfoodRob

Sr Member
RPF PREMIUM MEMBER
I finished for Christmas a few days before my wife this year , giving me some time home alone , and time for a project !!!
Looking at my home page on YouTube , a video by VanOaks propscought my eye .
It was not only a cool bunker bomb build , but Van Oaks had released the s.t.l. Files for free on his website .
How could I resist ????
A day was spent watching my Creality CR 10 ( stock no mods , using cura 4.8 ) steadily create all the parts for the build .
Basically what Van Oaks props have provided is a simple assembly kit of parts , to produce an accurate sized prop .
 
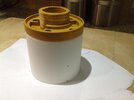
So I downloaded the free files and let my 3d printer do its work . I printed them in high definition , as I had no way of all applying a very gritty paint layer like both the originals and the Van Oaks video build . IMG_5953.JPG

This is the part where I realise I didn't take too many build photos ...sorry guys .

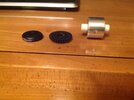
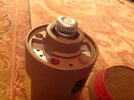
I used ally tape on the top knob support ( a record player part in real life ...) and silver paint on the knob itself

IMG_5948.JPGIMG_5949.JPG
 
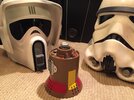
This is my first " stack up the parts" photo IMG_5958.JPG

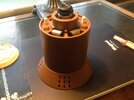
I used " leather brown" aerosol primer by " army painter" for the brown main colour ... as I said, this was a project over the Christmas holiday period , so I had to use what I had for the painting , plus we are in full lockdown in my part of the U.K.

By painting a couple of layers from about two foot away , and them going over with a normal coat, I was able to get a rough-ish coat , not as textured as it probably should be , but it suited me .

IMG_5964.JPG
 
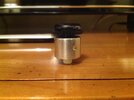
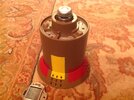
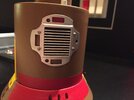
I used ally tape to cover the slider knobs , and silver paint for the other silver parts .

The red and yellow stripes were painted on using masking tape and twenty year old citadel acrylics , using a wide tipped brush .

IMG_5965.JPG
 
It's not really finalised yet , I a man still awaiting some small screws to hold on the photomultiplier plates , and also awaiting the courage to attempt the writing down the yellow side strip .
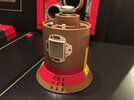
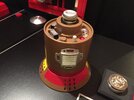
However I couldn't resist a couple of " finished photos .IMG_2637.JPG

IMG_2640.JPG

IMG_2642.JPG
 
I gave the assembled prop a coat of aerosol automotive matt varnish, which of course came out a satin hue .
I'm going to give it a light weathering , like VanOaks did in the YouTube video, and as Derek commented , the weathering only needs to be light as bombs don't get used twice !!!!
So I'll post a finally finished photo when my screws arrive and I actually get around to finishing this thing .
 
IMG_2689.JPG
X
I just did the heiroglyphs on the side with a fine tipped marker , they turned out ok but then I realised I'd painted them onto the wrong yellow stripe...damn .... but no one will notice when it explodes !!! I'm still waiting for some tiny round headed screws to arrive from eBay to finish this project ... but for now , don't let baby yoda anywhere near it !!!

IMG_2703.JPG
 
Fitted some small round headed screws into the photomultiplier plate, they are too small ( 10ba) I guess 8ba would have been better , but I'm happy so that's what matters to me at least ..lol .
IMG_2708.JPG

I have magnets in the bases , so it's currently hanging on to a metal roof beam at the studio . It may be there a while .IMG_2755.JPG
 
I decided not to leave in the studio as I suspect it would end up knocked off and in pieces on the floor .
So I cut a small piece of thin steel, painted it black and screwed it to a beam in my Attic . It can stay there for a while until a better display option makes itself known .
IMG_5994.jpg
IMG_5995.jpg
 
I am in the middle of building one of these Van Oaks kits. I had him print mine, I love that he does all of the small bits in a resin printer, so no sanding lines! Anyway, I swapped in larger magnets, and am working on a rotating knob switch, so it will ratchet when turned, and turn on the lights. I tried to make that ratchet from scratch, but now have a cheap party ratchet thing that was $2 from a party store that should work perfectly. I also bought real vents from WannaWanga, so it should look cool when I am all done.
As far as weathering, I plan some residual weathering, because they may get used once, but may be in a backpack for years!
 

Your message may be considered spam for the following reasons:

If you wish to reply despite these issues, check the box below before replying.
Be aware that malicious compliance may result in more severe penalties.
Back
Top