ROS Leia Organa saber

Yeah some chatter on this on other Leia threads here too. (I inadvertently posted it on TheJekyll's thread).

the list of inaccuracies are large, but yes, first to market.

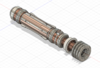
I can forgive many of them, but the missing bars inside the emitter rings is hard to get past for me.

Also interesting that they added the second switch socket. While nice for function, I think in this case I would rather have seen the canon single button saber design. Many boards do support single button use.
 
Hey folks. After a long break I'm picking this project back up again to finish two of these sabers. One for a commission and one for me. After sharing my initial file with Verity Cosplay, they had been whipping the details of this saber into perfection for their run here. It's amazing. Check it out.:


Me? I'm still set on producing my version via 3D Printing. Verity Cosplay was nice enough to collaborate with me on some of the details now that better images are available. To keep things simple for painting I'll be printing all the rings separately and assembling everything over a 5/16" threaded rod. The steel rod should add some nice weight too. I've simplified a few of the details that Verity is working into their saber. Small things that wouldn't hold up to 3D printing as well.

The copper rings will be a mix of actual copper foil tape and paint. For the Mother of Pearl, I found a neat solution. Pearl celluloid sheet for drums. I've seen this in person and it has realistic depth to the MOP effect. I'll be cutting inserts for my sabers.

Stay tuned.

Screen Shot 2020-04-19 at 11.13.41 AM.png
Screen Shot 2020-04-19 at 11.14.17 AM.png
Screen Shot 2020-04-19 at 1.08.38 PM.png
s-l1600.jpg
s-l1600-1.jpg
 

Attachments

  • Screen Shot 2020-04-19 at 1.07.02 PM.png
    Screen Shot 2020-04-19 at 1.07.02 PM.png
    1.1 MB · Views: 170
Last edited:
So I've completed printing and priming all the various bits for my two Leia sabers. And there's a lot of parts. Instead of printing out this a one giant piece, I've modeled and printed it as individual rings. Each printed separately. This will eliminate the need for masking all the alternating colors, and hopefully create a more "machined" look. All the parts mount to an internal 5/16" threaded rod.

Keeping track of all the pieces has been challenging, so I created an alphabetical index for each piece. Then each pieces labeled on a series of wood dowels for painting.

Also, I received the Mother of Pearl laminate and it is perfect. I'll be able to cut the pieces I need for this.

Painting soon.
CC6836DE-7CF9-4DB7-B97C-0B9FC0CBC4E3.jpg


IMG_2865.jpeg
IMG_2864.jpeg
IMG_2863.jpeg
IMG_2866.jpeg
IMG_2862.jpeg
AA4C889D-0CB9-41E4-AC20-8551219F5A4A.jpg
 
Started on paint today.
IMG_2883.jpeg
IMG_2884.jpeg
IMG_2882.jpeg
IMG_2886.jpeg
IMG_2887.jpeg
I'm using Alclad II Lacquers. The polished silver is fantastic. The copper cool too. I ran out of Silver so I have more on order. I did also work out how the Mother of Pearl inserts will fit. Each little insert will be handout from the material I got and glued in place. Here's a pic of a couple placed on the body for inspection. Also, one of my round leather punches made the perfect size circle of the Mother of Pearl on the button.
 
I have a love/hate relationship for that project. I absolutely love what you’re doing, and hate that you will not be offering a run!
 
Valor, how easy is the mother of pearl sheet to work with? Do you cut it with scissors or scalpel?

I've been toying with epoxy/uv resin and pearlescent mica powders for my Leia lightsaber, but struggling to get the desired outcome.

Also, if you wanted to add a bit more 'depth' to the pearl ignition button, I've purchased some mother of pearl dots that are used as fret markers on a guitar. They're around 1-2mm thick and a bit more like a button.
The MOP sheet I got is essentially plastic. Cuts very easily with an exact-o. it's probably about 1/2mm thick.
 
Last edited:
There is also true MoP veneer/laminate sheet that can be used (this is what we are likely to use for our production run). The pattern is the general MoP mosaic laminate. That is what I am 95% sure they used on the original prop. That can be cut with dremel, small kerf saw, laser or water jet.

it tends to come in varying thicknesses if you look around but common thicknesses seem to be .3mm, .5mm, .8mm, 1mm, and 1.5mm
 
So, the silver I used is the excellent Alclad II Lacquer. It's a little too "chrome" looking but a clear will knock it back to aluminum. But the Alclad copper feels too brown and dead. So I'm going over them with a Testors Enamel Copper which looks "brighter. I'm so damn impatient so I put a few of the copper and silver pieces to gather to get a sense of how the colors look together. I'm pretty pleased!

IMG_2896.jpeg
IMG_2897.jpeg
IMG_2898.jpeg
 
Okay, final touchups and assembly this weekend. I'm especially pleased with how the main grip area structure is working out. The inset area for the Mother of Pearl and the recessed area for the silver grips are working out very well.

I'm trying to have everything assembled with mechanical fasteners, no glue. The silver grips are help in place by the perfect little screws I found. Everything is getting threaded on the main rod. I like that if I need to repair or upgrade any part of this I can swap out a part.

Still some little details, and a stand to sort out. But I'm getting there.

IMG_2937.jpeg
IMG_2935.jpeg
IMG_2936.jpeg
9CBA071C-76AF-4760-844F-141435FD4AAA.jpg
 
Back
Top