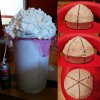
Rocketeer comic build

Thanks for all of the interest folks! I'm really excited about this costume.

So... the helmet should be finished now, but I made a bone headed mistake and tried dying my leather for my chin strap with Rit dye and I guess I did some wrong because now it looks like beef jerky. I'll have to get some more leather to finish it off.

In the mean time, here's a picture of the helmet on and me wearing my Captain America rescue jacket. I'm thinking if it just get a bib made for it in the right color, I could use this jacket.
20150802_203914.jpg20150802_203814.jpg
 
Looking good! Your Captain America' s jacket could do without transformation...but if you really want to be closer to the style than do the bib for sure. Eager to see the next update:)
 
Minor update:
Got the helmet finished off with the chin strap made and installed and finished up the lining.
20150803_171544.jpg20150803_214001.jpg
Now to delve deep into the rocket portion.
 
Last edited:
Thanks Joberg.

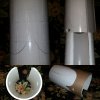
Here's the start of the jetpack. Cut off a side and engraved lines. I may have burned out my Dremel in the process however...
PhotoGrid_1438738989835.jpg
 
Last edited:
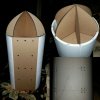
Test fit of some of the lasered parts. I'll be using expanding foam to shape the cone and this skeleton will be a guide for the shape. Also glued on my rivets which are googly eyes. I was going to measure them for placement but decided to just eyeball it.
PhotoGrid_1438822542361.jpg
 
Mine is 14" tall and inner diameter is 8", outer more like 8.6". That dish would work if you wanted a hemisphere, but in the comic it's more of a pointed bullet shape. Hope it works for you.

One thing I'm considering doing is having the cone be removable so I can get inside at the Arduino and battery pack.

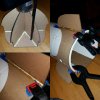
I also did some more work tonight. Gluing the fins on the rim piece and the skeleton together. This way when I have to resin the fins, they'll already be at the right angles and I don't have to worry about there being gaps from when I bent the card.
PhotoGrid_1438826868767.jpg
 
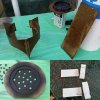
Got some more work in today. Resined the fin/trim, bottom, and back plate. Also fiberglassed the bottom and back to added strength. I also recut the engine light array to the right size and started on my hand controls.
PhotoGrid_1439163515564.jpg
 
Me too Joberg. I have to redo the controls upon further inspection. I'm going to make a buck out of 2x4 to mold the heated pvc over to get a more consistent shape and size.
 
Funny story: I left my resined parts outside overnight to dry and to air out and came out this morning to find the fin section over by the fence. Apparently the raccoons we feed at night tried to make off with them. One of them is named Rocket...

Anyway, here's more progress! I taped the back on temporarily so that I could fill the cone with expanding foam. I put down some plastic wrap between the skeleton and the pvc so that I can remove the cone to access the electronics and screws for the harness.
PhotoGrid_1439264993262.jpg

Any tips on what I should seal it with? I've seen people use Bondo, paper mache, and thermoplastic; what's probably best for this project?
 
Awesome build.

I want to do a Rocketeer costume also, but I don't have the skill to do any of the work for the stuff, and to buy it is ridiculously expensive.

Looking forward to the progress, keep up the good work!
 
Awesome build.

I want to do a Rocketeer costume also, but I don't have the skill to do any of the work for the stuff, and to buy it is ridiculously expensive.

Looking forward to the progress, keep up the good work!

I felt the same way. This is probably in my top 5 of costumes I want to wear. Recently I've been able to get a nice paying job that will let me get most of the pieces. But I would still be missing one critical part, the jetpack :(
 
I opted for Bondo on mine due to the ease of sanding/shaping and durability. I figured the rocket would get knocked around a bit at SDCC and boy, was I right. I've never worked with thermoplastics before but I would think it would be just as durable and probably a bit lighter (which would be ideal).
 
Thanks for all of the positive feedback y'all! I'm thinking Bondo/body filler is the way to go too.

I had a bit of a setback on the nose, unfortunately. I guess I started carving into it too soon because it collapsed in on itself a bit. It left enough of a dent where I'm going to add more foam before the body filler step. I've carved out some into each section and I'll be putting in more foam and letting it set the full 8 hours before I try anything this time.
 
So I'm planning on ordering a bib section to just put over the coat I already have. I got a sample of the Southbeach Leathers material they use and the color is just a tad too light. Anyone know a good way to darken a large piece of finished leather?
20150819_233009.jpg

Also, redid most of the expanding foam after it collapsed from my impatience. Next step will be body filler
20150819_234404.jpg
 
Last edited:
um, lemme clarify, the shaft of the tube is 13". Here is a skeletal with the bowl on top. I may reduce to 12"

I will make my own dern post if I feel like showing my work any further. skeletal.jpg
 
This thread is more than 8 years old.

Your message may be considered spam for the following reasons:

  1. This thread hasn't been active in some time. A new post in this thread might not contribute constructively to this discussion after so long.
If you wish to reply despite these issues, check the box below before replying.
Be aware that malicious compliance may result in more severe penalties.
Back
Top