blipper
Sr Member
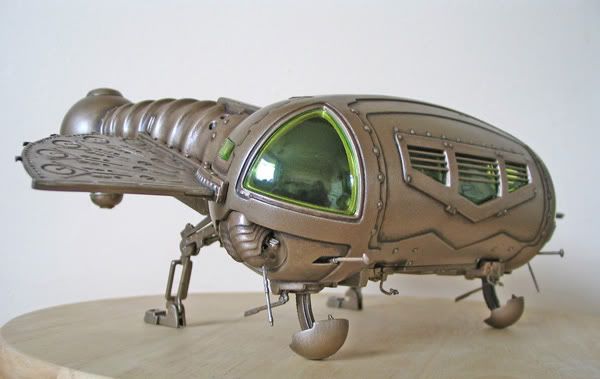
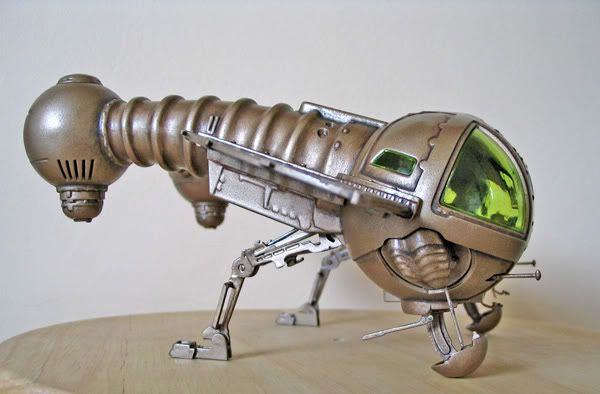
Hi folks, I recently got hold of a model I've been after for a looong time,
the Harkonnen ornithopter from the 1984 movie Dune. I love it's design,
and would love for one of the talented people here to some time come up
with a studio scale version, but for now, I'm a happy man-child")
I thought I'd post some progress shots, with some notes for anyone who
might pick this up in the future.
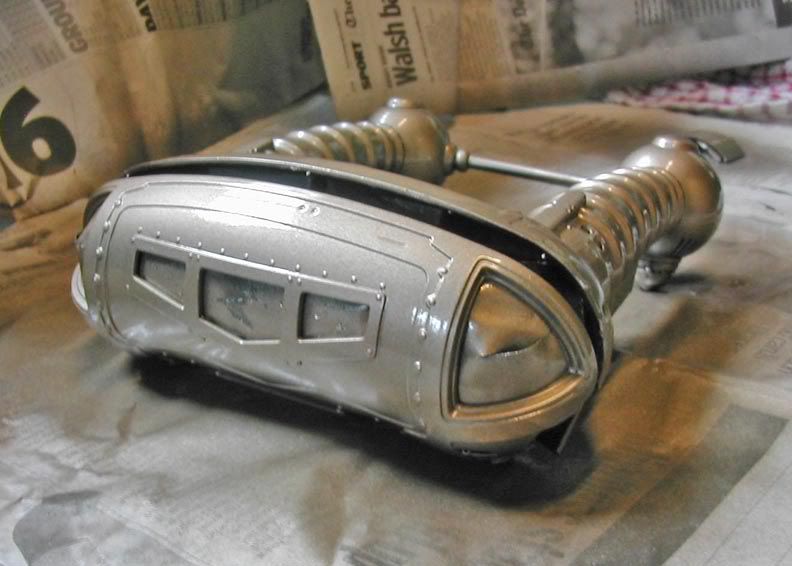
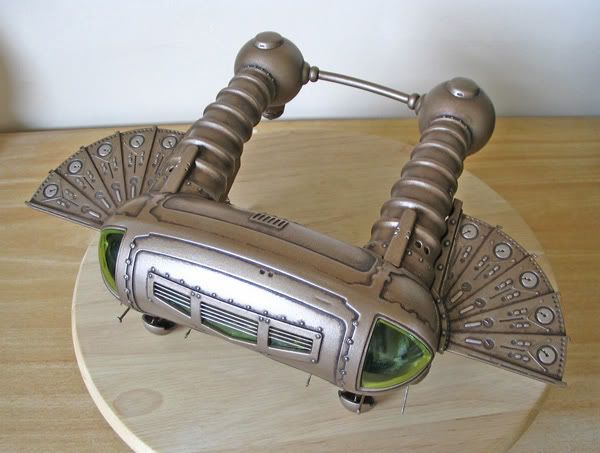
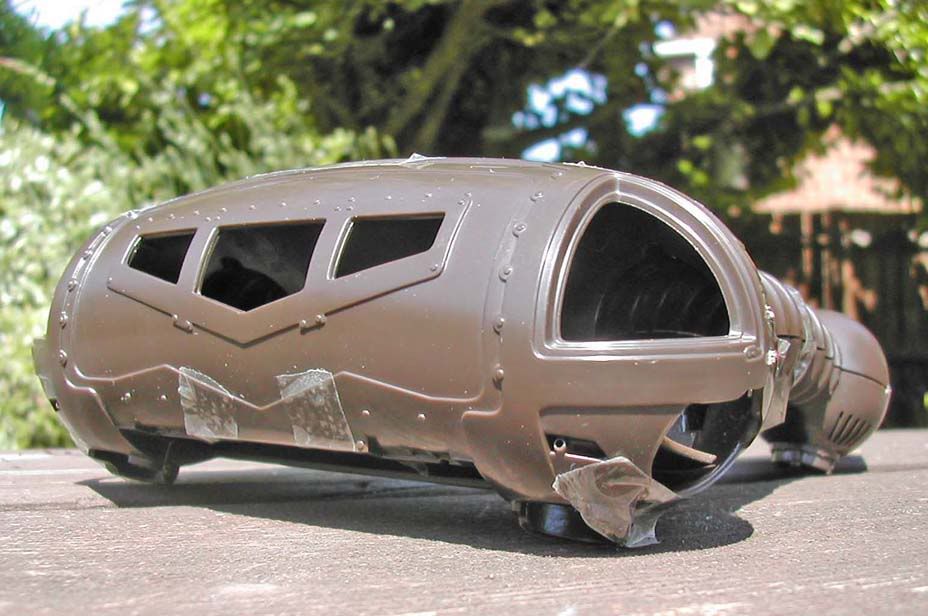
1: The basic form, crudely taped together to give me an idea of where to start.
And also enable me to whizz it round the garden evading sandworms
and spice blows like a giddy 10 year old.
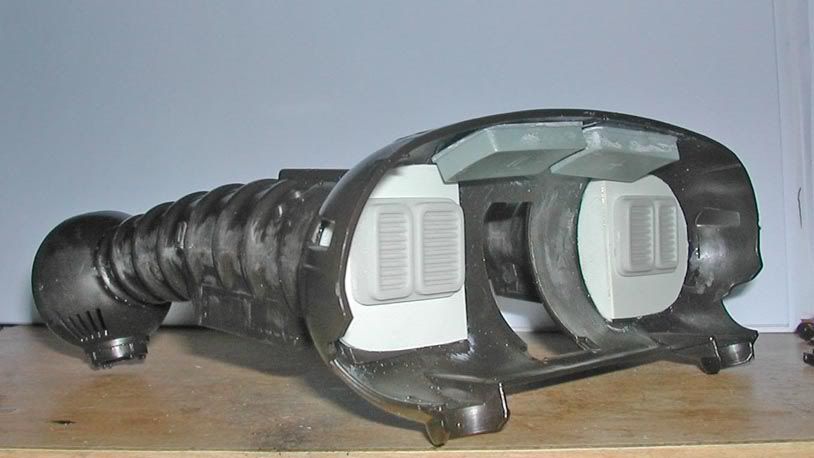
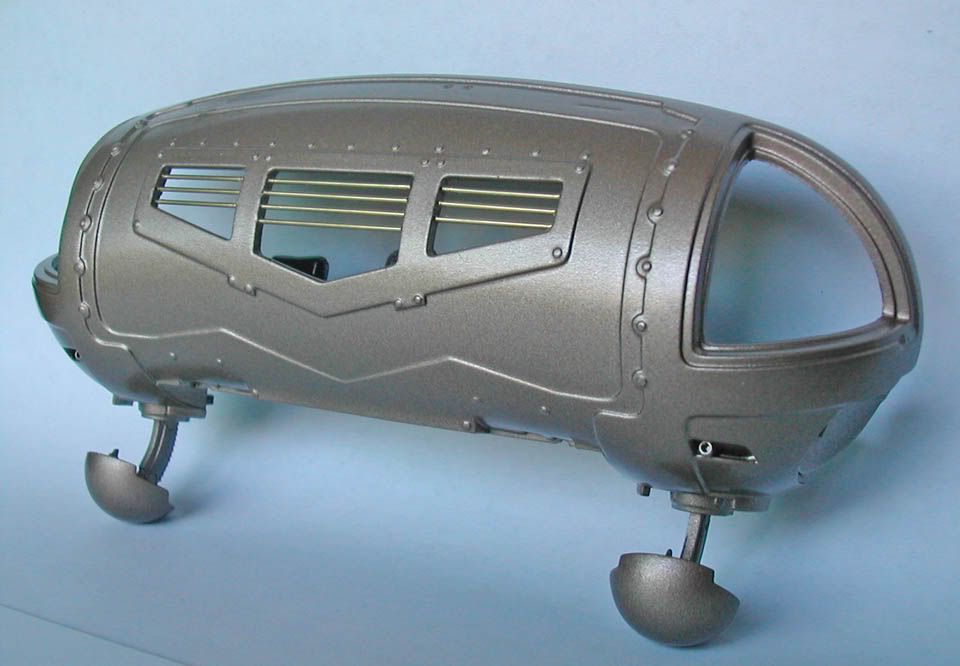
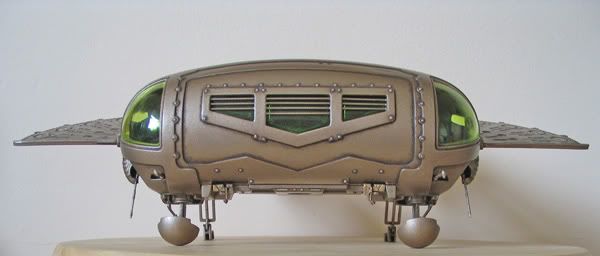
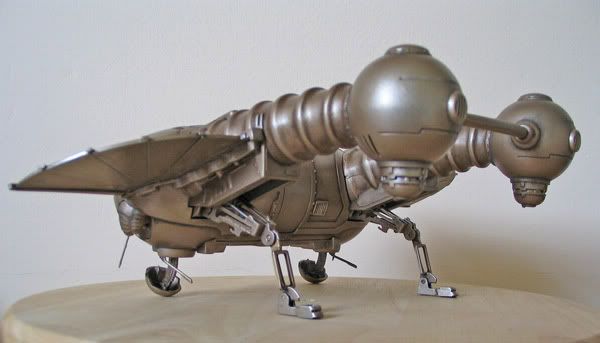
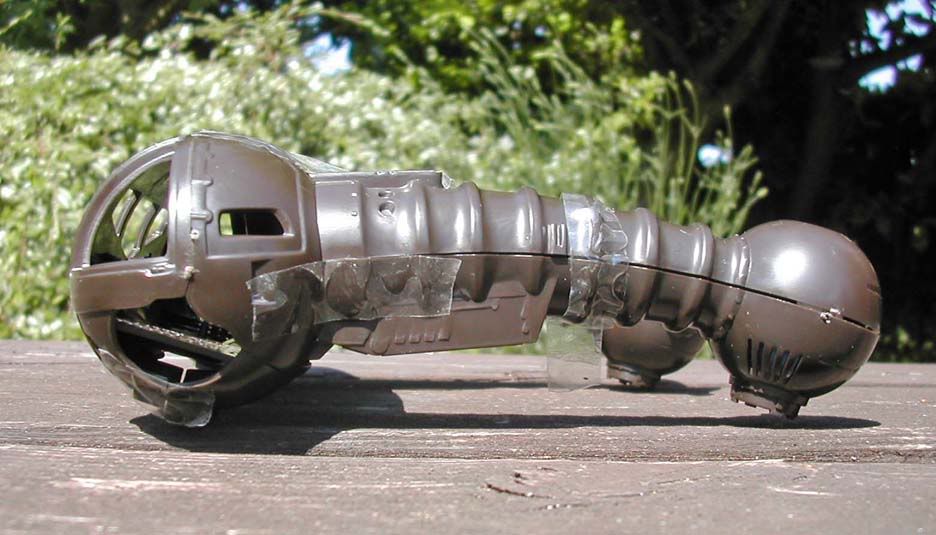
2: From the side - there's some seams that will need attention where the upper
and lower sections of the tail meet.
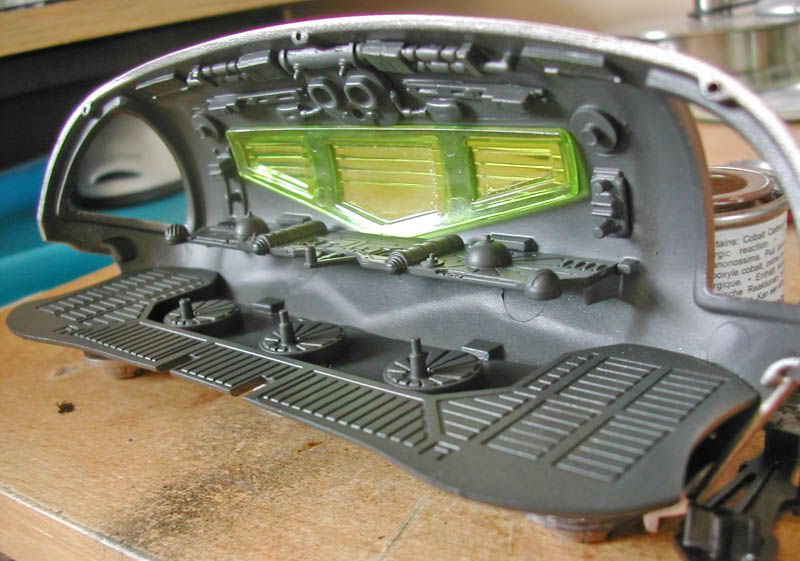
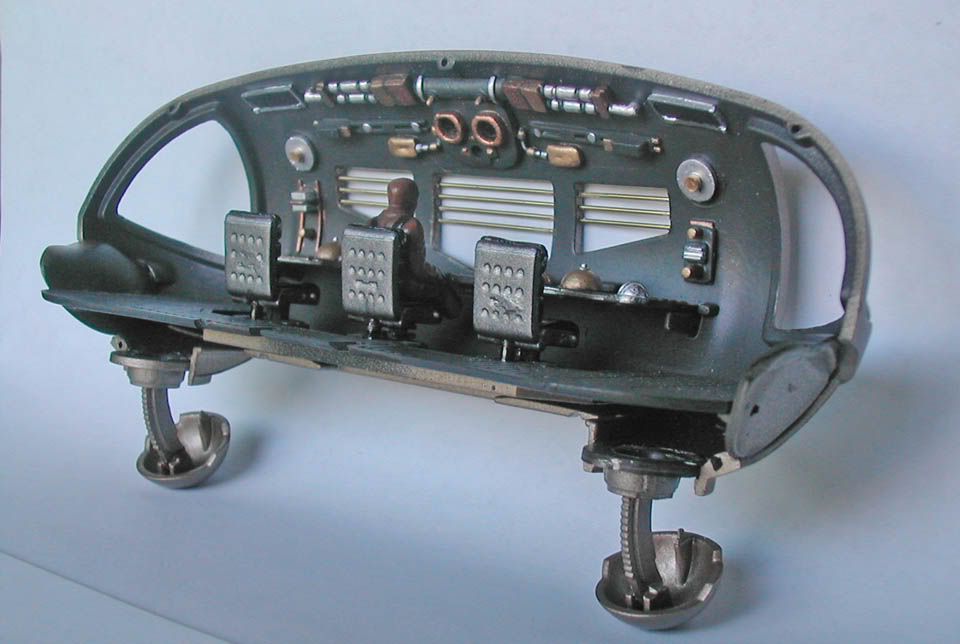
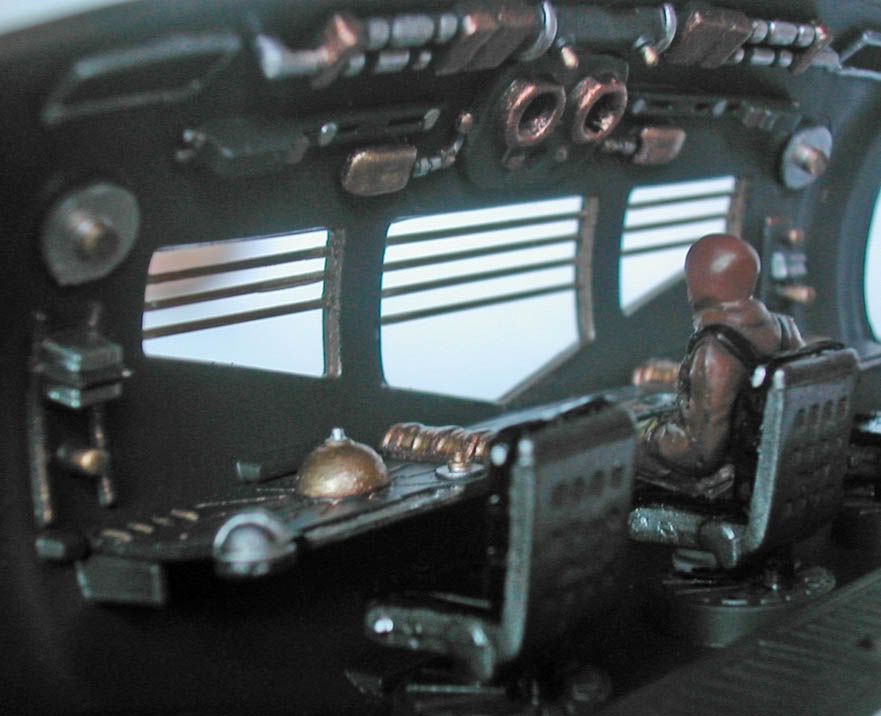
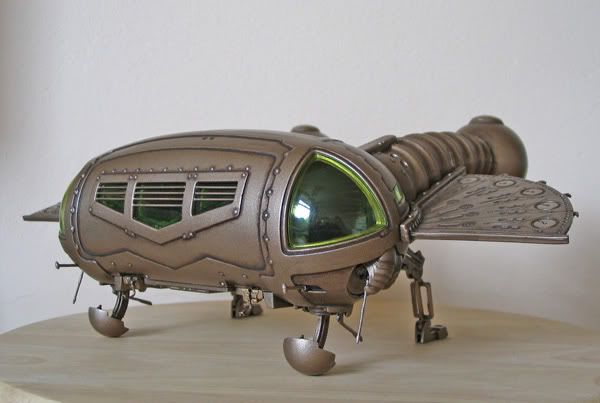
3: Starting work on detailing the cabin interior with various greeblies from other kits.
I'm an absolute nerd for vessel interiors, the movie can provide some good caps for
the details but I decided to go my own way but try and keep it consistant with the kind
of sparse and unconventional feel of the original.
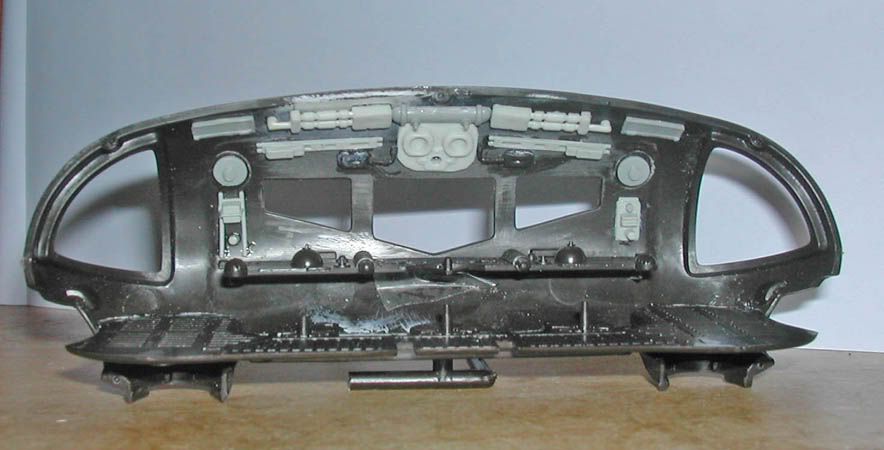
The ornithopter is yet another vessel that suffers from the Tardis effect, as in the
movie Paul and Jessica are able to lay full length from the pilot seat to the cabins
rear. Yet it doesn't seem possible looking at the model. Also the the width of the
cabin appears to be divided into three in the movie, where the pilots occupy the
central third and a wall or door seperates each end of the cabin. I chose not to
include that aspect, I prefered the idea of the "bug-eye" windows being exposed
to the whole cabin interior. It also let's in more light.
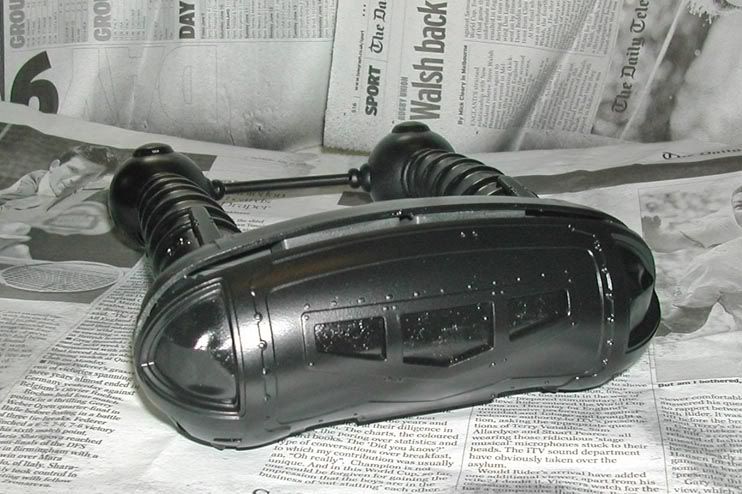
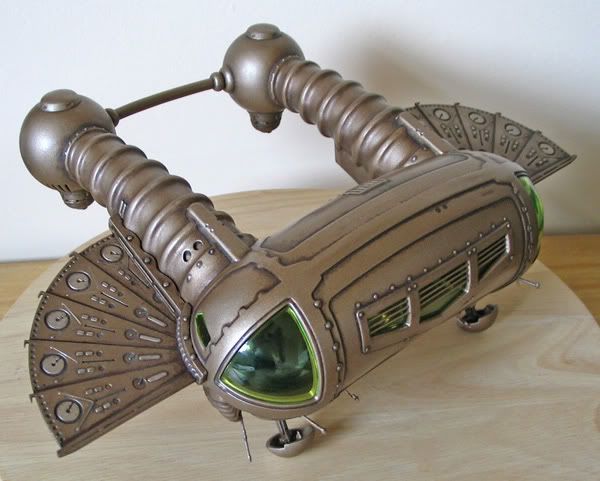
4: Bits part one -
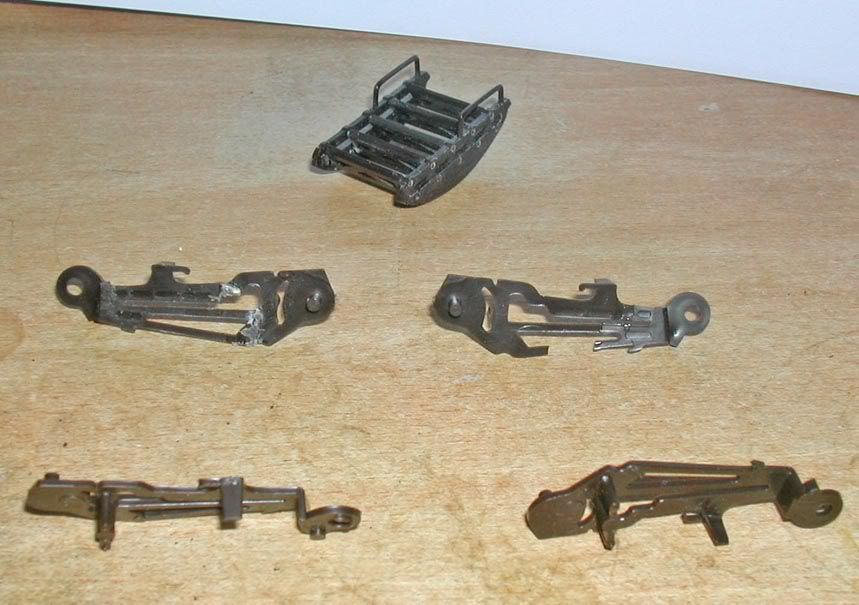
Wow, some parts reeeally need a lot of care. This made me think about the kits age
(over 20 years) and whether its a case of plastic degredation over time or simply
the plastic used was never that great to begin with.
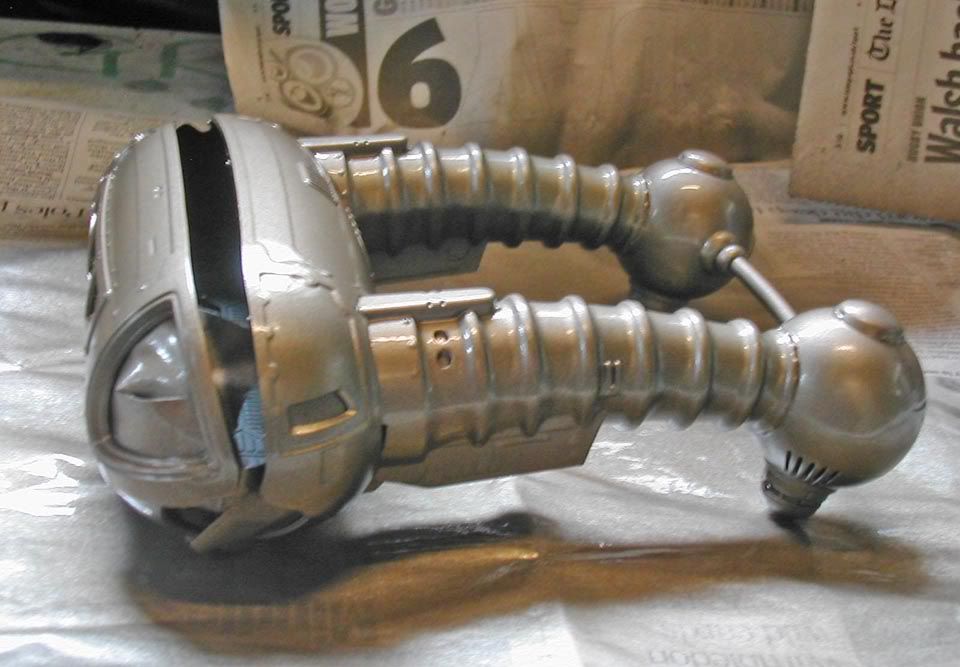
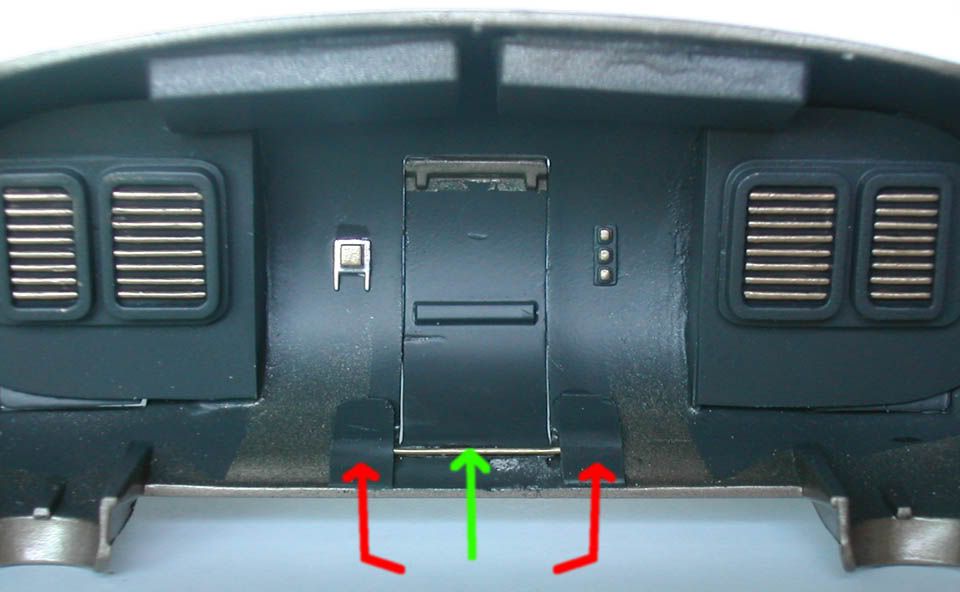
The photo above shows the rear hatch steps and the rear landing gear. I managed
to snap the rear legs multiple times even when I thought I was carefully removing
them. And later when I just tried to roughly assemble them. And I swear later again
when I simply looked at them. They're a pain to fix back, and also bear in mind that
they will be supporting the a fair bit of weight of the model if you're choosing to
display it with landing gear down.
I'm going to try to reinforce these later and maybe at some point in the future would
like to rescratch them from metal sheet for something sturdier.
The steps you just need to watch out for the hand-rails which are very fragile (yup,
both mine have already come off). Both sides of the steps once assembled needs to
be filed a fair bit so it won't jam in the door when they swing up.
More to follow.
the Harkonnen ornithopter from the 1984 movie Dune. I love it's design,
and would love for one of the talented people here to some time come up
with a studio scale version, but for now, I'm a happy man-child
I thought I'd post some progress shots, with some notes for anyone who
might pick this up in the future.
1: The basic form, crudely taped together to give me an idea of where to start.
And also enable me to whizz it round the garden evading sandworms
and spice blows like a giddy 10 year old.
2: From the side - there's some seams that will need attention where the upper
and lower sections of the tail meet.
3: Starting work on detailing the cabin interior with various greeblies from other kits.
I'm an absolute nerd for vessel interiors, the movie can provide some good caps for
the details but I decided to go my own way but try and keep it consistant with the kind
of sparse and unconventional feel of the original.
The ornithopter is yet another vessel that suffers from the Tardis effect, as in the
movie Paul and Jessica are able to lay full length from the pilot seat to the cabins
rear. Yet it doesn't seem possible looking at the model. Also the the width of the
cabin appears to be divided into three in the movie, where the pilots occupy the
central third and a wall or door seperates each end of the cabin. I chose not to
include that aspect, I prefered the idea of the "bug-eye" windows being exposed
to the whole cabin interior. It also let's in more light.
4: Bits part one -
Wow, some parts reeeally need a lot of care. This made me think about the kits age
(over 20 years) and whether its a case of plastic degredation over time or simply
the plastic used was never that great to begin with.
The photo above shows the rear hatch steps and the rear landing gear. I managed
to snap the rear legs multiple times even when I thought I was carefully removing
them. And later when I just tried to roughly assemble them. And I swear later again
when I simply looked at them. They're a pain to fix back, and also bear in mind that
they will be supporting the a fair bit of weight of the model if you're choosing to
display it with landing gear down.
I'm going to try to reinforce these later and maybe at some point in the future would
like to rescratch them from metal sheet for something sturdier.
The steps you just need to watch out for the hand-rails which are very fragile (yup,
both mine have already come off). Both sides of the steps once assembled needs to
be filed a fair bit so it won't jam in the door when they swing up.
More to follow.