Revell AT-AT Easy kit Help

danikin72

Active Member
Hello,
I have a question for all of the AT-AT experts out there.
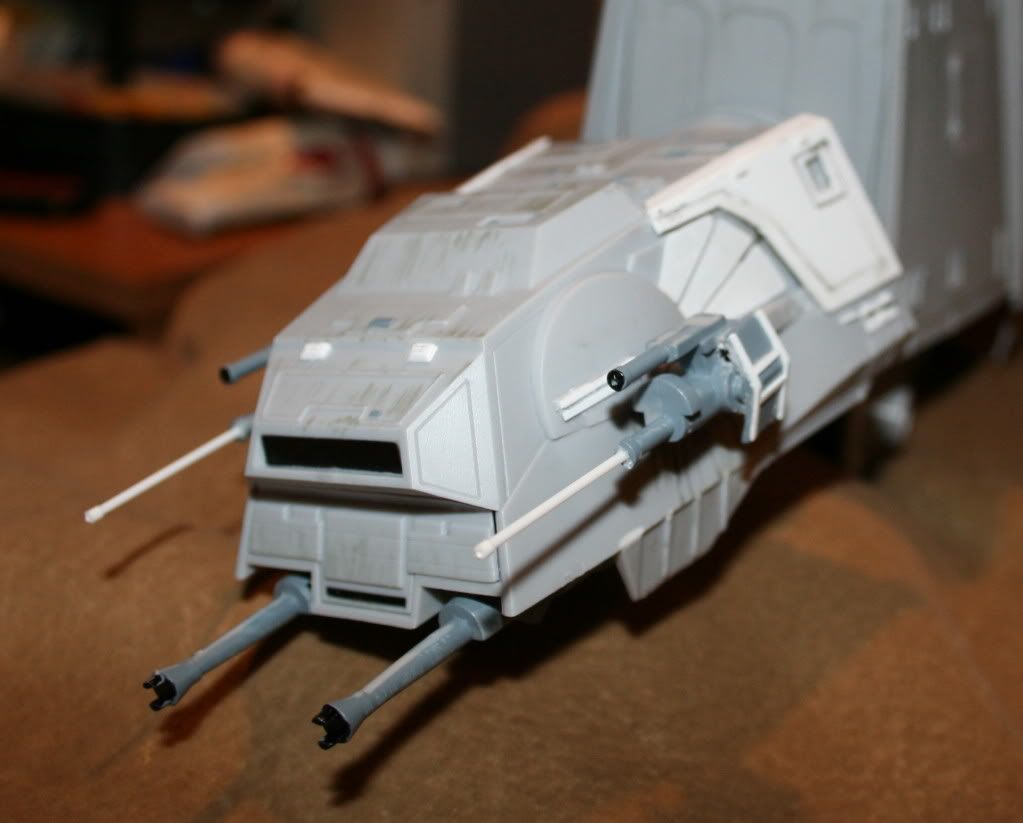
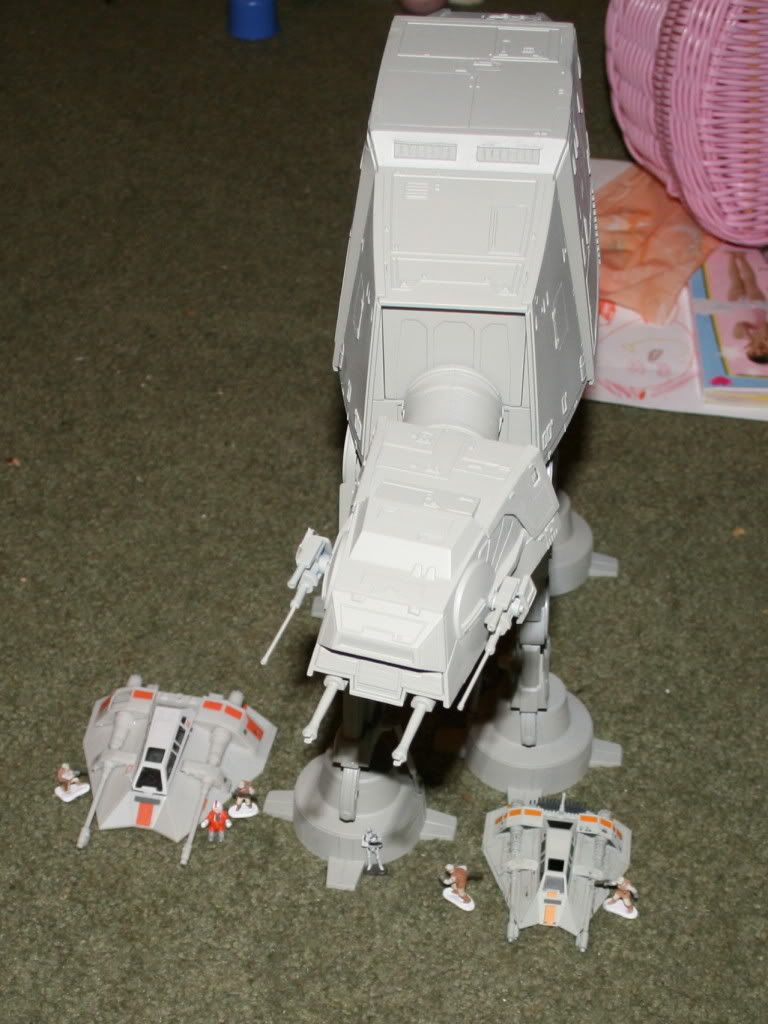
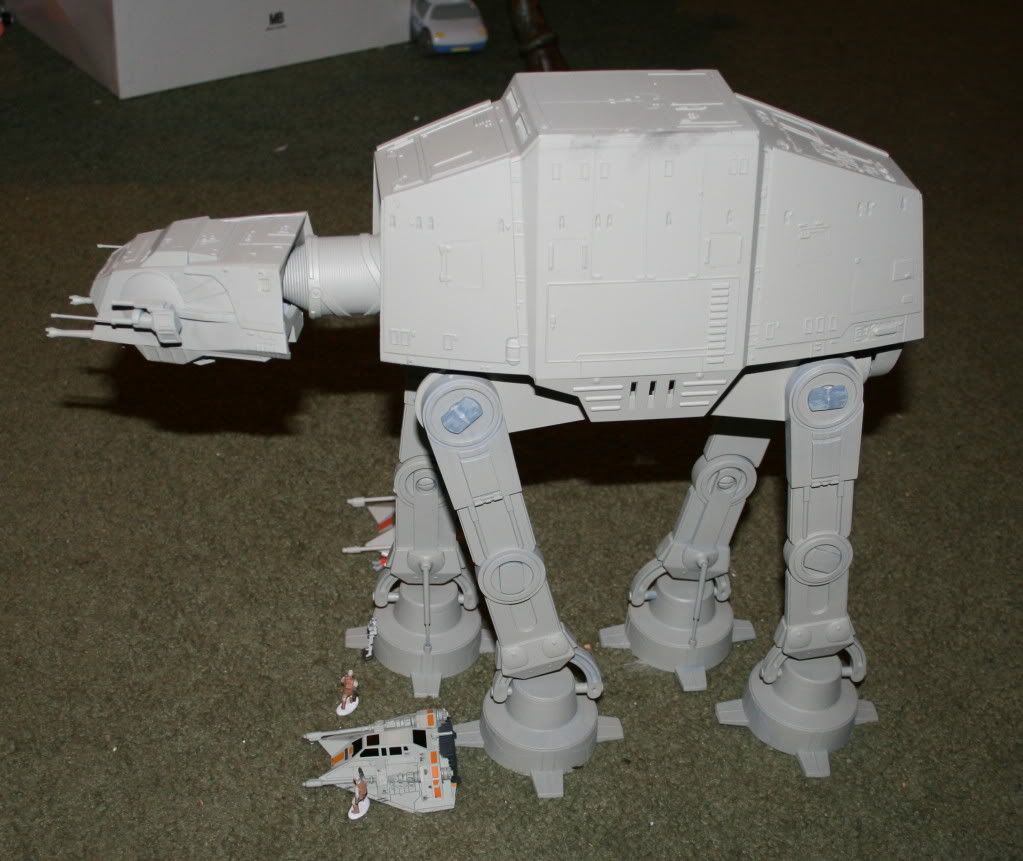
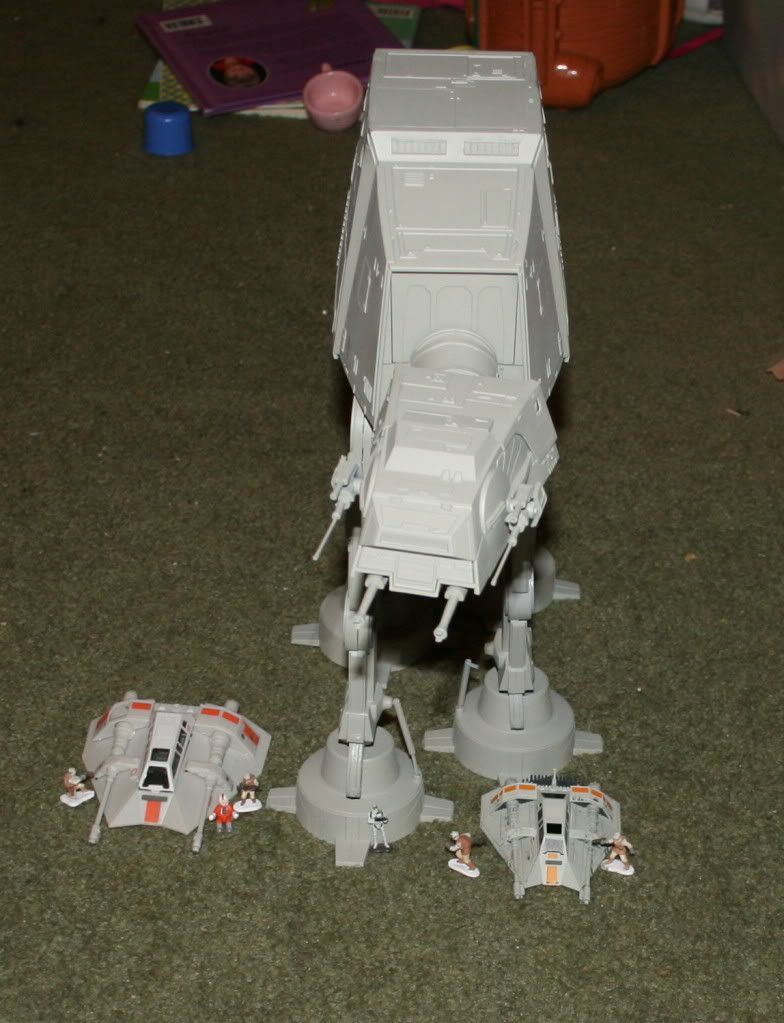
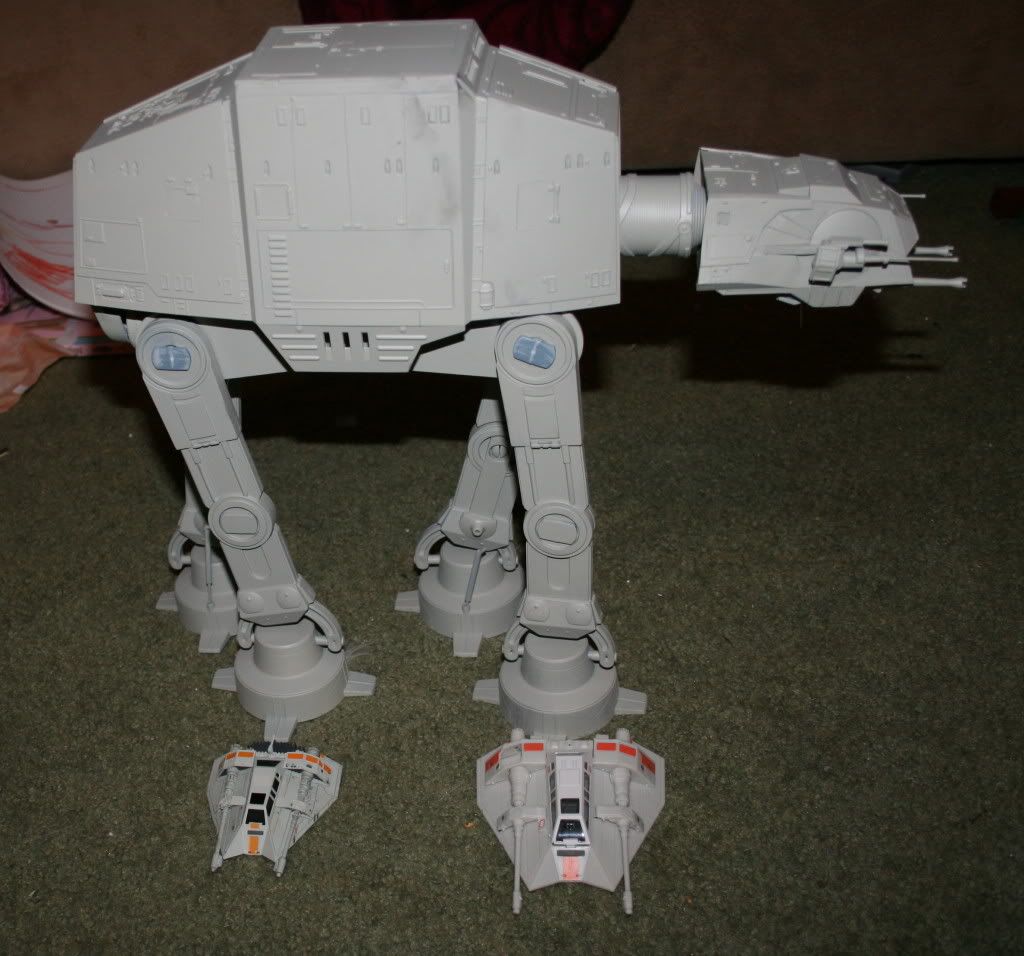
I am currently working on 2 of the Easy kits and trying to accurize the AT-AT as best I can, but I'm not sure about the chin and side guns.
Is there a kit I could I buy and in what scale would match this kit?

Any help would be appreciated.

I'll post picks in another thread when I'm a little farther along, so much work needs to go into this thing. The scribing alone is taking forever.

Also, does anyone know what kind of paint works well with latex? I'm considering making a new neck molded out of latex so the head is moveable.
Unless someone knows how else to do it.

Thanks.
 
I´m also reworking this kit, but haven´t touched the guns so far as I´m waiting for a replacement head. But I got this list from I think an RI member, unfortunately I forgot his name:

Tamiya 1/48 Flakvierling
Hasegawa 1/72 Karl German 60cm Mörser with Ammunitions Panzer IV (from the Panzer)
(Trumpeter 1/35 A10 Thunderbolt)
Tamiya 1/35 German Flak 36/37 - 88mm (European version)
Tamiya 1/48 German Panther
Tamiya 1/48 German Stug III Ausf.G 1/48 German Stug III Ausf.G | HobbyLink Japan 2x for main guns

Hope this helps!
 
huh, replacement head you say.
Figures!
Wish I knew about that before I almost completely rebuilt both of mine.

Thanks for the list, I think maybe I will pause on scratching any more parts until I can pick up some of these, I don't want to waste any more time on something if it's in these kits.

Do you have a thread for yours yet? I'd like to see what you've done.
 
I mastered an upgrade set which hopefully will be released by SSM during the next few months; this thread on RI shows my personal build plus installation of the first castings of the upgrade set:

Revell AT-AT - Resin Illuminati

I´m not sure if you can see the pictures if you´re not a member there.

Still waiting for the head replacement myself as Julien (Monsieur Tox) scratched such an awesome head that I knew I could never achieve the same result, at some point it should become available from RetroSF.
 
Here is a few simple things I did to make the head look more like the studio models compared to the out of box head. Not 100% accuracy, but good enough for the average person

I used thinner styrene rod for the side gun barrels. I added some plating strips to the guns as well. For the chin guns, I cut off the tabs and just moved them forward about half inch.
Added two strips along the gun domes (they were on the studio model I was referencing, but of course the problem is no two stuido models are the same)
And of course added armor plating and little detail bits to left and right sides as well as extended the semicircular armor plating right behind the guns

Also you can't really tell in the pictures, but I filed away the filler between the gun and the armor plate on the side of the gun to make it look more like separate pieces instead of one molded piece

IMG_1126.jpg

IMG_1128.jpg


Here it is with primer along with s size comparison to the Revell Pocket kit (not the regulare Easy kit) and a Di Agostini Snowspeeder from the Start Wars Vehicel collection series ( the smaller one).
Personally I think the Revell Speeder is more in scale (at least based on the foot crushing scene)
IMG_2420.jpg

IMG_2421.jpg

IMG_2425.jpg

IMG_2427.jpg
 
I mastered an upgrade set which hopefully will be released by SSM during the next few months; this thread on RI shows my personal build plus installation of the first castings of the upgrade set:

Revell AT-AT - Resin Illuminati

I´m not sure if you can see the pictures if you´re not a member there.

Still waiting for the head replacement myself as Julien (Monsieur Tox) scratched such an awesome head that I knew I could never achieve the same result, at some point it should become available from RetroSF.

Just looked at your work on the other site, couldn't see the pics without being a member, so I signed up.

Very impressive work there, we are addressing alot of the same things.
What are you using for the neck? or is it something you made from scratch?
I can't stand this part on the kit and will have to replace it with something.

I have to be carefull, I'm on a budget and doing 2 at once.
Hopefully I can save some time by casting some of the parts I've made.
Thanks for sharing your work... inspiring!
 
Also, does anyone know what kind of paint works well with latex? I'm considering making a new neck molded out of latex so the head is moveable.
Unless someone knows how else to do it.

Thanks.

I also working on this one. My program is to accurize this kit from the ground up. So my progress is I finished all four legs. And now doing the drive motors. The legs are fully poseable and can do a "turning" pose. As for the neck, I plan to do this by wrapping a fishing line on a tube. Then cast this using...

TCR-40 Tire Casting Rubber, 2 lbs.

And primed with tamiya lacquer primer.
 
Wow the work you´ve done to the legs, feet and engines is amazing! Far closer and accurate than I mine will ever be. How did you modify the Harrier engines? Putty sanded to shape and added vents? The groove in the half circle ankles is great as well.
And will there be a small bolt which slides through both slots in the upper leg joints when the leg moves?

Just awesome all around...Wish I could find some time to continue mine. :rolleyes

BTW, unfortunately only after I made my upgrade set which includes strengthened hips with slots, someone told me the kit´s hips are too long, the front and rear legs should be closer together which immensely changes the whole look and pose of the AT-AT. Just in case you´d want to change it...
 
Last edited:
How did you modify the Harrier engines? Putty sanded to shape and added vents?
And will there be a small bolt which slides through both slots in the upper leg joints when the leg moves?


BTW, unfortunately only after I made my upgrade set which includes strengthened hips with slots, someone told me the kit´s hips are too long, it...

Yep. The Harrier Engine shape was accomplished using Tamiya Epoxy Putty. I used the 12 hour curing time. So that it gives me enough time to sculpt it into shape. Then sanded to smooth.

The vents are composed of cut sheet styrene for the outside frame. The louvers are stack Evergreen Styrene Strip.

The stud that glide when the capping turn will be there. This will not be glued as this supposed to move along the small slot of the capping when it turn.

As for the hip support, I was aware of that. The Revell hip support is longer by 8 to 10mm. But I just move on.

Nice work on your AT-AT also. It was you guys and MonsieurTox that inspired me to do mine. Fortunately, this site is a big help for me. AT-AT Studio Model
 
That's some very inspiring work Jun. I have another AT-AT I've been holding off on waiting for the replacement head kit to finally come out. I think I will be looking to your build for guidance in doing the rest.
 
That's some very inspiring work Jun. I have another AT-AT I've been holding off on waiting for the replacement head kit to finally come out. I think I will be looking to your build for guidance in doing the rest.

I'm also waiting for the replacement head also last time. But, it seems like no news from RetroFX when its gonna be out. If ever I finish the rest of the body. And the head done by MonsiuerTox is not out yet. I might as well try to scratch build the head.

darth_daniel I made a mistake on the length of the hip support.
Check this drawing I did...
AT_AT :: Hip Comparison... picture by Jun_Austria - Photobucket
Maybe next time I will correct this.
 
Well, it looks like I'm not the only one out there that is working so hard at this model.
It makes me feel better about my build (I was starting to think I was a little OSD).
To all who have shared your work... Thank you.
They are all incredible builds and will surely be centerpieces to any collection.
I am going to get some more supplies this weekend so I can get back to work, now that I am filled with inspiration.

Hopefully I will have some pics soon to show my progress. It takes twice as long building 2 of them at once, and twice as frustrating when make a mistake.
 
To all who have shared your work... Thank you.

You are welcome. I wont be working on mine for a month. But for the meantime. I hope this will help....

AT_AT :: AT-ATHipSupport.jpg picture by Jun_Austria - Photobucket

darth_daniel and blakeh1 above reference is for you guys also.

This kit is a good exercise in developing ones skill to a full time scratchbuilder.
Once I overcome this kit, I believed I will be more confident in taking on future project.

Goodluck guys with your build.
 
Last edited:
Hey Jun,
Nice work on yours, the more I look at it the more impressed I am at your skills.
Would you by chance have a drawing or schematic of how you worked out the leg movements, I can't seem to wrap my head around it for some reason.
I would love to have full movement in the legs for more dynamic poses but can't seem to figure it out.
I want it to be stable and not fall to it's belly as soon as I let go.
I looks like you've also used some hardware there.

Thanks for posting your link...simply amazing.
 
I´d love to see better pictures of how the hips are connected to the drive engines. I see those metal connectors; how do they work so the hips are not pushed into the belly when the weight of the body rests on them?

Any help would be much appreciated! :)
 
Doing a design for a new school at the moment.
So I will get back with you guys next week.
I can foresee a lot of pictures for the answer. So...
"I'll be back".
 
This thread is more than 12 years old.

Your message may be considered spam for the following reasons:

  1. This thread hasn't been active in some time. A new post in this thread might not contribute constructively to this discussion after so long.
If you wish to reply despite these issues, check the box below before replying.
Be aware that malicious compliance may result in more severe penalties.
Back
Top